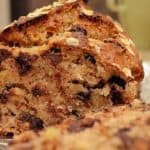
RECIPE CARD: Gluten-Free Peanut Butter Bread (PRINTABLE)
This tender, slightly sweet gluten-free peanut butter bread has a soft crumb and rich peanut butter flavor. It comes together without yeast or a rise time and is especially good toasted or served with your favorite jam.
Servings: 10 slices
Calories: 255kcal
Ingredients
- 2 cups gluten-free flour mix
- ⅓ cup granulated sugar
- 1⁄8 teaspoon uncut stevia extract
- 1 tablespoon baking powder
- 1 teaspoon salt
- 1 teaspoon cinnamon
- ⅓ to ½ cup creamy peanut butter
- 2 tablespoons unsweetened applesauce
- 2 teaspoons pure vanilla extract
- 1 cup milk of choice
- ½ cup chocolate chips or chopped peanuts (optional)
Instructions
- Prepare the oven and pan. Preheat the oven to 375°F. Grease a 9×5-inch loaf pan with baking spray or line it with parchment paper, leaving some overhang to make the loaf easier to remove.
- Mix the dry ingredients. In a large bowl, whisk together the gluten-free flour, sugar, stevia, baking powder, salt, and cinnamon until evenly combined.
- Mix the wet ingredients. In a separate bowl, stir together the peanut butter, applesauce, vanilla extract, and milk until the mixture is as smooth and evenly combined as possible.
- Combine the mixtures. Pour the wet mixture into the dry ingredients. Stir gently with a spatula just until no dry streaks remain. Do not overmix.
- Check the batter. The finished batter should be thick and scoopable rather than thin or watery.
- Add optional mix-ins. If using chocolate chips or chopped peanuts, gently fold them into the batter after the flour has been incorporated.
- Fill the pan. Scrape the batter into the prepared loaf pan and smooth the top with a spatula. Gently tap the pan on the counter once or twice to release any large air pockets.
- Bake. Bake for 40–45 minutes, beginning to check at 40 minutes. The loaf is ready when the top is golden brown, the edges have pulled slightly away from the pan, and a toothpick inserted into the center comes out clean.
- Cool. Let the loaf cool in the pan for 10–15 minutes. Then transfer it to a wire rack and allow it to cool completely, ideally for about 2–3 hours, before slicing.
Notes
- Use a scale to measure the flour and peanut butter
- Use stabilized creamy peanut butter for the right structure and moisture levels in the batter.
- If using natural peanut butter, make sure it has been thoroughly stirred before measuring, as separated oil can affect the batter's consistency.
- Avoid overmixing and stir the batter just until no dry flour remains.
- Aim for a thick cake-batter texture.
- Check the expiration date of your baking powder before baking. Old or expired baking powder may not provide enough lift.
- Allow the bread to cool completely on the wire rack for easy slicing
- The top is golden brown.
- A toothpick inserted near the center comes out clean.
- The edges pull slightly away from the pan
- Room temperature: Once completely cooled, wrap the loaf tightly in plastic wrap or place it in a zip-top bag. Store at room temperature for 2–3 days.
- Refrigerator: If your kitchen is very warm, refrigerate the bread to extend its shelf life by another 1–2 days. Toast or gently warm slices before serving.
- Freezer: Slice the bread and place parchment paper between the slices. Wrap tightly and freeze in a freezer-safe bag for 2–3 months.
- Thawing: Let frozen slices or the whole loaf thaw unopened at room temperature for 30–60 minutes. For individual slices, you can also toast them directly from frozen.
Nutrition
Serving: 10slices | Calories: 255kcal | Carbohydrates: 33g | Protein: 7g | Fat: 12g | Sodium: 429mg | Potassium: 158mg | Fiber: 3g | Sugar: 16g | Iron: 1mg
