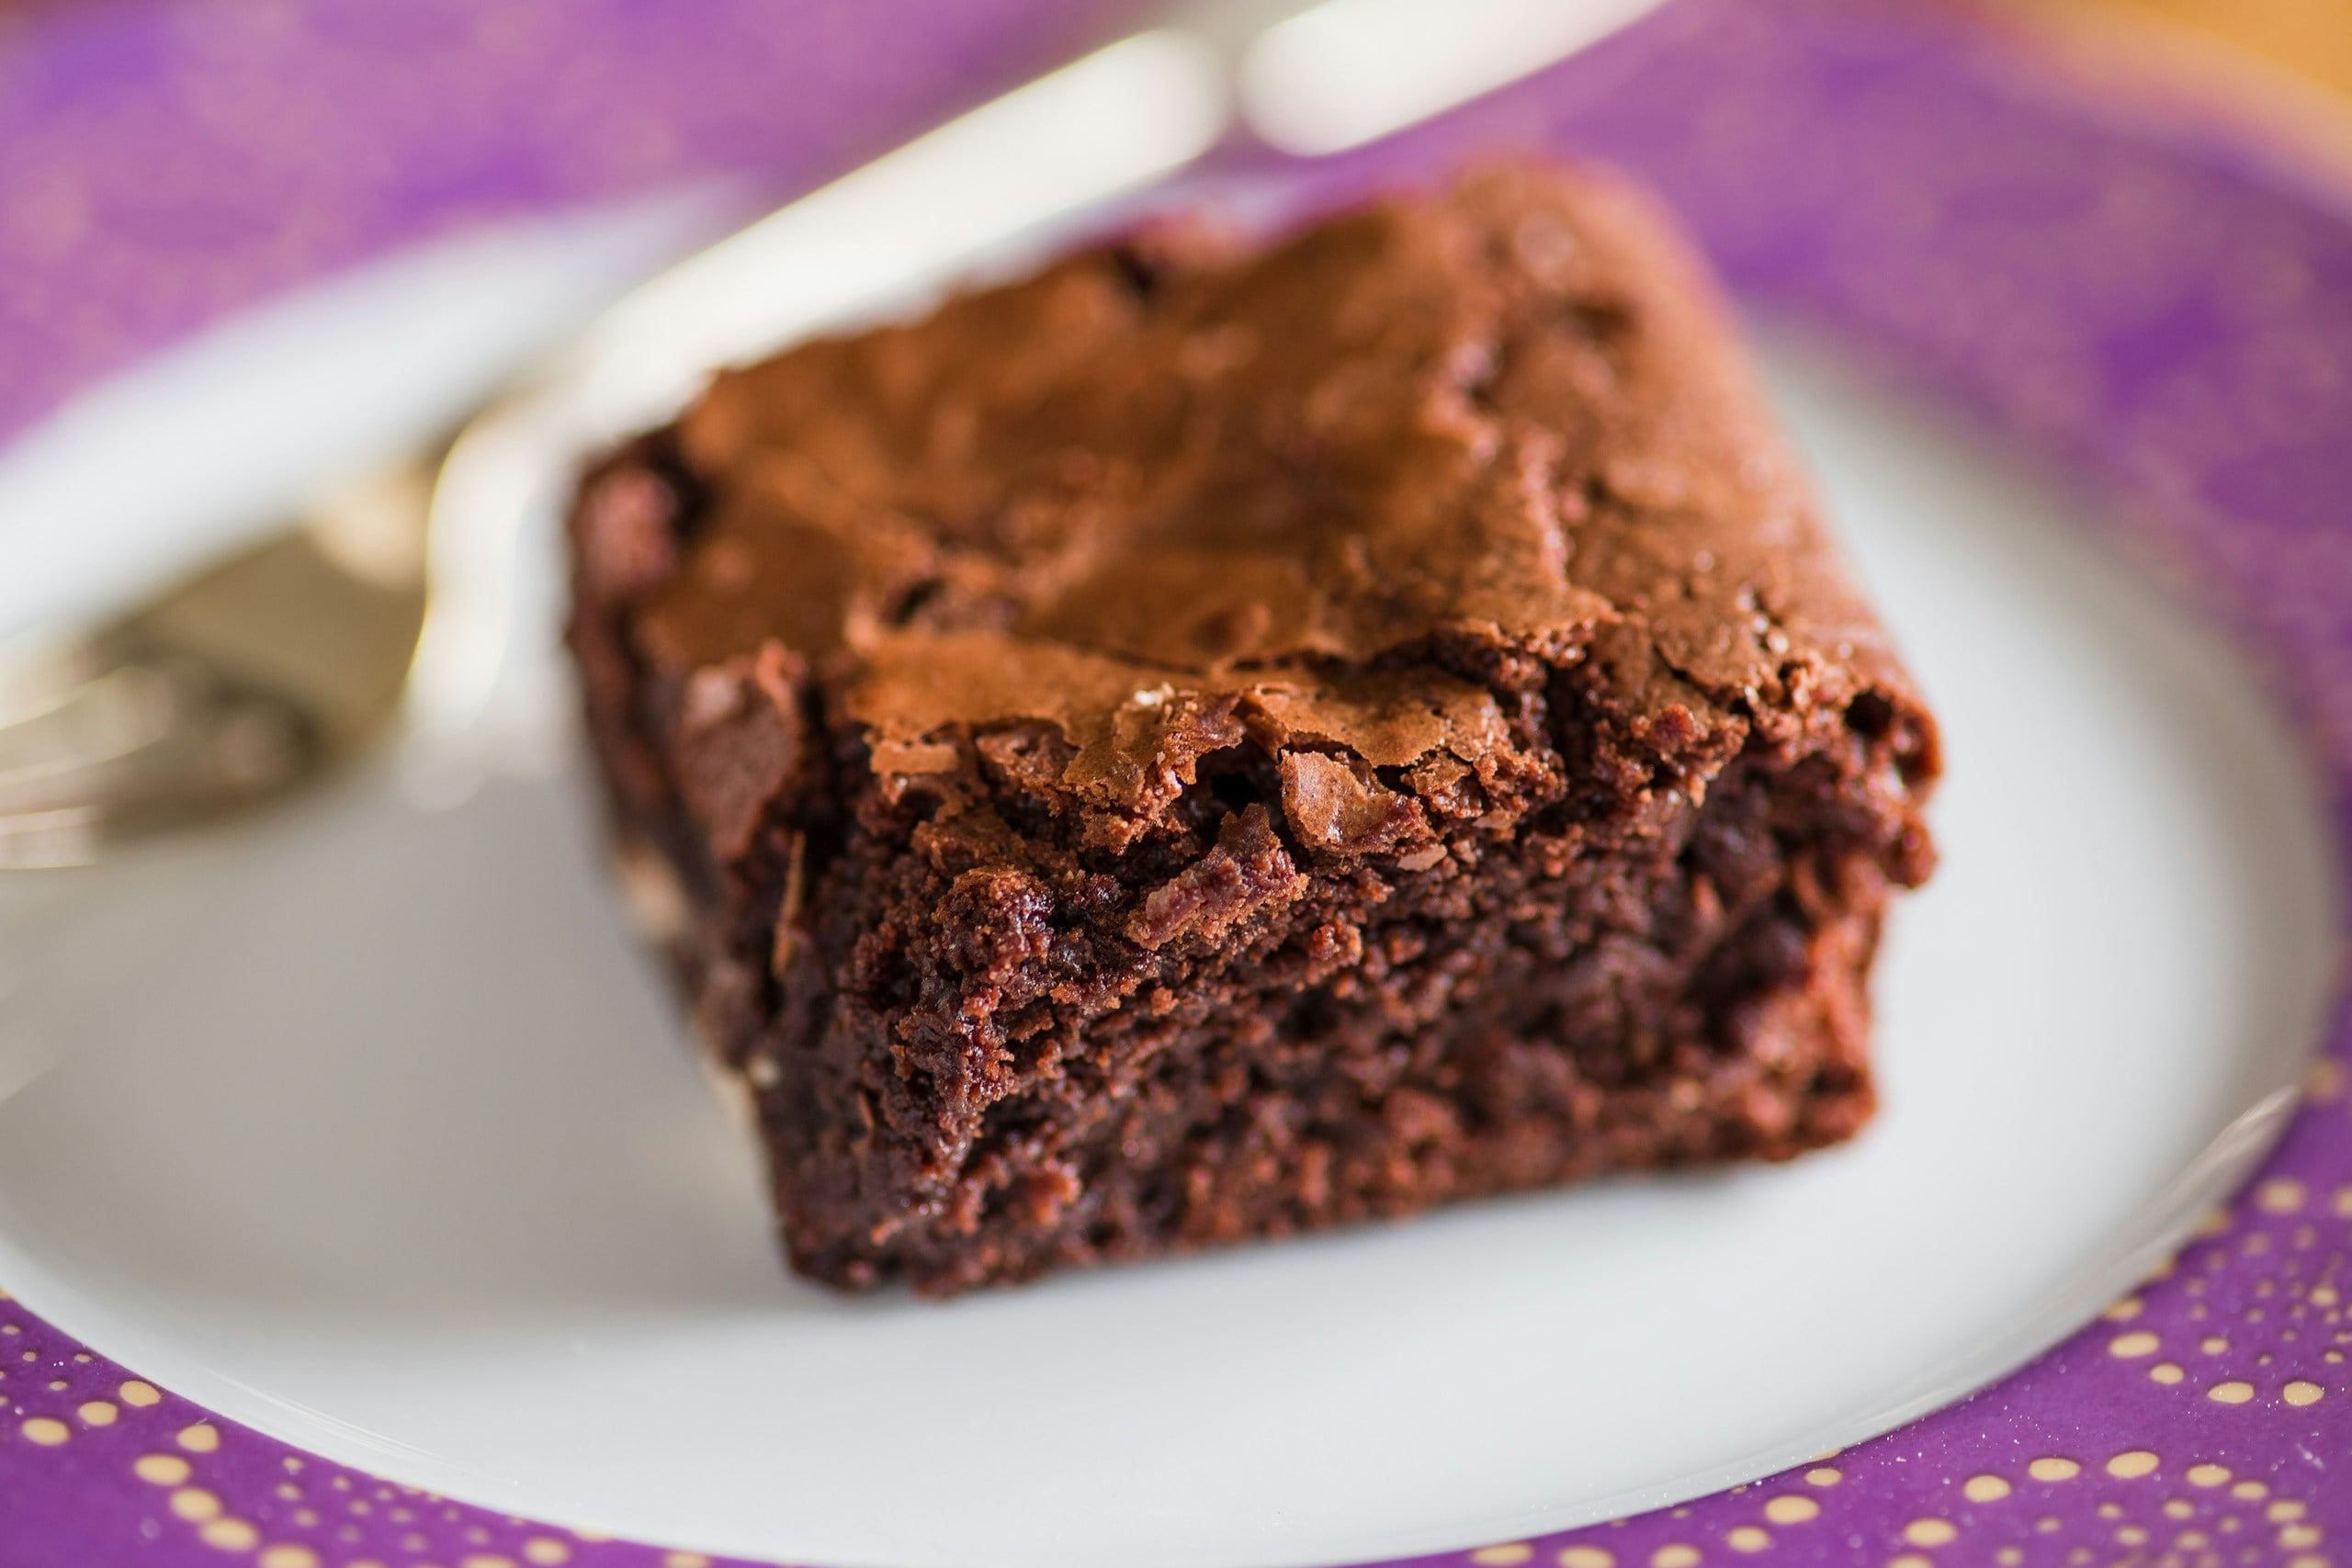
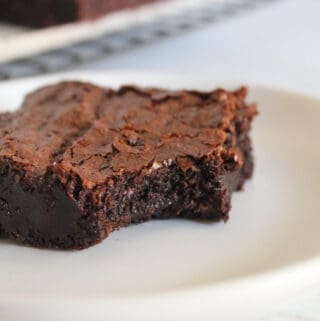
Many flourless cocoa brownies turn out dry at the edges, gummy in the center, or so fragile that they fall apart the second you cut into them.
This recipe solves that problem by balancing chocolate, eggs, sugar, and cocoa solids, yielding brownies with glossy tops, soft centers, and bold cocoa flavor.
Table of Contents

Do you struggle with brownies collapsing in the middle, turning dry the next day, or tasting flat instead of chocolatey? This guide will show you how to overcome these issues.
And if you enjoy gluten-free chocolate desserts, these brownies pair perfectly with our Almond Flour Brownies for another rich and dependable homemade option.
Why This Flourless Brownies Recipe Works
These flourless cocoa brownies are rich, fudgy, and deeply chocolatey because each ingredient has a clear job. Cocoa powder and melted chocolate create structure and intense flavor, while eggs help bind the batter so the brownies slice cleanly after cooling.
Sugar gives the tops that thin, crackly brownie crust, and the butter keeps the centers moist, soft, and almost truffle-like. The key is pulling the brownies from the oven while the center is just set, so they stay chewy instead of turning dry or cakey.
You’ll love this recipe because it is:
- Deeply chocolatey from cocoa powder and melted chocolate
- Naturally gluten-free with no flour needed
- Rich and fudgy with soft, gooey centers
- Crackly on top like classic bakery-style brownies
- Made in one bowl for easier cleanup
- Freezer-friendly for make-ahead desserts
- Simple to slice once fully cooled
These flourless brownies are made without traditional flour, so they’re a simple option for gluten-free baking while still tasting rich, fudgy, and deeply chocolatey.
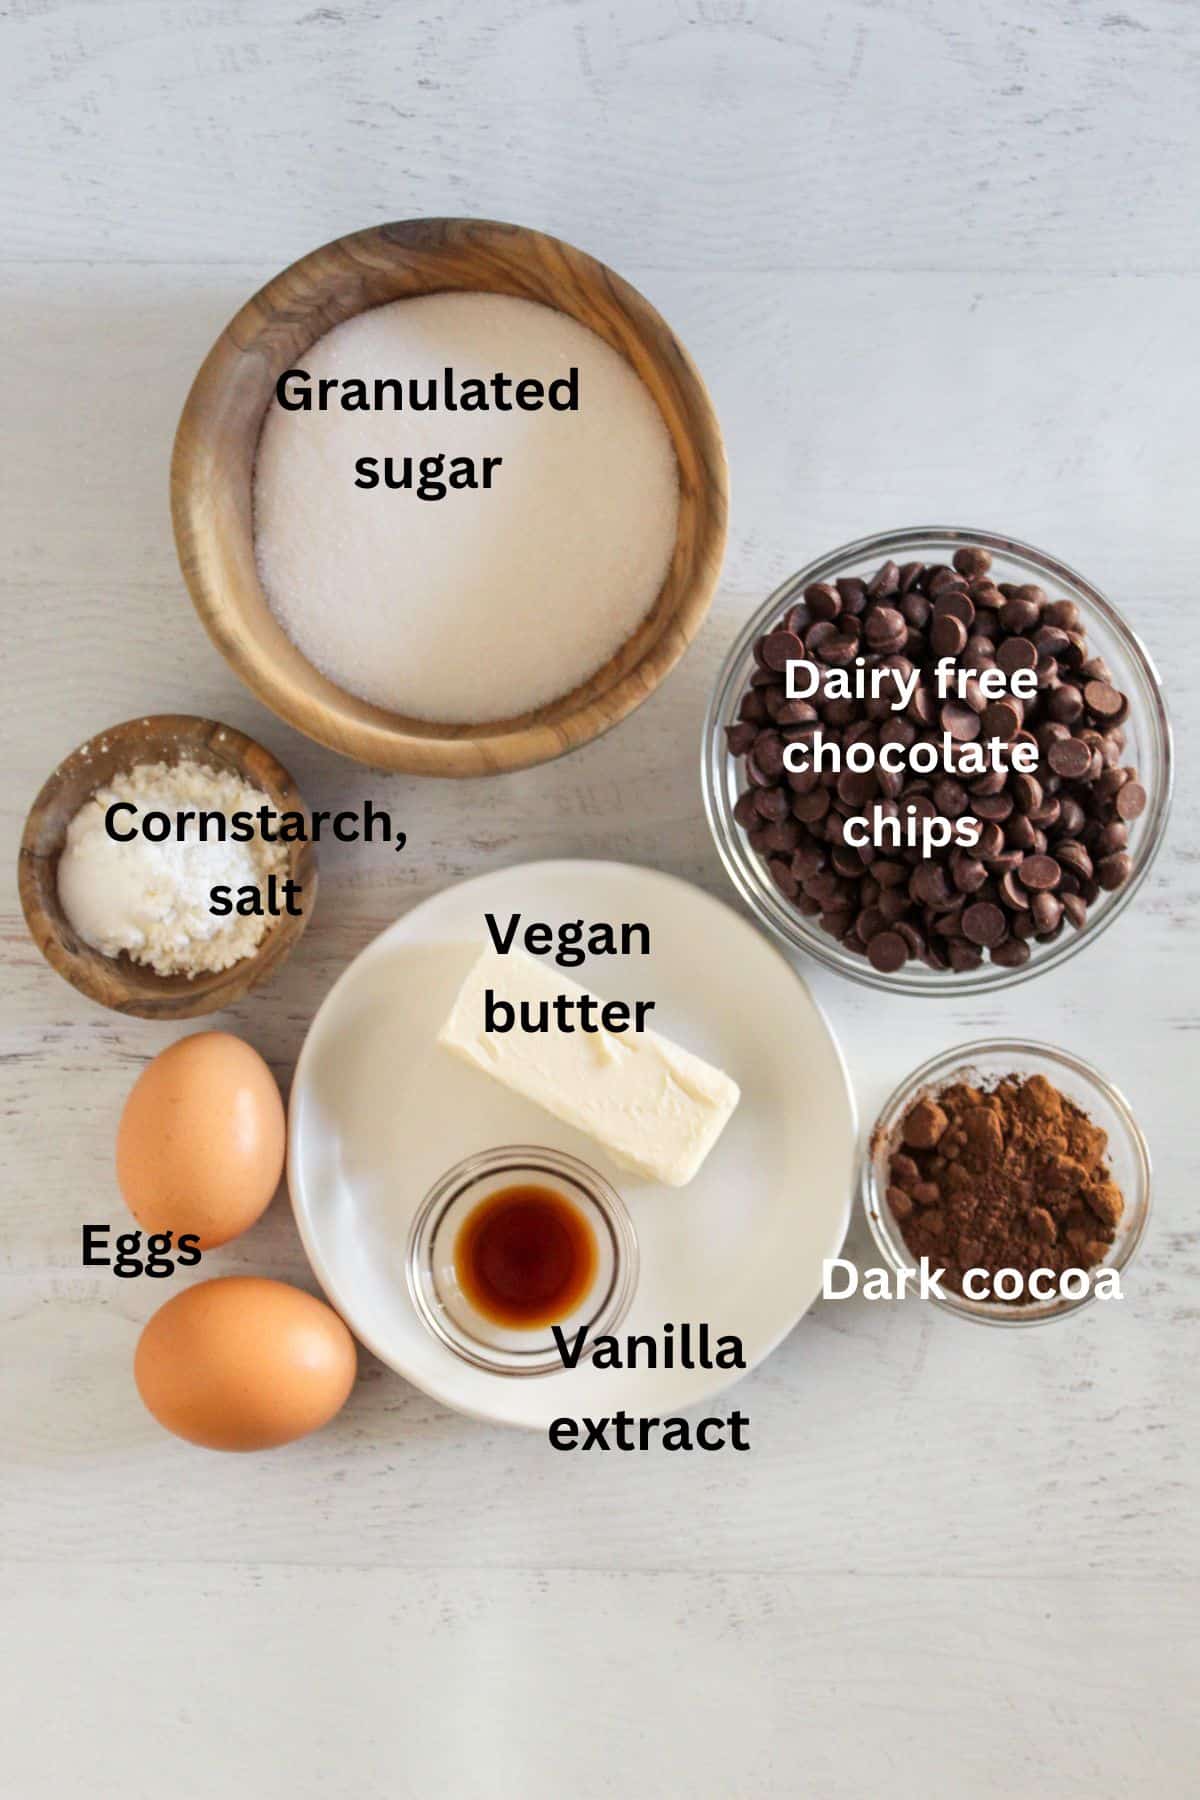
Quick Ingredient Scan List
Before you start mixing, take a quick look at the core ingredients I used for these chocolate flourless brownies.
- Vegan butter
- Dairy-free semi-sweet chocolate chips
- Granulated sugar
- Pure vanilla extract
- Eggs
- Dark cocoa powder (about 3 Tablespoons)
- Cornstarch (about 2 Tablespoons)
- Salt
Ingredients and Substitutions Notes
Because this batter behaves differently from traditional brownies, each ingredient directly affects the final texture, consistency, and moisture level. That’s why small substitutions can noticeably change the final result. In that case, study the roles of each ingredient and their possible substitutions.
- Vegan Butter: Vegan butter adds richness, moisture, and softness to the brownies. It also helps create that dense, fudgy texture that flourless brownies are known for. You can substitute regular unsalted butter if dairy-free baking is not required. Coconut oil can work in a pinch, but the brownies may feel slightly heavier and less creamy.
- Dairy-Free Semi-Sweet Chocolate Chips: This is where I got most of the deep chocolate flavor. Melted chocolate also helps the brownies hold together while creating a smoother, richer texture than cocoa powder alone. Dark chocolate chips can be used for a more intense flavor. Meanwhile, milk chocolate is not recommended because it can make the brownies too sweet and softer in structure.
- Granulated Sugar: Sugar does much more than sweeten these brownies. It helps create shiny crackly tops, supports moisture retention, and contributes to the chewy edges. Reducing the sugar too much can lead to dry or cakey brownies. Coconut sugar may be substituted, but the texture becomes slightly softer and less glossy on top.
- Pure Vanilla Extract: Vanilla rounds out the chocolate flavor and prevents the brownies from tasting flat or bitter. There’s really no perfect substitute here, so it’s best not to skip it.
- Eggs: Eggs help hold the batter together, support the chewy center, and yield clean slices after cooling.
- Dark Cocoa Powder: Dark cocoa powder adds a deeper cocoa flavor while balancing excess moisture in the batter, resulting in a smoother texture.
- Cornstarch: Cornstarch acts as a light stabilizer in this flour-free brownies recipe. Even though the brownies are technically flourless, a small amount of starch helps improve structure and reduce crumbling.
- Salt: Salt sharpens the chocolate flavor and balances the sweetness. Even a small amount makes the brownies taste richer and more complete. Fine sea salt or kosher salt both work well.
Do you love brownies with bold, rich flavor combinations? Our Chewy Gluten-Free Peanut Butter Brownies for Serious PB Lovers pair the same fudgy texture with an even deeper roasted peanut butter flavor.
Printable Flourless Cocoa Brownies Recipe Card
Ingredients
- ⅓ cup vegan butter
- 8 ounces dairy-free semi-sweet chocolate chips about 226 grams
- ¾ cup granulated sugar about 150 grams
- 1 teaspoon pure vanilla extract
- 2 large eggs
- 3 tablespoons dark cocoa powder about 18 grams
- 2 tablespoons cornstarch about 16 grams
- ¼ teaspoon salt
Instructions
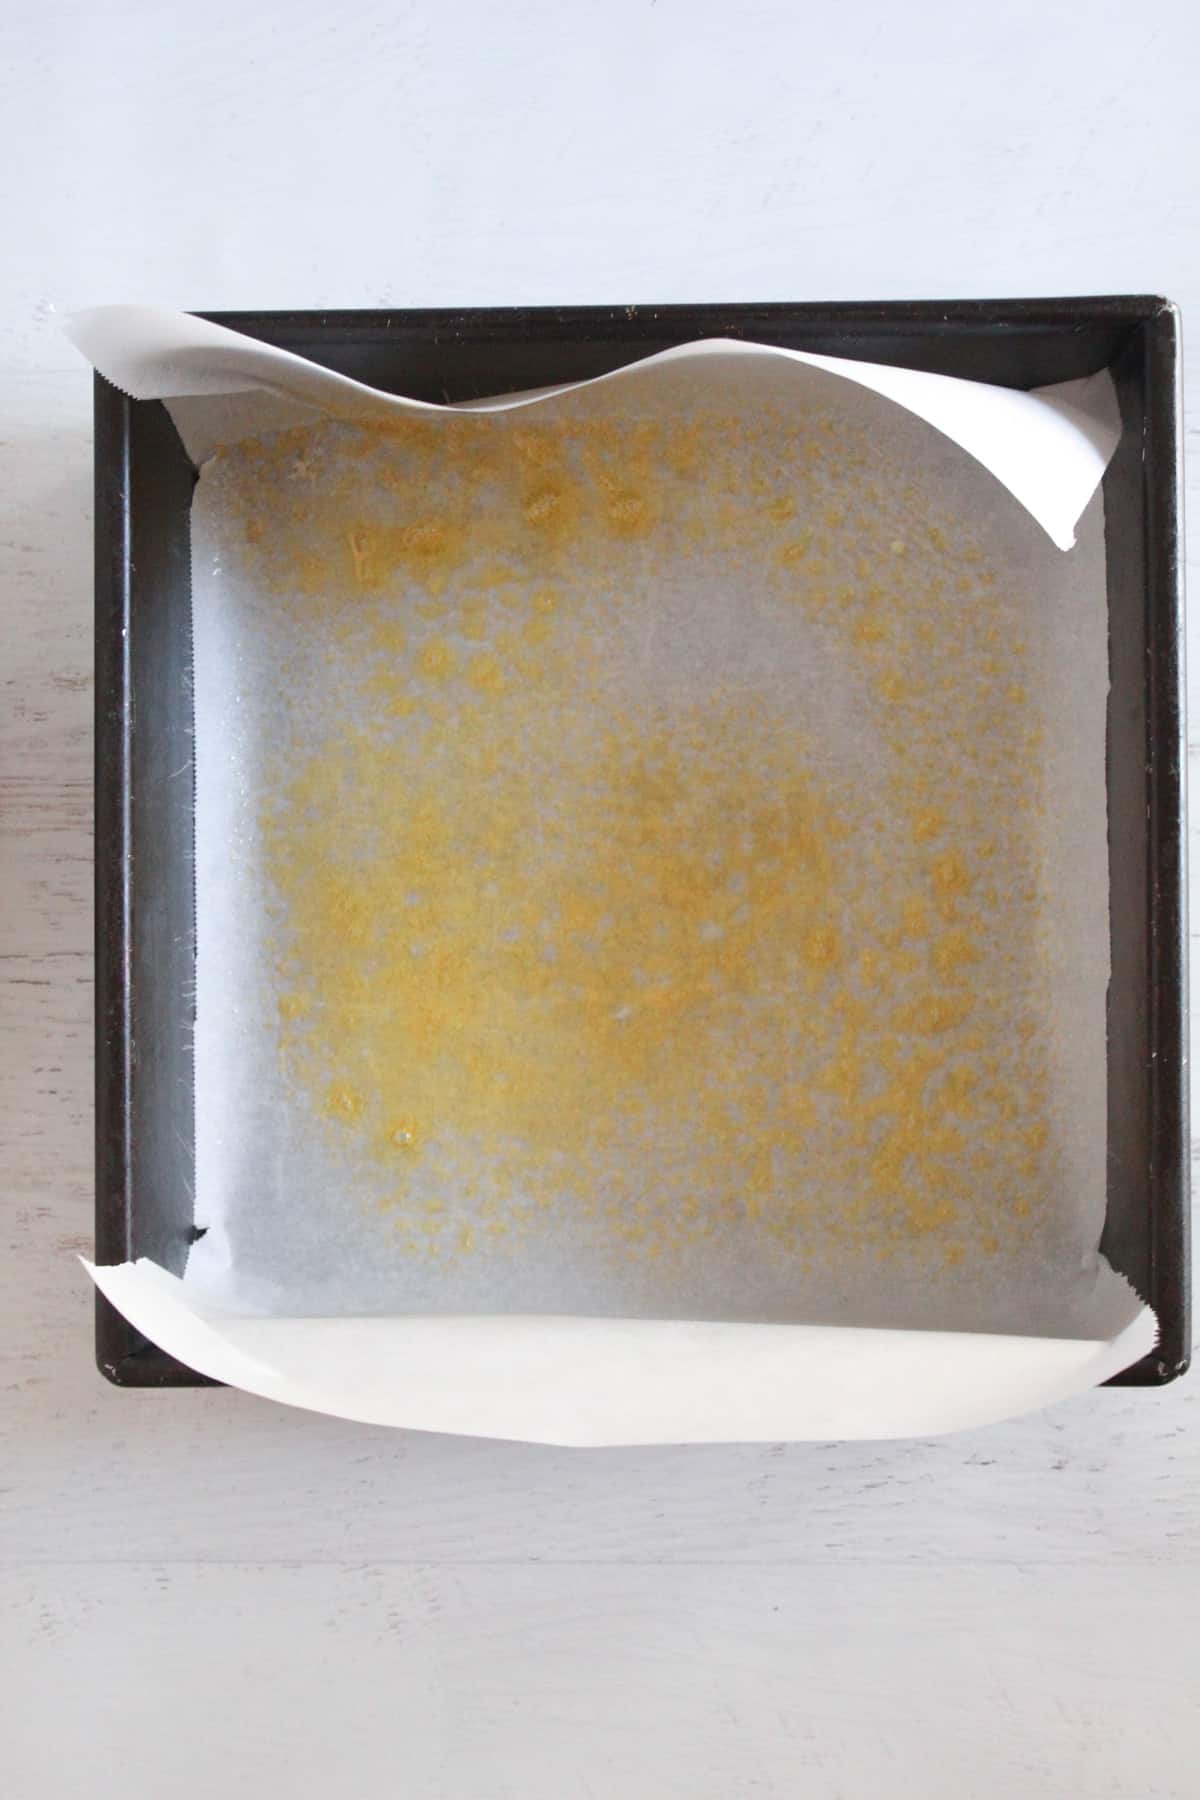
- Preheat your oven to 350°F. Then line an 8×8-inch baking pan with parchment paper and lightly spray it with cooking spray to prevent sticking.
- In a large microwave-safe bowl, combine the vegan butter and chocolate chips.Microwave for 30 seconds, stir, then continue heating in 30-second intervals until fully melted and smooth.
- Whisk the granulated sugar and vanilla extract into the melted chocolate mixture until fully combined. The batter should already look glossy and rich at this stage.
- Whisk in the first egg until completely incorporated. Then add the second egg and whisk until the batter is smooth, thick, and shiny.
- Add the cocoa powder, cornstarch, and salt. Mix thoroughly for about 30 seconds until no dry streaks remain.
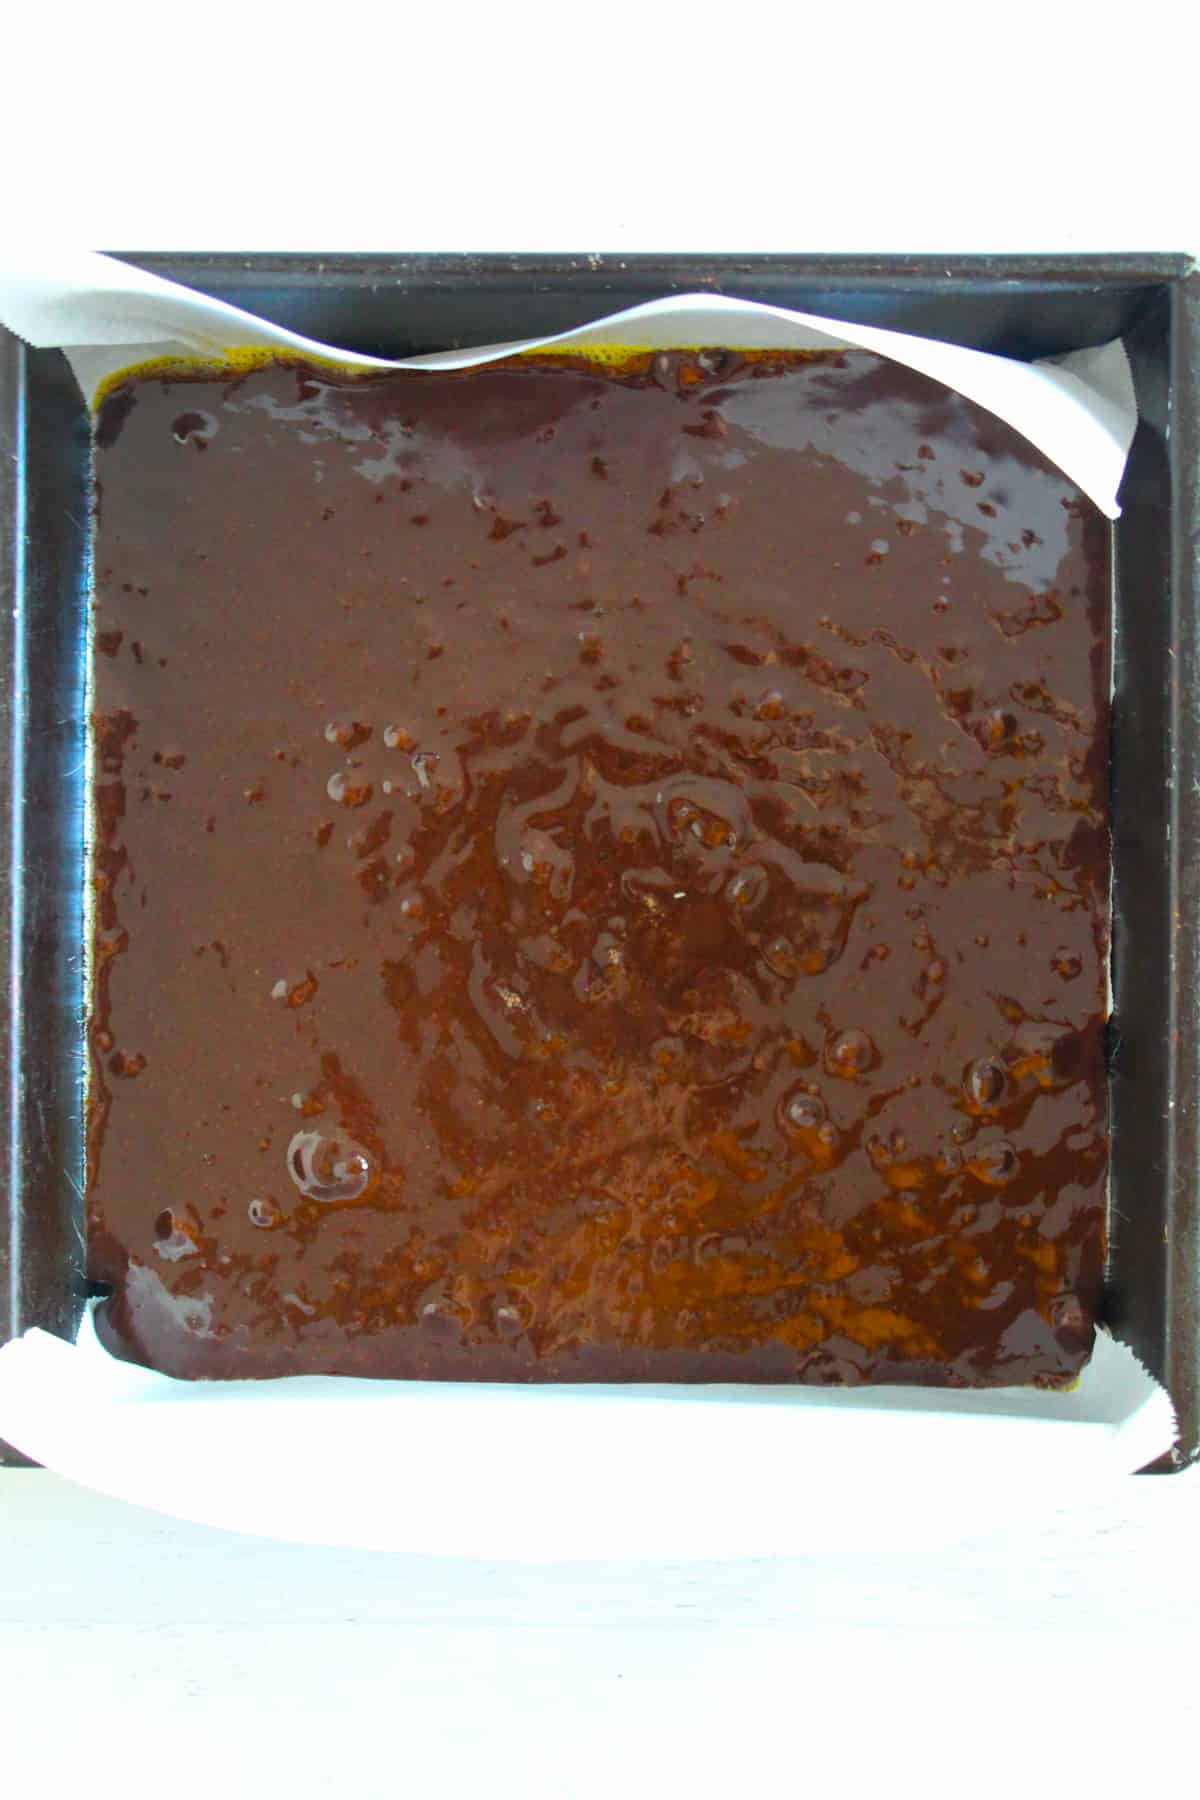
- Pour the batter into the prepared baking pan and smooth the top evenly using a spatula.
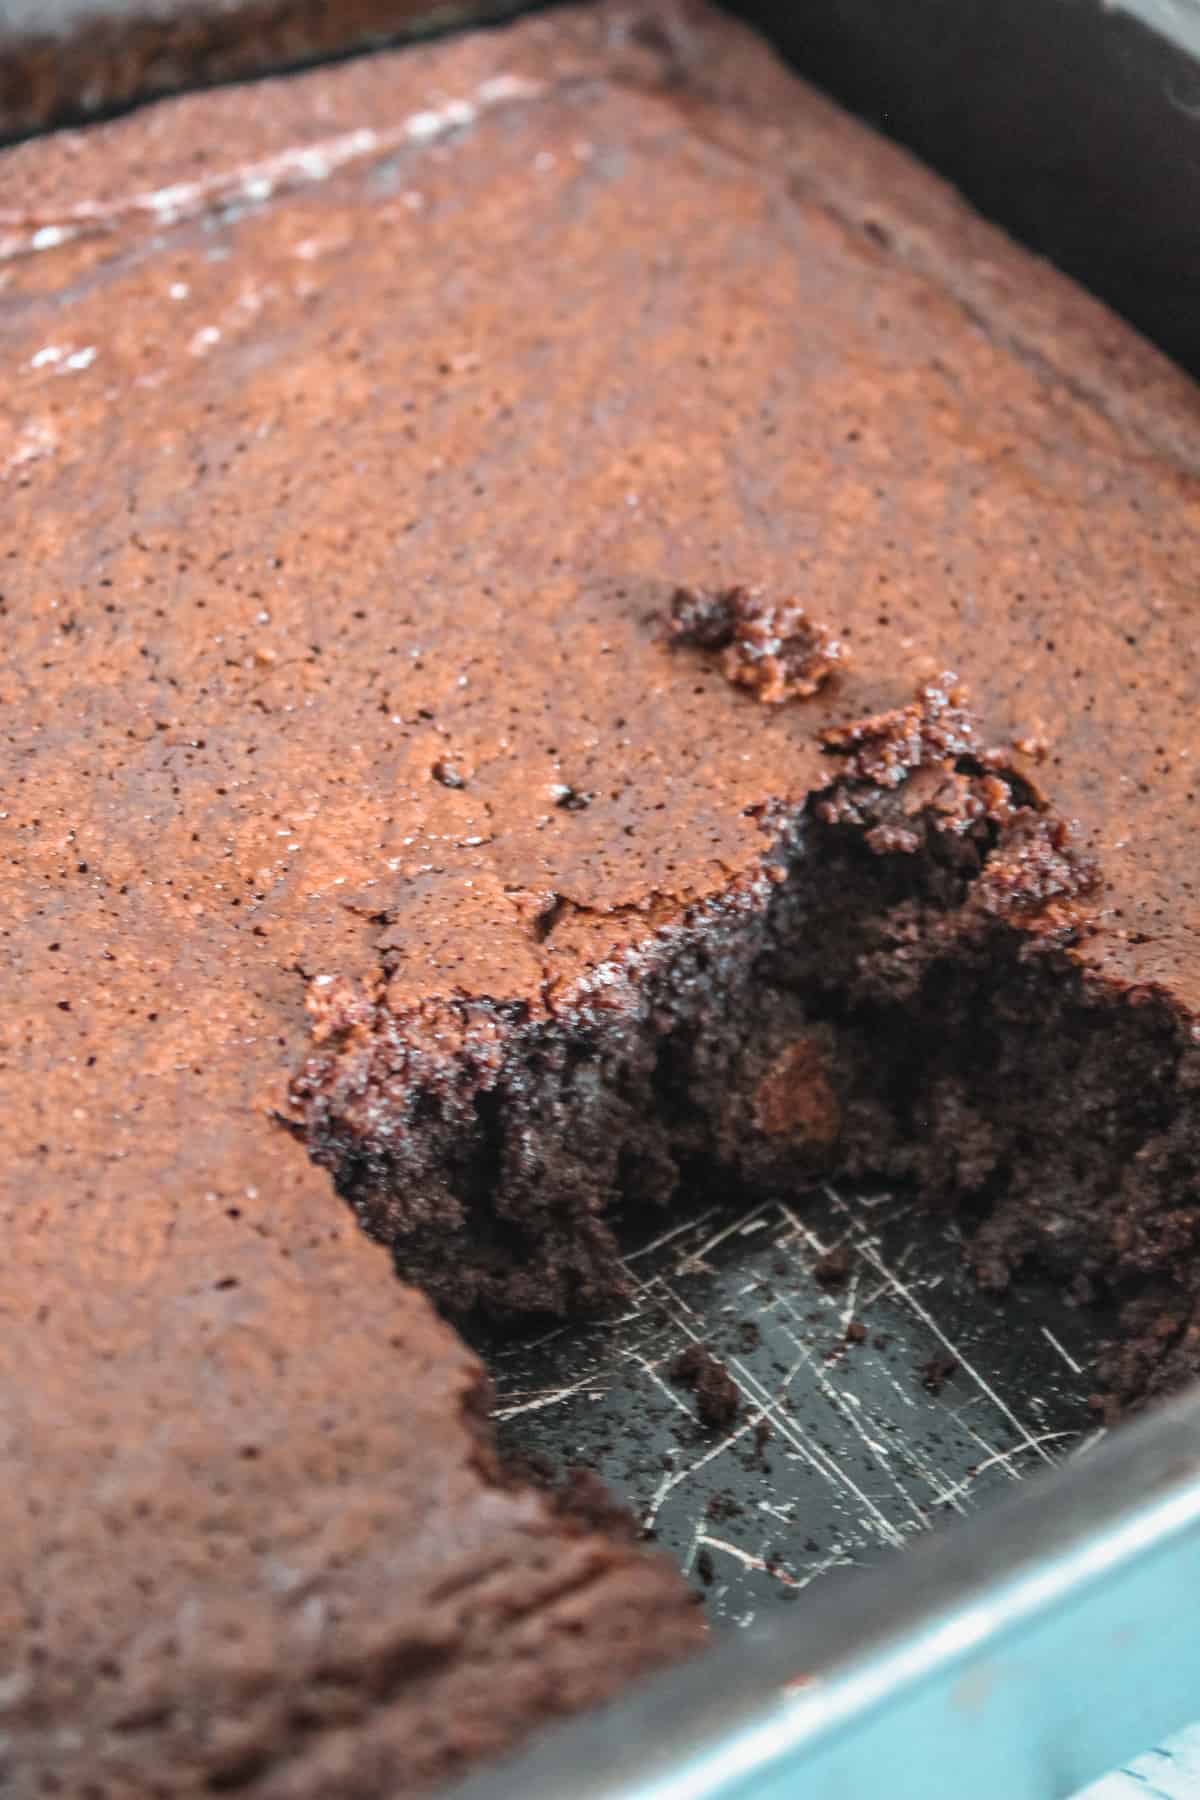
- Bake for 25–27 minutes. The brownies should look set around the edges while the center remains slightly soft.
- Allow the brownies to cool completely before cutting. This step is essential because the structure continues to set as the brownies cool.
Notes
- The edges should appear set and slightly firm.
- The center should still feel a little soft.
- A toothpick inserted into the center should come out mostly clean with a few moist crumbs.
- The top should develop a thin, crackly layer.
- Avoid overbaking, as flourless brownies continue to firm up after they come out of the oven.
Notes (Mistakes + Tips)
- Regular unsalted butter can be used in place of vegan butter.
- Dark cocoa powder creates a deeper chocolate flavor, but regular cocoa powder also works.
- Tapioca starch may be used instead of cornstarch.
- Do not reduce the sugar too much, or the brownies may lose their crackly top and fudgy texture.
- Cooling completely before slicing prevents crumbling.
- Whisk the eggs thoroughly to help create shiny tops.
Success Tips
- Use good-quality chocolate chips for the richest flavor.
- Do not overmix after adding the dry ingredients.
- Slight underbaking creates the best gooey center.
- Use parchment paper for easier removal and cleaner slices.
- Let the brownies rest before cutting for the best structure.
Storage
- Room Temperature: Store in an airtight container for up to 3 days.
- Refrigerator: Refrigerate for up to 1 week for a firmer, denser texture.
- Freezer: Wrap individual brownies tightly and freeze for up to 2 months.
- Reheating: Microwave for 10–15 seconds to bring back the soft, gooey center.
Nutrition
Did you make and love this recipe? Give it your review and rating below! And make sure to follow me on Instagram, Pinterest, and Facebook , too!
Essential Kitchen Tools
However, before you start, gather these basic baking tools:
- 8×8-inch Baking Pan: This pan size yields the ideal brownie thickness, with fudgy centers and set edges.
- Parchment Paper: It prevents sticking and makes it easier to lift the brownies out cleanly.
- Large Microwave-Safe Mixing Bowl: With this bowl, you can melt and mix all your ingredients, making cleanup easier.
- Whisk: Use this tool to fully combine the eggs and sugar for a glossy batter and crackly tops.
- Silicone Spatula: This makes it easier to scrape all the batter into the pan and spread it evenly.
- Measuring Cups and Spoons: These tools ensure ingredient ratios remain accurate for the best texture.
- Cooling Rack: It helps the brownies cool evenly so the centers set properly.
- Sharp Knife: Use a sharp knife to create cleaner brownie slices once fully cooled.
How to Make Flourless Cocoa Brownies (Step-by-Step)
Although our process is simple, follow the steps carefully to bake brownies that stay moist and hold their shape, not dry or crumbly.
Step 1: Prepare the Baking Pan
Preheat your oven to 350°F.
Line an 8×8-inch baking pan with parchment paper and lightly spray the paper with nonstick spray. This helps prevent sticking and makes it easier to lift the brownies out after cooling.
Step 2: Melt the Butter and Chocolate
Add the vegan butter and dairy-free semi-sweet chocolate chips to a large microwave-safe bowl.
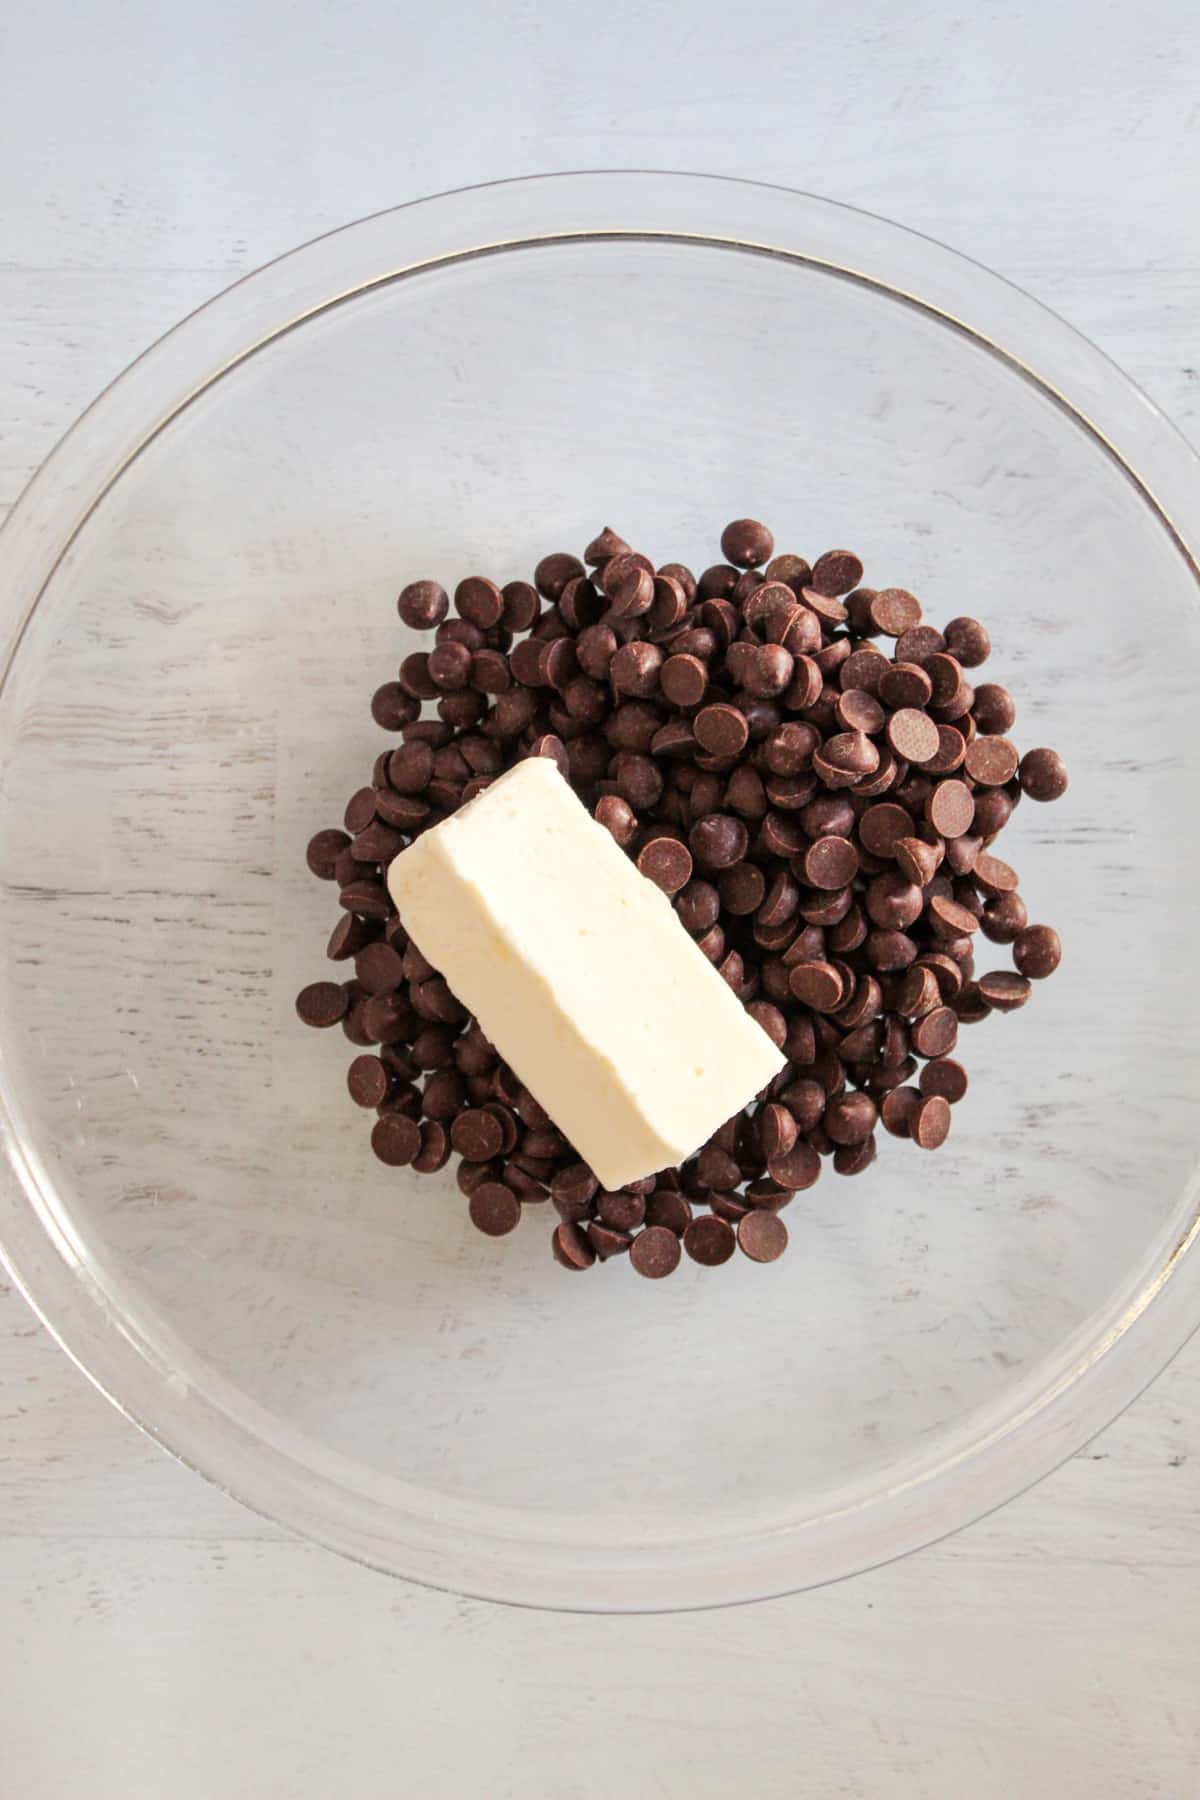
Microwave for 30 seconds, stir well, then continue microwaving in 30-second intervals until the mixture is completely melted and smooth.

Step 3: Add the Sugar and Vanilla
Whisk the granulated sugar and vanilla extract into the melted chocolate mixture.

The batter should become glossy and thick; this indicates you will get shiny, crackly tops after baking.
Step 4: Mix in the Eggs
Add the eggs one at a time, whisking thoroughly after each addition. Properly whisked eggs help the batter bake evenly and improve the final texture.

Step 5: Add the Dry Ingredients
Stir in the dark cocoa powder, cornstarch, and salt until fully combined.
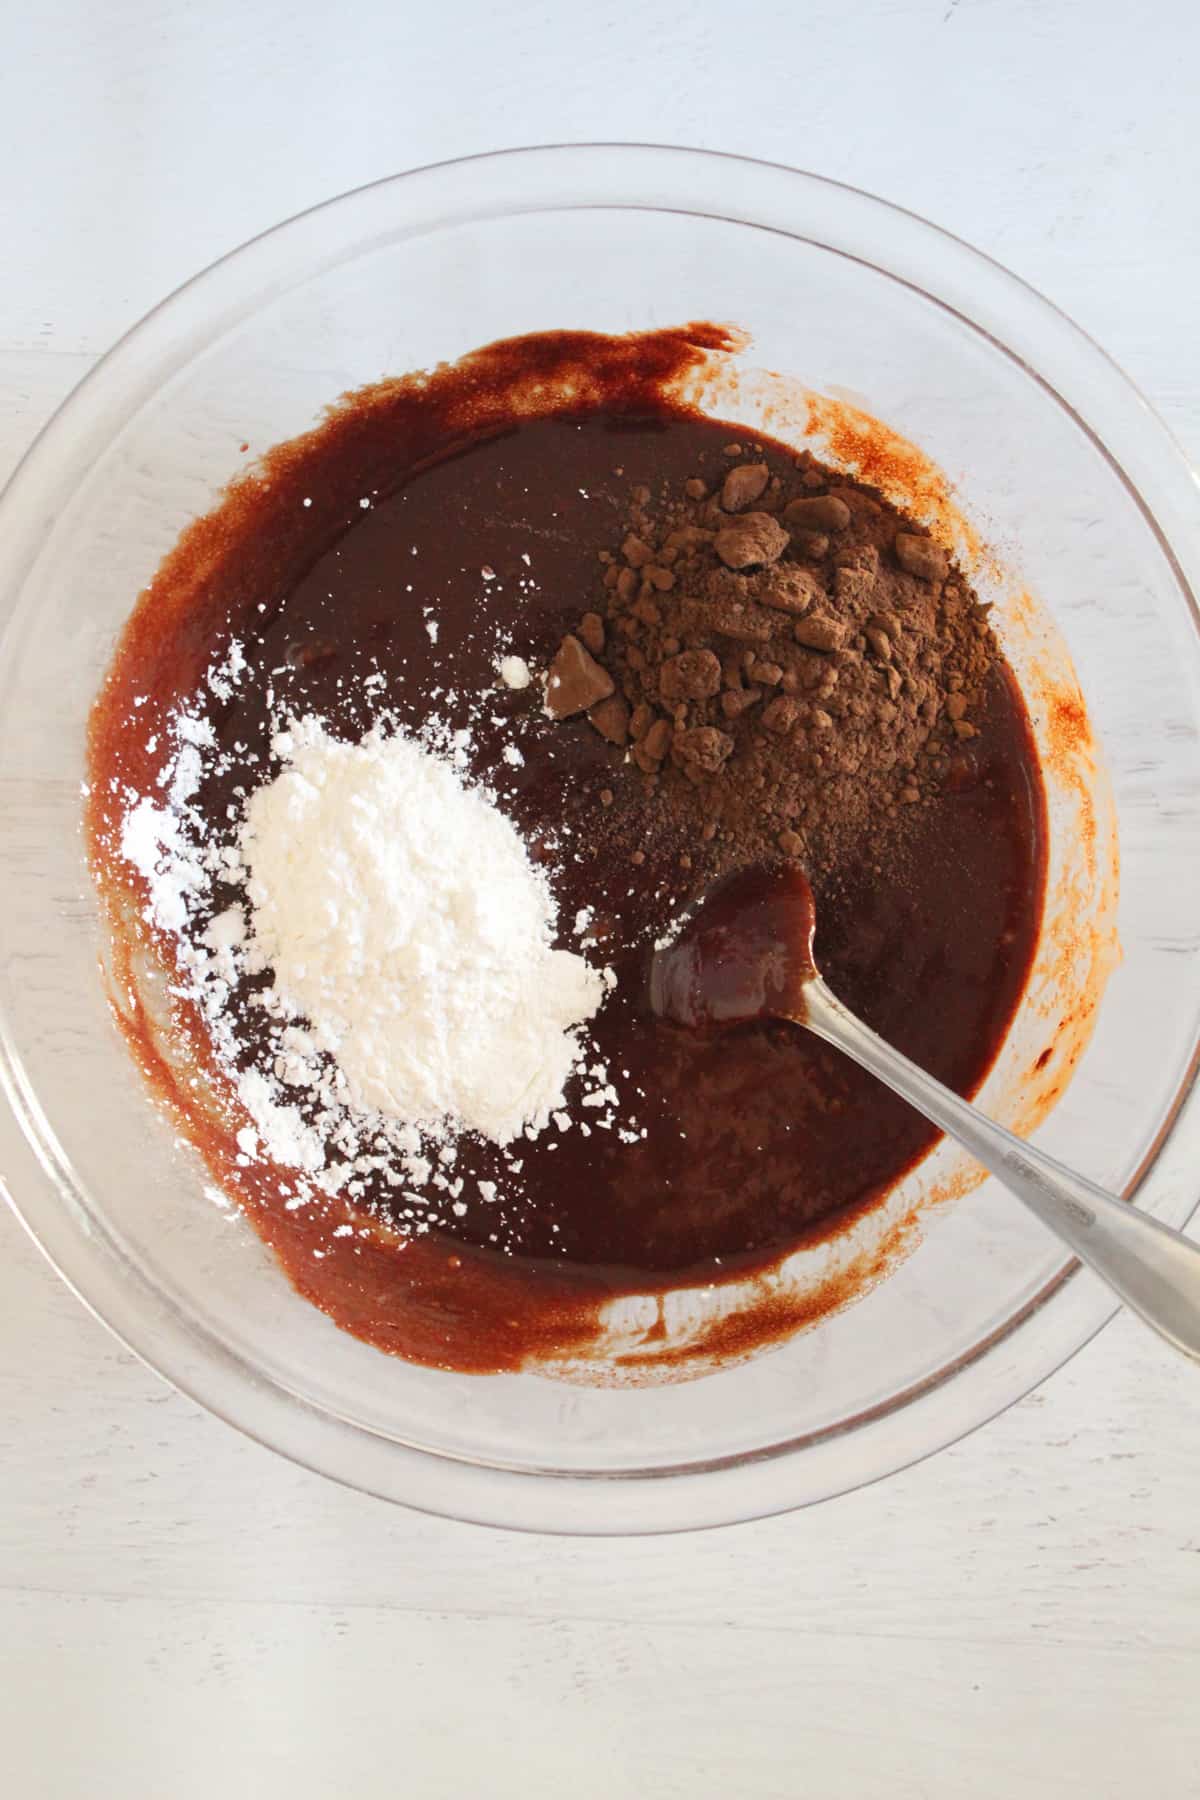
The batter should become thick, smooth, and deeply chocolatey.
Step 6: Spread the Batter Into the Pan
Pour the brownie batter into the prepared baking pan. Then use a spatula to spread it evenly into the corners so the brownies bake consistently.
Step 7: Bake Until Just Set
Bake for 25–27 minutes.
The edges should look set while the center remains slightly soft. A toothpick inserted into the middle should come out with moist crumbs rather than wet batter.
The brownies will continue setting as they cool, so removing them at this stage helps keep the center soft without drying the edges.
Step 8: Cool Completely Before Slicing
Allow the brownies to cool fully in the pan before cutting.
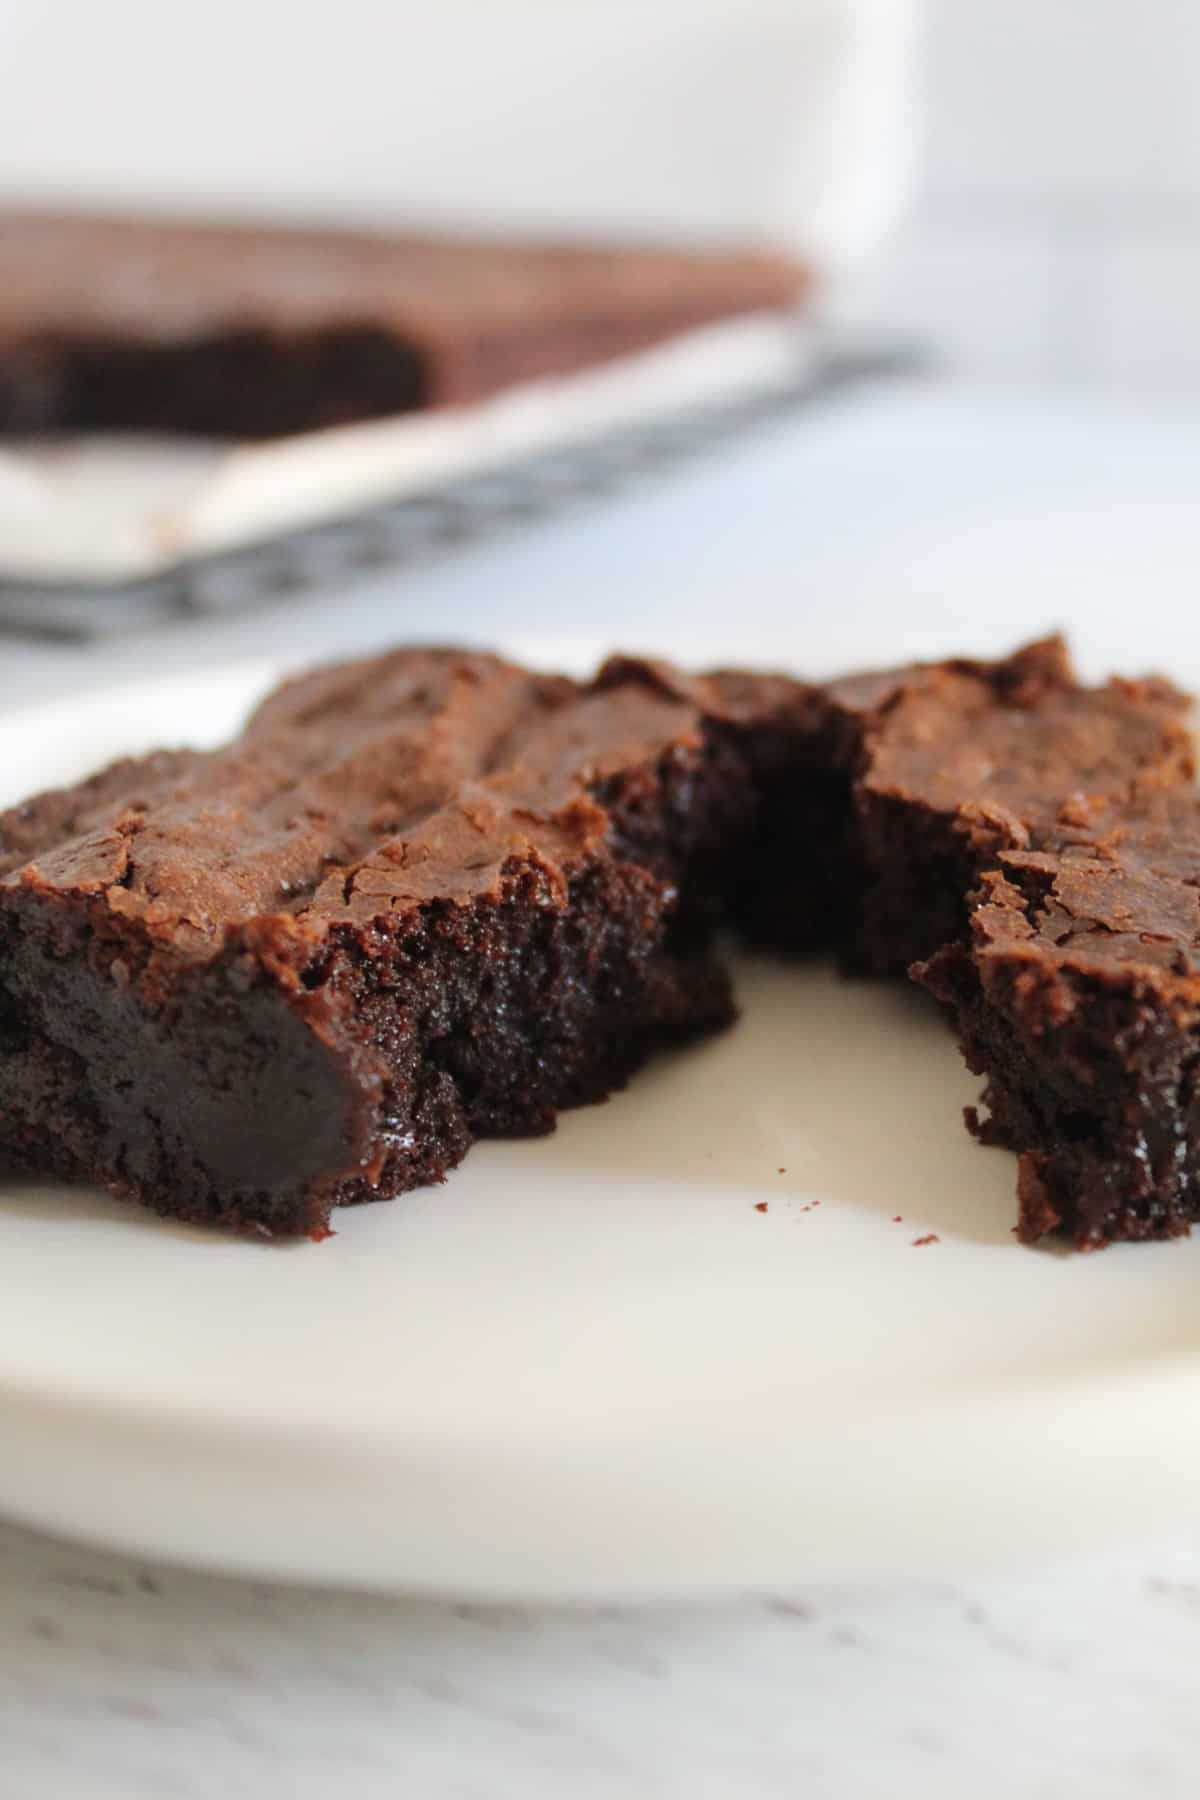
Cooling fully before slicing helps the brownies hold together more cleanly.
How to Fix Flourless Cocoa Brownies Recipe Common Issues
Small changes in baking time, ingredient ratios, or mixing technique can noticeably affect the texture of brownies.
Why Are My Brownies Dry?
Brownies often turn out dry because they are overbaked. Using too much cocoa powder or not enough fat can also make them less moist.
Do the following to fix this issue:
- Remove the brownies while the centers are still slightly soft.
- Measure cocoa powder carefully.
- Store in an airtight container.
Why Did My Brownies Sink?
A slight sink is normal in brownies without flour, but major collapsing usually means the brownies were underbaked or the oven door was opened too early.
Resolve brownie sinking issues by doing the following:
- Bake until the edges are set.
- Avoid opening the oven during baking.
- Cool brownies gradually.
Why Are They Too Gooey?
Flourless brownies should be fudgy, not raw. An excessively gooey center usually means they needed a few more minutes in the oven.
Follow the tips below if your chocolate snacks are too gooey:
- Use an 8×8-inch pan.
- Look for moist crumbs on the toothpick.
- Cool completely before slicing.
Why Did They Crumble?
Brownies usually crumble when ingredient measurements are off or when they are sliced while still warm.
Fix the crumble issue with the tips below:
- Use large eggs.
- Measure ingredients accurately.
- Let brownies cool fully before cutting.
Why Didn’t the Tops Crack?
Crackly tops depend on properly dissolved sugar and well-whisked eggs.
To make the tops crack, do the following:
- Whisk the sugar into the warm chocolate until thoroughly combined.
- Do not reduce the sugar too much.
- Use good-quality chocolate.
Why Do Flourless Brownies Taste Bitter?
Dark cocoa powder and overbaking can create bitterness.
Fix the bitterness by doing the following:
- Use semi-sweet chocolate.
- Avoid overbaking.
- Add vanilla for balance.
Why Did the Center Stay Raw?
A raw center usually means the brownies were underbaked or the oven temperature was too low.
Fix this issue quickly with the following tips:
- Bake until the edges are set.
- Check for moist crumbs, not wet batter.
- Verify oven temperature accuracy.
Flavor Variations for Flourless Cocoa Brownies Recipe
Flourless chocolate brownies are quite easy to customize. Small ingredient changes can completely shift the flavor, texture, sweetness, and richness while still keeping that signature fudgy center.
- Nutty Flourless Brownies: Chopped walnuts, pecans, or almonds add crunch and contrast to the soft brownie texture. Nuts slightly reduce the gooey texture by absorbing some of the batter’s moisture, but they also add more bite and richness.
- Espresso Flourless Brownies: Adding espresso powder deepens the chocolate flavor without making the brownies taste like coffee. This version delivers a richer, more intense flavor while maintaining the same fudgy texture and moisture. Start by mixing 1–2 teaspoons of espresso powder directly into the batter.
- Dark Chocolate Brownies: Using darker chocolate results in brownies that are bolder and less sweet. Dark chocolate’s lower sugar content and higher cocoa solids make the texture denser and richer. This also intensifies the overall flavor.
- Dairy-Free Flourless Brownies: The original recipe already uses dairy-free chocolate and vegan butter, making this variation easy to follow. Dairy-free brownies tend to stay soft and moist. However, bear in mind that some vegan butter brands can create a slightly softer center after cooling.
- Keto-Style Brownies: For a lower-carb version, replace the sugar with a keto-friendly sweetener and use sugar-free chocolate. Keto brownies are usually less glossy on top and slightly less chewy because sugar plays a major role in moisture retention and crackly tops.
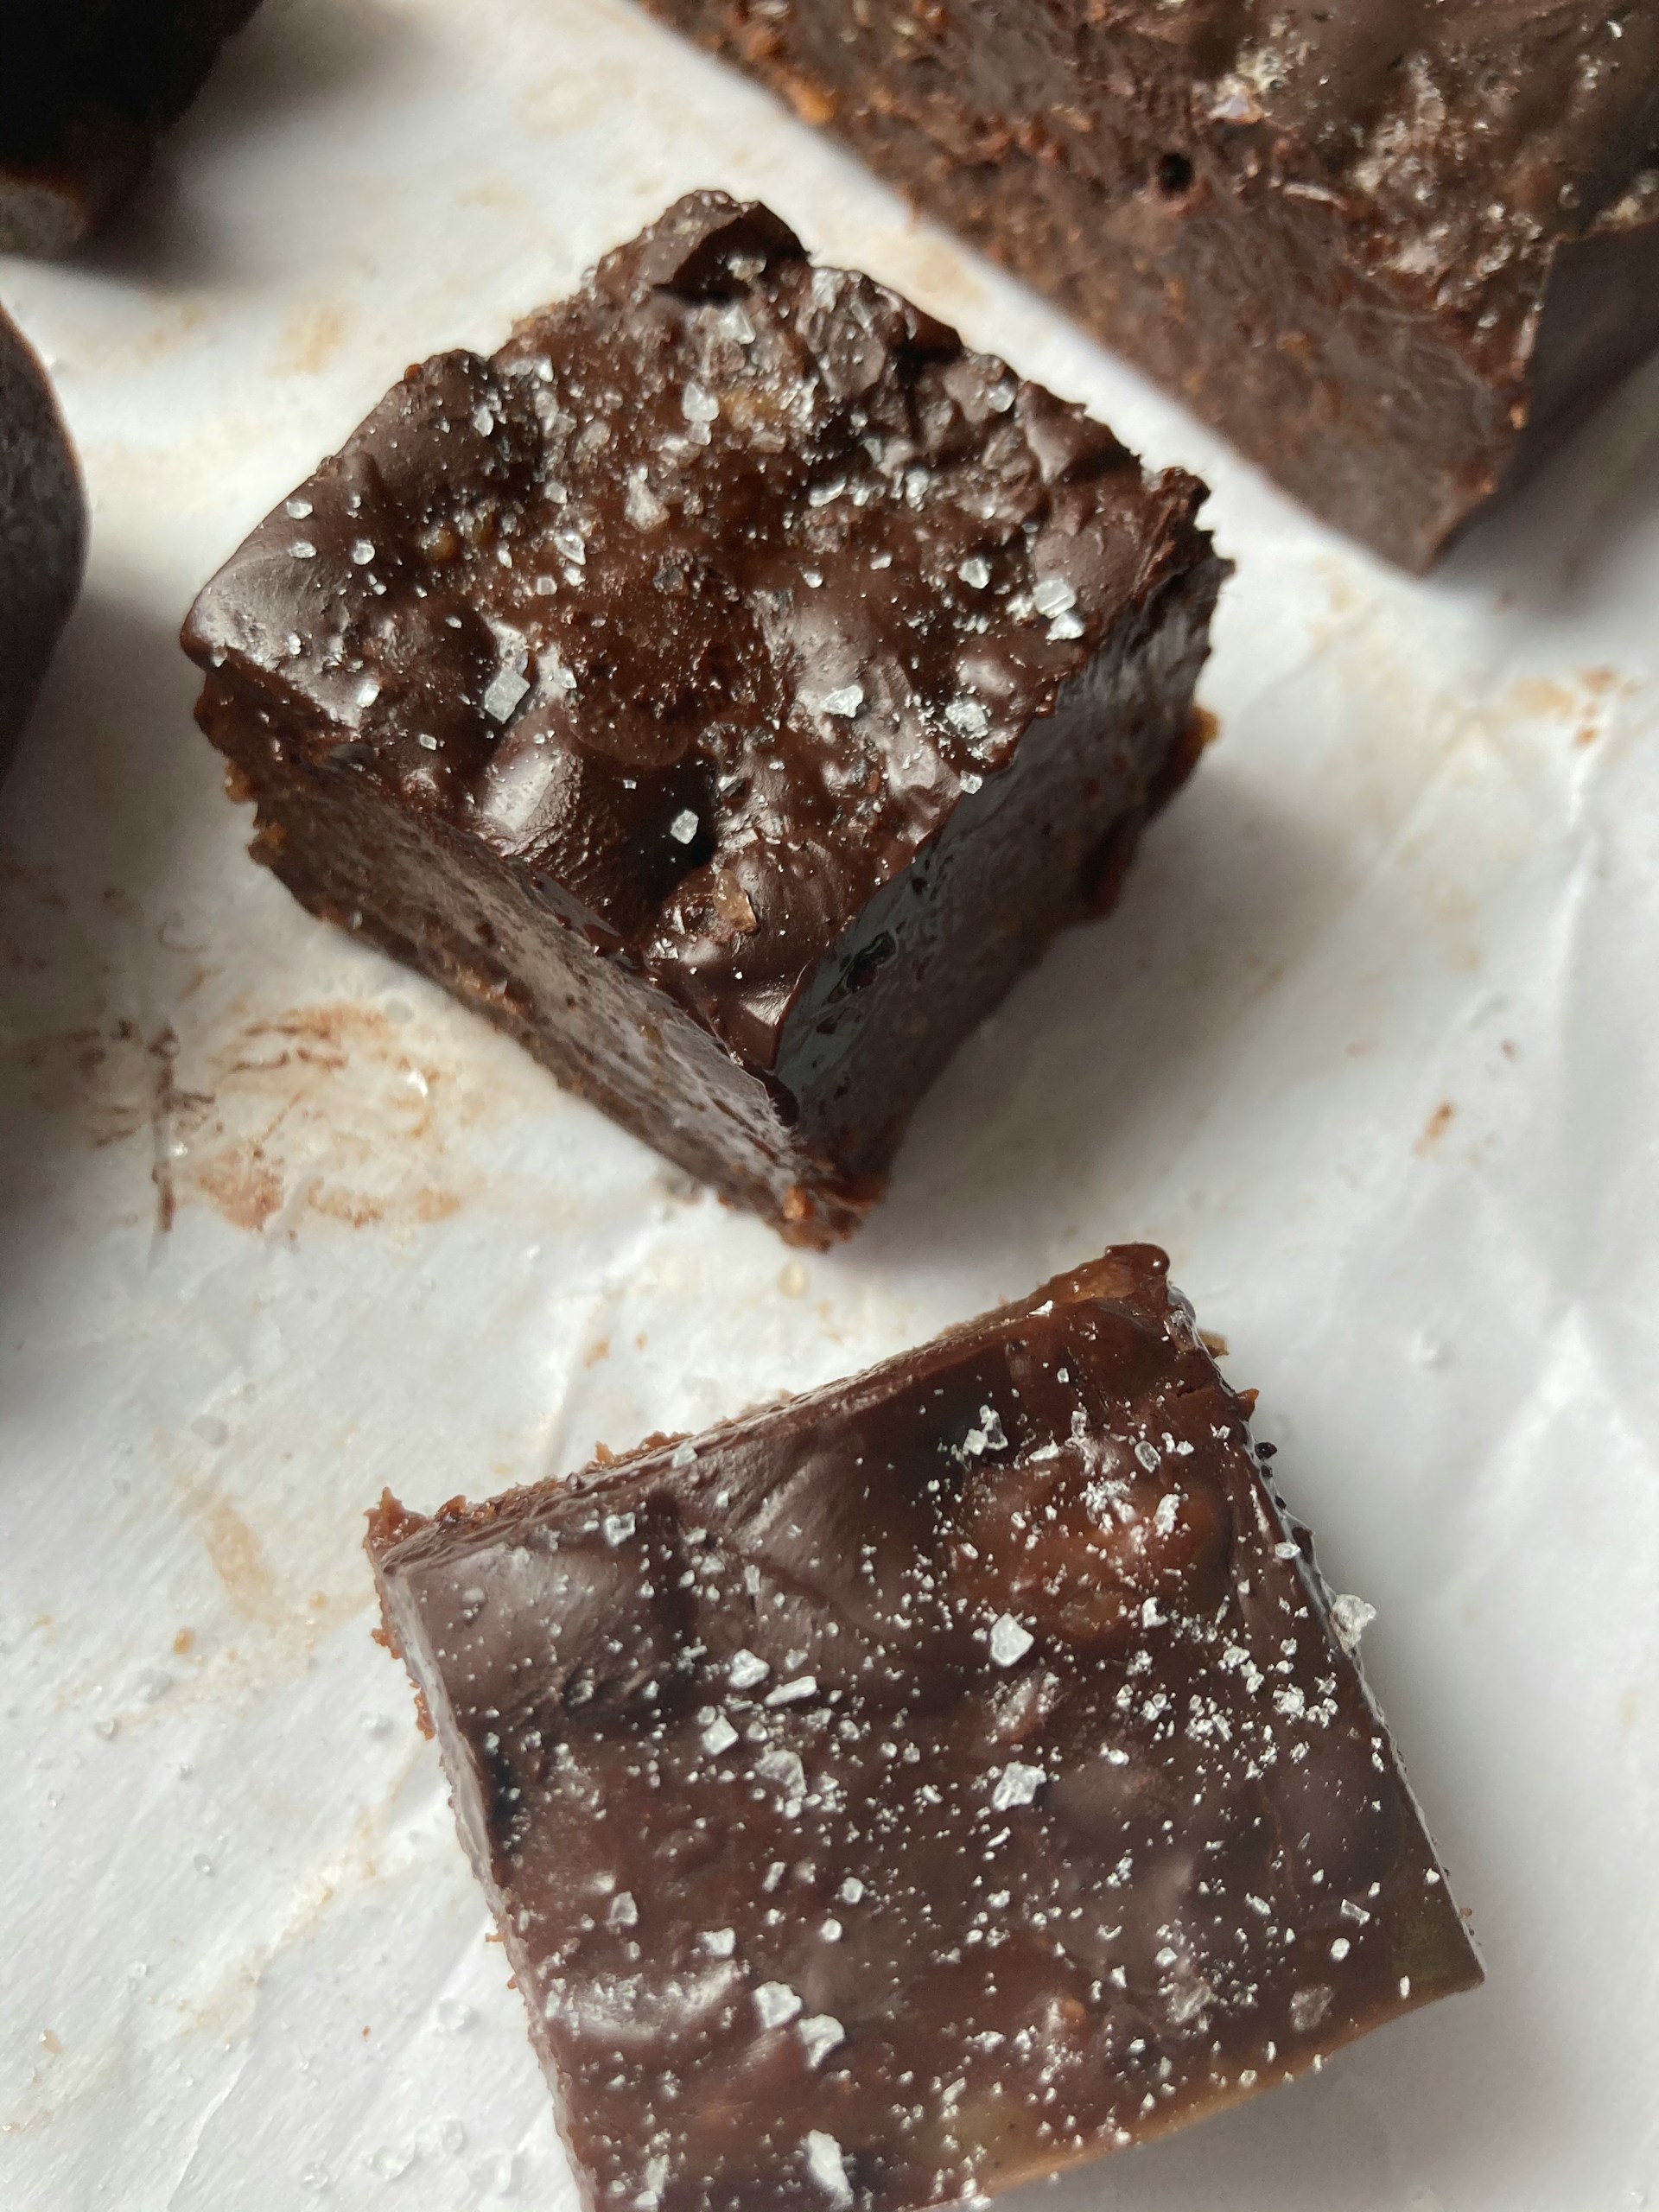
- Sea Salt Brownies: A sprinkle of flaky sea salt on top balances the sweetness and intensifies the chocolate flavor. This variation does not significantly alter the texture, but it creates a more balanced, richer-tasting brownie overall.
The Best Toppings and Pairings for Flourless Cocoa Brownies
Chocolate flourless brownies are already rich and intensely fudgy on their own, but the right toppings can make the flavor even more balanced and satisfying. Adding something cold, creamy, fruity, or slightly salty helps contrast the dense chocolate texture while creating a more layered dessert experience.
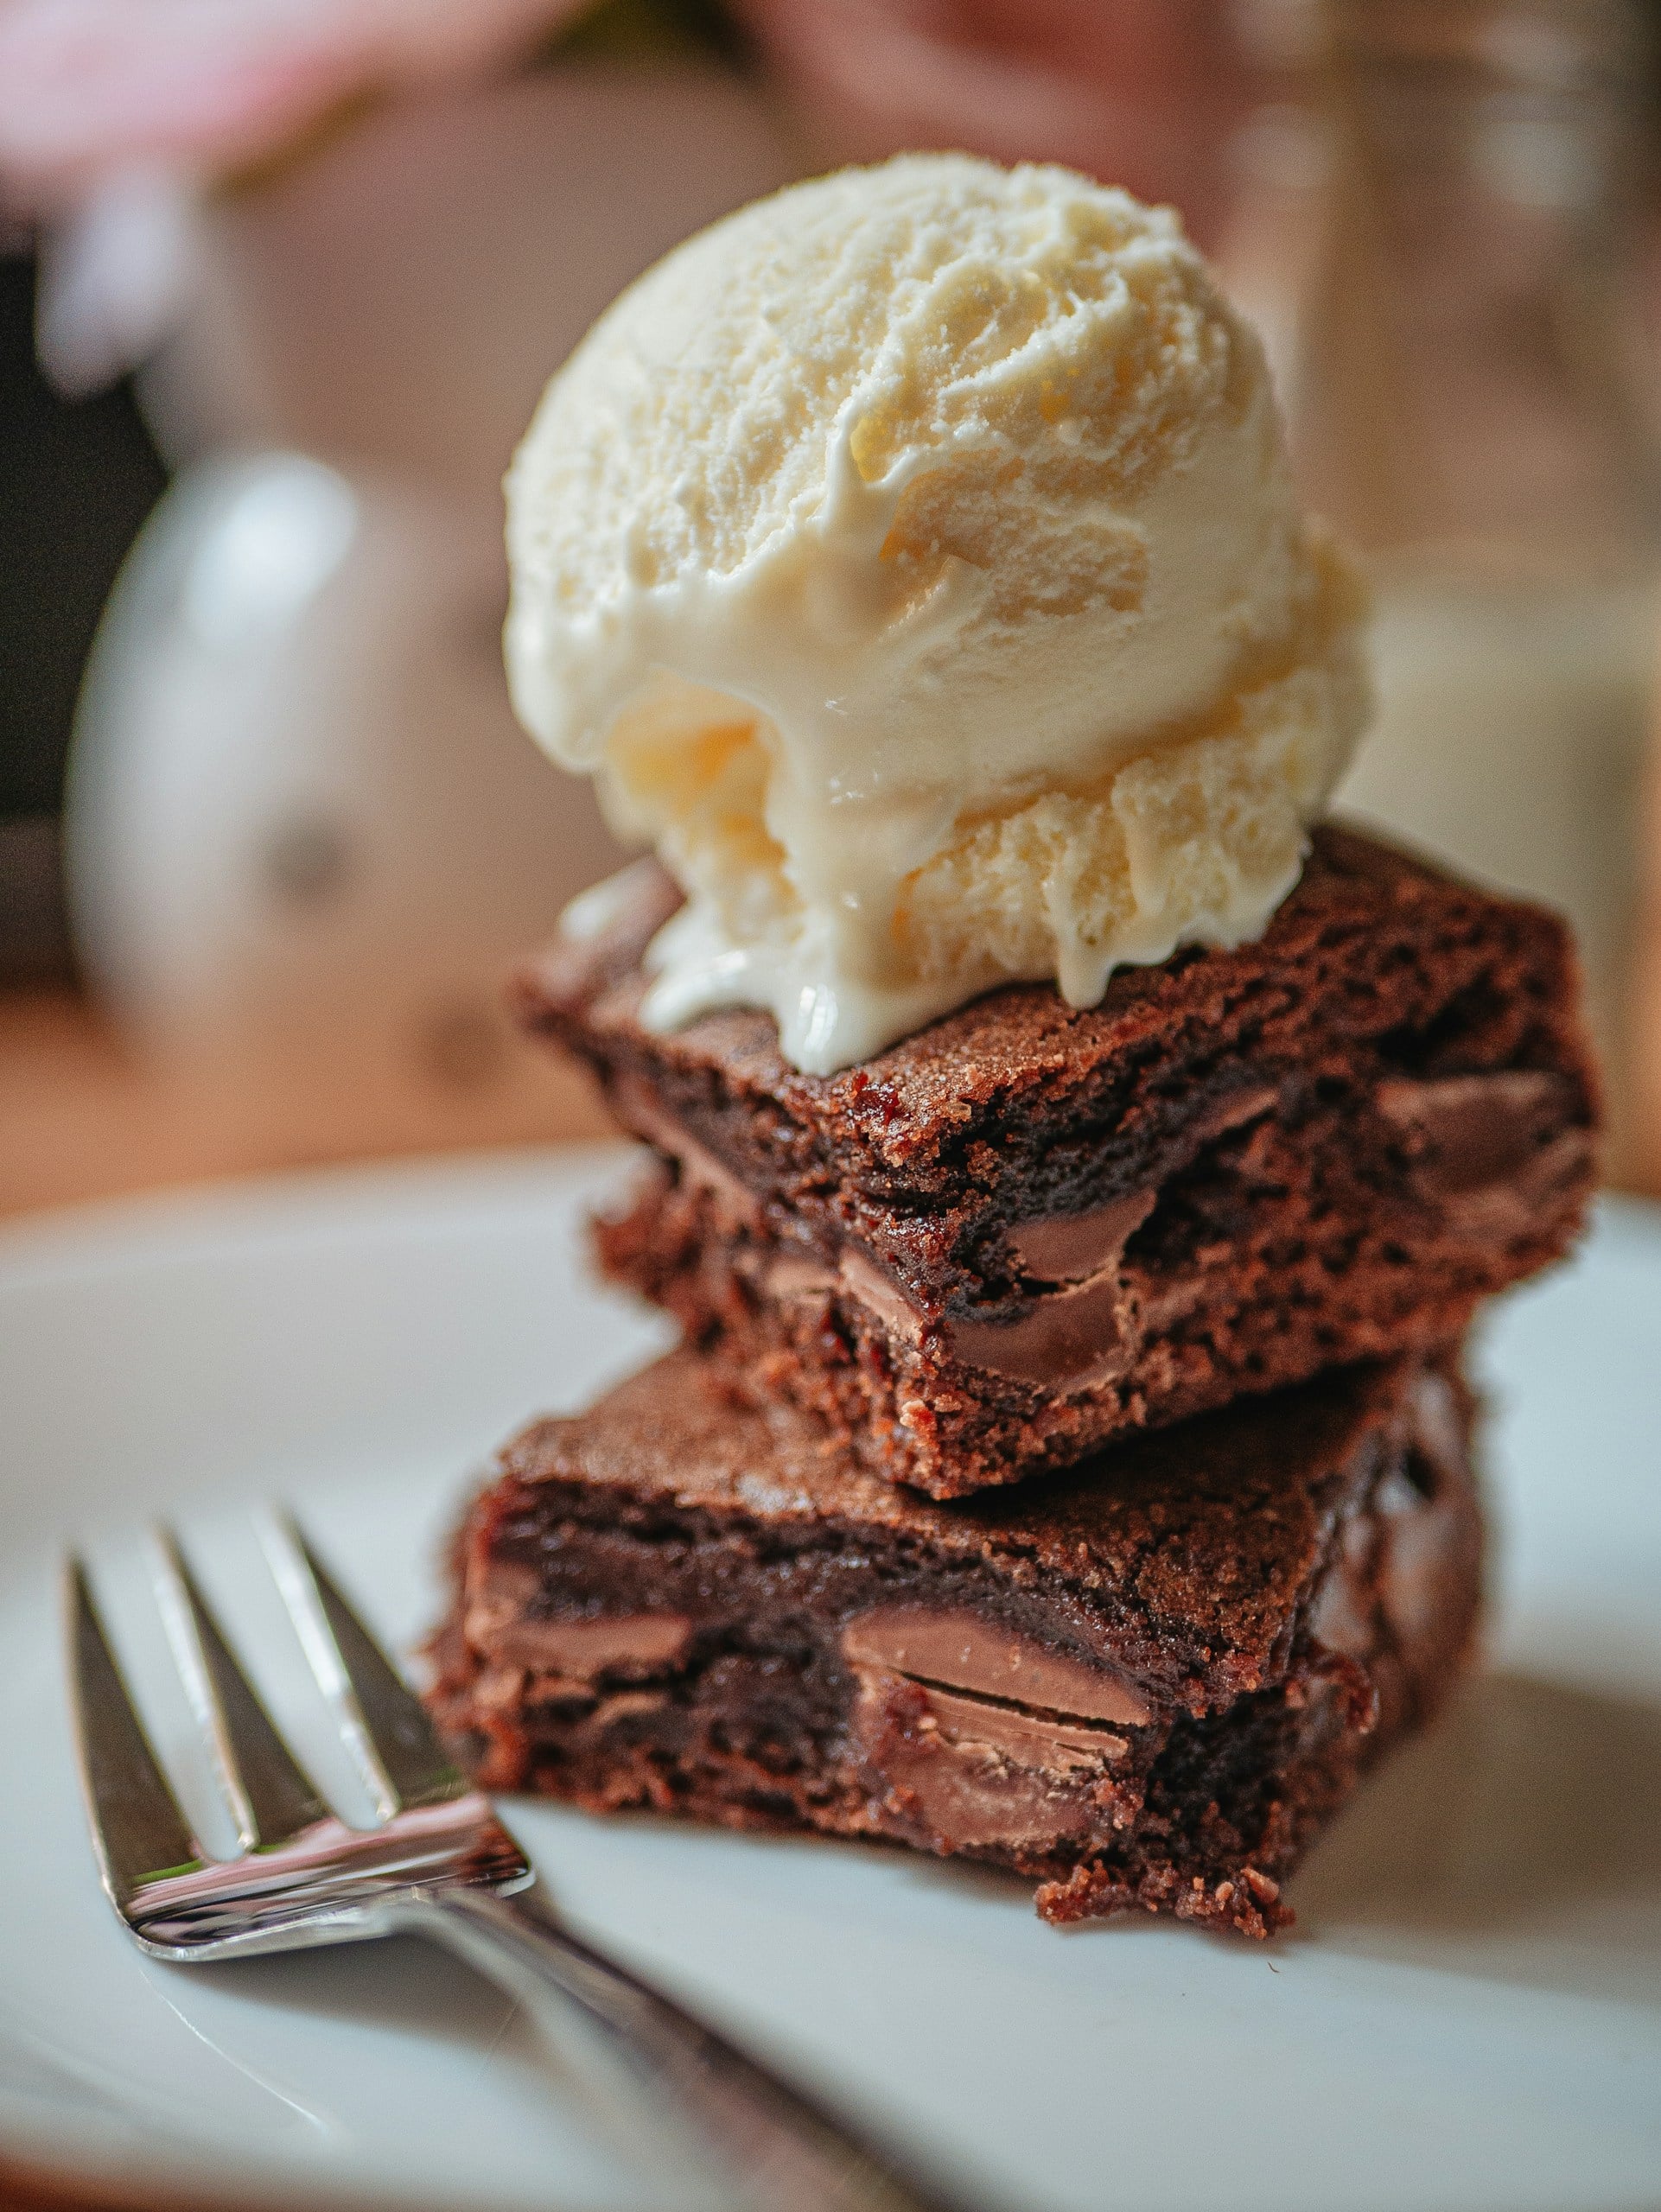
Vanilla Ice Cream
Cold vanilla ice cream melts smoothly over warm brownies, balancing the rich chocolate flavor. The creamy texture mellows the intense cocoa flavor and highlights the classic hot-and-cold contrast in this dessert.
Whipped Cream
Fresh whipped cream adds lightness without overpowering the brownies. Its airy texture contrasts especially well with dense fudgy centers.
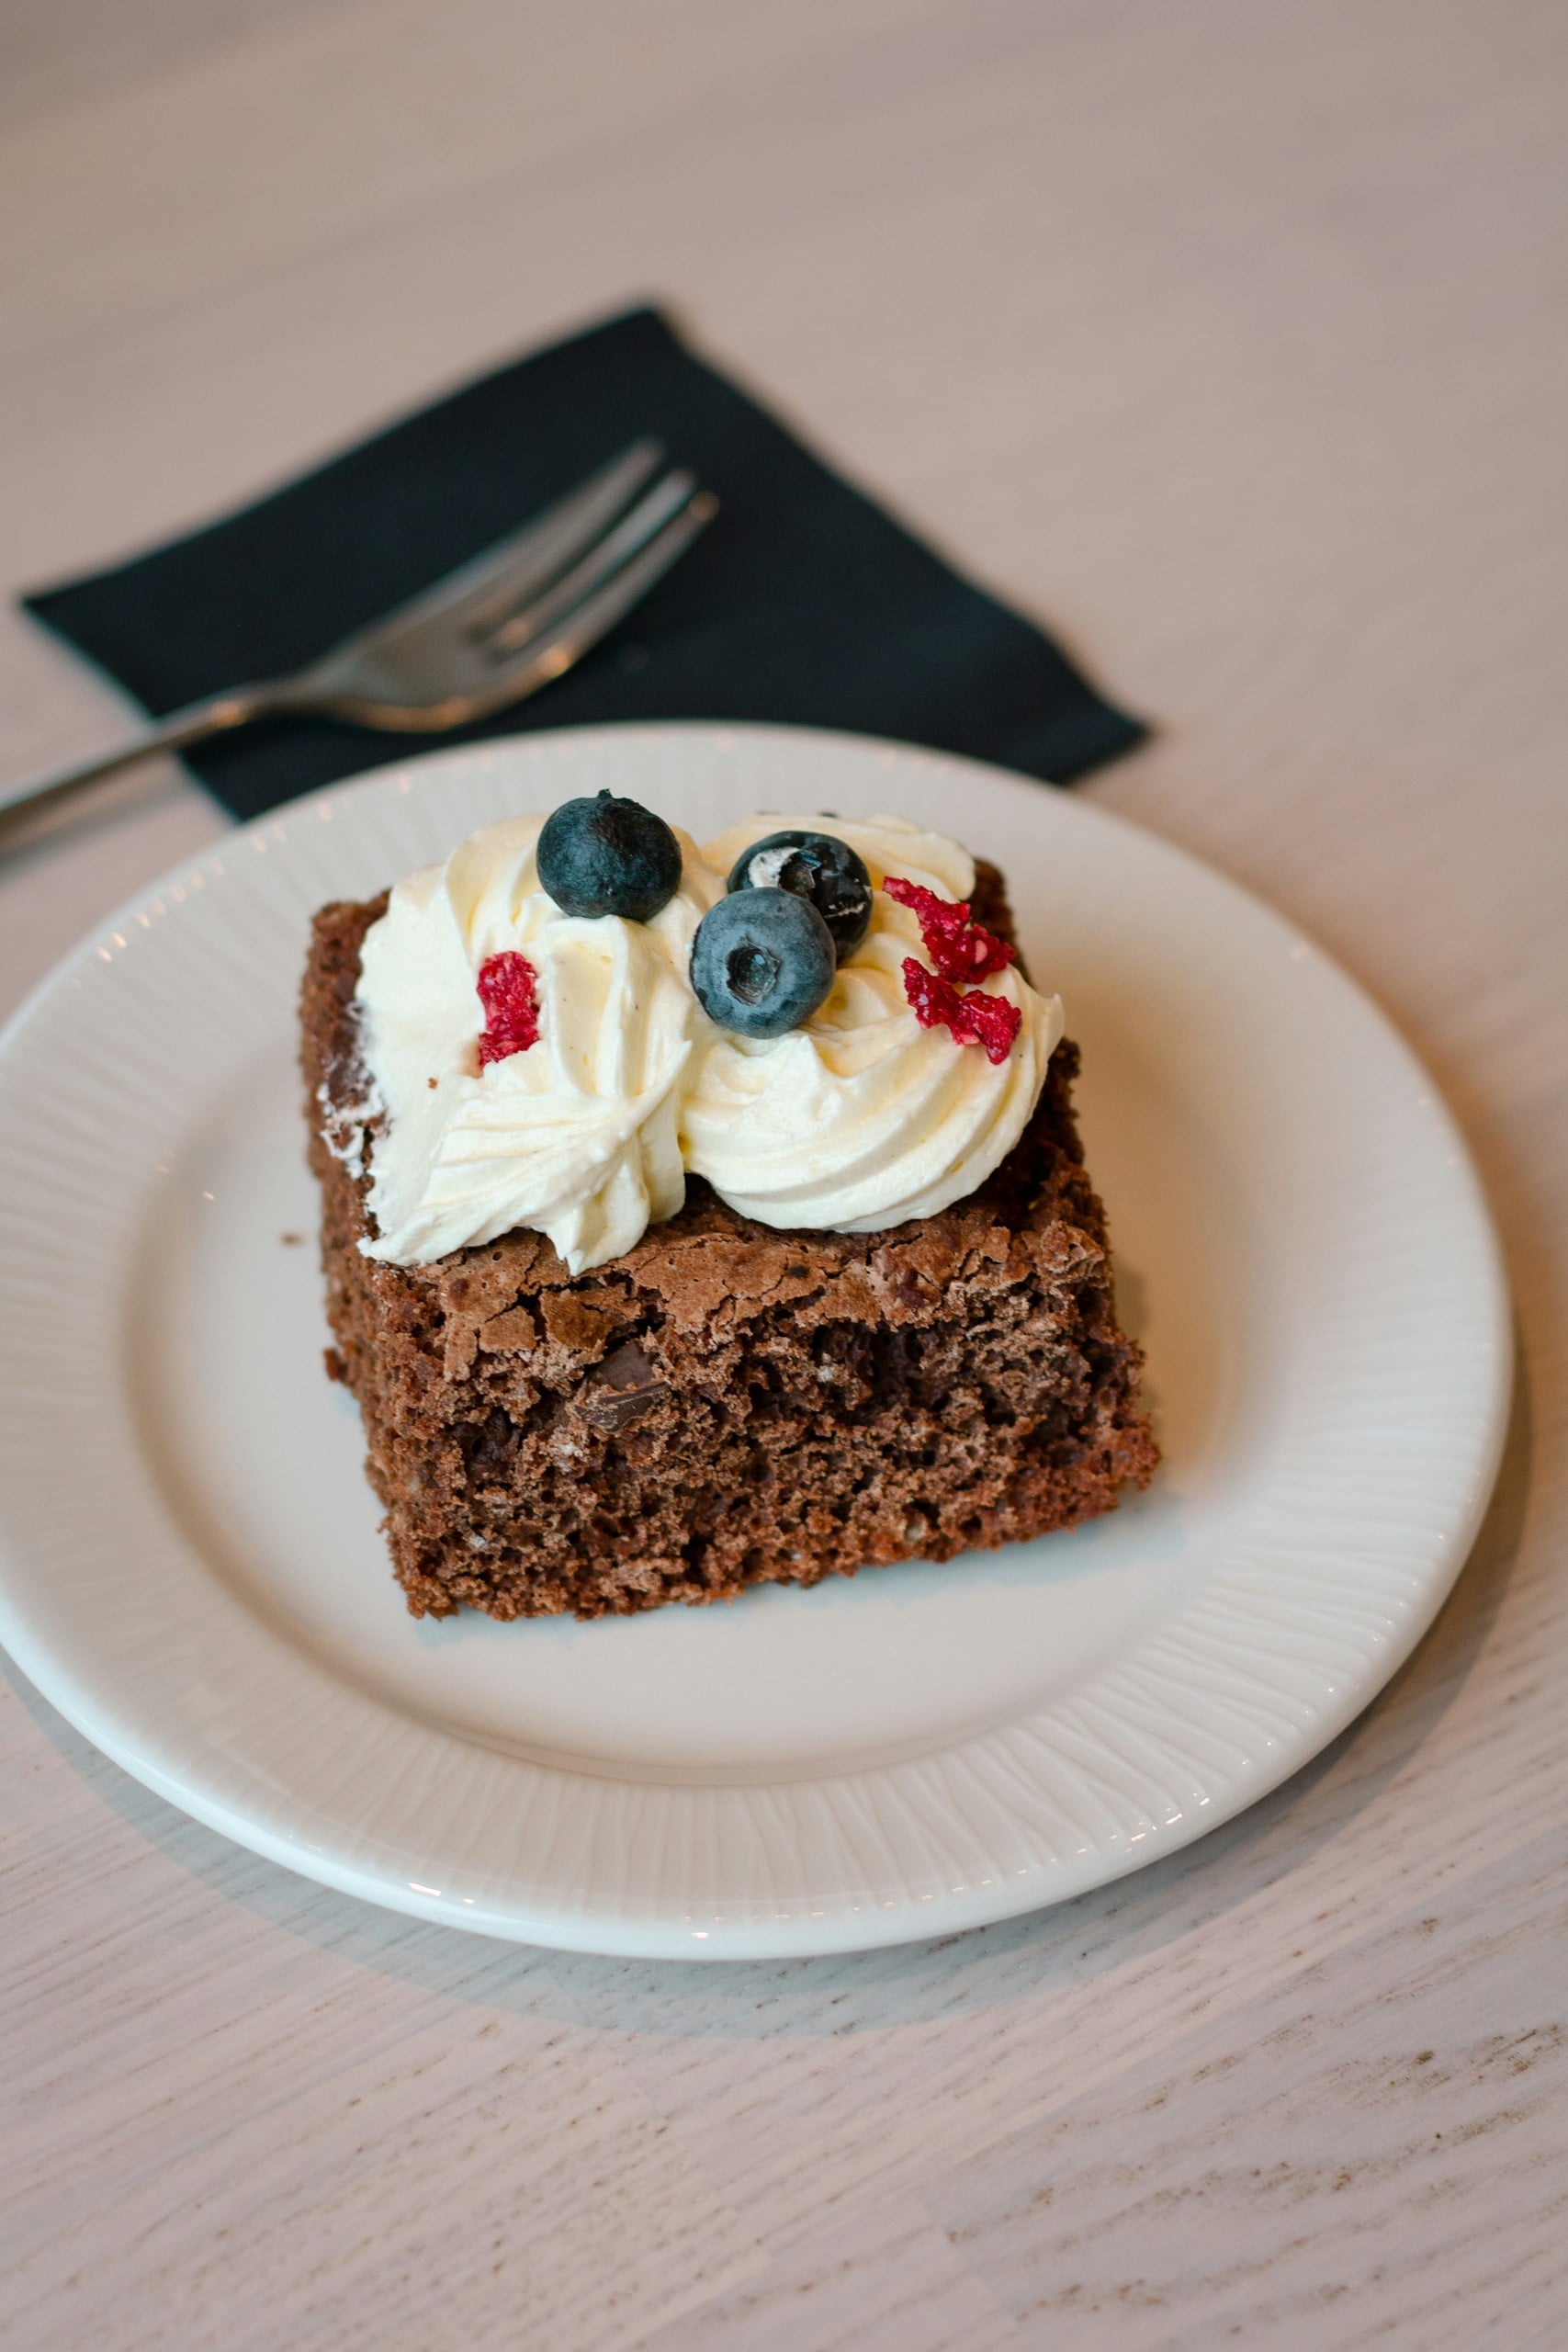
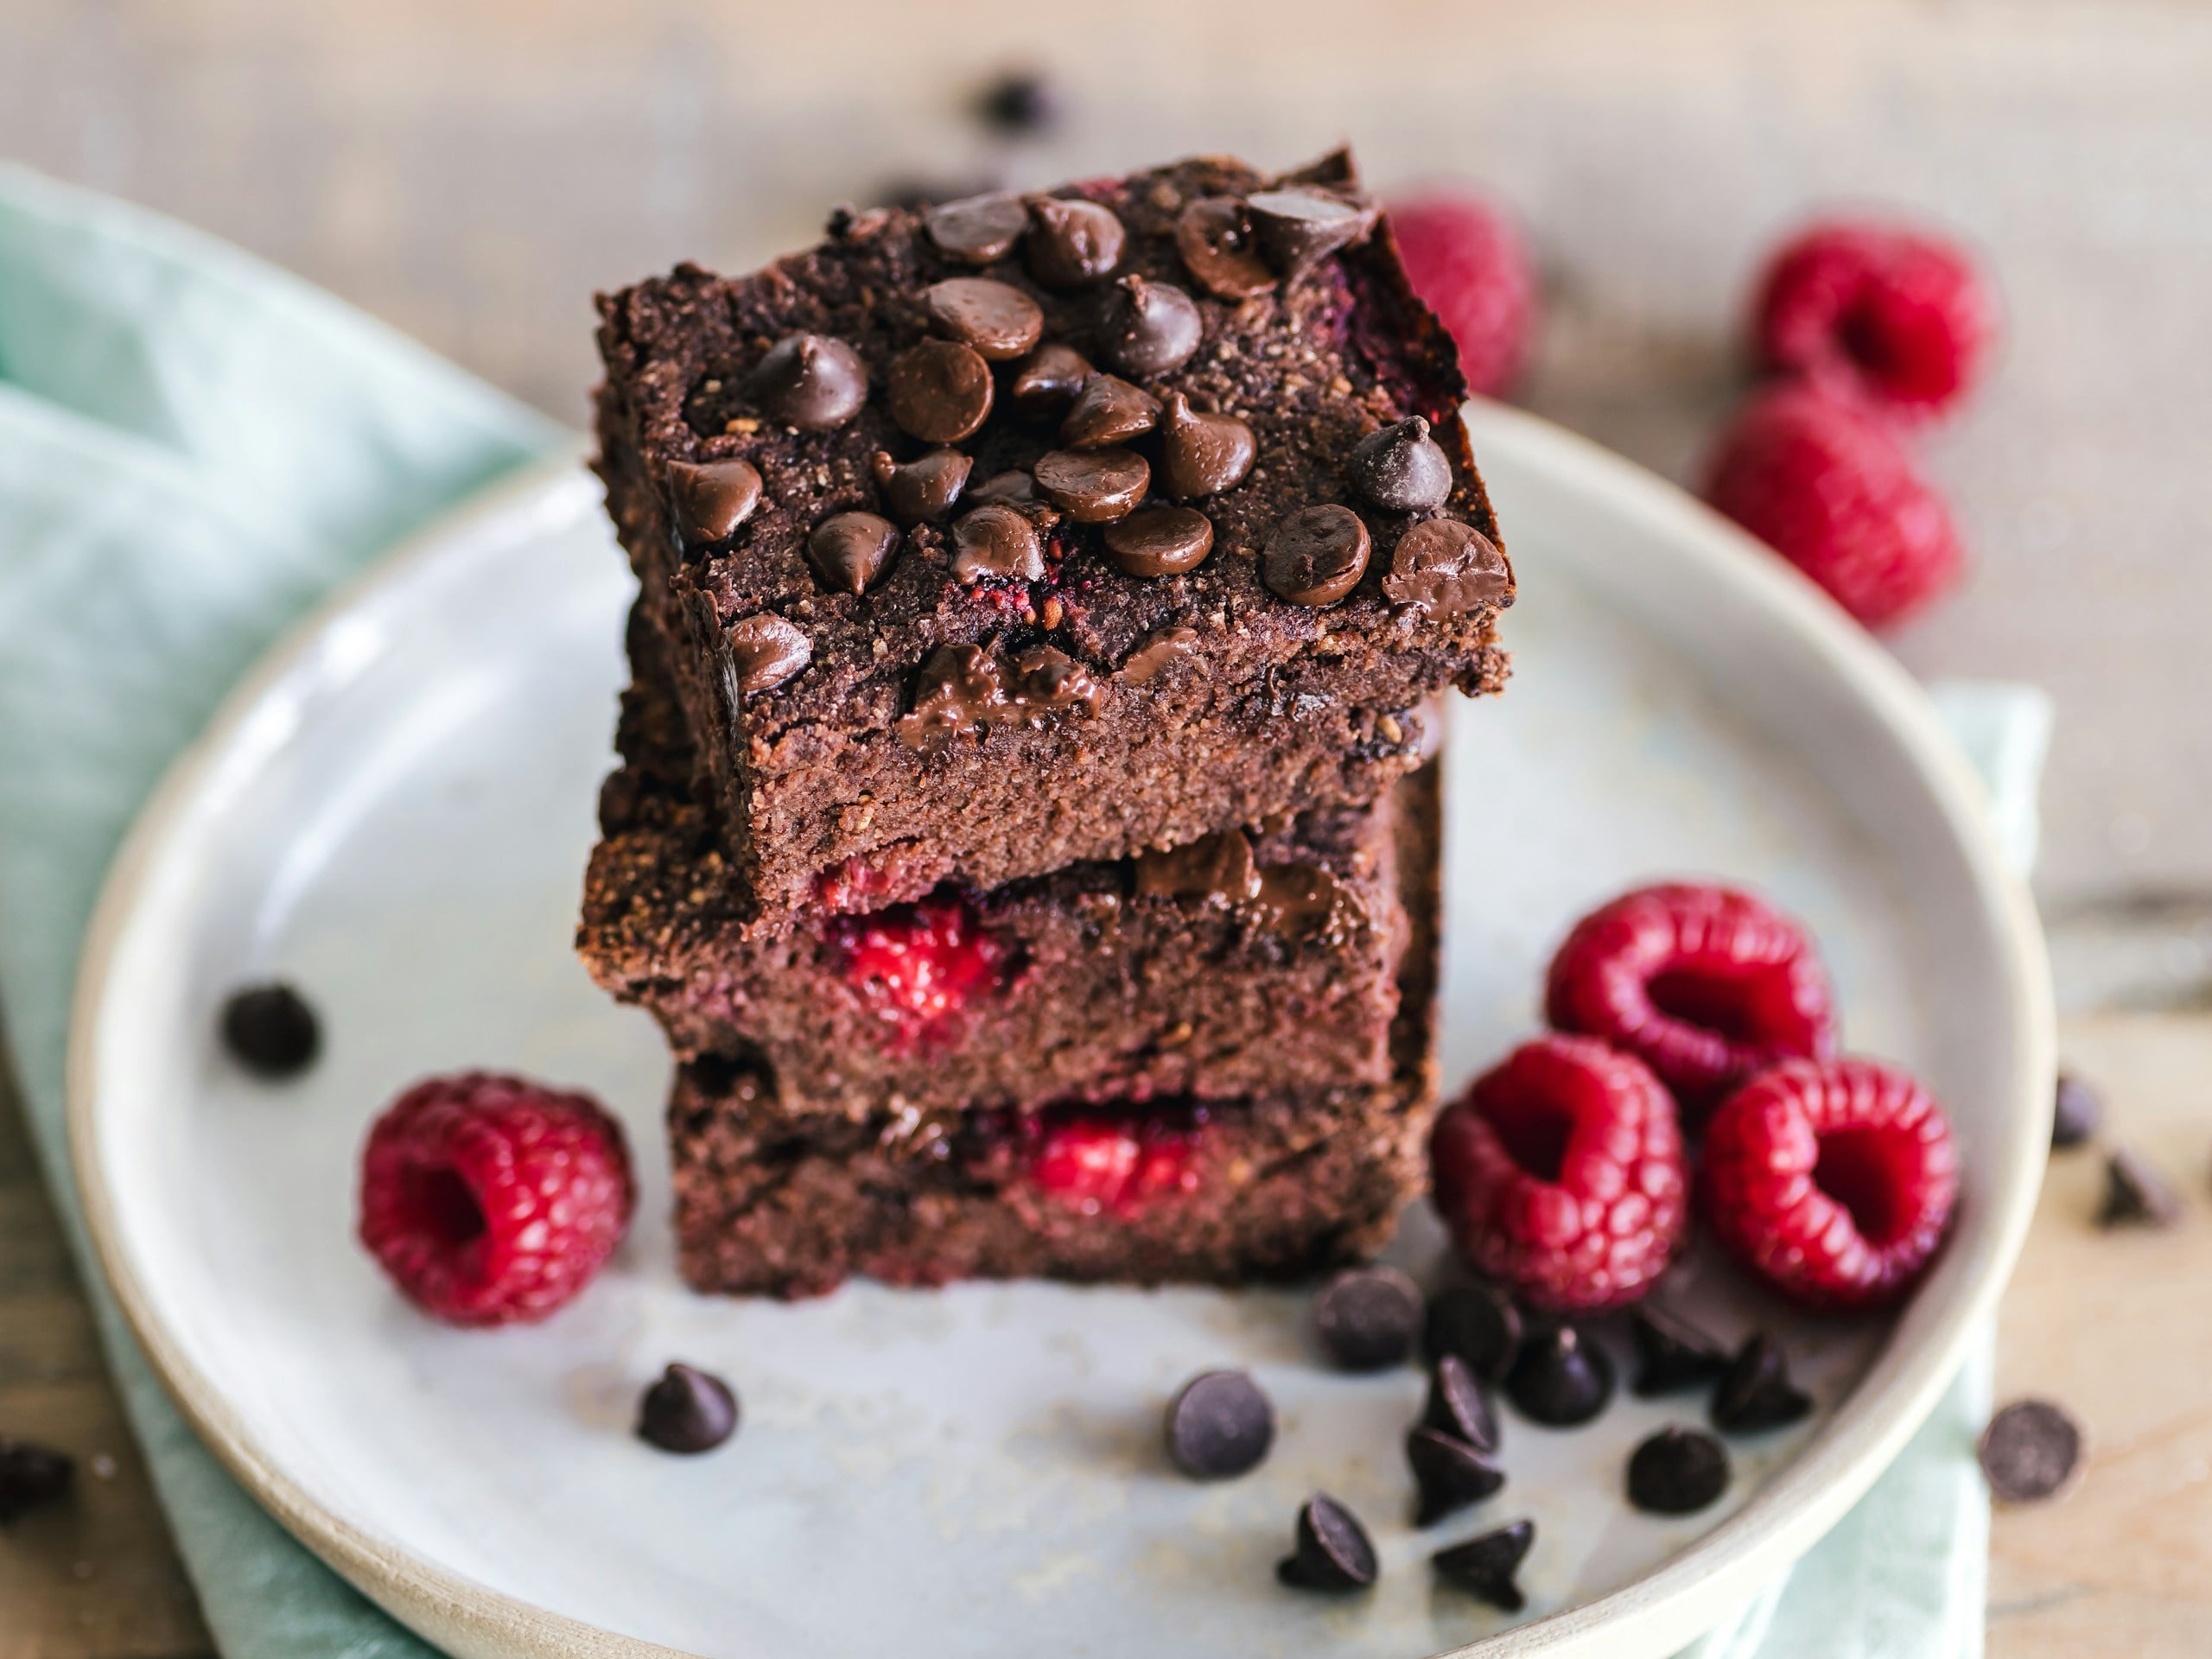
Raspberries and Strawberries
Fresh berries bring brightness and acidity that cut through the richness of the chocolate. Raspberries create a slightly tart contrast, while strawberries add a sweeter, softer balance.
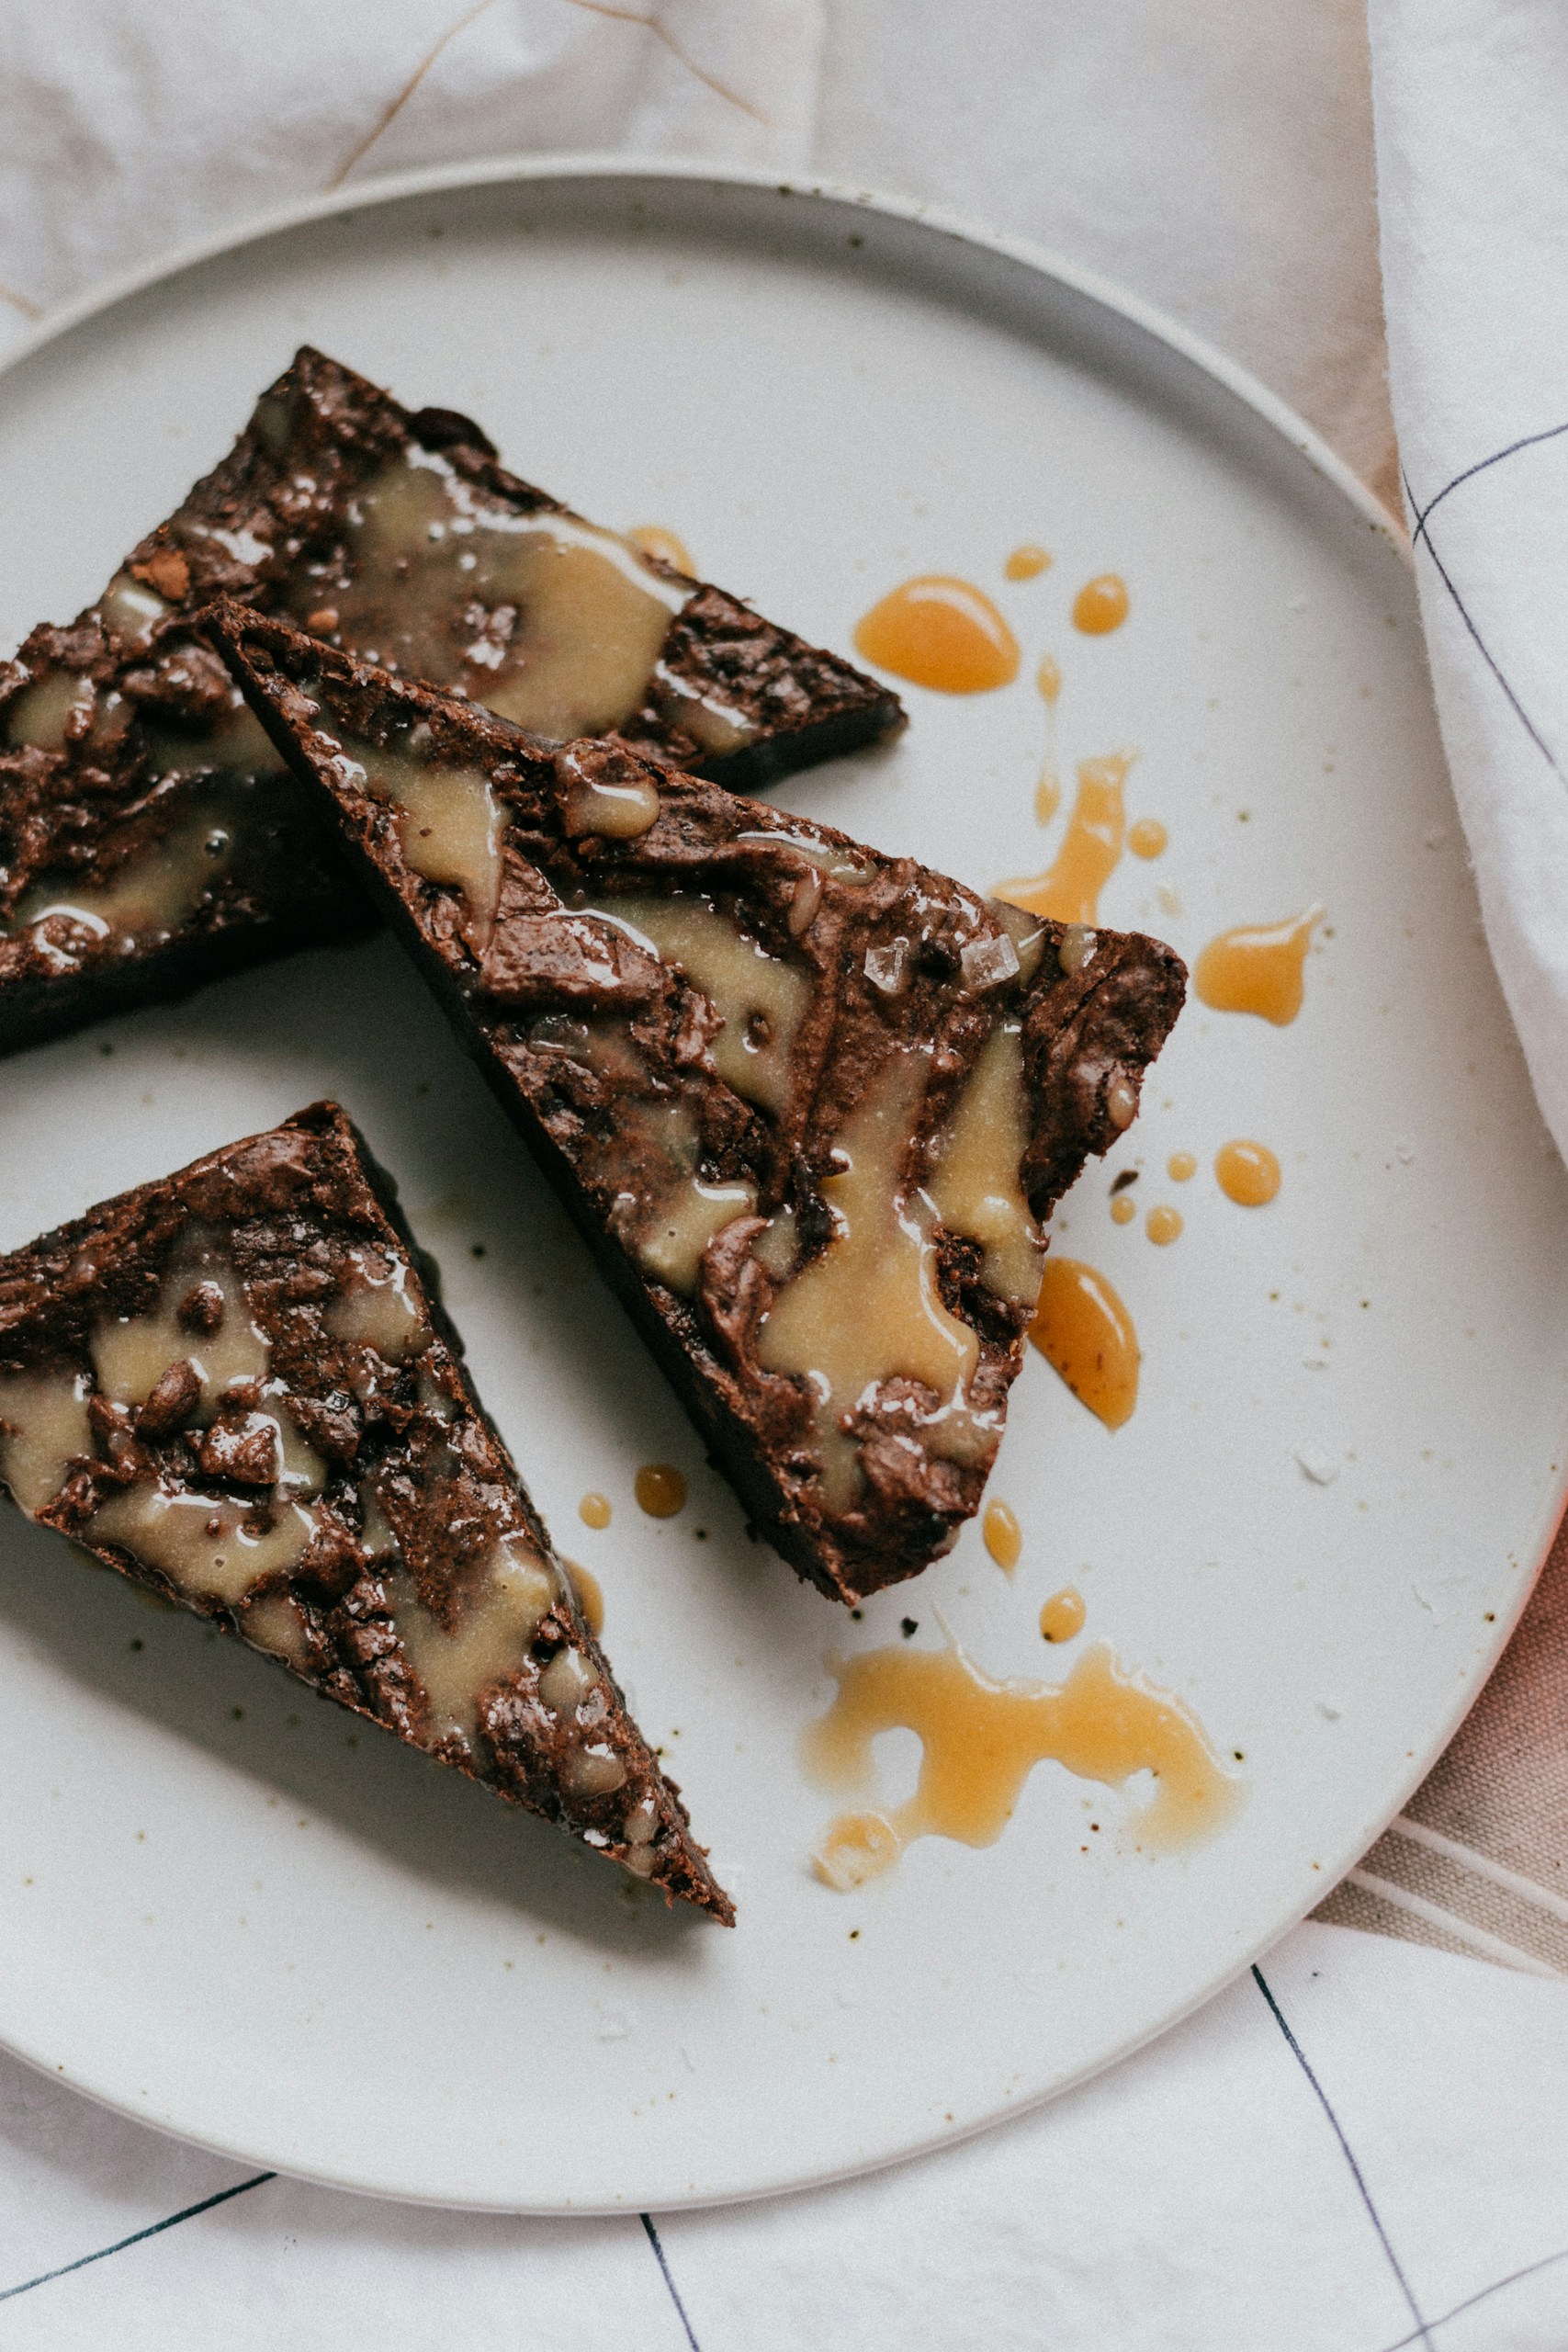
Caramel Drizzle
Caramel adds sweetness and a buttery finish, pairing especially well with dark chocolate brownies. A drizzle works best so the brownies don’t become too sweet. For an extra-rich finish, drizzle the cooled brownies with dairy-free chocolate ganache to add a smooth, glossy chocolate layer without using heavy cream.
Espresso
A small shot of espresso or strong coffee intensifies the chocolate flavor without changing the brownie texture. The slight bitterness also balances the sweetness in richer brownie variations.
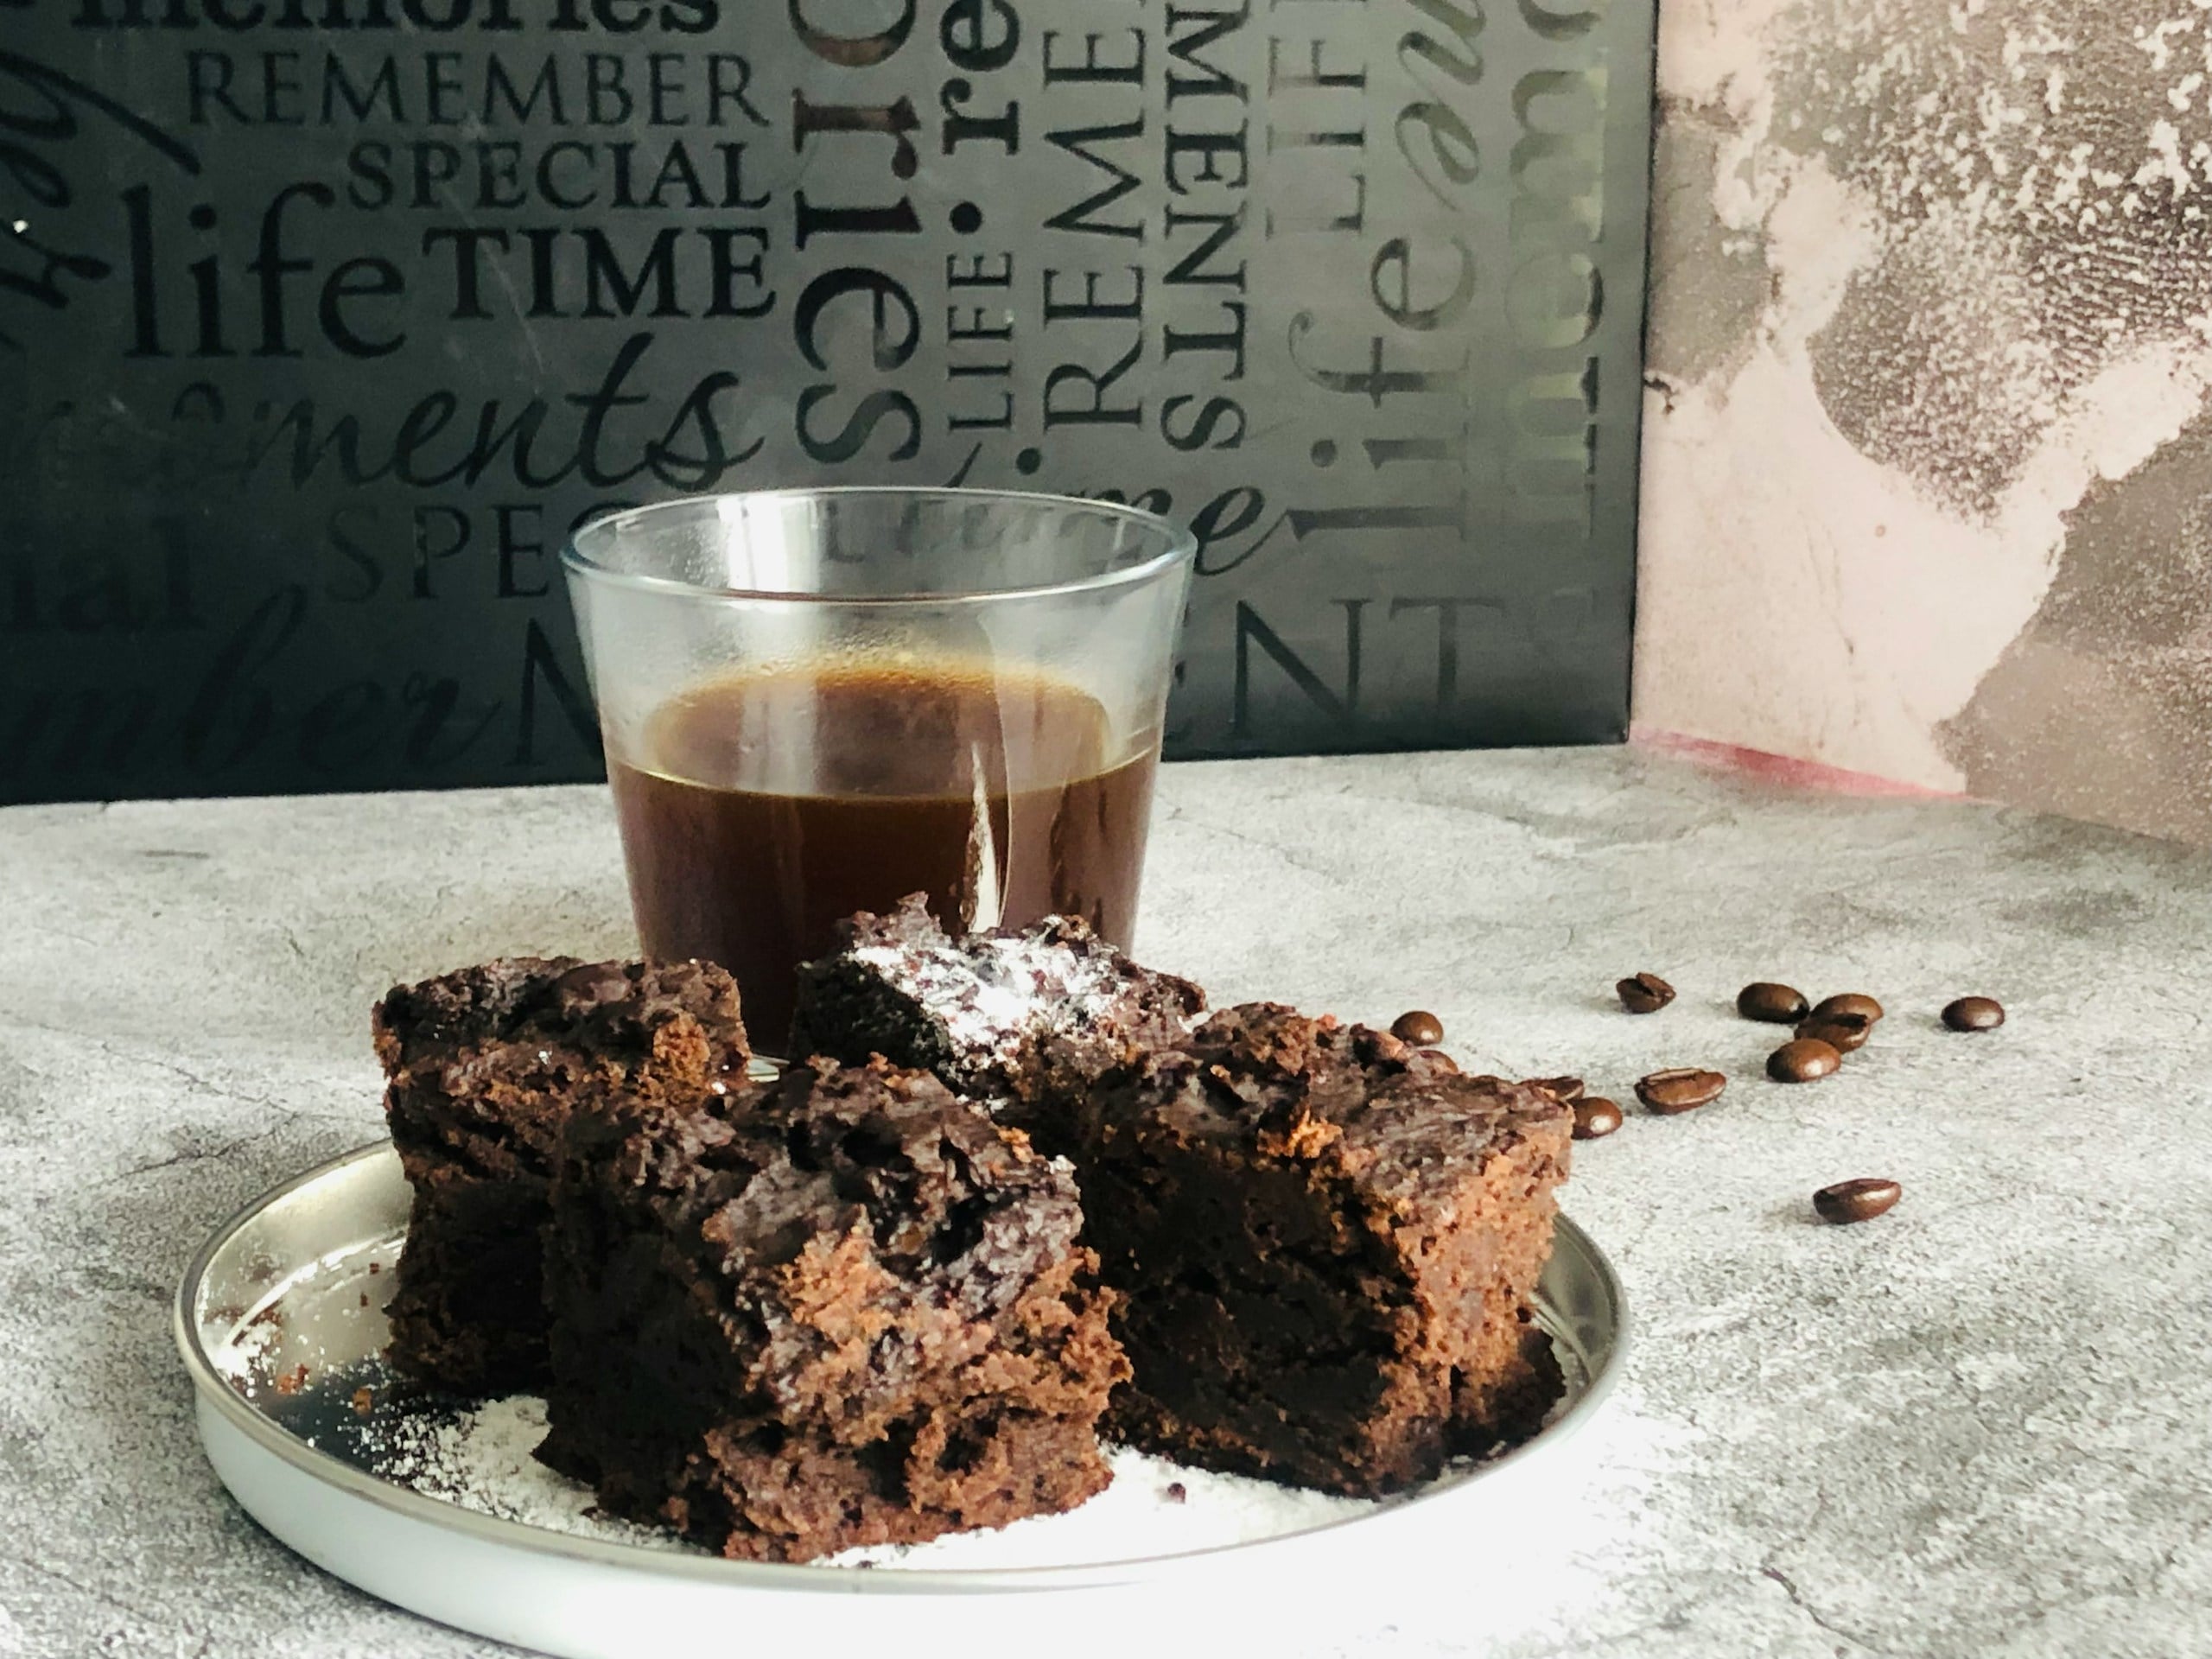
Flaky Sea Salt
Flaky sea salt enhances the chocolate flavor while creating a subtle contrast between sweet and salty. It also adds a delicate crunch to the top of the brownies.
How to Store, Freeze, and Reheat Flourless Cocoa Brownies
Proper storage helps the brownies stay soft and moist for several days. In fact, many people think the texture becomes even better the next day as the center fully settles and the chocolate flavor deepens.
Room Temperature Storage
Store chocolate brownies in an airtight container at room temperature for up to 3 days. However, place parchment paper between layers to prevent sticking and protect the crackly tops.
Refrigeration Tips
Store brownies in an airtight container in the refrigerator for up to 1 week. The texture will become firmer when chilled. But let the brownies sit at room temperature for 15–20 minutes before serving for a softer texture.
How to Freeze Brownies
Wrap individual brownie slices tightly in plastic wrap, then place them in a freezer-safe airtight container or zip-top bag. Use parchment paper between layers to prevent sticking.
Freeze them for up to 2 months. And when ready to eat, thaw the brownies overnight in the refrigerator or leave them at room temperature for 30–45 minutes.
The Best Way to Reheat for Gooey Texture
Microwave individual brownie slices for 10–15 seconds to soften the center and restore the fudgy texture. However, avoid overheating, as it can cause the brownies to dry out.
Flourless Brownie Baking Questions Answered (FAQ)
These are some of the questions we frequently get about flourless cocoa brownies. Don’t see yours here? Feel free to ask in the comments section below.
Can I Make Flourless Brownies Ahead of Time?
These brownies actually taste even richer the next day because the chocolate flavor deepens as the center settles. Store them in an airtight container at room temperature or refrigerate for a firmer texture.
Can I Use Milk Chocolate Instead of Semi-Sweet Chocolate?
You can, but the brownies will turn out sweeter and softer. Semi-sweet chocolate creates a better balance between sweetness, structure, and deep chocolate flavor.
What Pan Size Works Best for Flourless Brownies?
An 8×8-inch baking pan works best for thick, fudgy brownies with evenly baked centers. Larger pans spread the batter too thin and can dry the brownies out faster.
Can I Double This Brownie Recipe?
Of course you can. Double the ingredients and bake the brownies in a 9×13-inch pan. However, the baking time may increase slightly, so check for set edges and moist crumbs in the center.
Why Do Flourless Brownies Taste Better the Next Day?
As the brownies cool and rest, the chocolate and fat fully settle into the structure. This allows the texture and chocolate flavor to settle more fully overnight.
More Rich Chocolate Desserts
Do you want more gluten-free chocolate desserts? These recipes are great next options.
- For a softer candy-style dessert with deep chocolate flavor, try our Microwave Gluten-Free Fudge (Dairy-Free).
- If you want something more elegant for parties, holidays, or gifting, see our Perfect Valentine’s Chocolate-Covered Strawberries.
- Or are you craving a full chocolate cake with the same rich flavor profile? Our Delicious Gluten-Free Chocolate Fudge Cake (Dairy-Free) delivers dense chocolate layers with a soft, fudgy texture in every slice.
- For a richer, more elegant flourless dessert, try this Flourless Chocolate Cake.
Each one gives you another easy way to enjoy rich chocolate flavor, whether you want something quick, giftable, or celebration-worthy.
Share Your Experience With Us
Did you try this recipe? Leave a comment below and share how your flourless cocoa brownies turned out.
If you tested a variation, added different mix-ins, or solved a baking issue in your own way, share that too. Your experience may help other readers improve their results, too.