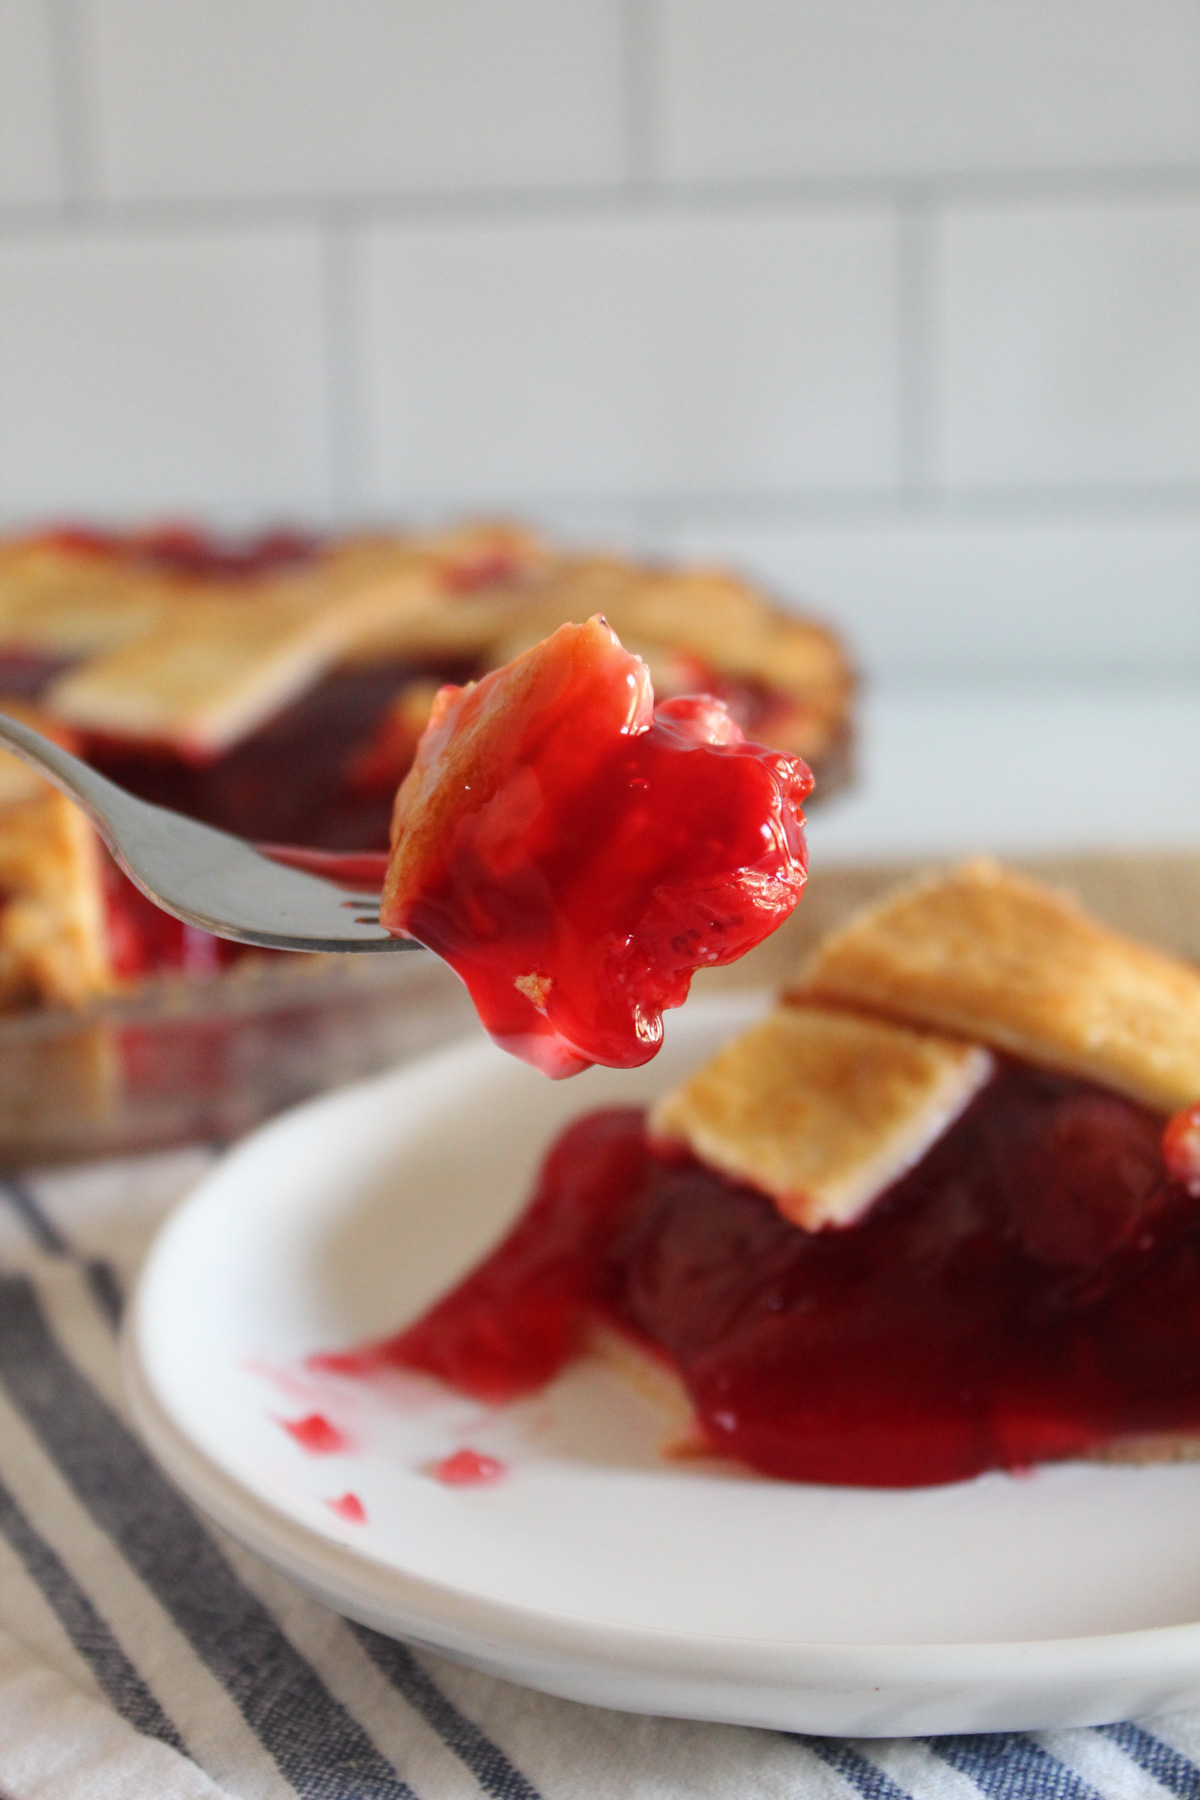
Success with gluten-free cherry pie starts with a glossy, sliceable filling. Instead of guessing why cherry pie filling turns runny, this guide shows you exactly how to thicken it properly, choose the right starch, and bake a pie that sets beautifully every time.
For many bakers, the main issue is a filling that pools and loses shape at the bottom of the slice. Once you understand starch activation, moisture balance, and cooling time, achieving consistent results is much easier.
Table of Contents

This guide covers why cherry pie filling fails, which thickeners work best, and visual cues for doneness. Whether using fresh, frozen, or canned cherries, this approach ensures a glossy, firm texture that slices cleanly.
If you prefer alternatives, you’ll also learn how to make cherry pie filling without cornstarch and why certain starches perform better when cooling is most important. For more gluten-free confidence, check out our Hearty, Fluffy Oatmeal Rolls.
Quick Ingredient List
We’ll get to the filling science and technique, but first, let’s go through what this gluten-free cherry pie recipe uses:
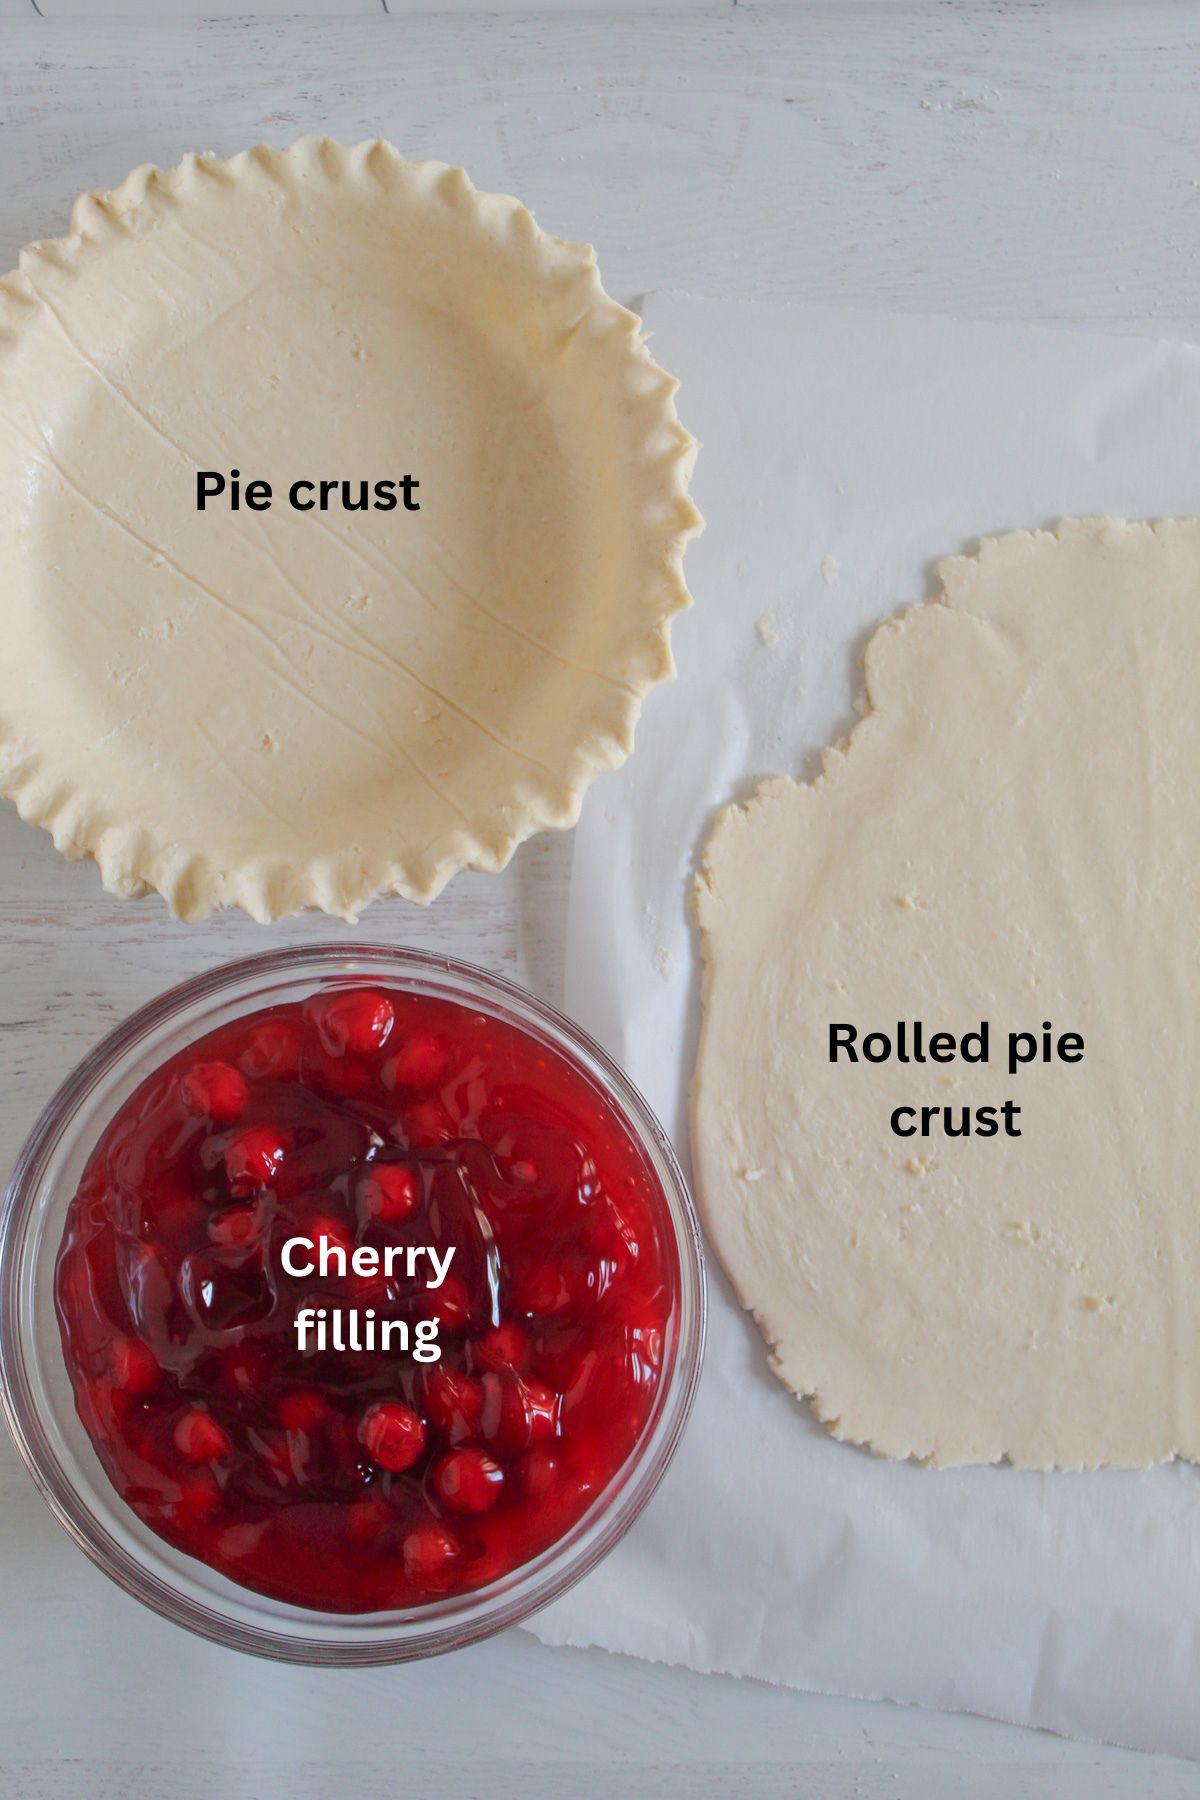
- Gluten-free pie crusts
- Cherry pie filling
- Cornstarch
- Large egg
Cherry Nutrition & Health Highlights (Research-Backed)
Cherries are more than pie filling. They’re part of a nutrient-rich fruit category that supports overall health. According to Harvard’s Nutrition Source, diets high in fruits are linked with a lower risk of heart disease and help regulate blood pressure, thanks in part to fiber and valuable plant compounds found in whole fruit.
Key Nutrients in Cherries (USDA & Dietary Research)
- Vitamin C: Cherries provide vitamin C, a powerful antioxidant needed for collagen production, immune health, and neutralizing free radicals.
- Fiber: Dietary fiber in cherries helps regulate digestion, supports healthy blood sugar control, and contributes to satiety, especially useful when balancing fruit sweetness in desserts.
- Potassium & Antioxidants: Cherries supply potassium and phytonutrients, such as polyphenols, which may have anti-inflammatory benefits and are associated with cardiovascular health.
Ingredients & Substitutions
Understanding why each ingredient matters helps you troubleshoot and adapt.
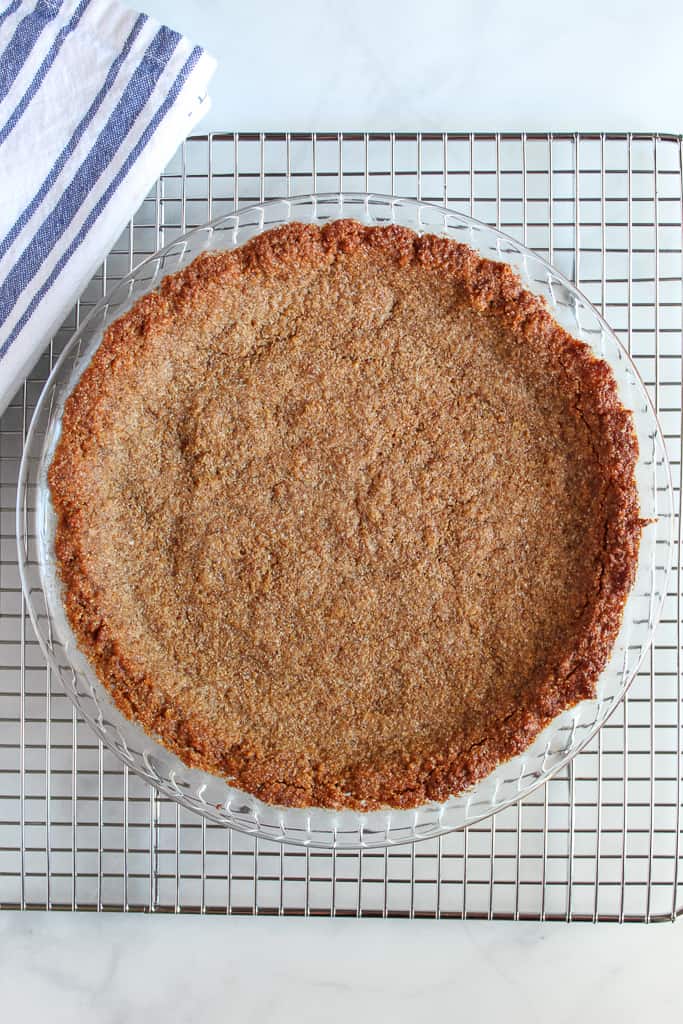
Gluten-Free Pie Crust
A sturdy crust provides structure and holds the cherry filling in place. While store-bought gluten-free crusts work well for convenience, homemade crusts typically deliver better texture and flavor.
Because gluten-free dough lacks elasticity, reducing the amount of crust or over-handling it can lead to crumbling or cracking. For best results, keep the structure intact and avoid over-thinning.
Substitution note: Use a quality gluten-free crust. Traditional wheat crust isn’t suitable for a gluten-free recipe.
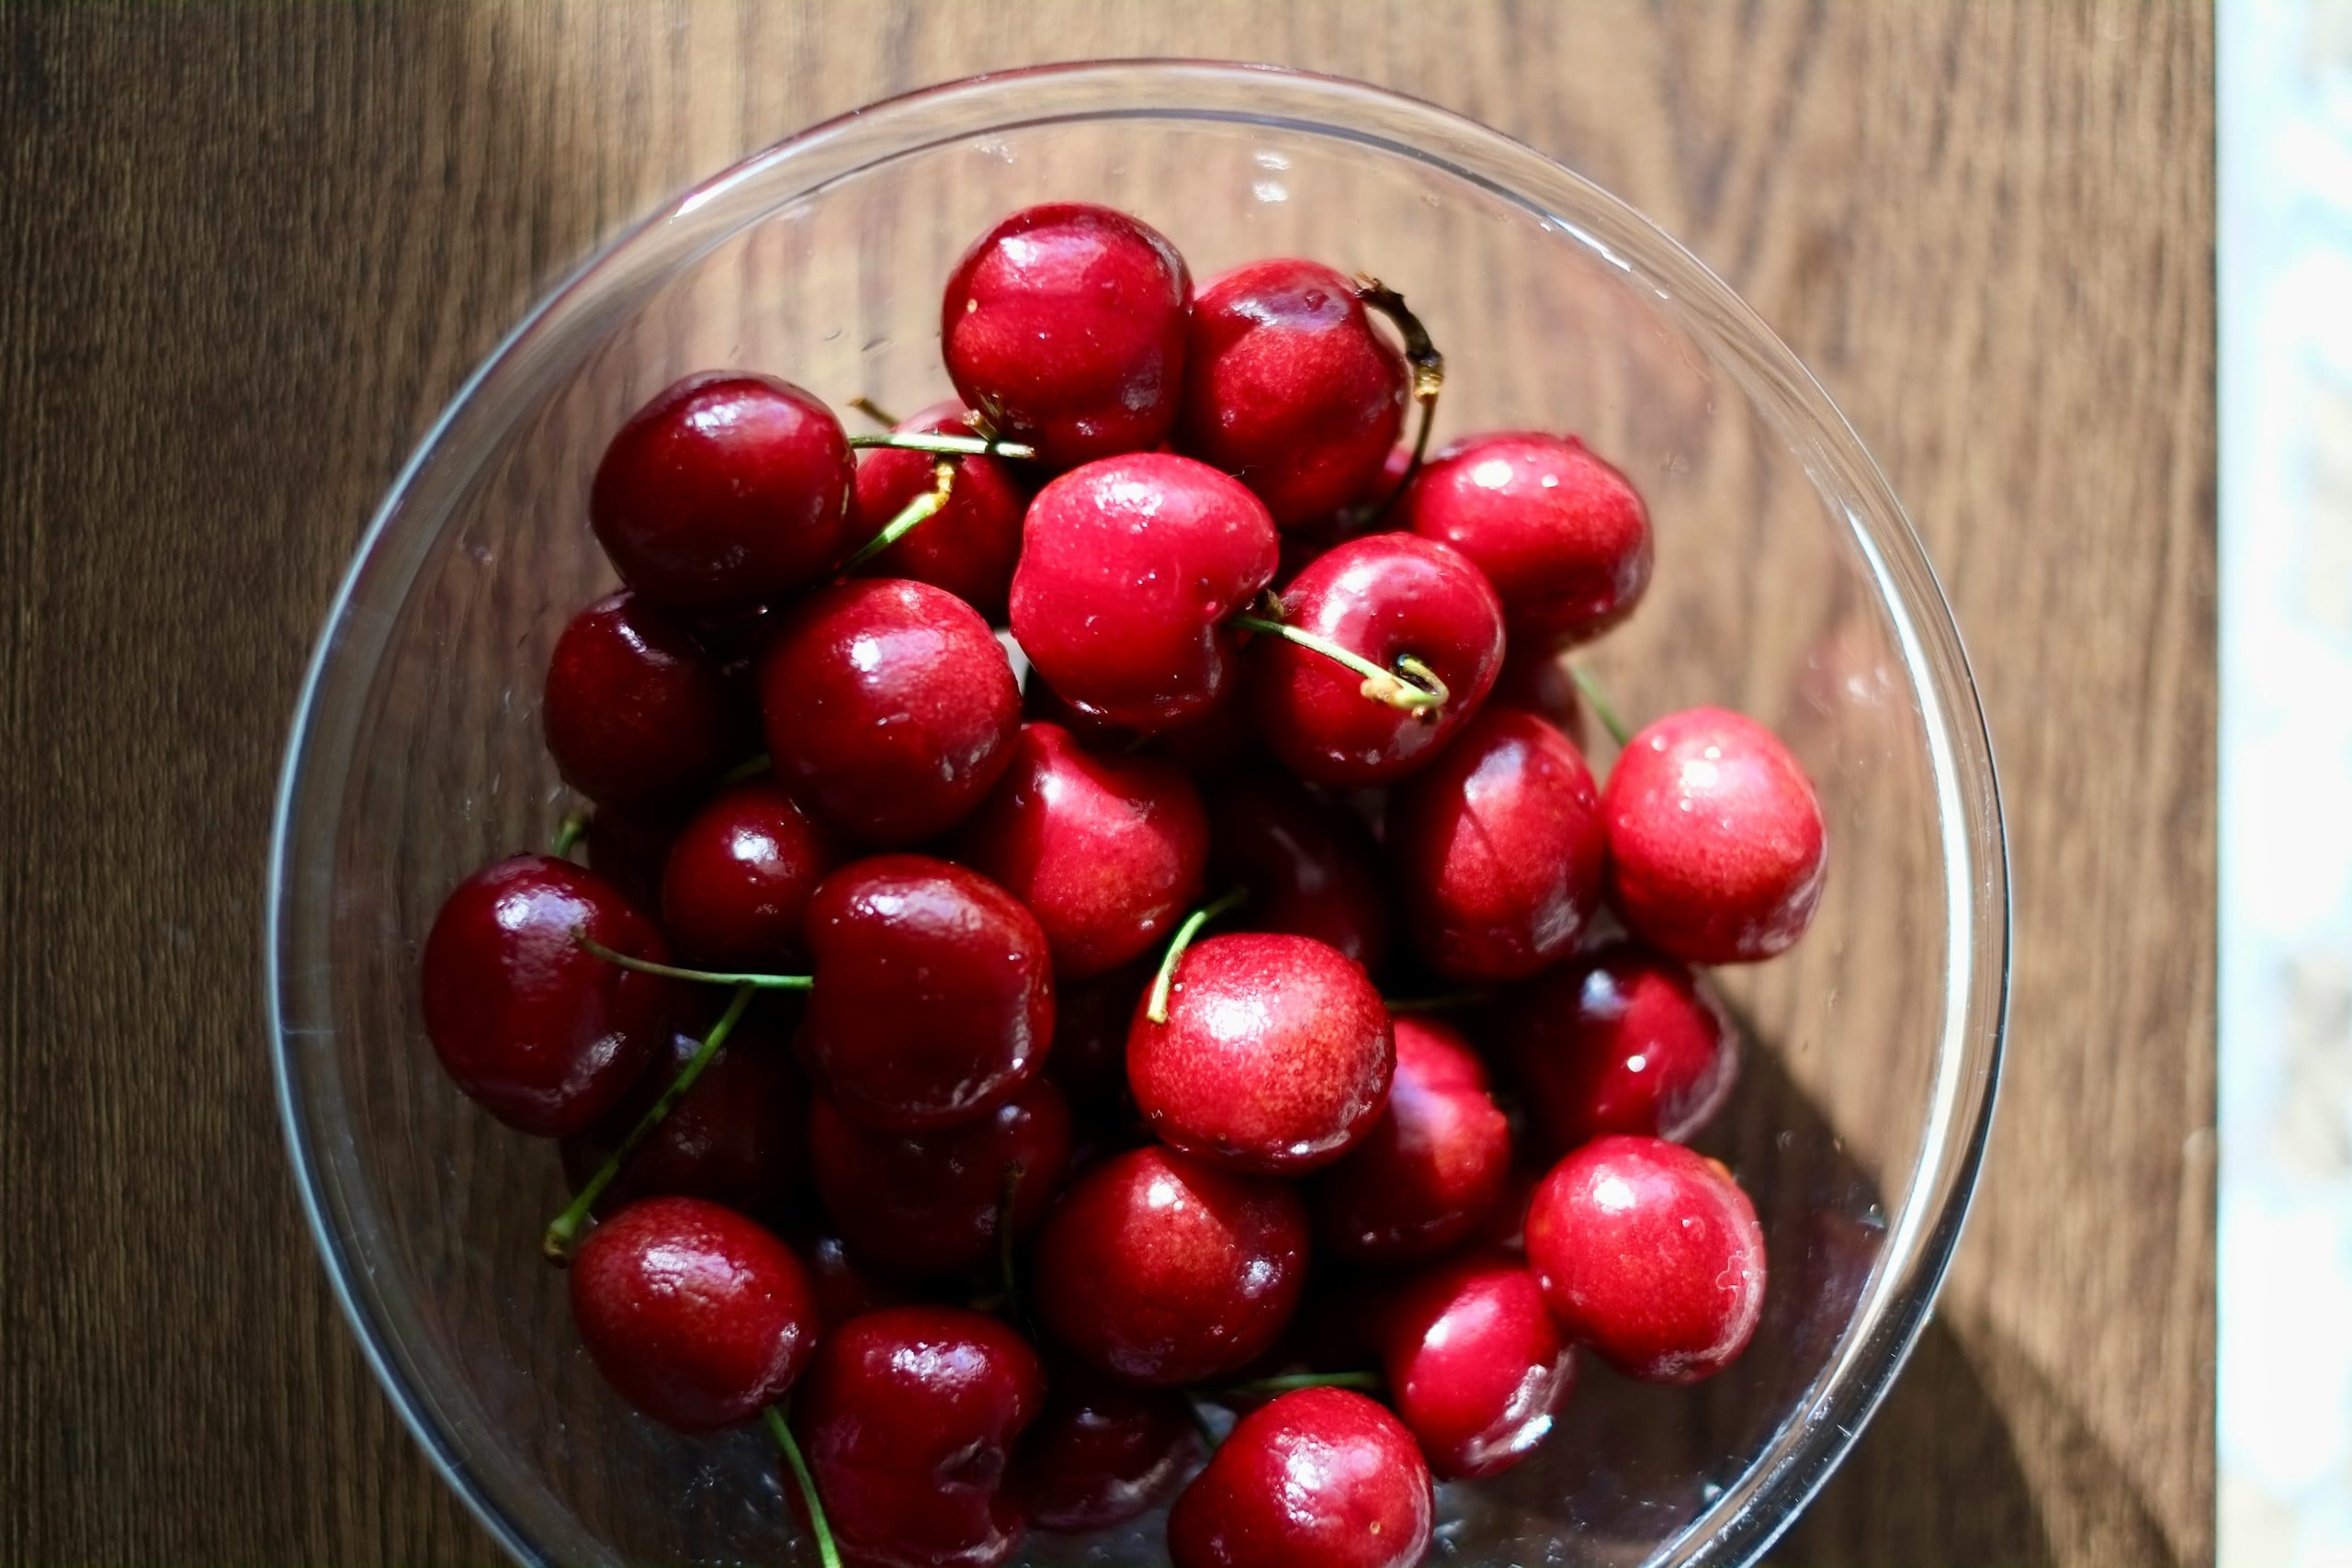
Cherry Pie Filling (Canned or Fresh)
The filling supplies fruit, juice, and sweetness, all essential to texture and flavor balance. Canned cherry pie filling works reliably, whereas fresh cherries require adjustments in sugar and thickener to compensate for natural moisture variation.
If too little filling is used, gaps can form beneath the crust, leaving the pie underfilled and uneven. On the other hand, fresh cherries (about 5¼ cups) can be substituted successfully when properly sweetened and thickened.
Substitution note: When using fresh fruit, adjust sugar based on tartness and increase thickener slightly if the cherries are especially juicy.
Cornstarch
Cornstarch traps juice during gelatinization, creating that classic smooth, glossy texture. Because it activates at a full simmer, proper heating is essential.
When too little is used, the filling remains thin and may weep liquid after cooling. Conversely, excessive starch can create clumps or a pasty texture.
Substitution note: Tapioca or arrowroot also works, though ratios and texture will vary. See Cornstarch vs Tapioca vs Arrowroot article.
Large Egg (For Egg Wash)
The egg wash enhances browning and adds a crisp finish to the crust. Although it doesn’t affect the filling structure, it improves overall presentation. Skipping the egg results in a paler crust, but the pie will still bake properly.
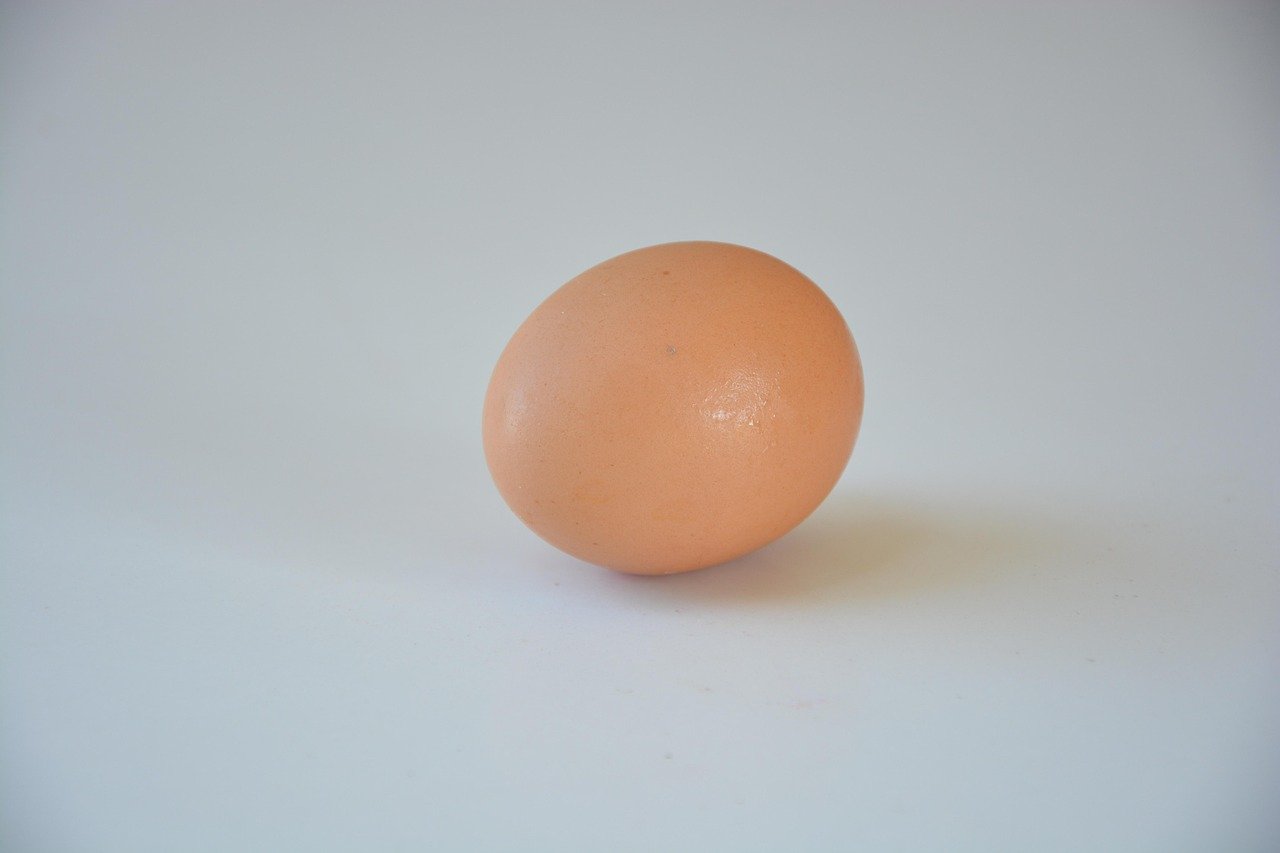
Substitution note: Use non-dairy milk or a light brush of oil for similar browning.
Sugar
For canned filling, sugar is already included, so no additional sweetener is needed. For homemade filling, use granulated sugar to balance the tartness of cherries, opting for a neutral flavor unless a deeper note is desired from flavored sugars.
Lemon Juice (Optional)
Lemon Juice Purpose (Optional): A splash enhances pectin activity and brightens flavor with fresh fruit.

Printable Gluten Free Cherry Pie Recipe Card
Ingredients
For the Pie Filling
- 21 ounces cherry pie filling 1 large can
- ⅓ Tablespoon cornstarch
For the Crust
- 2 gluten free pie crusts (bottom + lattice top)
- 1 large egg (for egg wash)
Instructions
- Preheat the oven to 425°F (220°C).
- Roll out the larger dough disc and fit it into a 9″ pie plate. Trim excess.
- Mix cherry pie filling and cornstarch in a medium bowl until combined.
- Heat the cherry mixture over medium until bubbling, then simmer for 60 seconds to thicken.
- Pour the thickened filling into the crust.
- Top Crust: Roll out the smaller dough disc. Place over the filling whole or cut into strips for a lattice.
- Trim and crimp edges to seal. Cut slits to vent, if using a full crust.
- Beat the egg and brush it over the top crust.
- Bake for 35–45 minutes, until the crust is golden and the filling bubbles.
- Cool on the counter 3–4 hours before slicing to let the filling set.
Notes
Pro Tips
- If the dough cracks when placed in the pan, press it back together, because gluten-free dough is forgiving.
- Always roll on a surface dusted with starch/flour to minimize sticking.
- Use pastry strips for classic lattice. This also creates steam vents.
Estimated Nutrition (Per Slice, 1 of 8)
Based on typical gluten-free cherry pie estimates from food databases, these are the nutrition and calorie calculations:- Calories: 290-320 kcal
- Carbohydrates: ~40-50 g
- Fat: ~10-15 g
- Protein: ~2-3 g
Nutrition
Did you make and love this recipe? Give it your review and rating below! And make sure to follow me on Instagram, Pinterest, and Facebook , too!
Why Cherry Pie Filling Fails
Effective filling depends on starch activation, moisture control, and proper assembly.
Why It Turns Runny
If your cherry pie filling comes out thin or watery, one of these common issues is usually the cause:
- Not Enough Thickener: Too little starch can’t hold juices.
- Insufficient Boil: Starch needs a strong simmer, typically around 95°C (203°F), to fully gelatinize.
- Excess Juice: Especially from thawed frozen fruit.
- Incorrect Starch Ratio: Some thickeners require different amounts to achieve the same gel strength.
Why It Turns Gummy
On the other hand, using too much starch or cooking it incorrectly can create a dense, gummy texture:
- Too Much Tapioca: Can make filling pasty.
- Overcooked Cornstarch: Breaks down the gel network.
- Excess Starch: Clumps or beads in the final gel.
Why Filling Leaks from the Crust
If the filling escapes from the crust or slices don’t hold their shape, these factors are often responsible:
- Not Cooled Long Enough: Hot slices flow, so allow the filling to fully set.
- Poor Crust Seal: Lack of docking or an egg barrier allows liquid to escape.
- Improper Venting: Steam needs escape paths to avoid leaks.
Do you need more confidence in gluten-free baking? Explore recipes like our Easy Gluten-Free Pumpkin Waffles to build your skill set across a wider range of gluten-free bakes.
Best Thickener for Gluten-Free Cherry Pie Filling (Comparison Table)
In this section, a printable table shows how each starch performs across five critical categories for cherry pie filling. Also, we’ve provided a deeper look at what those categories mean in practice, along with a handy ratio chart you can use at the stove.
Thickener Comparison Table
| Thickener | Gel Strength | Clarity | Freeze Stability | Texture | Best for |
|---|---|---|---|---|---|
| Cornstarch | Medium-High | Clear | Medium | Smooth, classic | Everyday pies |
| Tapioca Starch | High | Slightly opaque | High | Hearty, glossy | Freeze/thaw pies |
| Arrowroot | Medium | Very clear | Low-Medium | Silky | Fresh fruit pies |
| Potato Starch | High | Cloudy | Medium | Dense | Rustic fillings |
- Activation: Cornstarch needs a full boil, tapioca builds even as it cools, and arrowroot breaks down with prolonged heat.
- Freeze Stability: Tapioca performs best; corn is moderate; arrowroot and potato can break down.
- Flavor Neutrality: Cornstarch and arrowroot are the cleanest.
Ratio Guide:
- 2 Cups of Fruit: Use ~1.5 tbsp starch
- 3 Cups of Fruit: Use ~2 tbsp
- 4 Cups of Fruit: Use ~2.5 tbsp
- 5 Cups of Fruit: Use ~3 tbsp
Fresh vs Frozen vs Canned Cherries
Choosing the right cherries for your gluten-free cherry pie filling affects moisture, sweetness, and the amount of thickener you need.
Using Fresh
Pit first, then heat. Ensure that you adjust the sugar based on tartness.
Using Frozen
Do not fully thaw. Cook from frozen and increase the thickener by ~10–15% to offset the extra liquid.
Using Canned
Drain some syrup if it’s too sweet. Then, reduce added sugar, and add a bit of thickener before baking.
If you want lighter gluten-free batter ideas that pair well with fruit toppings or leftover filling, try our Blender Oatmeal Crepes Recipe.
Essential Kitchen Tools
You’ll need a few reliable tools to execute this perfectly:
- Heavy-bottomed saucepan – for even heat distribution
- Heat-proof silicone spatula – to keep stirring without scratching
- Candy/instant-read thermometer – for accurate temperature cues
- Mesh strainer – to remove excess liquid when needed
- Pie plate – for assembling your pie
Step-by-Step Instructions (Expanded With Texture Cues)
The following is a numbered list of instructions for your gluten-free cherry pie filling. It includes visual thickness signals, rest times, boiling cues, and doneness indicators that build confidence and reduce bounce.
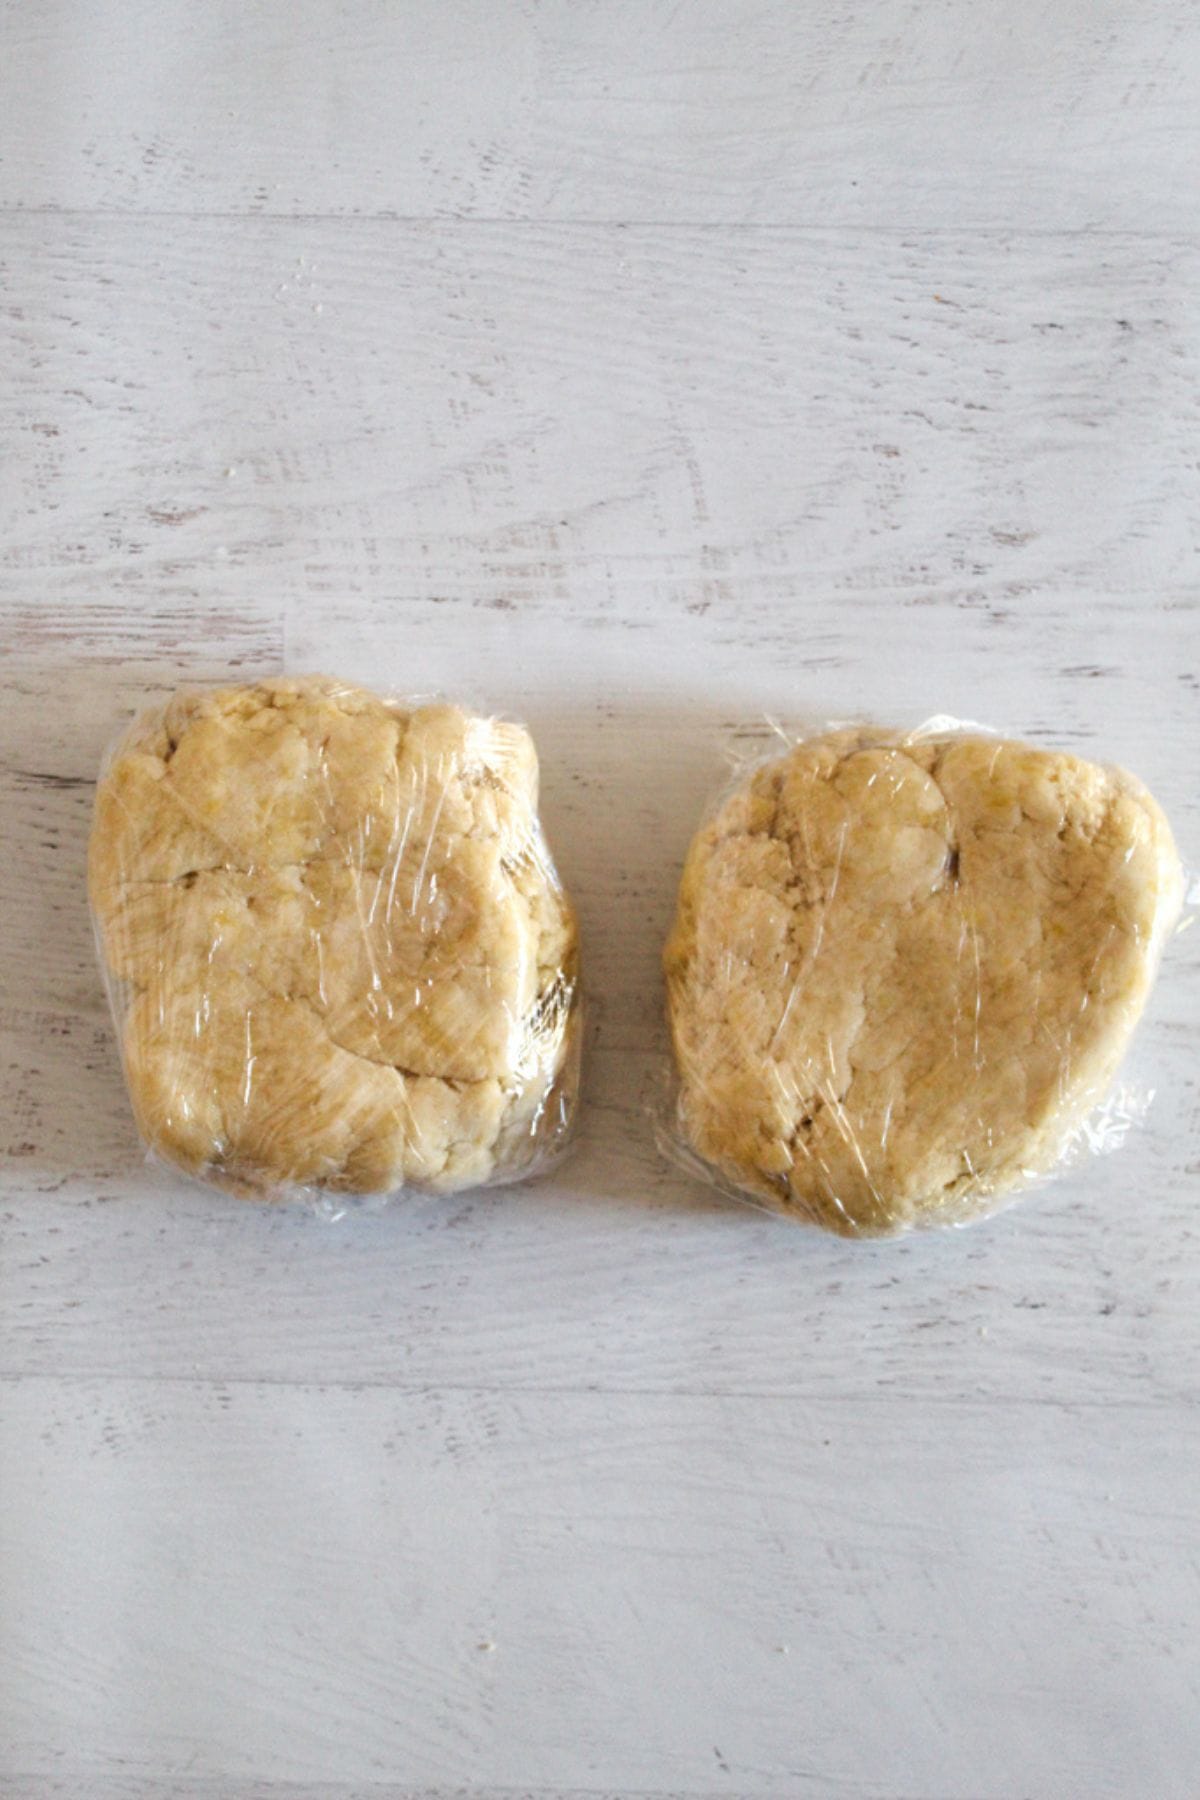
Step 1: Prepare the Crust Dough
Make or unwrap your gluten-free pie crust dough. Divide it into two portions, one slightly larger for the bottom crust and one smaller for the top or lattice. Wrap both portions and chill until firm (about 15–30 minutes). This makes rolling easier and reduces tearing.
Step 2: Preheat the Oven
Set the oven to 425°F (220°C) so it’s fully ready once the pie is assembled.
Step 3: Roll Out the Bottom Crust
Lightly flour your surface with gluten-free flour or starch. On parchment or a pastry mat, roll the larger dough portion into a circle roughly 12″ in diameter. Lift it carefully with your rolling pin and fit it into your pie plate. Then, gently press it to the bottom and up the sides without stretching. Trim the excess dough with a knife.
Step 4: Prepare the Cherry Filling
In a medium bowl, combine the cherry pie filling with the measured cornstarch. Then, stir until the cornstarch is fully dissolved. Afterwards, set this mixture aside while you heat the saucepan.
Step 5: Heat & Thicken the Filling
Place the cherry mixture in your heavy-bottomed saucepan and heat over medium. As it warms, it will begin to sizzle. Bring it to a steady simmer and allow it to bubble for at least 60 seconds to fully activate the starch. If you’re using a thermometer, aim for 95–100°C (203–212°F).
Step 6: Check for Proper Thickness
Before removing from the heat, look for these cues:
- The filling coats the back of a spoon.
- It mounds slightly when lifted.
- It no longer appears watery or glossy thin.
If it still looks loose, continue simmering briefly until it meets these indicators.
Step 7: Rest the Filling
Remove the saucepan from the heat. Let the filling rest off the heat for 2–3 minutes, then let it cool for a further 5–10 minutes so it doesn’t melt the crust when poured.
Step 8: Add Filling to Crust
Pour the slightly cooled, thickened cherry filling evenly into the bottom crust in the pie plate.

Step 9: Roll Out and Add Top Crust
Roll the smaller dough portion into a rectangle or circle three times the width of the pie. Cut into even 1-inch strips for lattice, or leave whole for a full top crust.
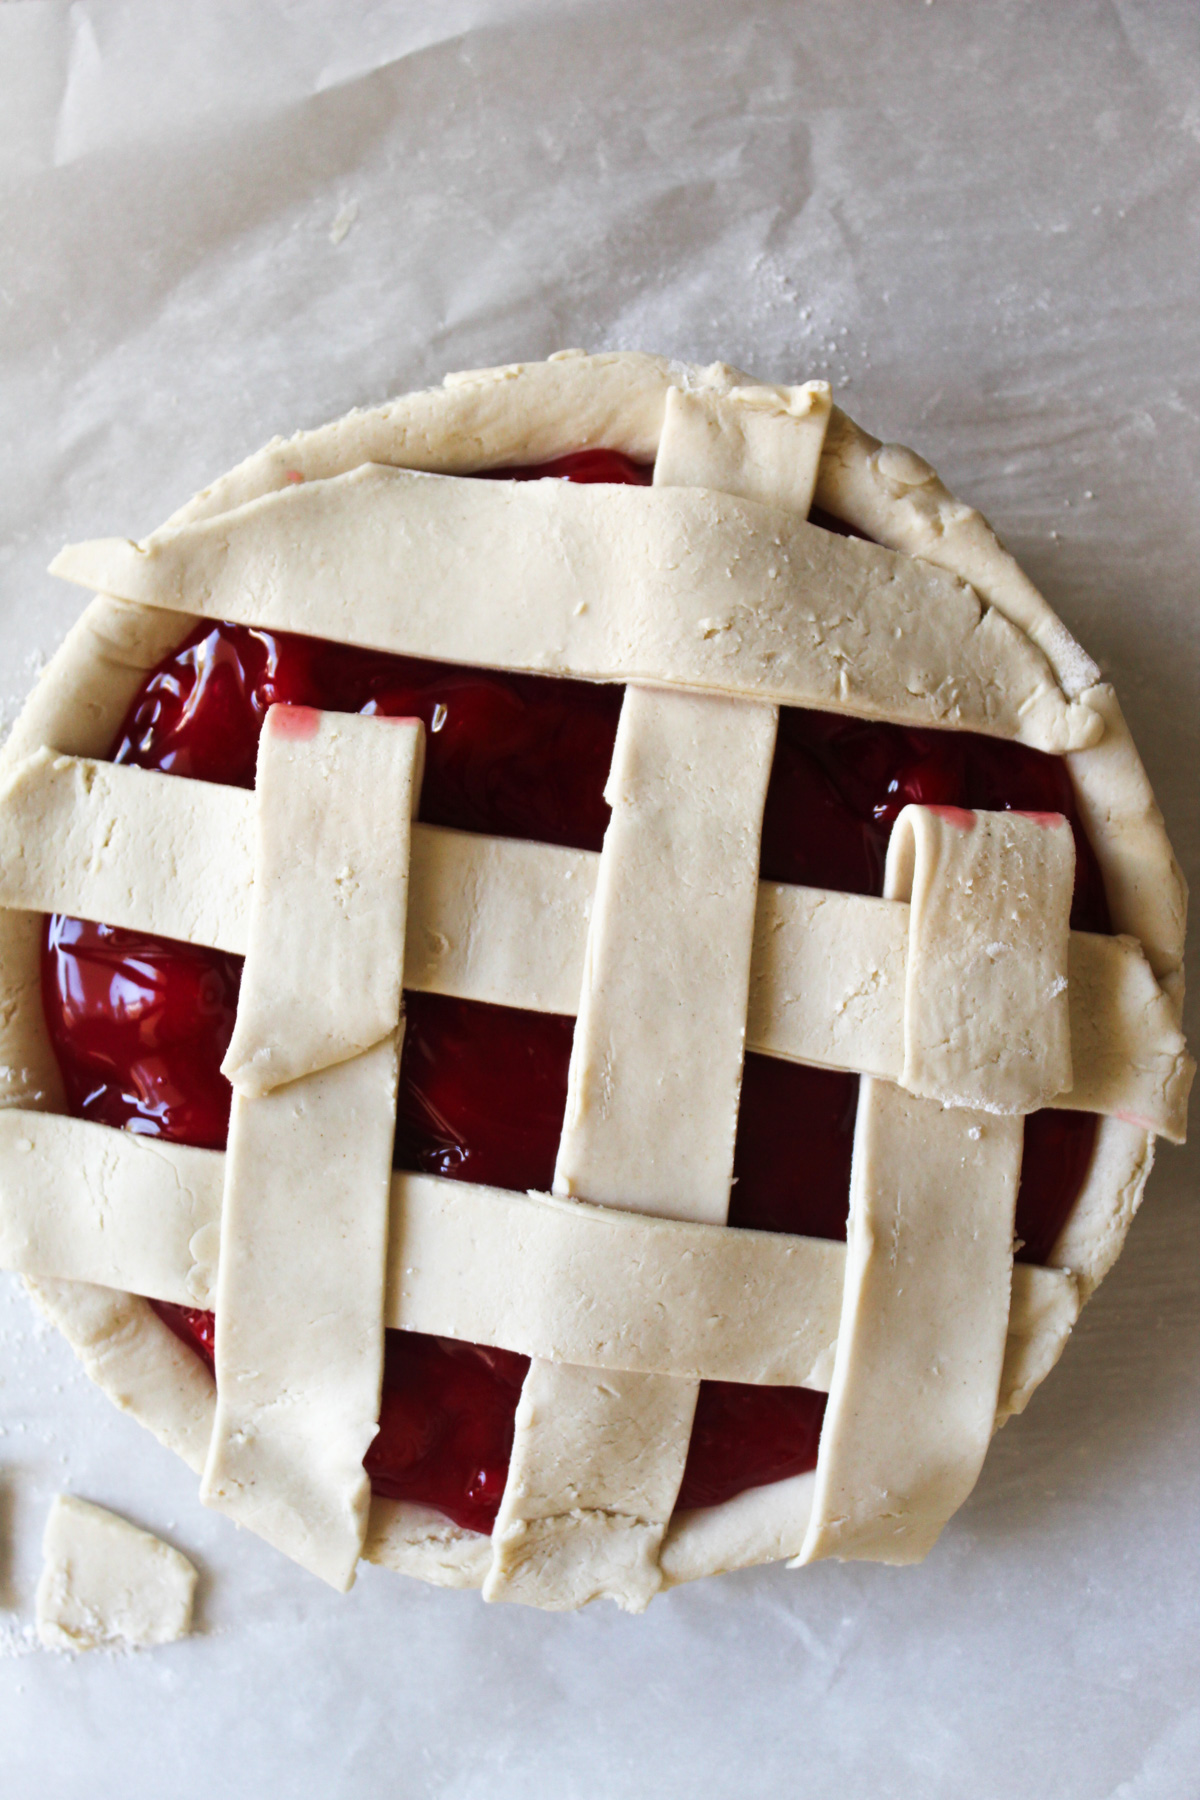
- For Lattice: Lay three strips across the filling, then weave three more at right angles.
- For Full Crust: Place over filling and cut vents.
Afterwards, trim and crimp the edges to seal.
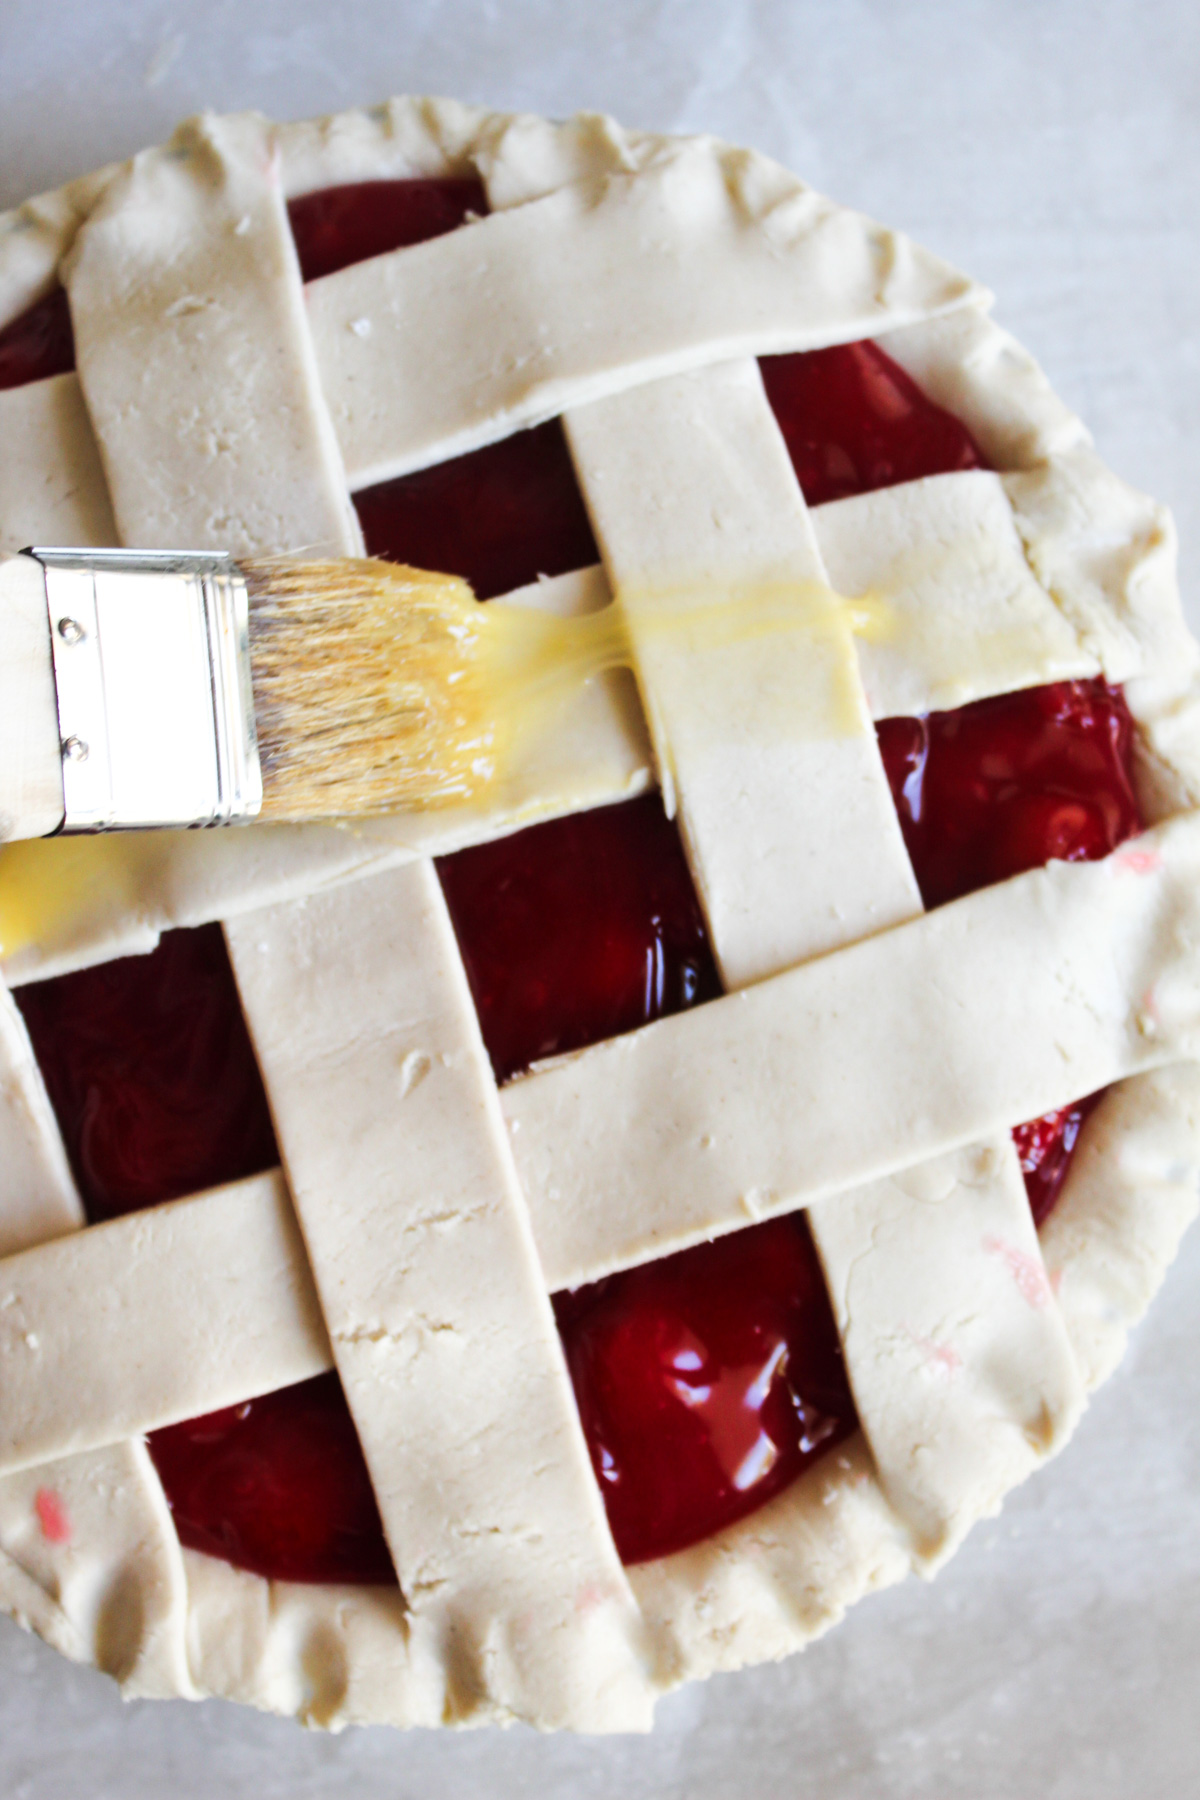
Step 10: Apply Egg Wash
Beat the egg and brush it over the entire top crust and edges. This promotes golden color and crisp finish.
Step 11: Bake the Pie
Bake the pie in the preheated oven for 35–45 minutes, or until:
- The crust is golden brown.
- The filling bubbles at the vents
If the edges brown too fast, shield them with foil after ~25 minutes.
Step 12: Cool Before Serving
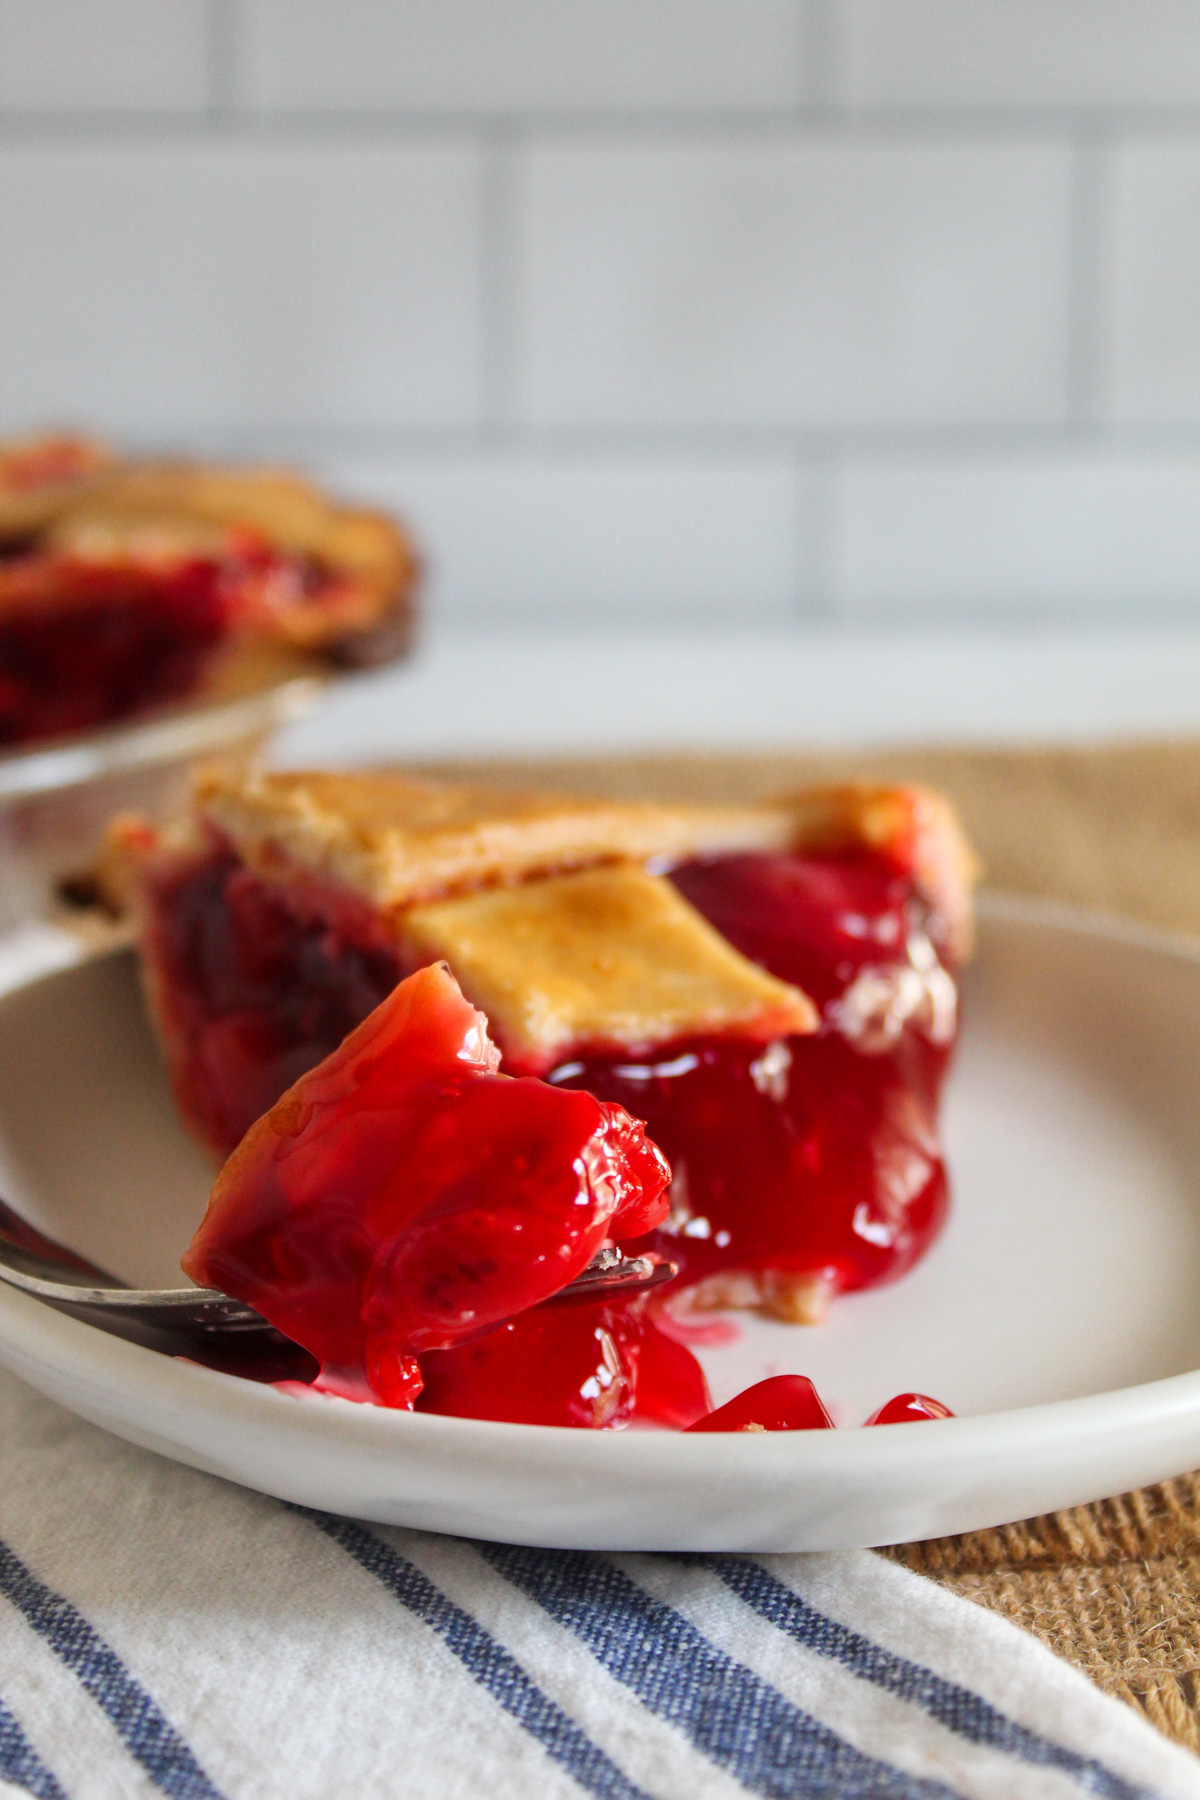
Once baked, remove the pie and cool at room temperature for 3–4 hours. This gives the thickener time to set, so the slices hold firm.
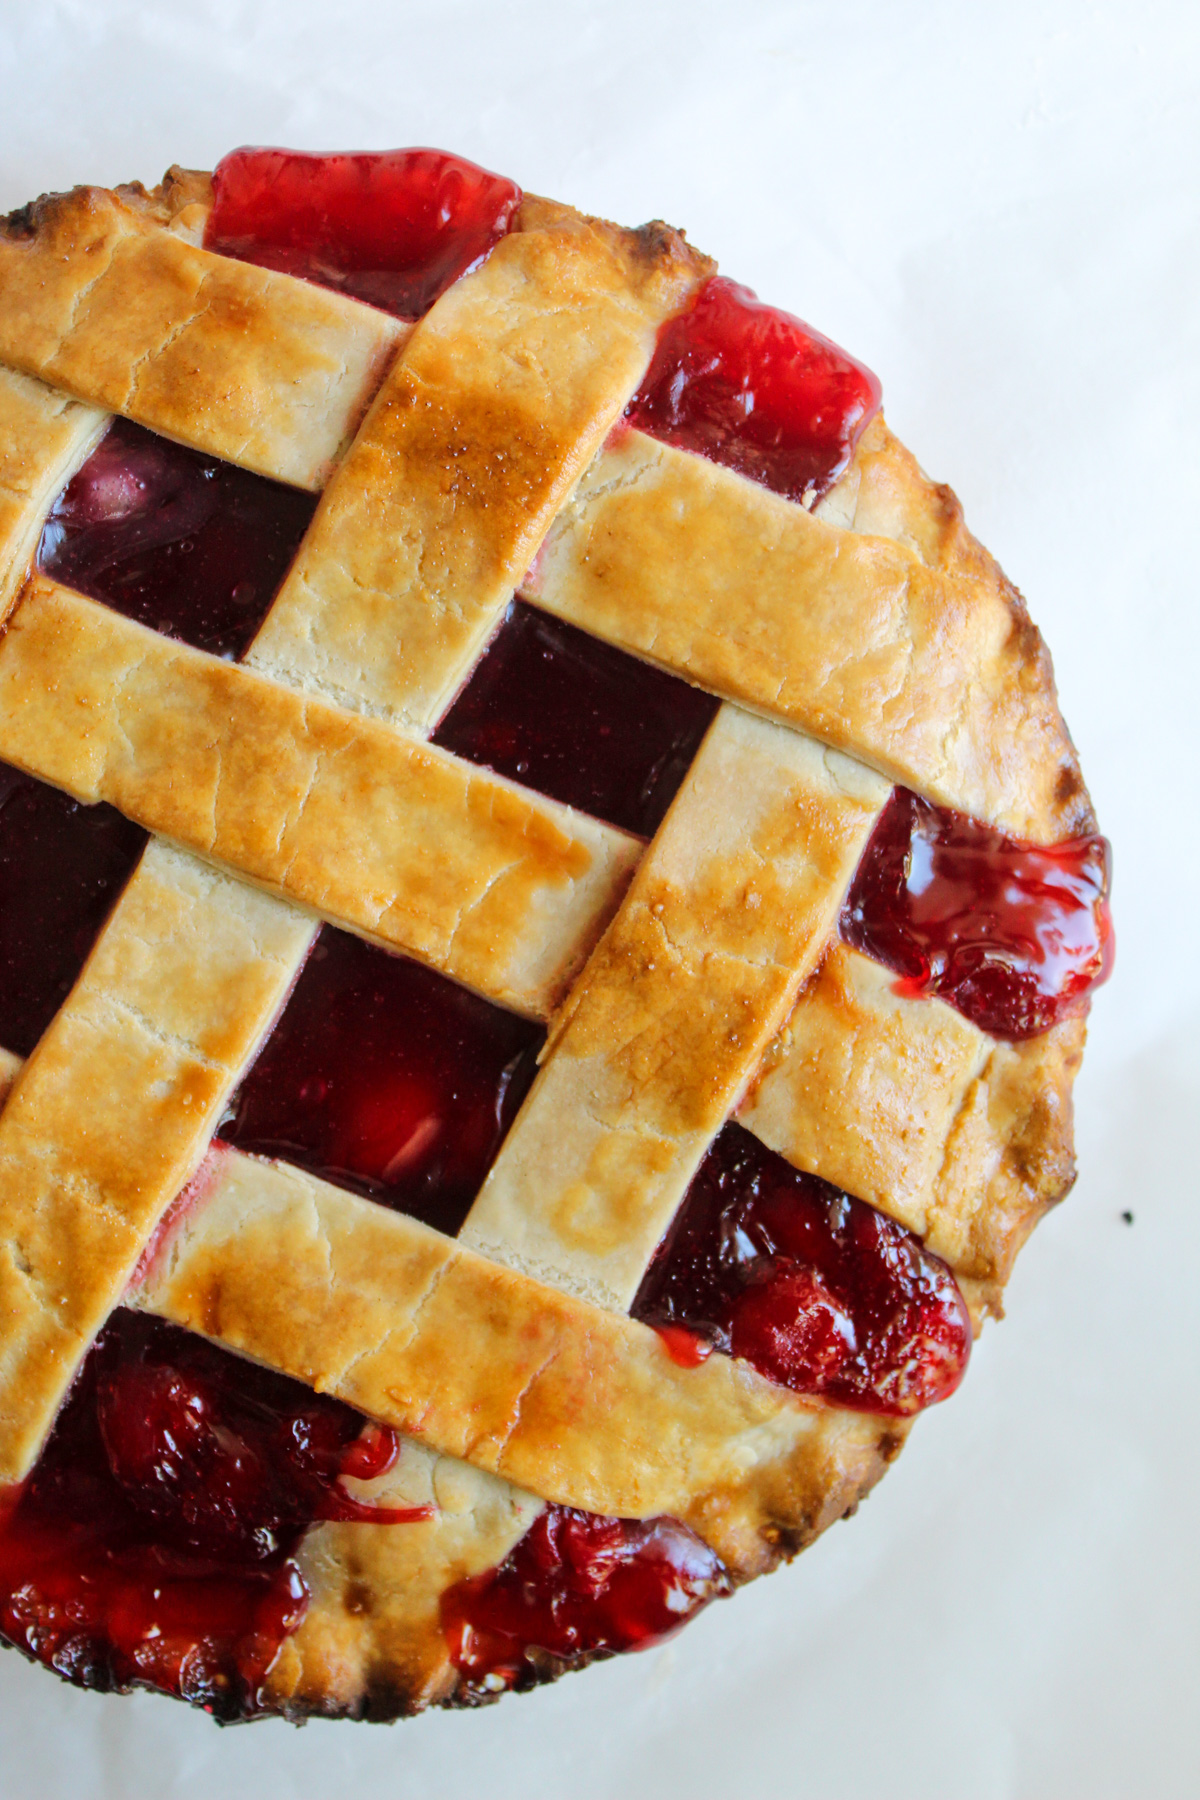
Quick Visual & Doneness Checklist
- Filling bubbles steadily at vents
- Crust edges golden
- Filling coats, spoon, and mounds
- Slices are clean and not watery.
How to Prevent a Soggy Bottom Crust
Following all five steps below gives you a crisp, moisture-resistant bottom crust that pairs perfectly with rich, glossy gluten-free cherry pie filling.
- Blind-bake the bottom crust with a dough mat and pie weights until lightly set.
- Brush with egg wash and bake briefly to create a moisture barrier.
- Use a preheated baking sheet to jump-start bottom cooking.
- Cool the filling slightly before adding to the crust.
- Vent the top crust well to prevent steam buildup.
If you’re interested in pairing desserts or using extra kitchen techniques across baking styles, see our Almond Flour Oatmeal Cookies. You will learn more gluten-free baking strategies and techniques for texture control.
Why You Must Wait for 3–4 Hours (Cooling Science)
Cooling finishes the structural work heat begins. Without it, even properly thickened filling can collapse when sliced.

Starch Retrogradation
As the pie cools, the starch molecules realign and tighten, a process called starch retrogradation. This strengthens the gel that traps juice around the cherries and transforms the filling from soft to sliceable.
Why Cutting Early Causes Collapse
When heated, the starch gel remains fluid. Slicing too soon breaks the network before it firms, causing filling to flow rather than hold its shape.
Ideal Cooling Window
Let the pie cool at room temperature for 3–4 hours before cutting. Refrigeration afterward further firms the gel and improves clean slicing.
How to Store and Freeze Your Cherry Pie
Follow this guide to keep your pie tasting fresh and your gluten-free cherry pie filling firm and sliceable. This knowledge will come in handy if you serve it over a few days or prepare it ahead of time.
Should you want another excellent gluten-free holiday dessert with firm set and texture guidance, see our Gluten-Free Pumpkin Pie.
Refrigeration
Cool completely, then cover loosely. Store up to 4 days in the refrigerator. Covering too early traps steam and softens the crust.
Freezing Baked Pie
Wrap tightly in plastic wrap, then foil. Freeze up to 1 month. Thaw overnight in the refrigerator before reheating.
Freezing Filling Only
Tapioca and cornstarch freeze best. Thaw overnight in the fridge, then reheat gently. If needed, simmer briefly to restore thickness.
Reheating
Warm at 325–350°F (165–175°C) uncovered to allow steam to escape and keep the crust crisp.
Delicious Variations for Your Cherry Pie
Explore simple ways to elevate your cherry pie with added charm and flavor. These variations boost engagement and look great in photos.
Almond Extract Cherry Pie
Add ½ teaspoon almond extract to the warm filling for a fragrant, nutty twist that highlights the fruit without changing texture.
Bourbon Cherry Pie
Stir in 1–2 tablespoons of bourbon after the filling thickens. It deepens flavor and adds warmth without altering the set.
Chocolate Cherry Pie
Sprinkle 2–3 tablespoons finely chopped dark chocolate over the hot filling before crusting. The chocolate ribbons create a rich contrast with glossy cherries.
Cherry Crumble Topping
Top the pie with a crisp gluten-free oat crumble instead of a full crust. It bakes to a golden color, adding a crunchy texture.
Lattice vs Full Crust
A lattice top shows off glossy fruit and vents steam evenly. A full crust offers classic form and keeps filling sealed beneath.
Would you like another fruit pie idea with a versatile crust technique and texture cues? Check out our Gluten-Free Baking Questions Answered
This section provides clear, concise answers to the most common questions about gluten-free cherry pie filling, helping you troubleshoot like a pro. Yes, tapioca works as a thickener and often gives a clearer, slightly chewier gel. The starch wasn’t fully activated by boiling, or there was too much liquid for the amount of thickener used. Yes, use other starches like tapioca or arrowroot, though texture and clarity will differ. Yes, you can use it; drain excess syrup and add a bit of thickener before baking. Yes, replace egg wash with a plant-based wash and use vegan pie crust ingredients. Fully thicken the filling, cool slightly before baking, and provide steam vents in the crust. Yes, almond flour crust works, but chill it well so it holds up under the filling. Yes, cook from frozen to reduce excess liquid, and consider adding a bit more thickener. Cool for at least 3–4 hours before slicing so the filling sets. Yes, you can reduce the sugar slightly based on the fruit’s sweetness without harming the set. Yes, wrap the baked pie tightly and freeze for up to ~1 month. But thaw in the fridge before serving. Some starches cloud more than others. Tapioca and arrowroot usually produce clearer gels than coarse flours. Reheat at 325–350°F on a baking sheet uncovered so steam escapes and the crust stays crisp. Expand your pie baking without leaving the site. These recipes below build on the techniques and flavors you’ve just read about in your gluten-free cherry pie guide: Whether you’re baking another pie or trying something new, these recipes will help you keep exploring delicious gluten-free desserts. Tell us what happened with your cherry pie filling in the comments, whether it was runny, gummy, or perfect. Let us know which thickener you used and why, and ask any remaining questions about texture, cooling, or baking technique. Your insights help other bakers succeed, too!Can I Use Tapioca Instead of Cornstarch?
Why Is My Cherry Pie Filling Watery?
Can I Make Cherry Pie Filling without Cornstarch?
Can I Use Canned Cherry Pie Filling?
Can I Make This Vegan?
How Do I Prevent Cherry Juice Leakage?
Can I Use Almond Flour Crust?
Can I Use Frozen Cherries?
How Long Should It Cool?
Can I Reduce Sugar?
Can I Freeze Cherry Pie?
Why Is My Filling Cloudy?
How Do I Reheat without A Soggy Crust?
Related Recipes You Can Try
Have A Question Or Tip to Share?