This tender, flaky gluten-free pie crust recipe is reminiscent of the flaky crust of a regular pie crust. With simple ingredients, it makes an incredibly tasty, golden brown pie crust. And this easy recipe is dairy-free too!
Whether this is your first gluten-free pie crust recipe to try or you’ve made dozens of them, this is a pie crust that will be one of your family’s favorites. It’s perfect for sweet pies like this apple pie or this pumpkin pie, or you can omit the sugar and use it for savory pies.
Table of Contents
Either way, this is an easy gluten-free pie crust you cannot go wrong with. Follow the step-by-step instructions below for the flakiest texture of this traditional pie crust.
Gluten-Free Pie Crust Recipe at a Glance
This recipe makes 3 pie crusts, so it’s perfect for a double-crust pie like this gluten-free apple pie, and then you have one left over for single-crust pies like this gluten-free chocolate pie. This crust is also:
- Dairy free
- Quick to mix with either a food processor or a stand mixer (just like these strawberry cake mix cookies!)
- A perfect pie crust to use for a blind bake (baking the pie crust before filling) or for adding pie filling and then baking. More on blind baking in Pro Tip #4.
- Easy to roll pie crust dough
I’ll share some tips for mixing and handling it below, but if you’ve been hesitant to make a homemade pie crust in the past, this is a very easy and forgiving recipe, even for beginning bakers!
Looking for some gluten-free baking substitutes and how-tos? Check out these coconut sugar substitutes, corn flour substitutes, xanthan gum substitutes, and gluten-free vanilla extract brands.
Ingredients & Substitutions for the Perfect Pie Crust
The ingredients list is super short for this recipe. Below are the ingredients I use and recommend, and then an equivalent substitution if there is one:
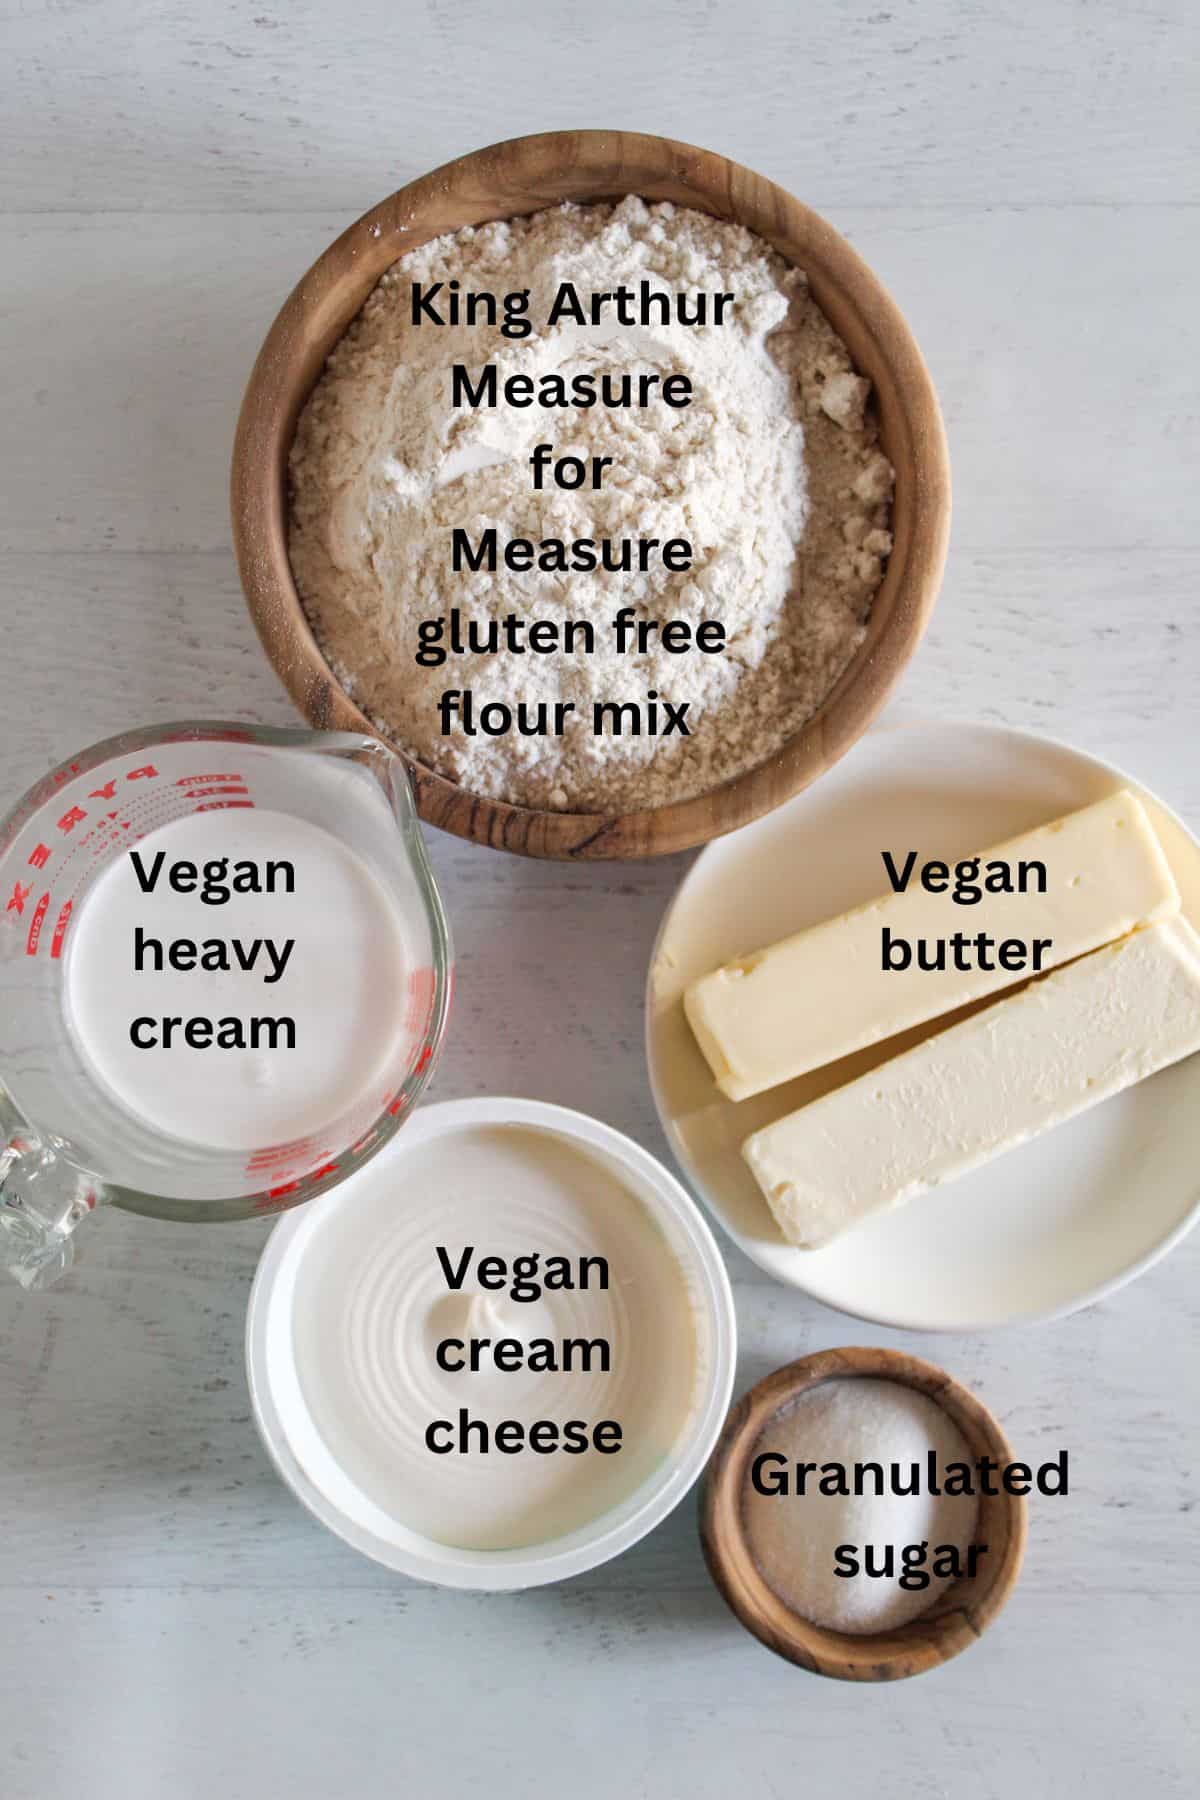
- Vegan Cream Cheese – The vegan cream cheese is an essential ingredient for making a truly flaky crust. The brands tested that work well in this recipe are Kite Hill and Violife. Other brands may work, but I haven’t tested them. I don’t recommend substituting the cream cheese, but if you need to, use regular cream cheese.
- Vegan Butter -Vegan butter sticks work well in this recipe, and they work wonderfully. Solid (not melted) coconut oil also works as a substitute. So does regular butter if you’re okay with using dairy.
- Vegan Heavy Cream – This recipe uses the Silk brand. Acceptable substitutes for the dairy- free heavy cream include: regular heavy cream and canned coconut cream (the cream part on the top of the can).
- Gluten-Free Flour Blend – The King Arthur Measure for Measure Gluten Free flour mix was used in this recipe. Other gluten-free flour mixes may work, but have not been tested. If opting for another flour mix, be sure it includes xanthan gum. (Try to avoid using too much flour; mix it with Xanthan gum, though, as this can make the bread more bitter.) I would not recommend substituting with a single gluten-free flour, as a flour mixture provides the needed balance of flours to starches for this gluten-free crust.
- Granulated Sugar – You can reduce the sugar if you’d like, or omit it entirely for savory recipes.
Why Use Flour With Xanthan Gum as a Substitute? A Virginia Tech-backed study shows that Xanthan gum can improve water activity when making baked goods compared to similar ingredients like guar gum. This contributes to a more moist and fresher flavor and a more yeasty aroma. Be careful not to add too much Xanthan gum, though, as this can increase the bitterness of the baked item.
Exact measurements for the ingredients for this flaky pie crust are listed in the recipe card below.
Step-by-Step to the Best Gluten-Free Pie Crust
This step-by-step method breaks the process down into simple, reliable actions so you can make a gluten-free pie crust that works every time.
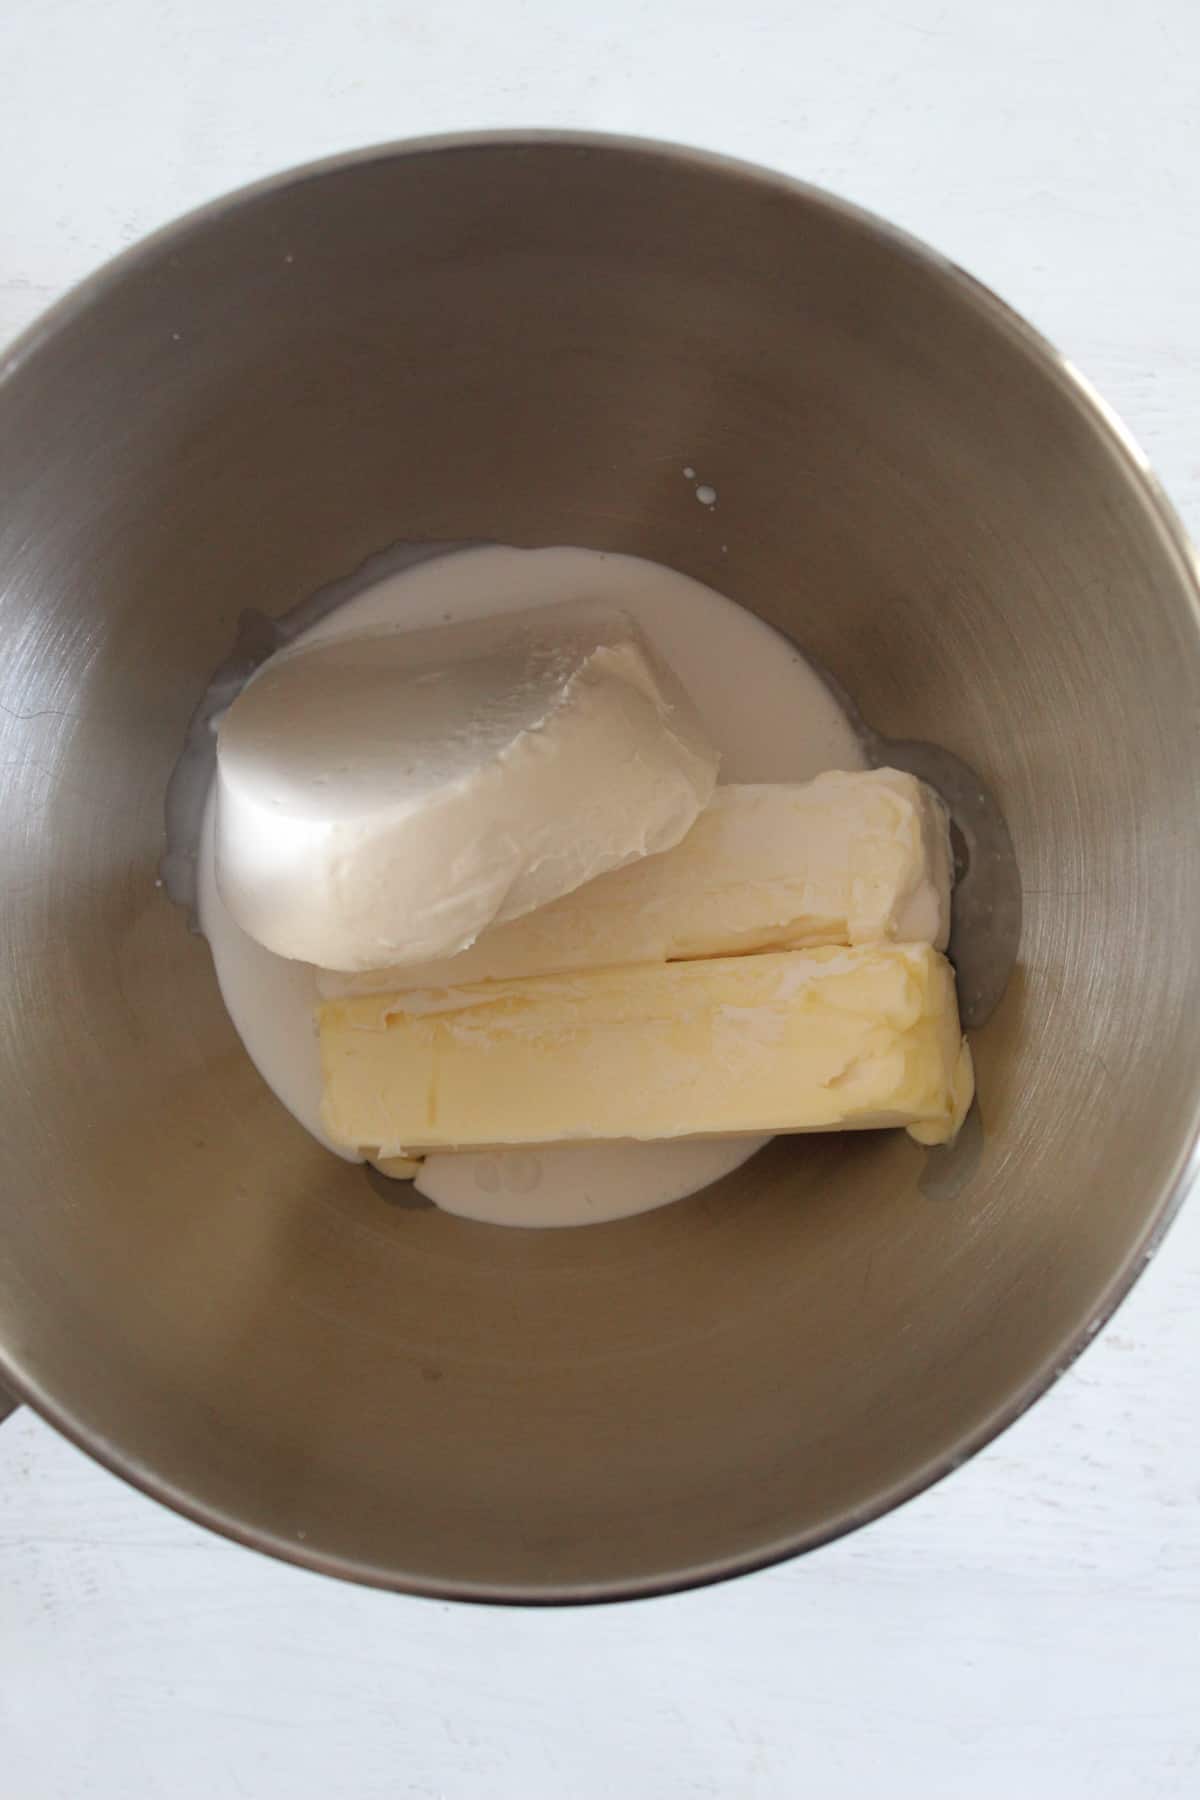
Step One: Mix Wet Ingredients
Combine the vegan butter, vegan cream cheese, and vegan heavy cream in a large bowl until fully blended. You can use handheld beaters or a stand mixer. (For food processor instructions, see Pro Tip #3).
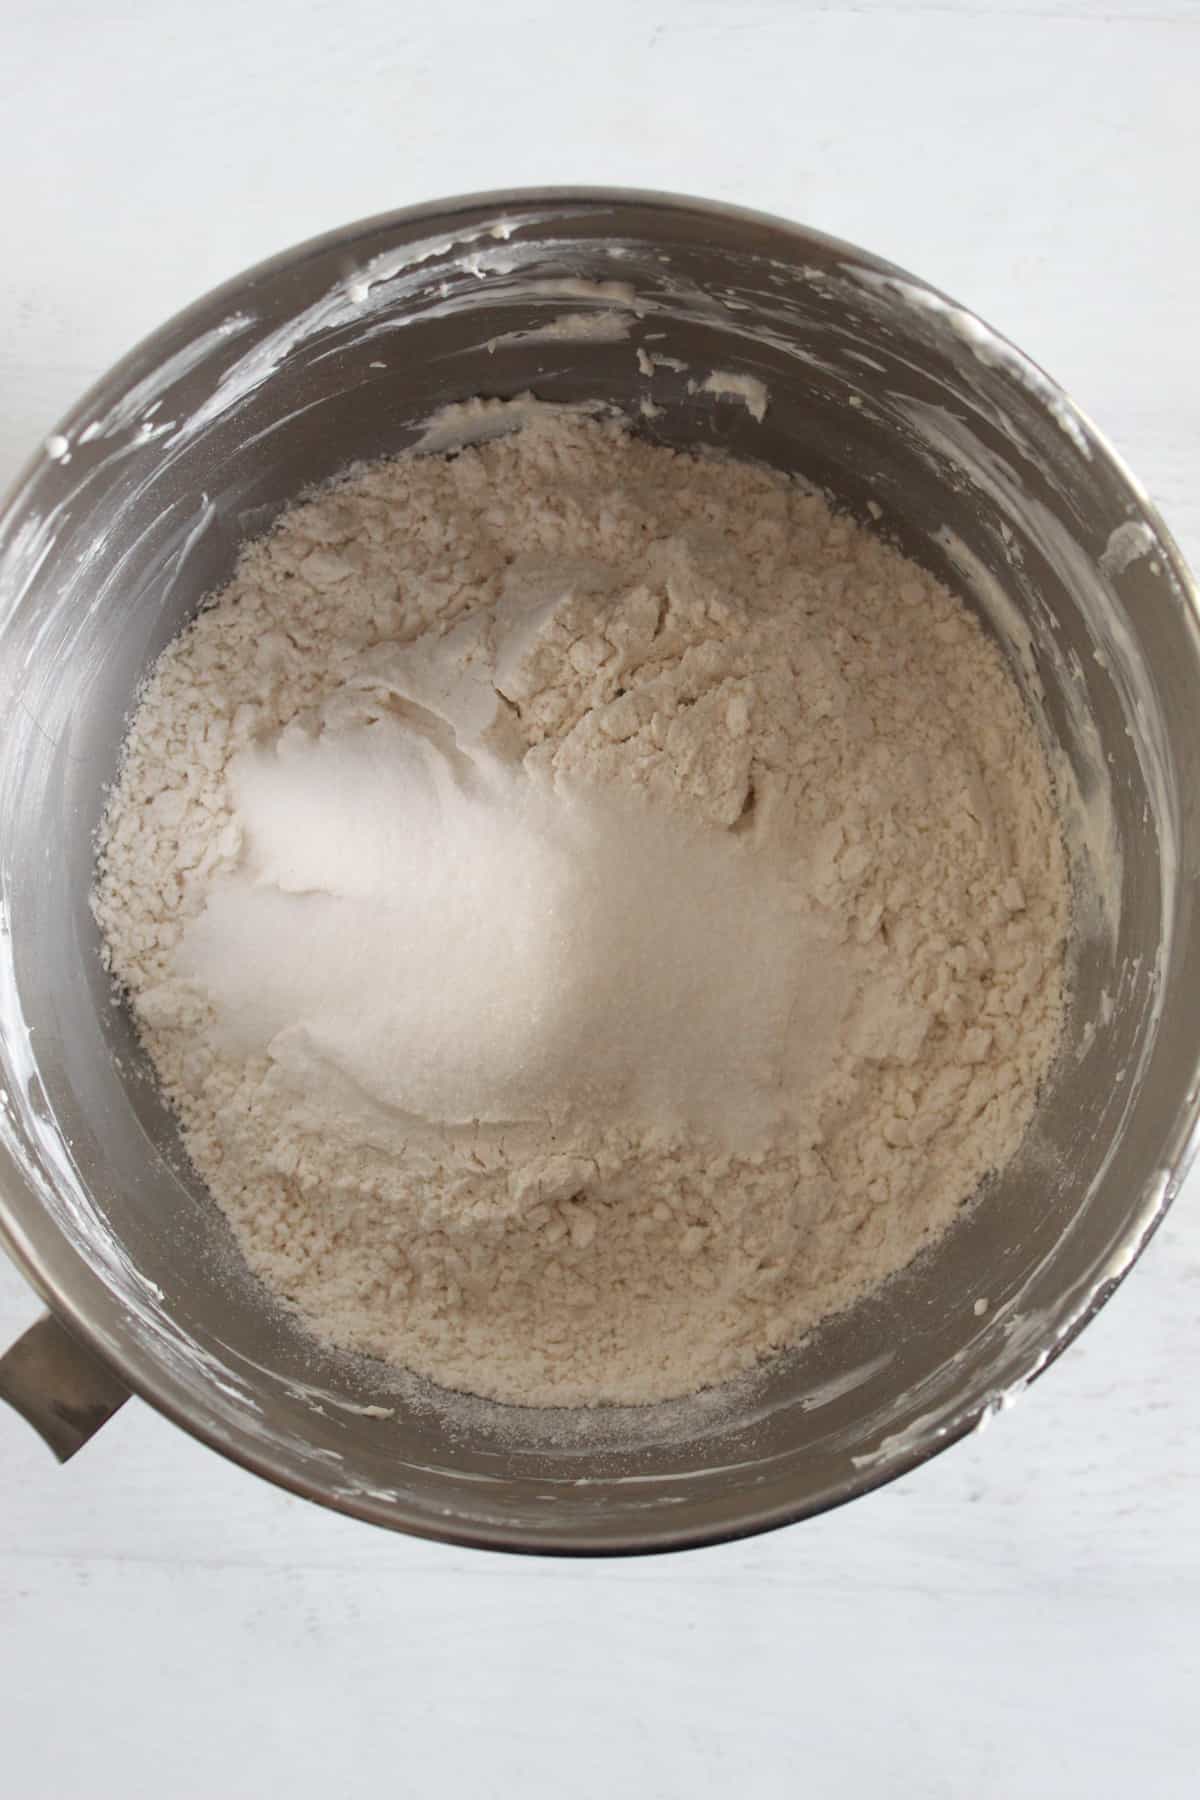
Step Two: Add Dry Ingredients
Add the gluten-free flour blend and sugar – and mix on low speed for 30 seconds, scraping down the bowl with a sturdy spatula.
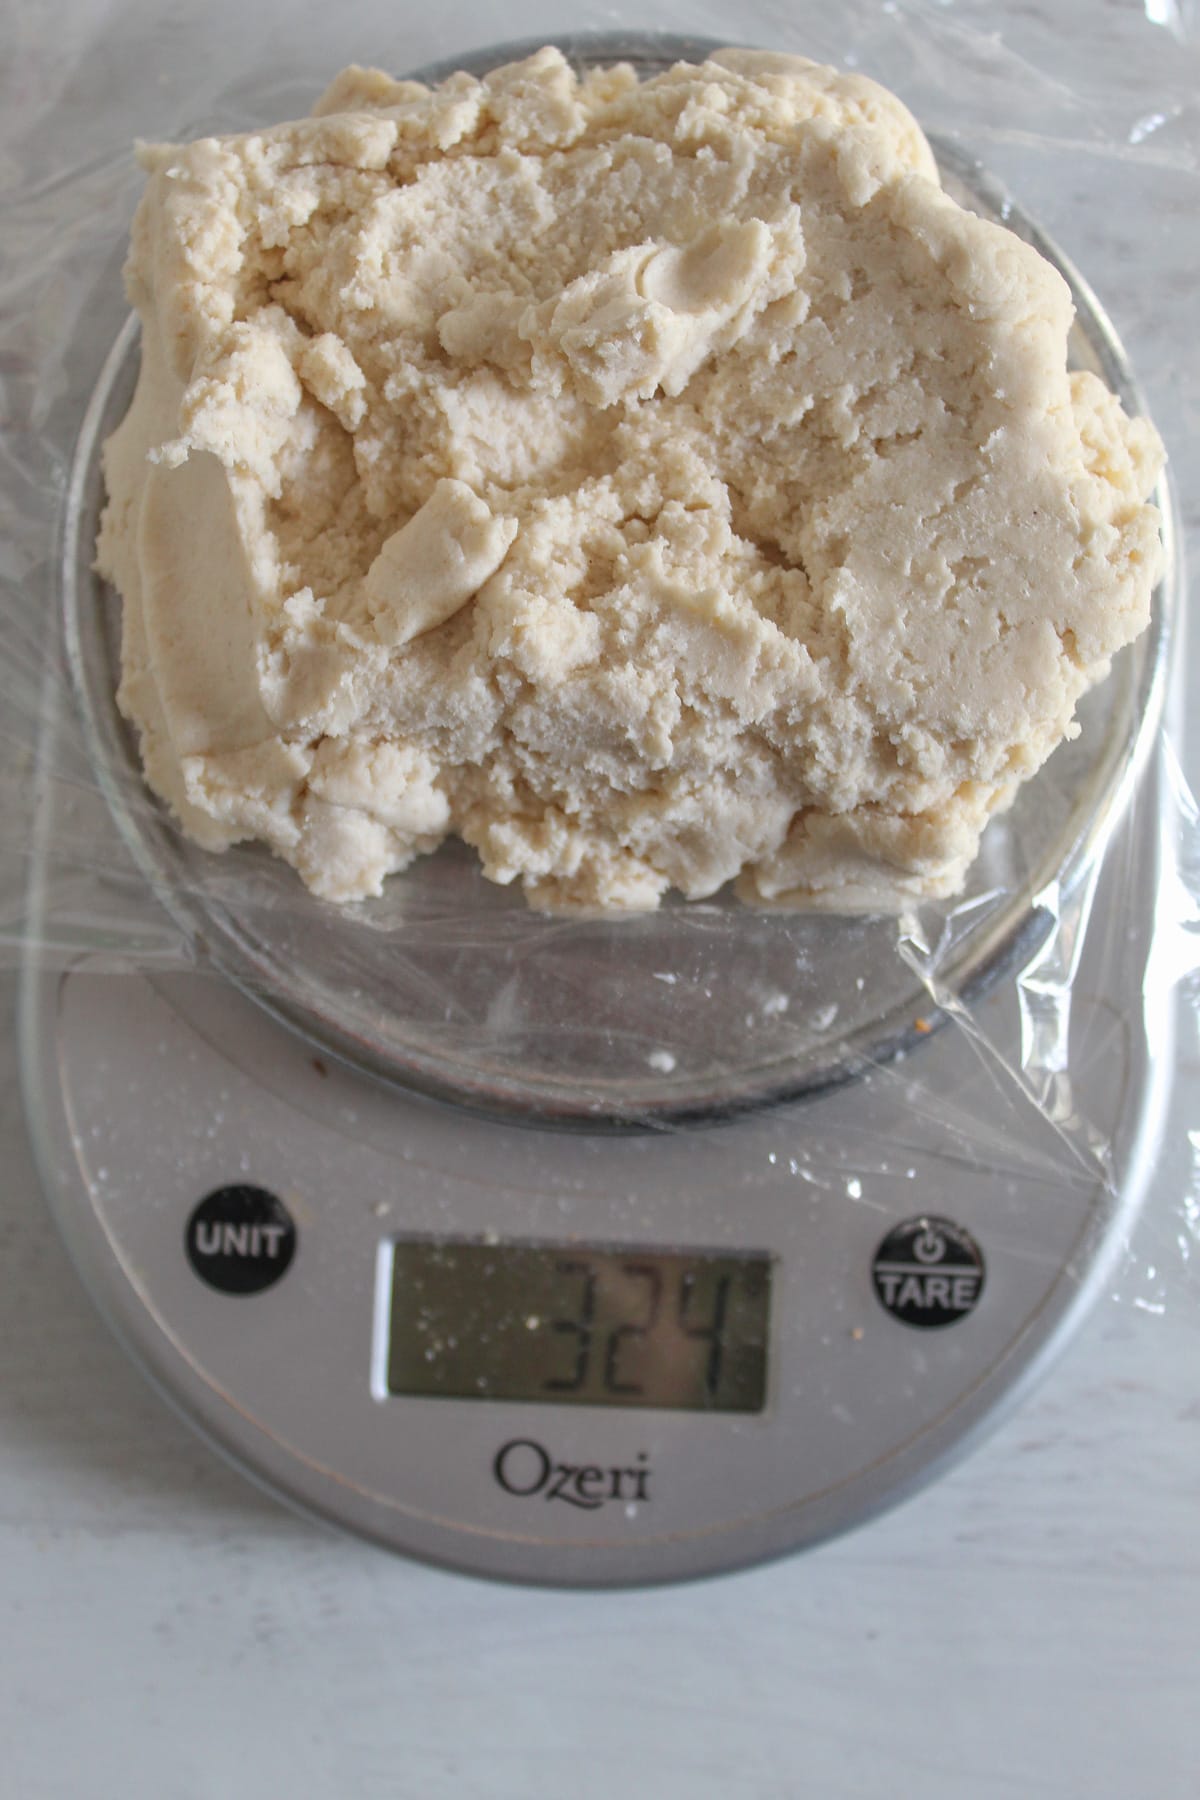
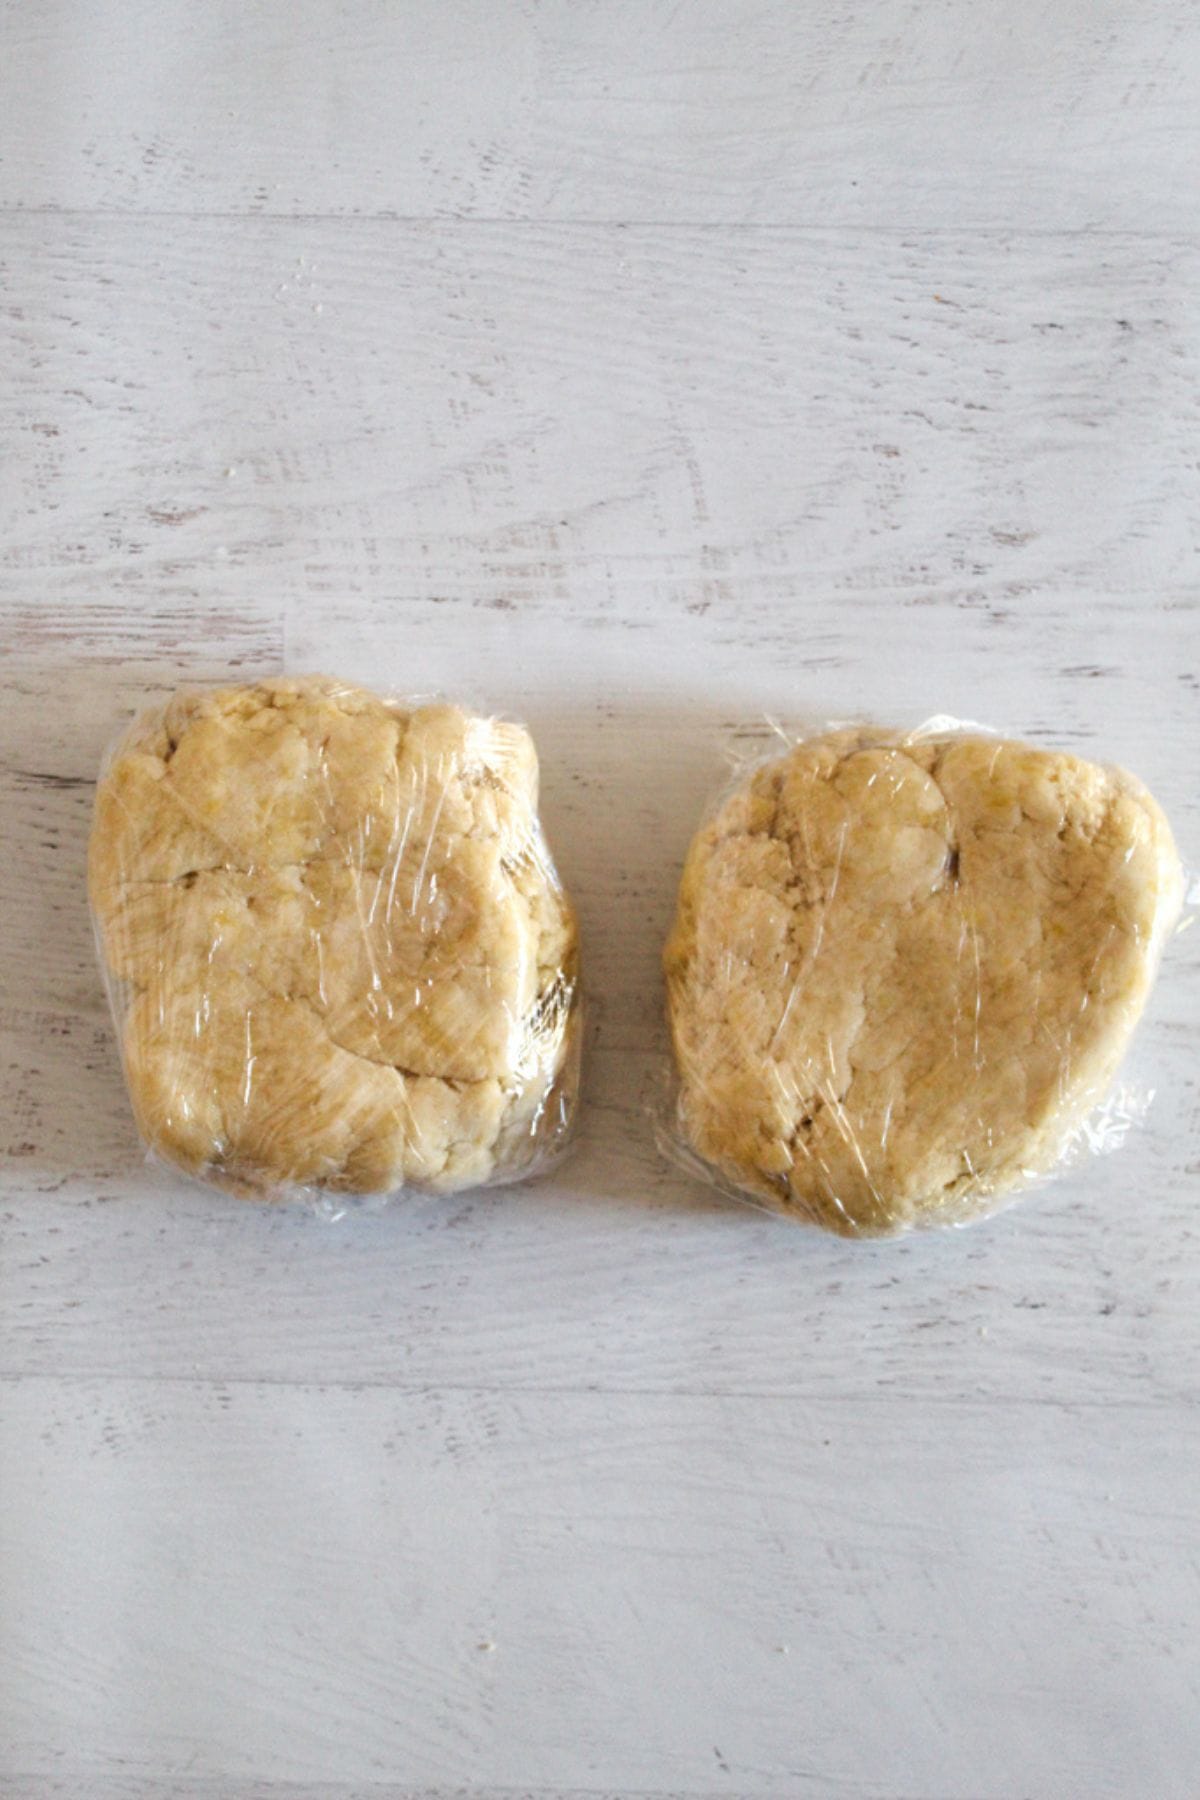
Step Three: Weigh Dough Portions
Place a piece of plastic wrap on the digital scale, and then use the scale to portion out the dough. Each portion should weigh 322 to 324 grams.
Step Four: Refrigerate Dough
Flatten each portion into a disk and refrigerate for 30 minutes to firm up the dough before rolling. See Storing this Gluten Free Pie Crust below for more on storing the dough at this point.
Step Five: Prepare your work surface
Place a large piece of parchment paper on your work surface and sprinkle lightly with additional flour mix. Place one disk of chilled dough on the parchment paper, keeping the other chilled until it’s needed.
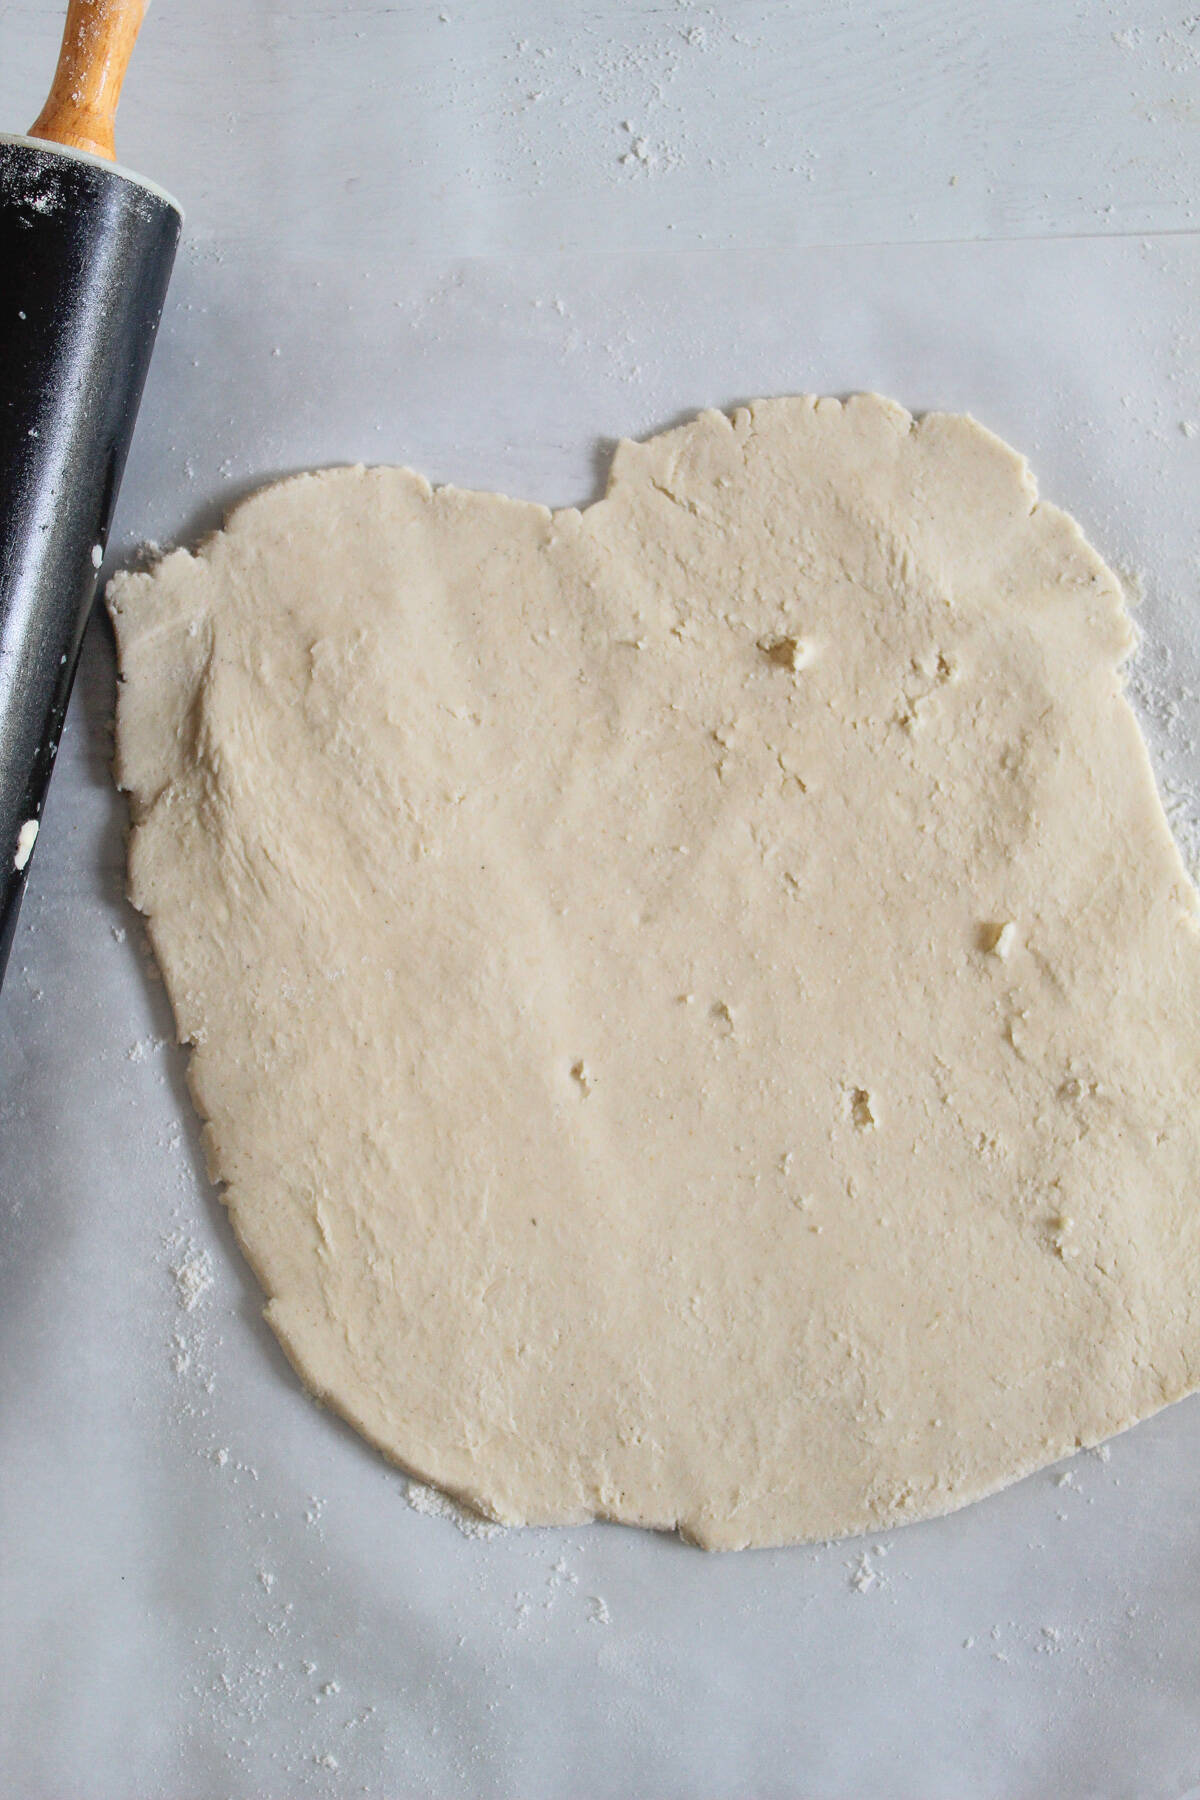
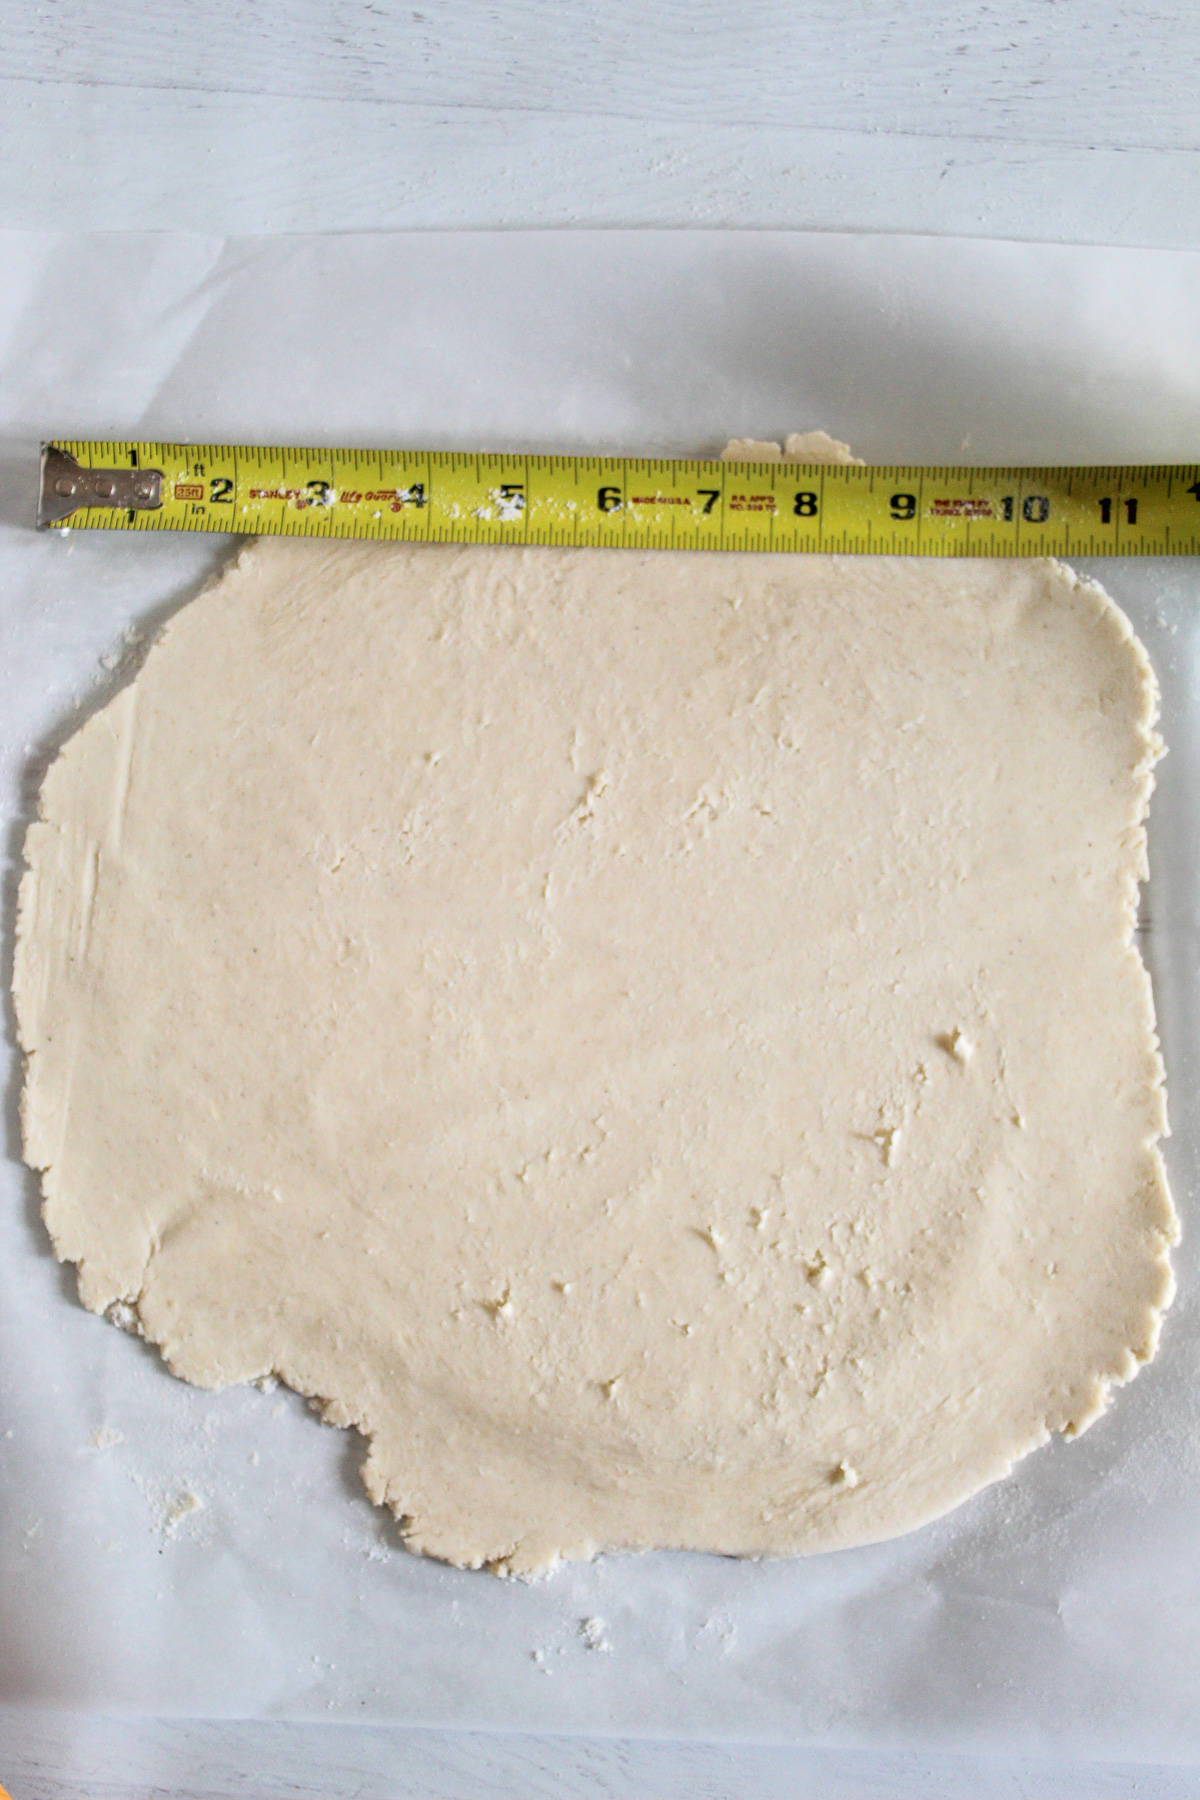
Step Six: Roll Dough to Desired Size
Roll the dough evenly to a roughly round shape that’s about 11 inches in diameter, turning the parchment as you go to create a round crust. Sprinkle with additional flour if needed. It doesn’t have to be a perfect circle yet – you’ll take care of that in the next step.
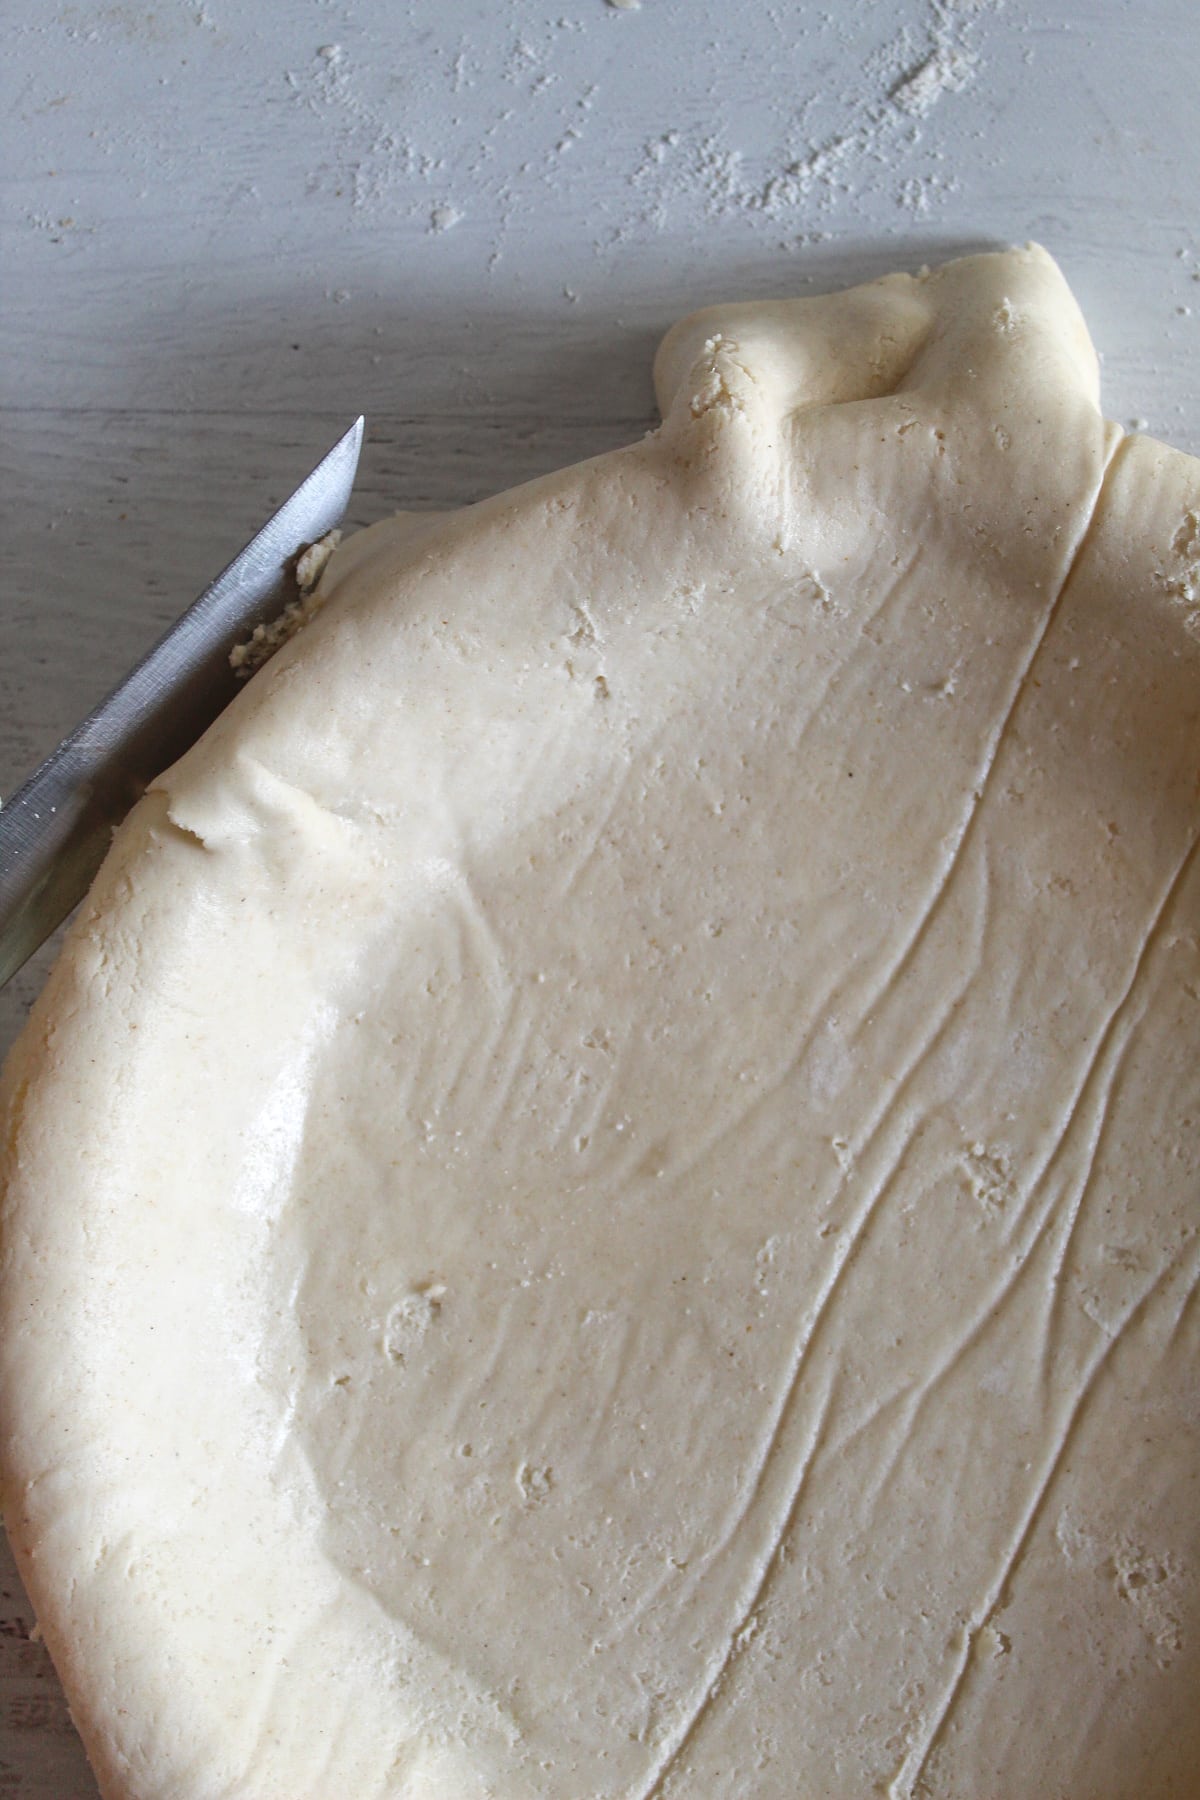
Step Seven: Transfer dough to pie pan
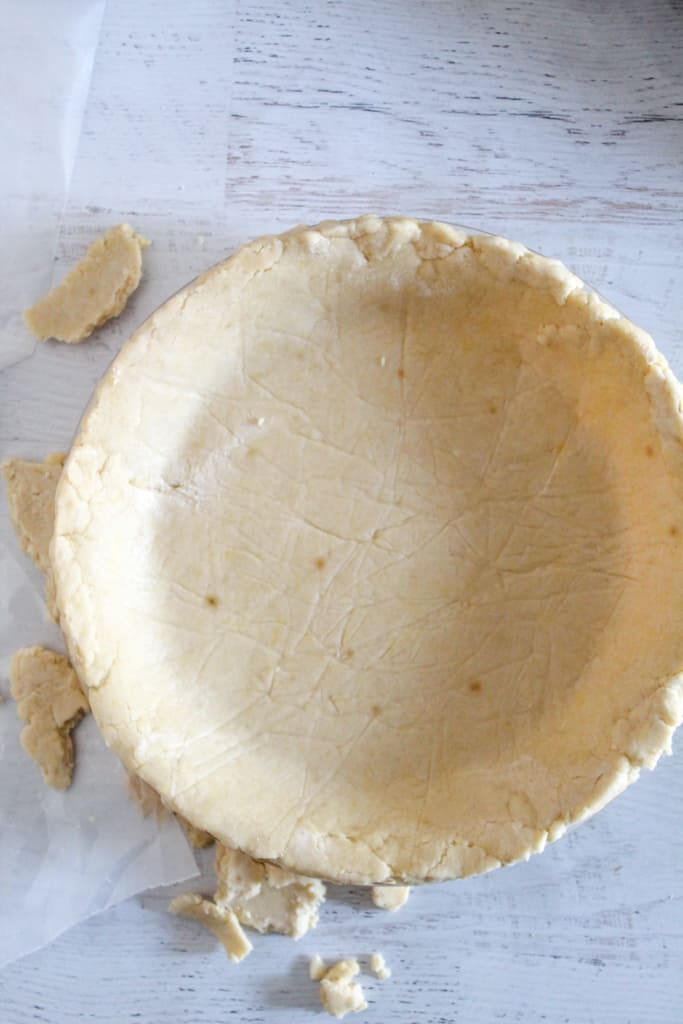
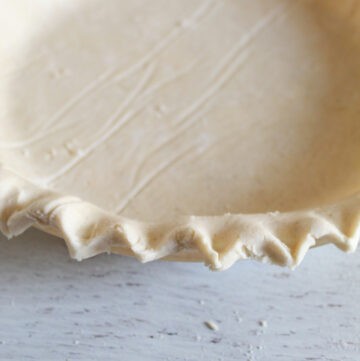
Place your pie pan close to the rolled crust and use the rolling pin to drape the crust over it. Place the crust into the pie plate. If making a single-crust pie, this bottom crust is all you need. Trim the long edges and make a decorative edge.
If making a double-crust pie, repeat the process of rolling another disk of dough to an 11-inch round circle. This will be your top crust. At this point, you are ready to fill it or blind bake it (see Pro Tip #4 below on blind baking).
Step Eight: Bake your pie.
If baking the crust without filling, preheat the oven to 375 degrees F and add a pie weight to keep it from puffing up. Bake with the pie weight for 10-15 minutes, depending on the thickness of the crust. The pie crust will be golden brown when it’s finished baking.
Step Nine: Add your favorite filling.
Not all fillings are the same!
- Some fillings, like creams and some custards, can be cooked separately from the pie crust, often on the stovetop, and added to the baked crust.
- Others can be added without being cooked (much), like many fillings that include berries or are whipped or chilled.
- If a filling includes egg, like a meringue or egg-heavy custard, it may need to be briefly baked to set properly.
- Pie fillings similar to apple, sweet potato, and pumpkin are normally baked with the pie crust.
Depending on the recipe, baking the crust with the filling may require lowering the oven temperature (though rarely lower than 350 degrees F) and baking it for 35 to 55 minutes.
Gluten-Free Pie Crust Recipe Card
Ingredients
- 1 cup vegan butter softened
- 8 ounces vegan cream cheese softened
- 1/2 cup vegan heavy cream room temperature
- 385 grams King Arthur Measure for Measure gluten free flour mix about 3 cups
- 25 grams granulated sugar about 2 Tablespoons
Instructions
- Use a stand mixer or handheld mixer to combine the vegan butter, vegan cream cheese, and vegan heavy cream in a large bowl for 30 seconds until completely combined.
- Add the gluten-free flour mix and granulated sugar. Mix on low speed until a ball of dough forms, scraping the bowl as needed.
- Turn the dough out onto a piece of plastic wrap.
- Divide dough into 3 roughly equally sized pieces. They should weigh 222 to 224 grams each when weighed on a digital scale.
- Flatten each one to a disk and wrap well in plastic wrap. Place them in the refrigerator for 30 minutes.
- When the dough has finished chilling, preheat the oven to 375F.
- Remove one disk from the refrigerator and place on a sheet of floured parchment paper.
- Roll dough into an 11-inch circle, turning the parchment as you go, adding bits of flour as necessary.
- When ready to move the dough to the pie plate, gently pick up and drape half the dough onto the rolling pin and move it to the pie plate, gently laying it inside the pan. Remove the parchment paper. If if cracks, simply press it back together.
- Trim off any long edges and make a decorative edge by pinching the edges of the dough. If making a double crust pie, repeat the steps, starting at removing the disk of dough from the refrigerator.
- At this point the crust is ready to be filled or blind baked. If you are baking the pie crust without filling it first, put a pie weight on top of the dough and bake at 375F for 10-15 minutes until the crust is golden brown. If you are filling the crust before baking, be sure to follow the baking instructions in that specific pie recipe.
Notes
- This recipe was tested with King Arthur Measure for Measure Gluten-Free Flour Mix. Other mixes may work, but have not been tested.
- Vegan butter may be substituted with regular butter or solid coconut oil.
- Vegan heavy cream may be substituted with canned coconut cream (the cream toward the top of the can).
- This crust may be mixed in a food processor (follow instructions in Pro Tips section, #3).
- When rolling the dough, first place the dough on a floured parchment paper, then sprinkle lightly with a bit more flour.
- You may need a bit more flour to prevent the rolling pin from sticking to the pie crust.
- If the dough cracks when laying it in the pie plate, simply press it back together.
- It is not necessary to bake before filling the pie crust. But if you opt to, follow the instructions for blind baking in the Pro Tips section, #4.
Nutrition
Did you make and love this recipe? Give it your review and ![]() rating below! And make sure to follow me on Instagram, Pinterest and Facebook too!
rating below! And make sure to follow me on Instagram, Pinterest and Facebook too!
What’s King Arthur Measure for Measure Flour? “King Arthur” is a brand that makes a gluten-free flour that can be substituted 1:1 for wheat flour. Whenever you find a recipe that calls for wheat flour and want to use a gluten-free alternative, you can use an equal amount of this flour.
Storing this Gluten-Free Pie Crust
There are three different options for storing pie crust dough. The best thing to do for storage depends on how far along you are in the gluten-free crust-making process:
- Once the disks of pie crust have been formed, they can be stored in the refrigerator for up to 5 days. If they have been chilled this long, allow them to warm for 20 minutes before rolling out.
- For longer storage of each disk of dough, place each one into an airtight container or plastic bag and freeze. Pie crusts may be frozen for up to 3 months. Defrost and use as directed.
- For storage of a rolled pie crust in a pie plate, they can either be chilled or frozen. In either case, wrap the pie pan well with plastic wrap or aluminum foil and place it in the refrigerator for up to 2 days or freeze it for up to 3 months.
Pro Tips for a Flaky Gluten-Free Pie Crust
For the best pie crust, follow these tips:
1. Weigh the Ingredients
Accuracy is incredibly important in gluten-free baking. For many of our gluten-free recipes, we’ll give ingredient amounts in grams because weighing the ingredients with a digital scale often gives you a more accurate measurement than measuring cups. Accurate measurements can mean the difference between a light and fluffy roll and a dense, gummy bread. The same is true for this pie crust. Even a Tablespoon more or less will alter the consistency of the crust.
Use a digital scale like this one to ensure that your butter, flour, and sugar are measured correctly. Feel free to let us know if you find a digital scale that’ll measure your ingredients to a tenth of a gram in the comments, because accuracy is simply that important!
2. Use Room Temperature Ingredients
As I discuss in this baking guide, room temperature ingredients blend better and make for a better-textured baked good – this pie crust included. Unlike when using a pastry cutter to cut in cold butter, like in these gluten-free biscuits, the butter-cream cheese mixture of this gluten-free pie crust recipe should be creamy and well-blended, like in this yummy almond-flour oatmeal cookie batter.
3. Food Processor Instructions
If opting to use a food processor for mixing the gluten-free pie dough, follow these instructions:
- Use a large, 8-cup model to ensure the ingredients won’t get mixed properly.
- Add the vegan butter, vegan cream cheese, and vegan heavy cream to the bowl.
- Pulse a few times to fully mix the wet ingredients.
- Add in the flour blend and the sugar, and pulse a few times until a ball of dough forms.
- Proceed to weighing the dough.
Another option is a Kitchen Aid stand mixer to mix the dough.
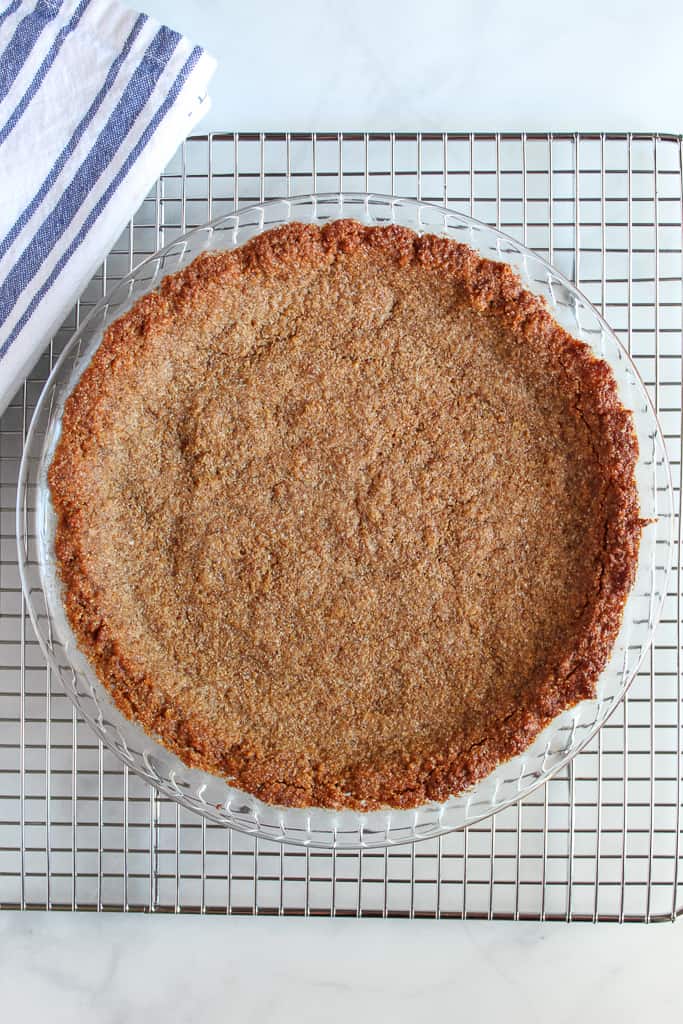
4. Blind Baking
Blind baking simply means baking an unfilled pie crust. Add pie weights to the crust to keep it from puffing up, and bake for 10–15 minutes.
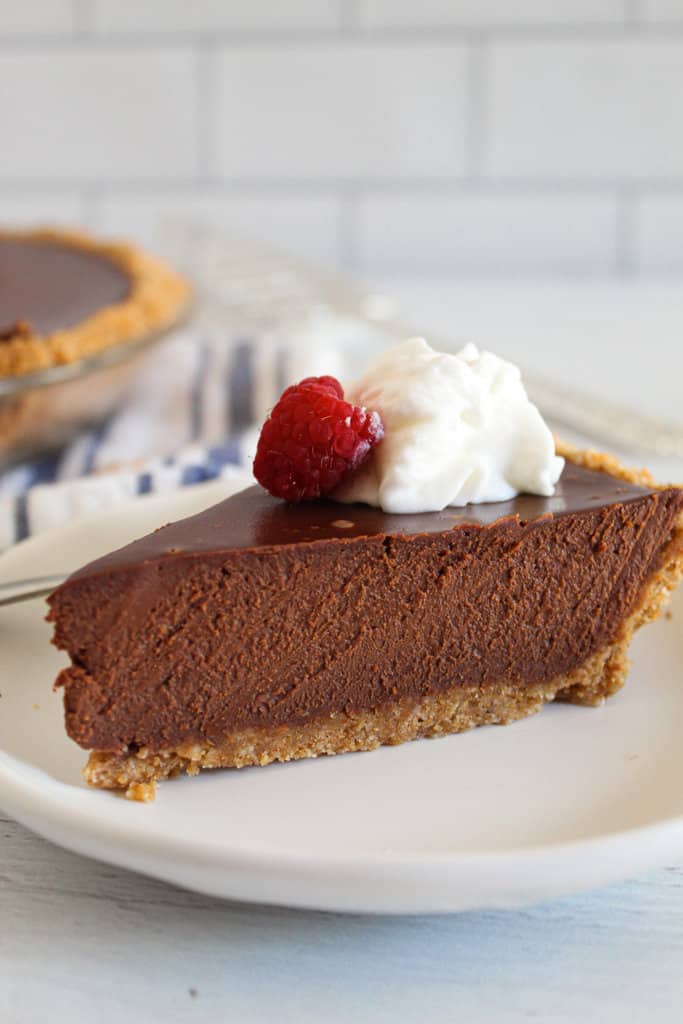
You need to blind bake a pie crust whenever the filling isn’t baked. This chocolate pie is a good example; the crust must be fully baked before adding the filling.
However, in the case of an apple pie, where it is baked, blind baking is not needed.
FAQs about this Homemade Gluten-Free Pie Crust
Gluten-free pie crust can feel a little intimidating the first time around. If you’re wondering why your dough behaved a certain way, or how to fix a crust that didn’t quite cooperate, you’re not alone. These are the most common questions readers ask, with clear, no-nonsense answers to help your next pie turn out even better. If you don’t see yours, just drop it in the comments.
Can I use a different flour blend in this pie crust?
The recipe has been tested with King Arthur Measure for Measure gluten-free flour mix; other mixes may work, but they have not been tested. If you try another flour mix, be aware that it may affect the gluten content of the finished pie crust or the flavor.
As mentioned above, flour mixes with Xanthan gum may result in a less stale-tasting baked good, but also increase the bitterness. Reference this guide to flours to see why.
Do you have other pie crust recipes?
Some of our pie recipes do include a different crust! The ones I link to in the section below are some of my favorites. We also have a recipe for gluten-free graham cracker crust.
Can I make the crust ahead of time?
The crusts can be made, wrapped well, and refrigerated for up to 5 days or frozen for a few months. When ready to use, let the crust come to room temperature before rolling out. Reference the Storing this Gluten Free Pie Crust section for more information.
How do I store unbaked pie crust?
The key is to wrap it well. Use plastic wrap and wrap the disk of dough so no air can get in. Then place it into a plastic bag and seal the bag. Place in the refrigerator for up to 5 days or freeze if you don’t use it within five days of mixing it.
Do I need to bake the crust before using it?
Baking a crust depends on the filling going inside it. If the filling in the crust is not going to be baked, then yes, you’ll need to do what’s called blind baking and bake the crust beforehand. But if the filling is going to be baked, like in this pumpkin pie, then no, the crust does not need to be baked ahead of time.
Can I fix cracks in my pie dough?
It’s possible to fix cracks in the pie dough after adding it to the pie pan and before baking it. Just smooth them out with a finger before putting them in the oven.
Is it normal for gluten-free pie crusts to come out crumbly?
Crumbly pie dough usually just needs a little more liquid. If your pie dough seems crumbly, try sprinkling a few drops of water on it while rolling it out.
Favorite Pie Recipes!
Once you’ve mastered this gluten-free pie crust, the real fun begins. It’s the kind of recipe that opens the door to all your favorite fillings, classic, cozy, and everything in between. If you’re in the mood to keep baking, these reader-favorite pie recipes are perfect places to start.
- Gluten-Free Pumpkin Pie {Dairy Free}
- Gluten-Free Cherry Pie Recipe: Easy & Dairy-Free
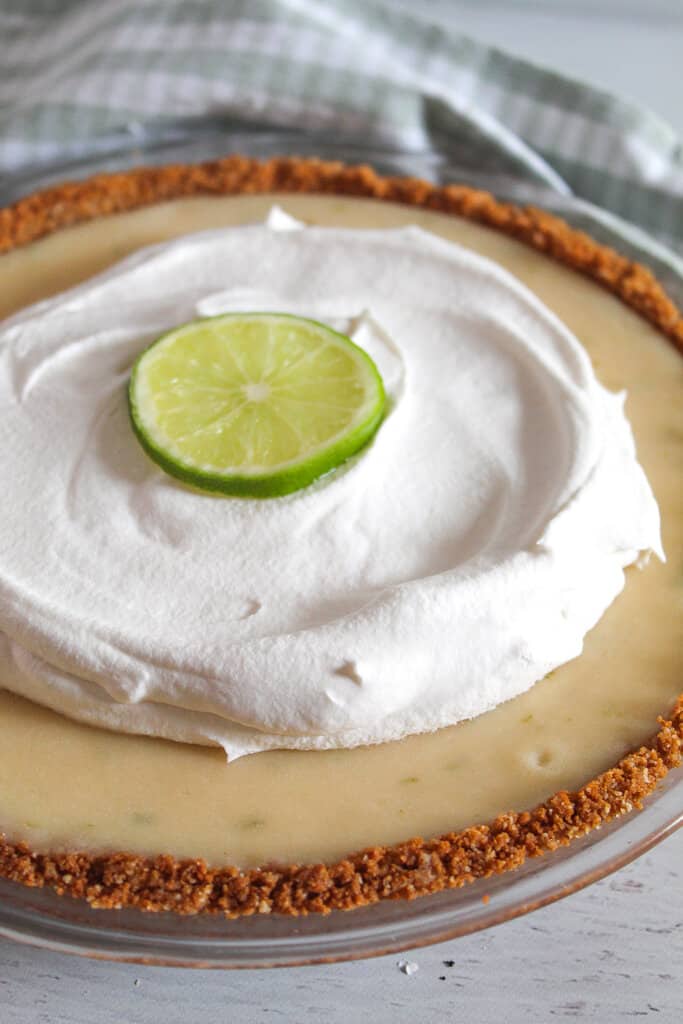
- Easy Gluten-Free Key Lime Pie (Dairy-Free)
- Melt in Your Mouth Gluten-Free Chocolate Pie (Dairy-Free)
- Gluten-Free Apple Pie Recipe with an Easy, Flaky Crust
Whether you’re baking for a holiday, a potluck, or just because pie sounds like a good idea today, these recipes are tried, tested, and well-loved.
Baked it? Thinking about baking it? Either way, tell us in the comments what pie you’re making next. Reader favorites often inspire the next recipe around here.