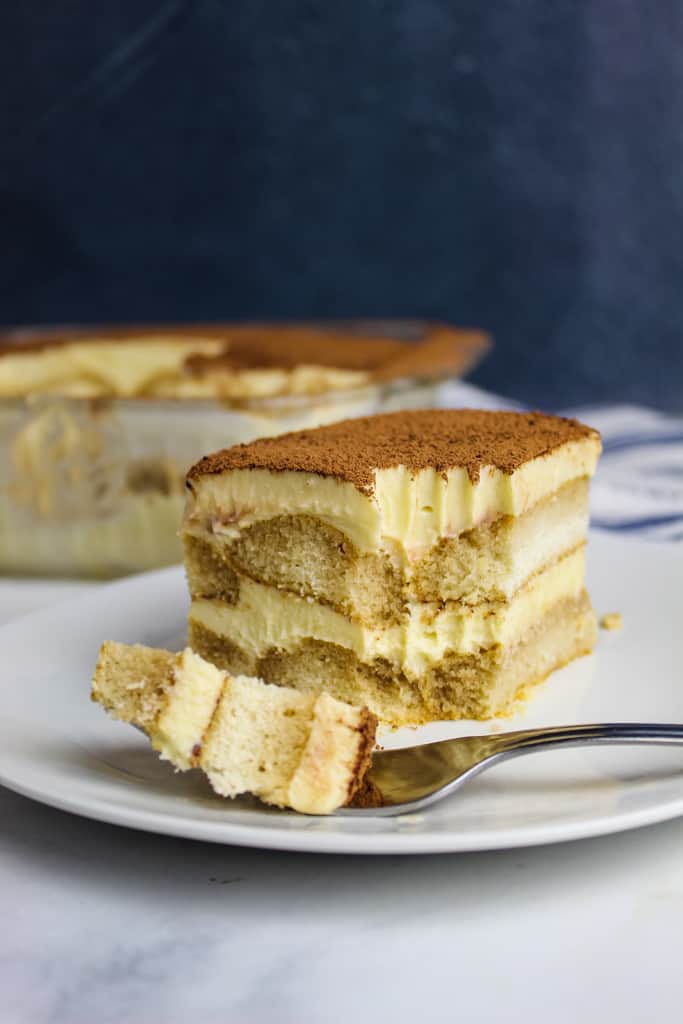
Tiramisu is one of those desserts that feels instantly luxurious, with delicate layers of coffee-soaked ladyfingers, silky cream filling, and a dusting of cocoa that melts into every bite. It’s the ultimate dessert to serve when you want something creamy and decadent that you can make ahead of time.
This gluten-free, dairy-free tiramisu recreates everything people love about the classic Italian dessert. Instead of traditional mascarpone and heavy cream, this recipe uses a combination of dairy-free cream cheese and whipped coconut cream to create a filling that’s unbelievably smooth, light, and creamy. The result is a dessert that’s indulgent, balanced, and surprisingly close to the traditional version, but made entirely without gluten or dairy.
Table of Contents
This recipe is a great option when you’re hosting guests with dietary restrictions. Gluten-free and dairy-free desserts can sometimes feel limiting, but this tiramisu adapts beautifully with a few smart ingredient swaps. Once assembled, most people would never guess it’s made without dairy or wheat.
In the recipe below, I’ll walk you through each step, from whipping the coconut cream to layering the coffee-soaked ladyfingers, so you can create a tiramisu that looks impressive and tastes even better.
What Is Tiramisu?
Tiramisu is one of Italy’s most beloved desserts, known for its delicate layers, rich flavor, and elegant presentation. The name tiramisu literally translates from Italian as “pick me up,” referring to the energizing effect of the strong espresso used to make this dessert, often with a splash of coffee liqueur.
At its core, tiramisu is a layered, no-bake dessert made from three main components:
- Ladyfingers (savoiardi): These are light, crunchy, and airy sponge cookies that easily absorb liquid and soften as they sit in the tiramisu.
- Coffee/Espresso: Used to soak the ladyfingers and give the dessert its signature flavor.
- Mascarpone cream: A rich mixture traditionally made with mascarpone cheese, eggs, and sugar.
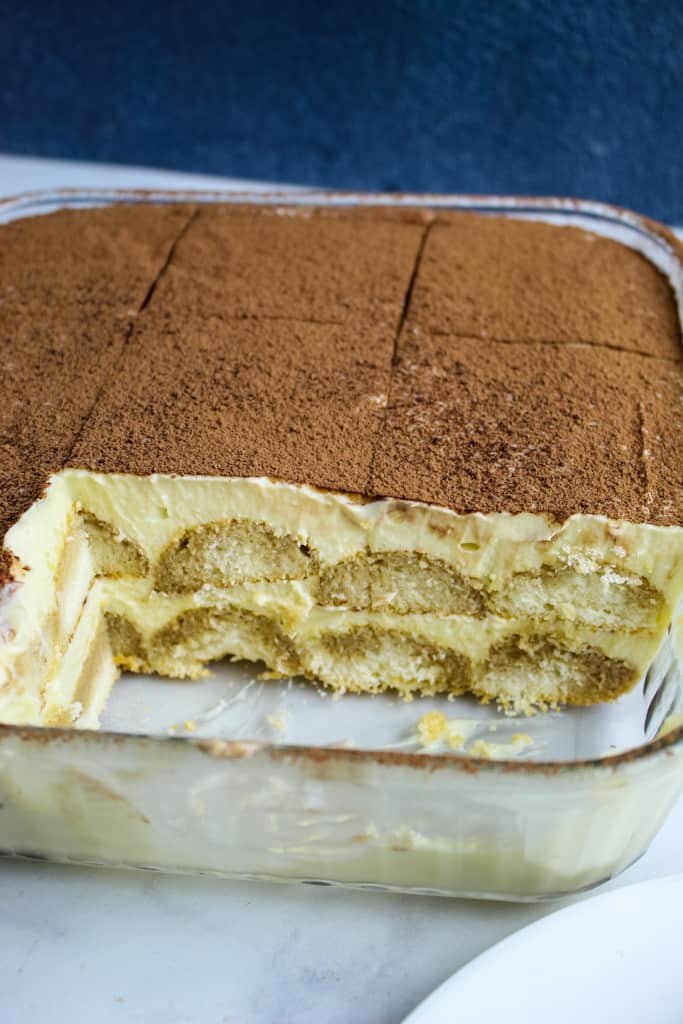
These layers are assembled, then topped with a generous dusting of cocoa powder. After chilling in the fridge, the dessert turns soft and creamy with flavors from every layer blending perfectly.
Why You’ll Love This Recipe
If you love classic tiramisu but need a version that works with gluten-free or dairy-free diets, this recipe delivers all the flavor and elegance of the original dessert without the ingredients that often cause issues. It’s great for so many more reasons, too!
- Tastes like a traditional tiramisu, even with the ingredient swaps!
- Gluten-free AND dairy-free
- Completely no-bake
- Perfect for making ahead
- Looks impressive with minimal effort
- Versatile for gatherings since it suits many dietary needs
Whether you’re making it for a special occasion or just craving something rich and comforting, this recipe brings simplicity, flavor, and elegance in every bite.
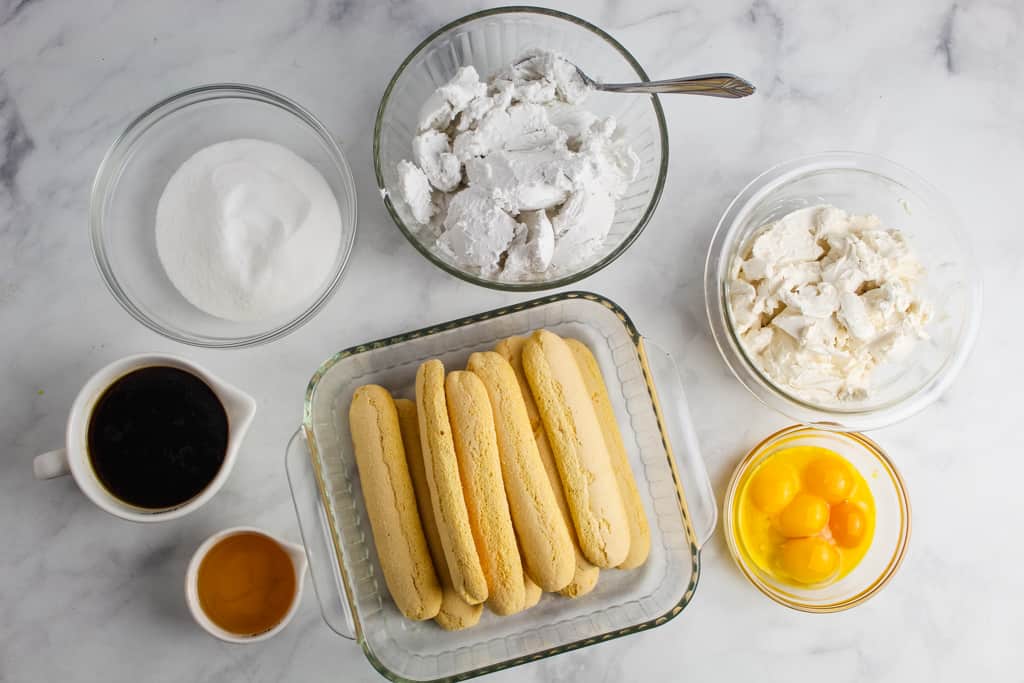
Ingredient Breakdown
What makes tiramisu unique is its balance of textures and flavors. The ladyfingers absorb espresso, becoming tender and sponge-like, while the cream layer provides richness and just the right amount of sweetness. While this gluten-free, dairy-free version swaps a few traditional components, each ingredient plays an important role in achieving the same texture and flavor.
- Granulated Sugar
- Dairy-Free Cream Cheese
- Coconut Cream
- Gluten-Free Ladyfingers
- Egg Yolks
- Coffee/Espresso (strong!)
- Amaretto (optional but delicious!)
- Unsweetened Cocoa Powder
Measurements for each ingredient, along with instructions for making Gluten-Free Tiramisu, are in the printable recipe card below.
Printable Gluten-Free Tiramisu Recipe Card
Ingredients
- 6 egg yolks
- 1 cup granulated sugar (205 grams)
- 16 oz dairy-free cream cheese, room temperature
- 16 oz coconut cream, cold
- 10-15 gluten-free ladyfingers
- ¾ cup espresso or strong coffee, cold
- ¼ cup Amaretto
- unsweetened cocoa powder, for dusting
Instructions
Make the Filling:
- Heat 1 inch of water in the bottom pan of a double boiler to simmering. In the top pan, combine the egg yolks and sugar and place over the simmering pan.
- Keep the heat at a low simmer and cook, stirring the egg yolks and sugar for about 10 minutes. The mixture should turn light yellow and leave a trail from the whisk.
- Remove from the heat and set aside to cool.
- In a large bowl, beat the cream cheese until smooth.
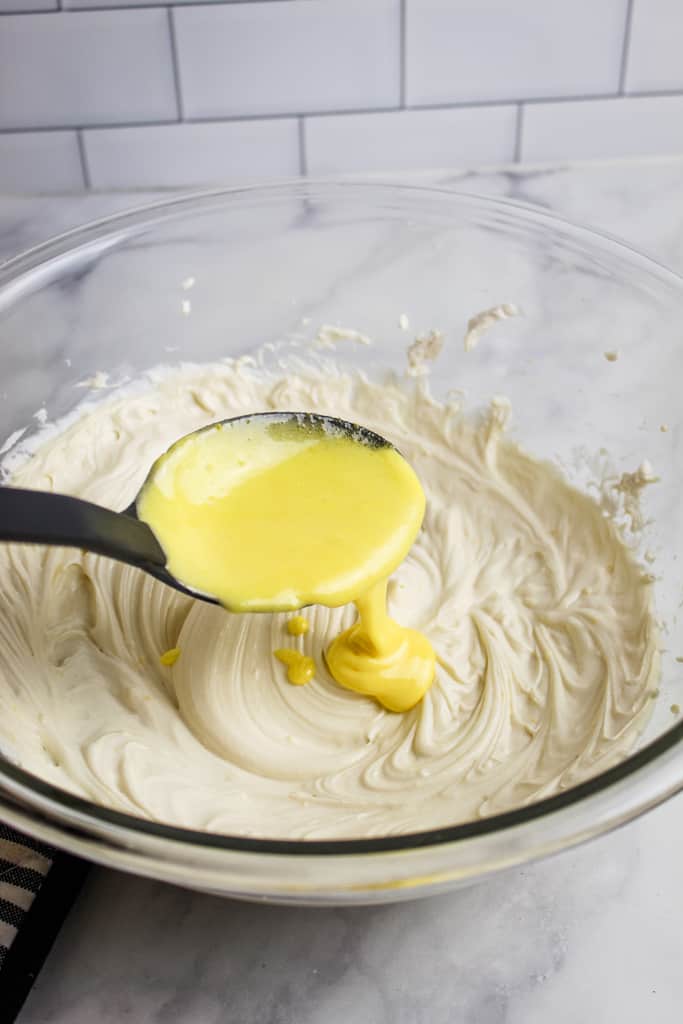
- Add about 1/3 of the egg yolk mixture to the cream cheese and beat until fully mixed.
- Continue adding egg yolk mixture in two more additions, mixing completely after each addition. Set aside.
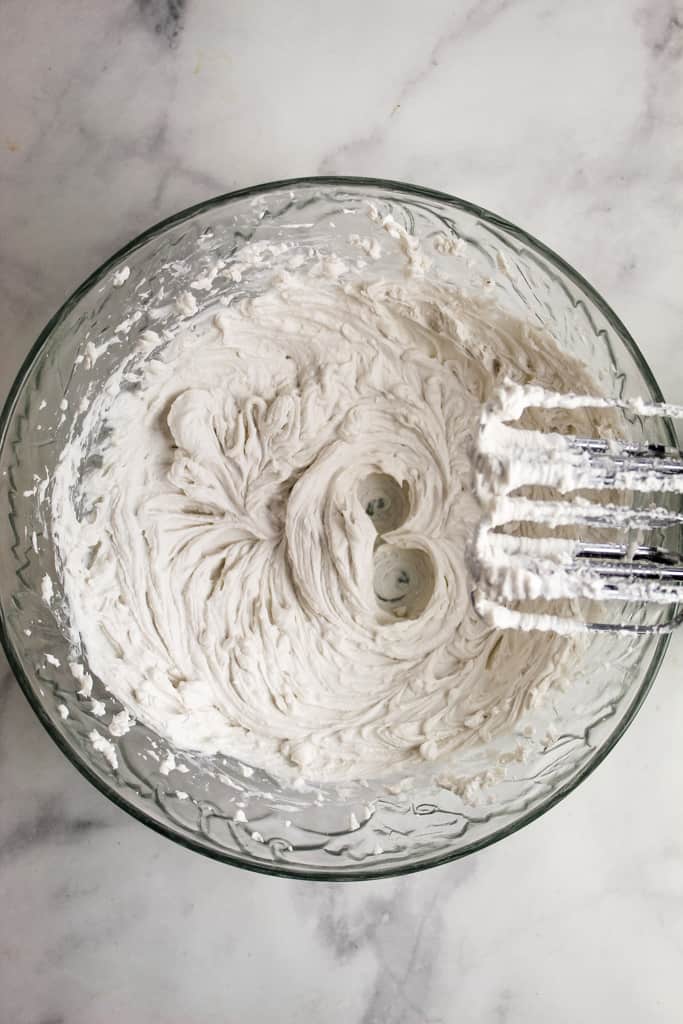
- In a large, deep bowl, add the coconut cream and beat until the mixture is light and fluffy.
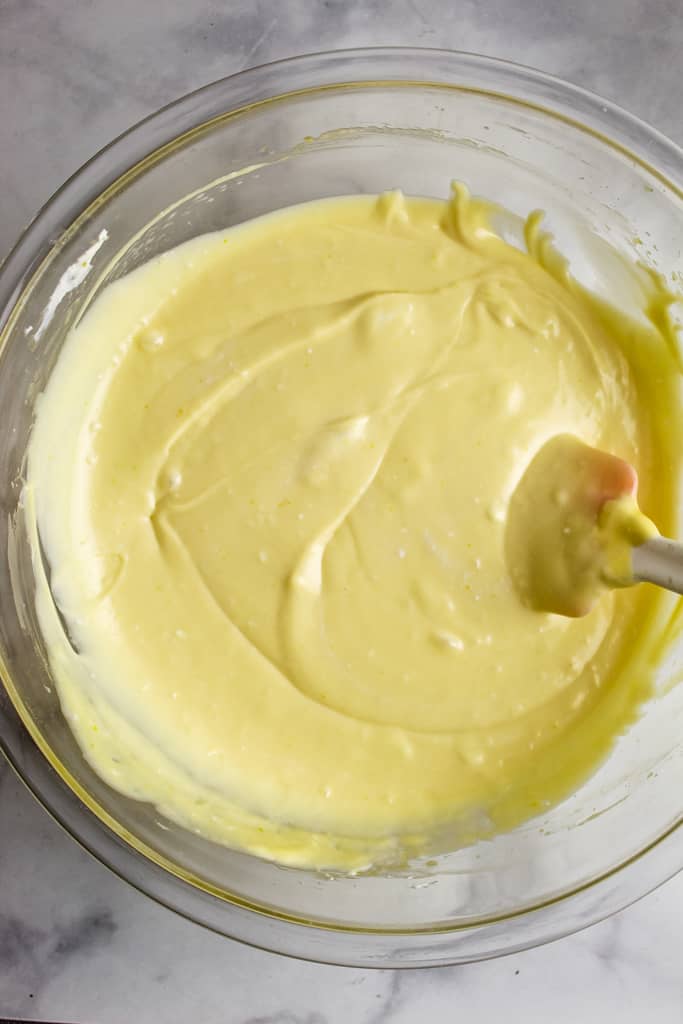
- Add half of the whipped coconut cream to the bowl of cream cheese mixture and gently fold in with a spatula until completely blended.
- Add the remaining half of the whipped coconut cream to the cream cheese and continue folding it in.
Assemble Tiramisu:
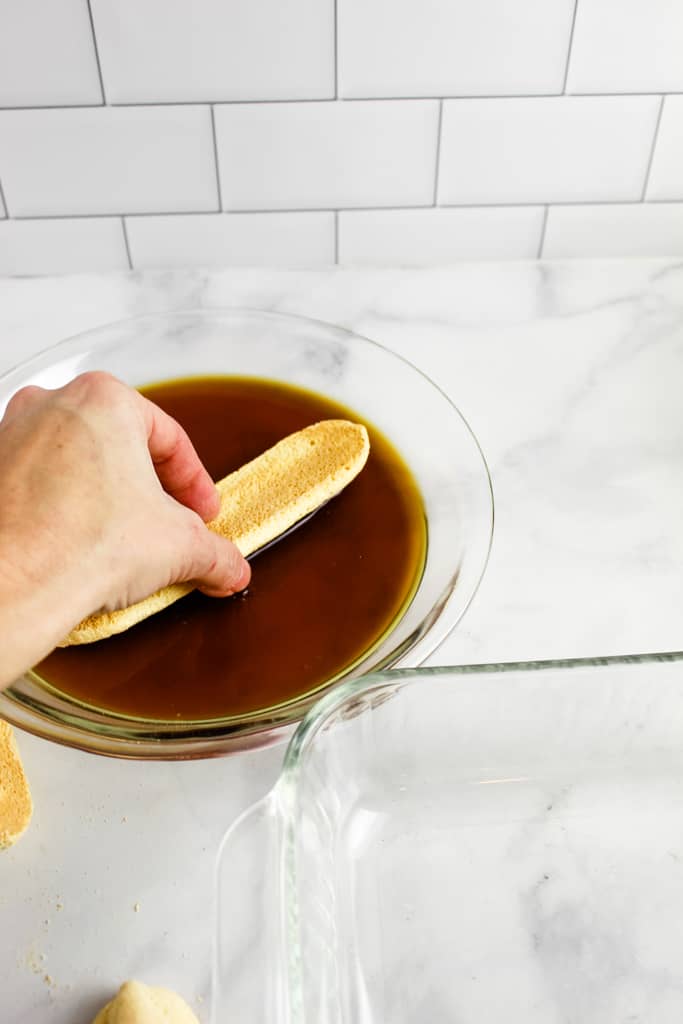
- Mix the coffee and Amaretto in a large, flat dish like a pie plate.
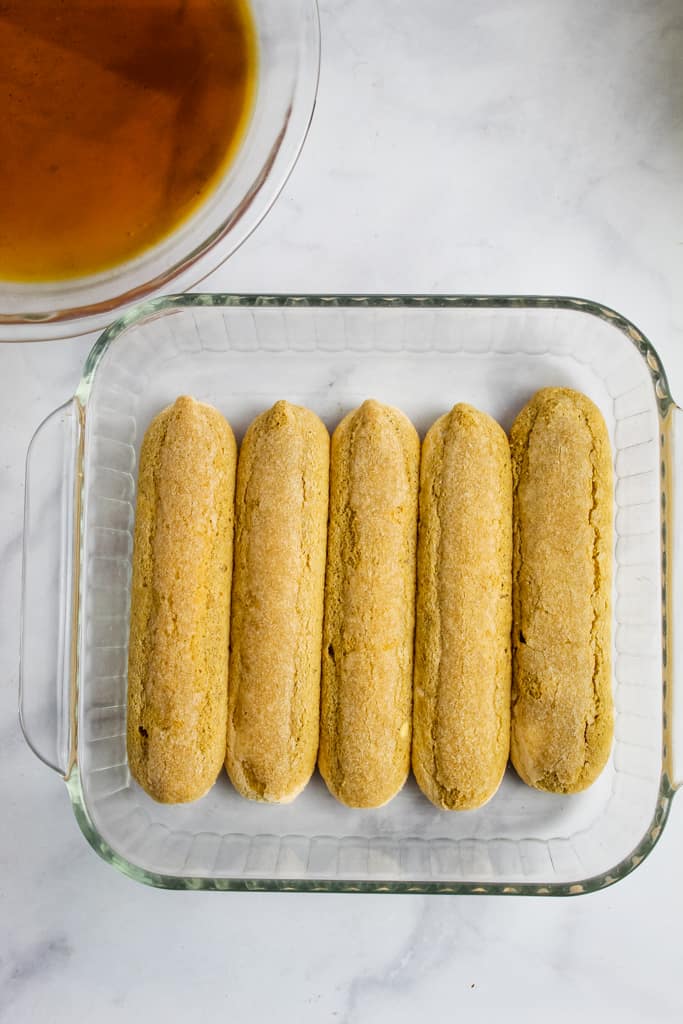
- Quickly dip both sides of the ladyfingers in the coffee mixture. Do not let it sit.
- Repeat with more lady fingers, placing them on the bottom of an 8” x 8” baking dish. Lay them side by side to fill in all the space.
- Top the layer of ladyfingers with half of the cream mixture, gently spreading to reach the sides of the dish.
- Sprinkle generously with cocoa powder.
- Dip the rest of the ladyfingers into the coffee mixture and layer on top of the cocoa powder.
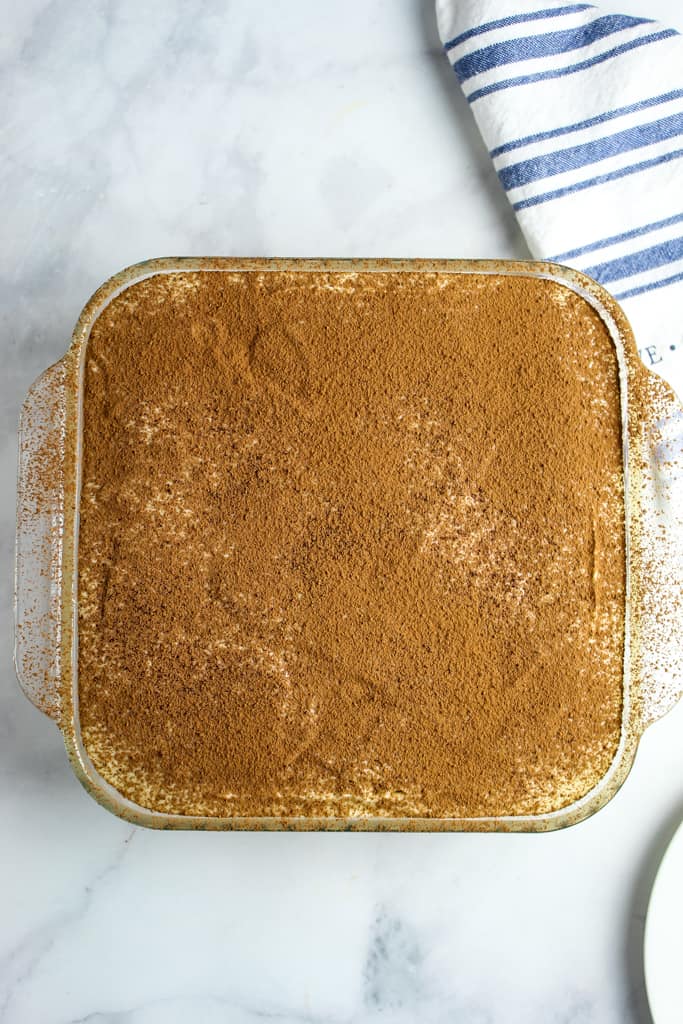
- Spread the last half of the cream gently over the ladyfingers. Top with a generous sprinkling of cocoa powder.
- Cover the dish with foil or a lid and refrigerate at least 6-8 hours, or overnight.
- Slice and serve.
Notes
- If you do not have a double-boiler, place a large heat-proof bowl over the pan of simmering water. Be sure the bowl is not touching the water or you will cook the eggs.
- Two brands of dairy free cream cheese were used in the recipe – Kite Hill and Toffuti. Make sure they are at room temperature before creaming.
- Coconut cream is sold in a can – refrigerate the cans the night before using so the cream is cold. Scrape it out of the can using a spoon.
- Schar ladyfingers were used in the recipe.
- Folding the whipped coconut cream into the cream cheese may take anywhere from 7 – 10 minutes.
- Refrigerate before serving for best results.
Nutrition
Tiramisu Step-by-Step Instructions
These step-by-step instructions include helpful tips and images to guide you through making the best gluten-free, dairy-free tiramisu!
Step 1: Make the Filling
Heat 1 inch of water in the bottom pan of a double boiler until it simmers. In the top pan, combine the 6 egg yolks and 1 cup of sugar. Keep the heat at a low simmer, and cook, stirring the mixture for about 10 minutes. It should turn light yellow and leave a trail when you lift the whisk from the bowl. Remove from the heat and set aside to cool.
Tip: If you do not have a double boiler, place a large heat-proof bowl over a pan of simmering water. Do not let the bowl touch the water, or the eggs will cook!
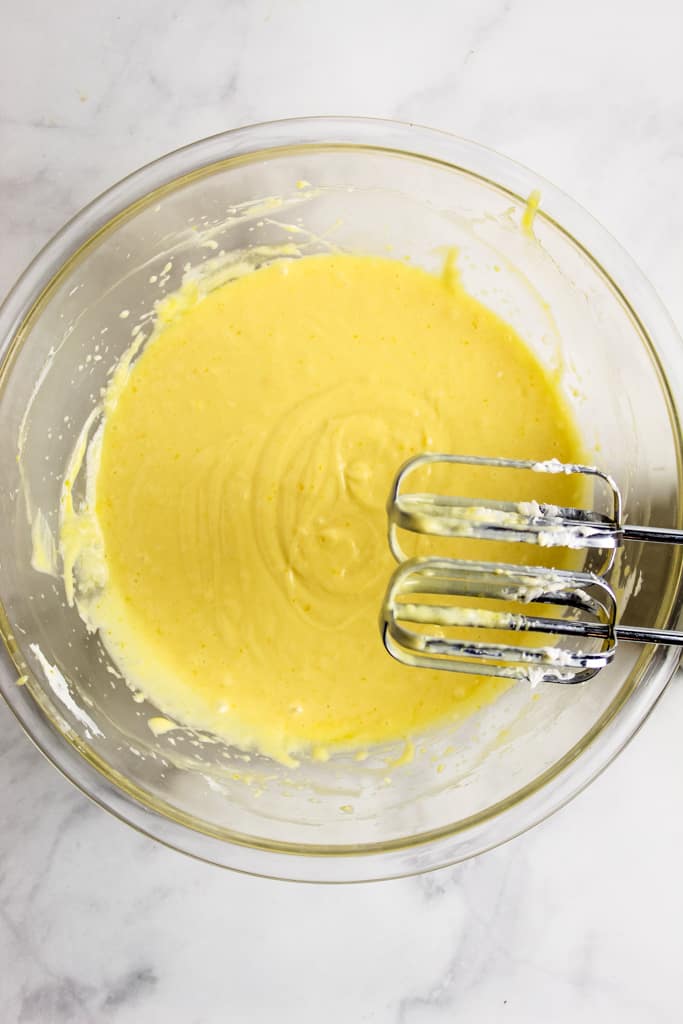
Step 2
In a large bowl, beat the 16 oz. of cream cheese until smooth. Add about 1/3 of the egg yolk mixture to the cream cheese, then beat until fully mixed. Continue adding the egg yolk mixture in 2 more additions, mixing completely after each addition. Set aside.
Step 3
In a large, deep bowl, add the 16 oz. of coconut cream and beat until light and fluffy. Add half of the whipped coconut cream to the cream cheese mixture, then gently fold in with a spatula until completely blended.
Add the remaining half of the whipped coconut cream and continue folding in.
Tip: Do not rush this step; it can take up to 10 minutes to completely fold in the whipped cream. Gently folding it in keeps the texture light and airy.
Step 4: Assemble the Layers
Mix the coffee/espresso and Amaretto in a large, flat dish, such as a pie plate. One at a time, quickly dip both sides of the ladyfingers into the coffee mixture and lay them side by side in the bottom of an 8″x8″ baking dish to fill all the space.
Top the ladyfingers with half of the cream mixture, gently spreading it to reach the sides of the dish. Sprinkle generously with cocoa powder.
Create a second layer: Dip the remaining ladyfingers into the coffee mixture and layer on top of the cocoa. Spread the remaining cream mixture gently over the ladyfingers. Top with a generous sprinkling of cocoa powder.
Tip: Do not let the ladyfingers sit in the coffee as they will start to fall apart.
Step 5: Refrigerate and Enjoy!
Cover the dish with plastic wrap or foil and refrigerate for at least 6-8 hours, or preferably, overnight. Slice and serve!
Expert Tips for Perfect Tiramisu
Making tiramisu is fairly simple, but these small tips help to ensure your tiramisu turns out creamy, balanced, and beautifully layered every time.
Use Strong Coffee
The flavor of tiramisu relies heavily on the coffee layer. Using strong-brewed coffee or espresso ensures the dessert has a rich, bold flavor that stands out against the creamy filling. Weak coffee can make the dessert taste flat.
Chill the Coconut Cream
Cold coconut cream whips much better than warm cream. For the best results, refrigerate the coconut cream overnight before whipping. This allows the thick cream to quickly achieve a fluffy texture when whipped.
Don’t Over-Soak the Ladyfingers
Ladyfingers should be dipped quickly in the coffee mixture, not soaked. A quick dip ensures they absorb enough flavor while still maintaining their structure. If they become too wet, the layers can collapse, and the dessert may turn mushy.
Fold the Cream Gently
When combining the whipped coconut cream with the other ingredients, use gentle folding rather than aggressive stirring. This helps keep the filling light and airy. The video below shows a gentle folding technique to help you achieve that perfect texture.
Allow Enough Chilling Time
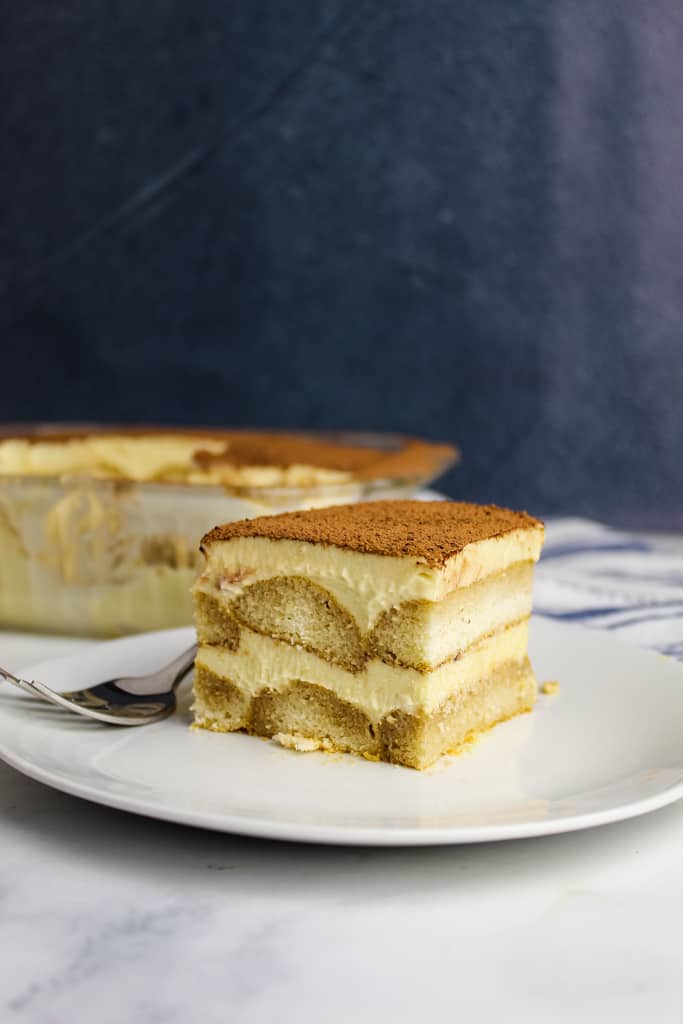
Tiramisu needs time to set properly. Refrigerating it for several hours, ideally overnight, allows the flavors to blend and the layers to firm up, resulting in clean slices.
Variations
One of the best things about tiramisu (aside from its amazing flavor) is that you can experiment with different flavors and ingredients. Save this recipe so you can try out some tiramisu variations the next time you make it!
- Chocolate Tiramisu: Add melted dairy-free chocolate to the cream filling for a richer chocolate flavor.
- Alcohol-Free: Simply omit the coffee liqueur or add a splash of vanilla or rum extract in its place.
- Berry Tiramisu: Replace the coffee soak with berry syrup, then layer in fresh raspberries or strawberries for a fruity twist.
- Individual Tiramisu Cups: Instead of assembling the dessert in a large dish, build small portions in glasses or jars for an elegant presentation at your next dinner party!
These variations allow you to customize the dessert for different occasions and flavor preferences. Have fun with it and be sure to comment with your favorite variation!
Storage & Make-Ahead
One of the best things about tiramisu is that it’s a no-bake dessert, making it perfect for making ahead. In fact, it actually gets better as it chills. As the layers rest in the fridge, the coffee flavor deepens, the ladyfingers soften, and the creamy filling sets into those beautiful sliceable layers. By the time you serve it, every bite has the perfect combination of espresso, sweetness, and cocoa.
Once assembled, cover the dish tightly and refrigerate it. It will stay fresh for 3-4 days, although the texture is usually best within the first two days.
Because tiramisu contains a creamy filling, it should always be kept refrigerated until serving. If you want to make it ahead of time for an event, making it the day before is ideal. Overnight chilling allows the layers to soften and the flavors to blend.
Tiramisu FAQs
Find answers to all your tiramisu questions here! For more questions or comments, be sure to let us know in the comments below.
Can Tiramisu Be Made Without Alcohol?
Many tiramisu recipes omit alcohol entirely and rely solely on espresso for flavor. You can either leave the alcohol out or swap it with a splash of vanilla, almond, or rum extract.
Why Did My Tiramisu Turn Watery?
This can happen if the ladyfingers were soaked too long or if the cream mixture was too thin. Check out the tips section above for ways to get the best texture from your tiramisu. The images in the step-by-step section can also help you compare your recipe side by side with mine.
How Long Does Tiramisu Need to Chill?
For the best texture, chill for 6-8 hours; refrigerating overnight is ideal, to allow the flavors to meld and the layers to set up, for beautiful slices the next day!
Where Can You Buy Gluten-Free Ladyfingers?
The gluten-free ladyfingers used in this recipe are from the Schar brand. They can be purchased on the Schar website or on Amazon. They are larger cookies, and five or six will fit perfectly in the bottom of an 8” x 8” baking dish. The 7.1-ounce package contains 12 cookies, so it’s the perfect amount for this recipe.
Tiramisu: The Greatest Dessert
With its coffee-soaked layers, creamy filling, and light dusting of cocoa, tiramisu has a way of turning an ordinary meal into something special. And with this gluten-free, dairy-free version, you don’t have to miss out on that classic experience just because of dietary restrictions.
By using simple ingredient swaps, this recipe recreates the signature texture and flavor that makes tiramisu so beloved. The result is a dessert that’s just as rich, smooth, and satisfying as the traditional version, but accessible to more people at the table.
One of the things that makes tiramisu so wonderful is how easy it is to prepare. There’s no baking required, the steps are straightforward, and the dessert actually improves as it rests in the refrigerator. That means you can make it ahead of time, let the flavors develop overnight, and serve it when you’re ready with minimal stress.
Whether you’re hosting a special occasion or simply treating yourself to a homemade dessert, tiramisu is always a crowd-pleaser.
Now grab a fork, slice into those beautiful layers, and enjoy every creamy, coffee-infused bite.
More Dessert Recipes!
Looking for more gluten-free and dairy-free desserts that don’t compromise on flavor? Try out some of these recipes below. There are plenty of delicious options to keep your dessert table full.
With so many tasty options, your gluten-free and dairy-free dessert lineup never has to feel limited.
Share Your Tiramisu
If you try this gluten-free, dairy-free tiramisu, I’d love to hear how it turned out for you. Leave a comment below to share your experience, variations you tried, or tips that worked well in your kitchen.