If you’ve ever baked gluten-free sugar cookies and felt that familiar mix of hope and hesitation, you’re not alone. Sugar cookies are supposed to be simple, with soft centers, lightly crisp edges, and a dough that rolls out smooth and holds its shape.
But when gluten is removed, things can go sideways fast. Dough cracks. Cookies spread. The texture turns dry or crumbly. And suddenly, what should be a fun baking project becomes frustrating.
Table of Contents
That’s exactly why this recipe exists.
I set out to create a truly reliable gluten-free sugar cookie, one that behaves and tastes like a classic sugar cookie. Here, you’ll make a dough that rolls out smoothly and cuts into clean shapes. The best part is that even after cooling, you can be sure these cookies will stay soft, tender, and sweet.
This recipe checks all the boxes.
These gluten-free sugar cookies are soft without being cakey, sturdy enough for cut-outs, and forgiving enough for both beginner and experienced bakers. Whether you’re baking a simple batch for everyday treats or planning ahead for holiday baking, this dough works with you, not against you.
Why You’ll Love These Gluten-Free Sugar Cookies
These gluten-free sugar cookies are tender, buttery, and sturdy enough for cut-outs. They are perfect for decorating, gifting, or baking with kids. If you’ve ever struggled with dry or fragile gluten-free dough, this recipe will finally change that.
- Zero frustration: Dough that is soft and rollable for easy use.
- Perfect for cookie cut-outs: Use different cookie cutters to make this dough perfect for Christmas, Valentine’s Day, and every occasion!
- It’s gluten-free and dairy-free!
- Great as drop cookies too: If you just want a sugar cookie and plan to skip the decorating, you can skip the refrigeration too. Scoop tablespoons of cookie dough onto the baking tray, flatten slightly, and bake. Baked this way, they’re similar to my almond flour sugar cookies.
- Fun for kids: From the simplicity of the recipe to tons of ways to decorate, this recipe is a perfect way to spend some fun family time in the kitchen.
Throughout this post, you’ll find plenty of guidance. From choosing a gluten-free flour blend to understanding certain steps like ingredient temperature and dough rest time, which all contribute to the recipe’s success. If you’ve ever wondered why gluten-free cookie dough behaves the way it does, I’ll walk you through it in a practical, approachable way. Read on and let’s get baking!
Ingredients at-a-Glance
Gluten-free sugar cookies that don’t crack, crumble, or spread? Yes, it’s possible! A simple recipe with just 8 ingredients and great results is right here and waiting for you to make it.
This recipe was carefully developed using the right balance of fat, sugar, and gluten-free flour so the cookies stay soft and enjoyable to eat for days (if they last that long!).
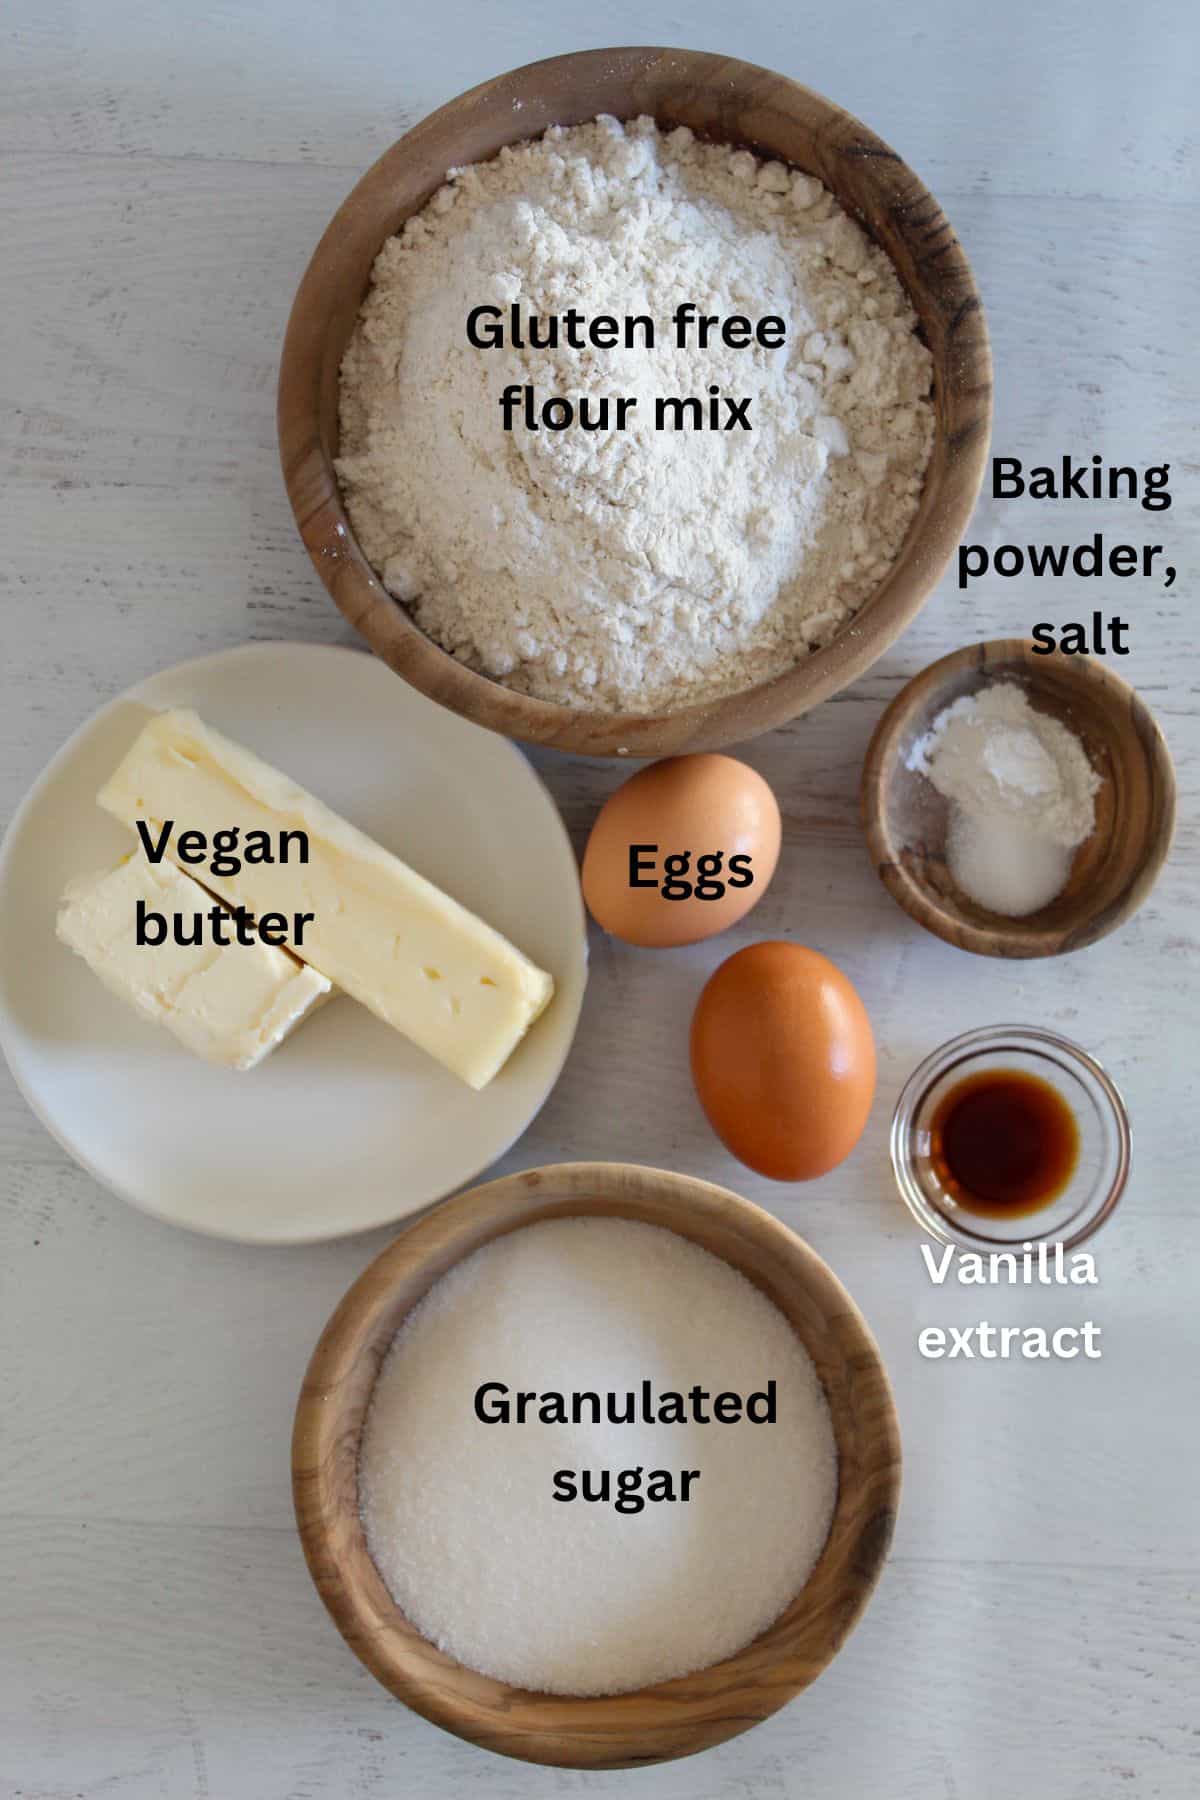
- Gluten-Free Flour Mix: I tested this using my homemade gluten-free flour mix. I prefer homemade because I know what’s in it and know that I’m using clean, additive-free ingredients.
- Xanthan Gum: My gluten-free flour mix does not contain xanthan gum, so this recipe will need 1 teaspoon to help bind the cookie dough ingredients together
- Baking Powder: Make sure yours is gluten-free, as not all baking powder is!
- Salt: A small but essential ingredient that balances sweetness and enhances the buttery flavor of the cookies.
- Granulated Sugar: Sweetens the dough while also helping the cookies hold their shape and develop lightly crisp edges.
- Vegan Butter: Adds richness and structure. Use a good-quality vegan butter that’s suitable for baking for the best results.
- Eggs: Help bind the dough and give the cookies structure and softness.
- Pure Vanilla Extract: This Watkins brand is a great choice for both the quality and the cost!
Measurements for each ingredient, along with steps for making the cookies, are in the recipe card below.
Printable Gluten-Free Cut-Out Sugar Cookies Recipe Card
Ingredients
- 3 cups Zest for Baking gluten-free flour blend (recipe linked in notes) (390 grams)
- 1 tsp xanthan gum (see notes)
- 1 tsp baking powder
- 1/2 tsp salt
- 1 cup granulated sugar (200 grams)
- 3/4 cup vegan butter, room temperature (170 grams)
- 1 tsp pure vanilla extract
- 2 large eggs, room temperature
Instructions
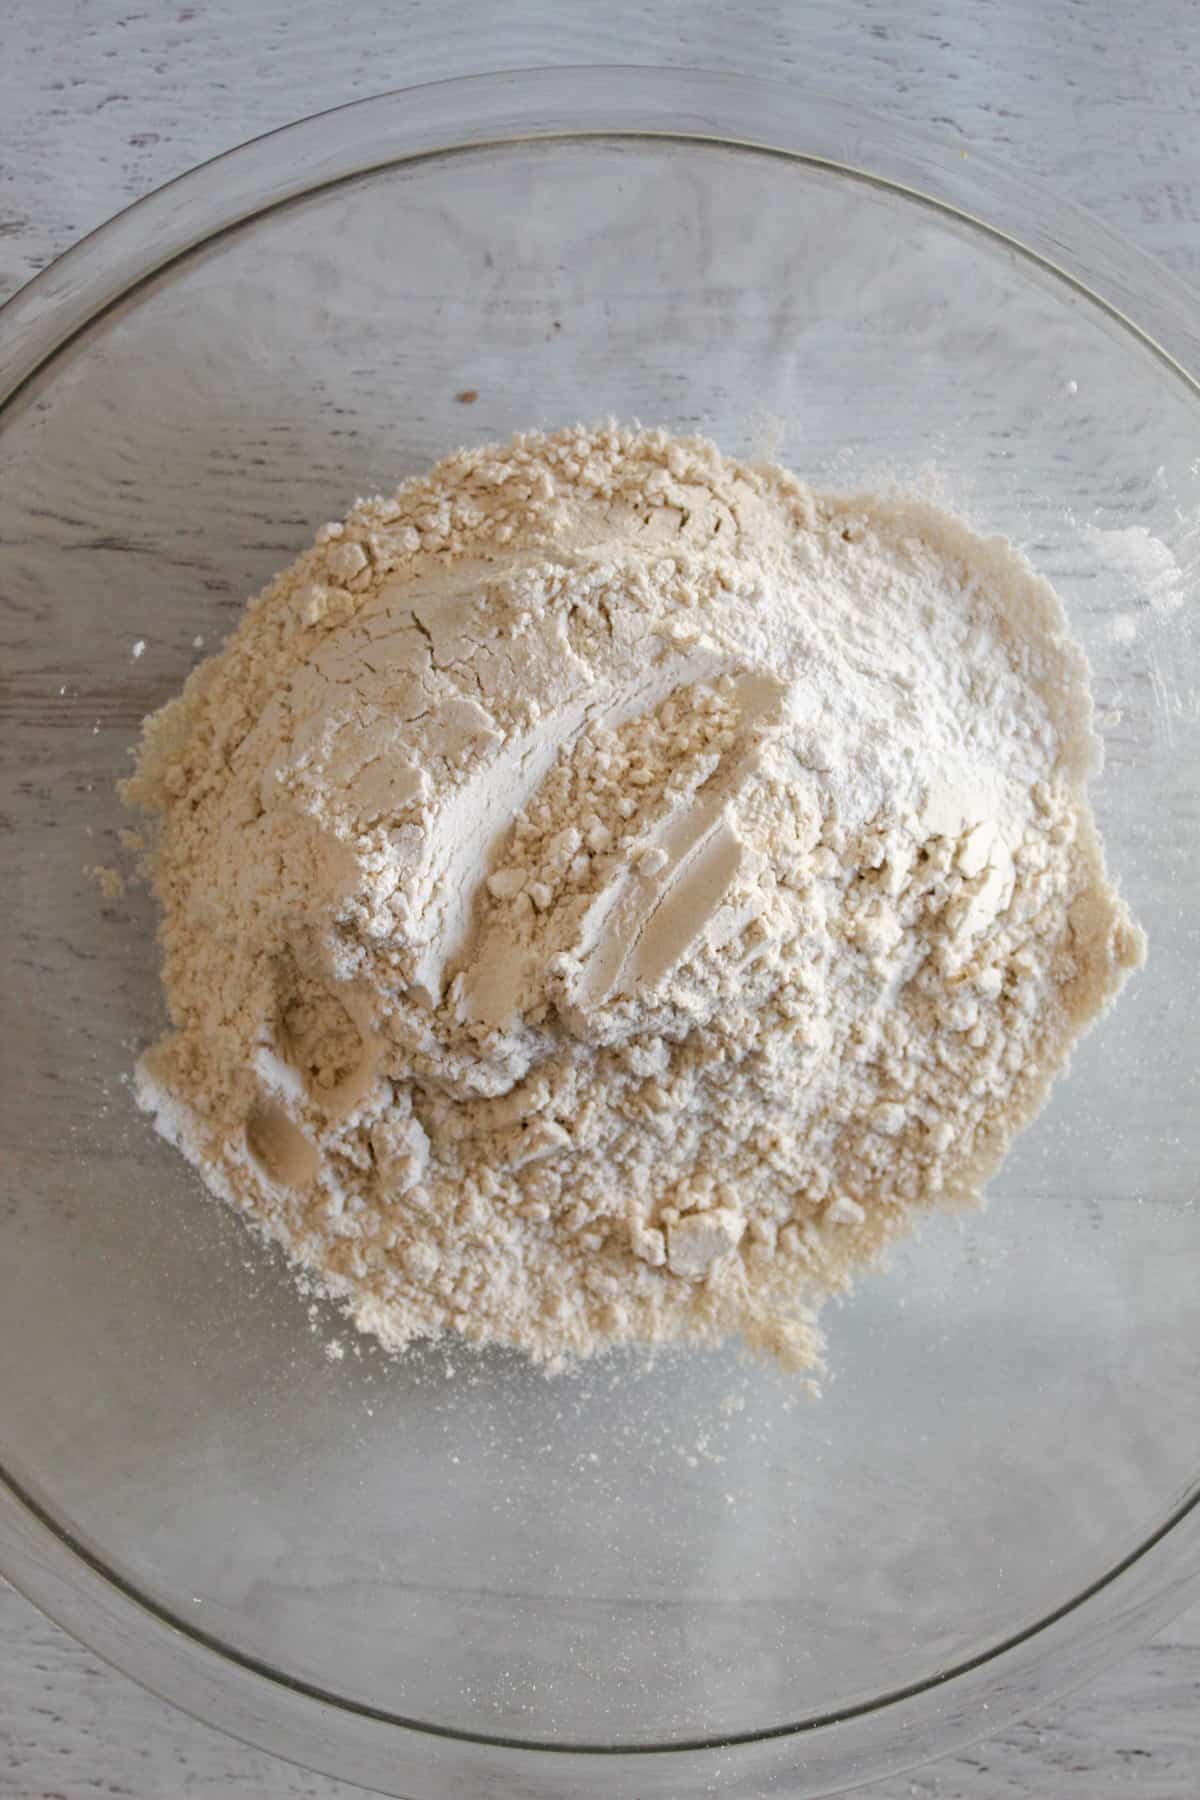
- In a medium bowl, stir together the flour blend, xanthan gum, baking powder, and salt.
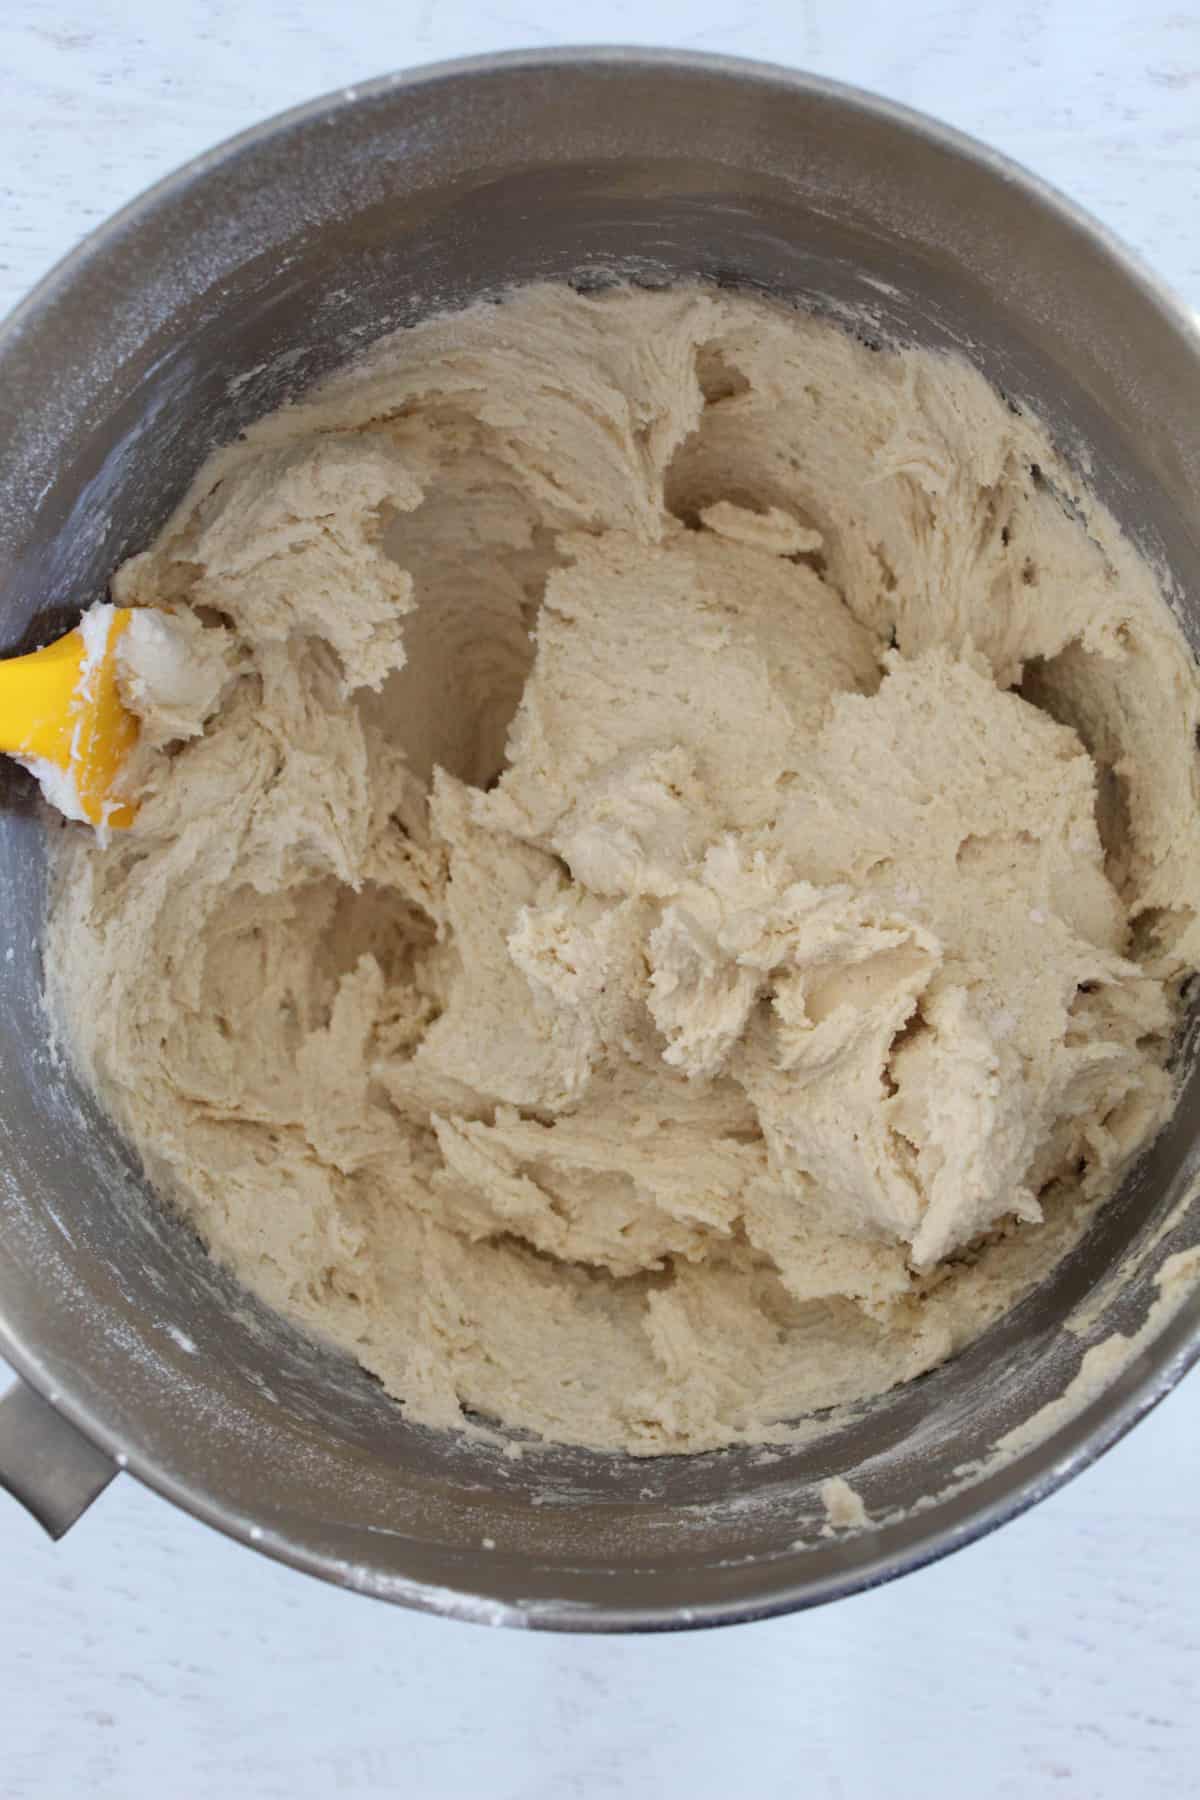
- In the bowl of a stand mixer, on medium-high speed, beat granulated sugar and butter until mixture is creamy. It should be fluffy and lighter in color (about 3-4 minutes).
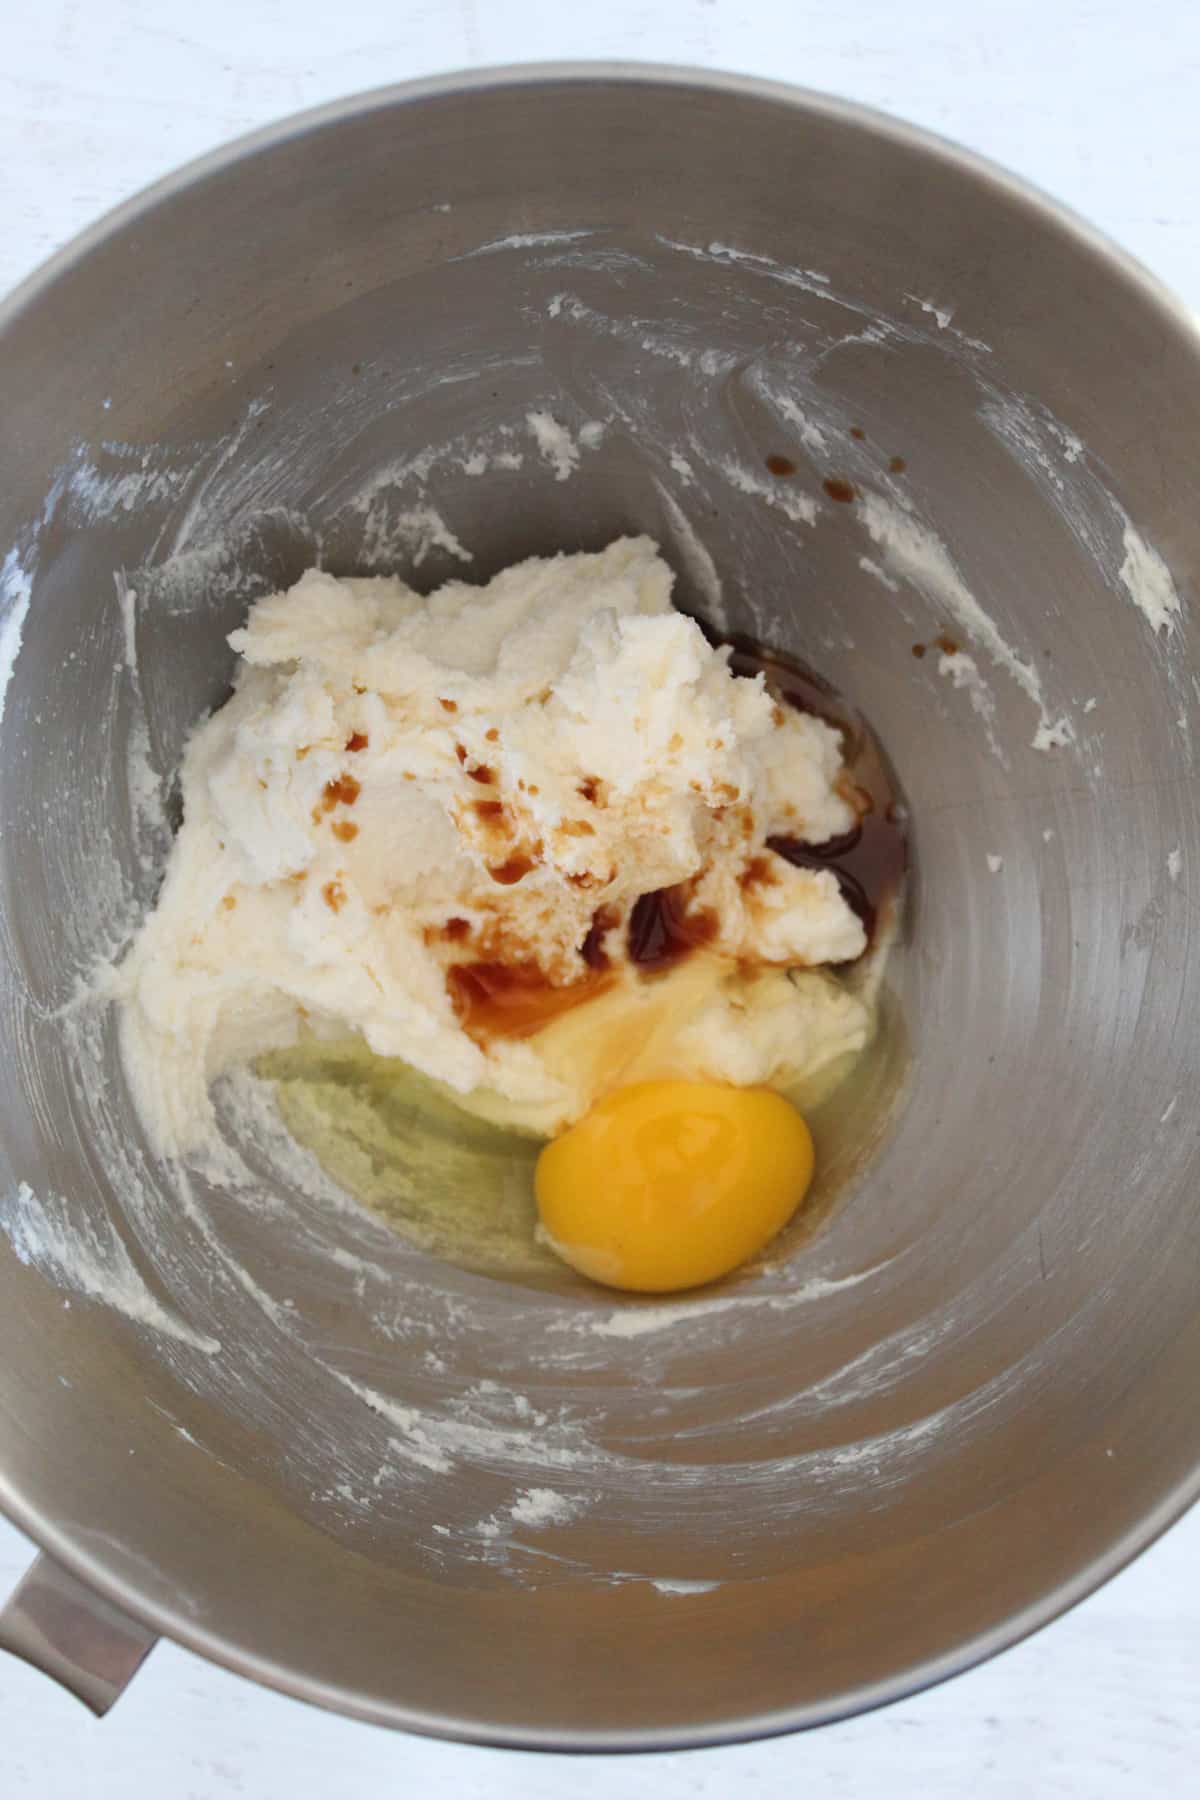
- Add vanilla extract and mix again on low speed for a few seconds. Add the eggs, one at a time, and allow them to fully incorporate. Scrape down the sides of the bowl.
- Add the flour mixture to the mixer. Mix on medium speed just until completely combined; do not overmix.
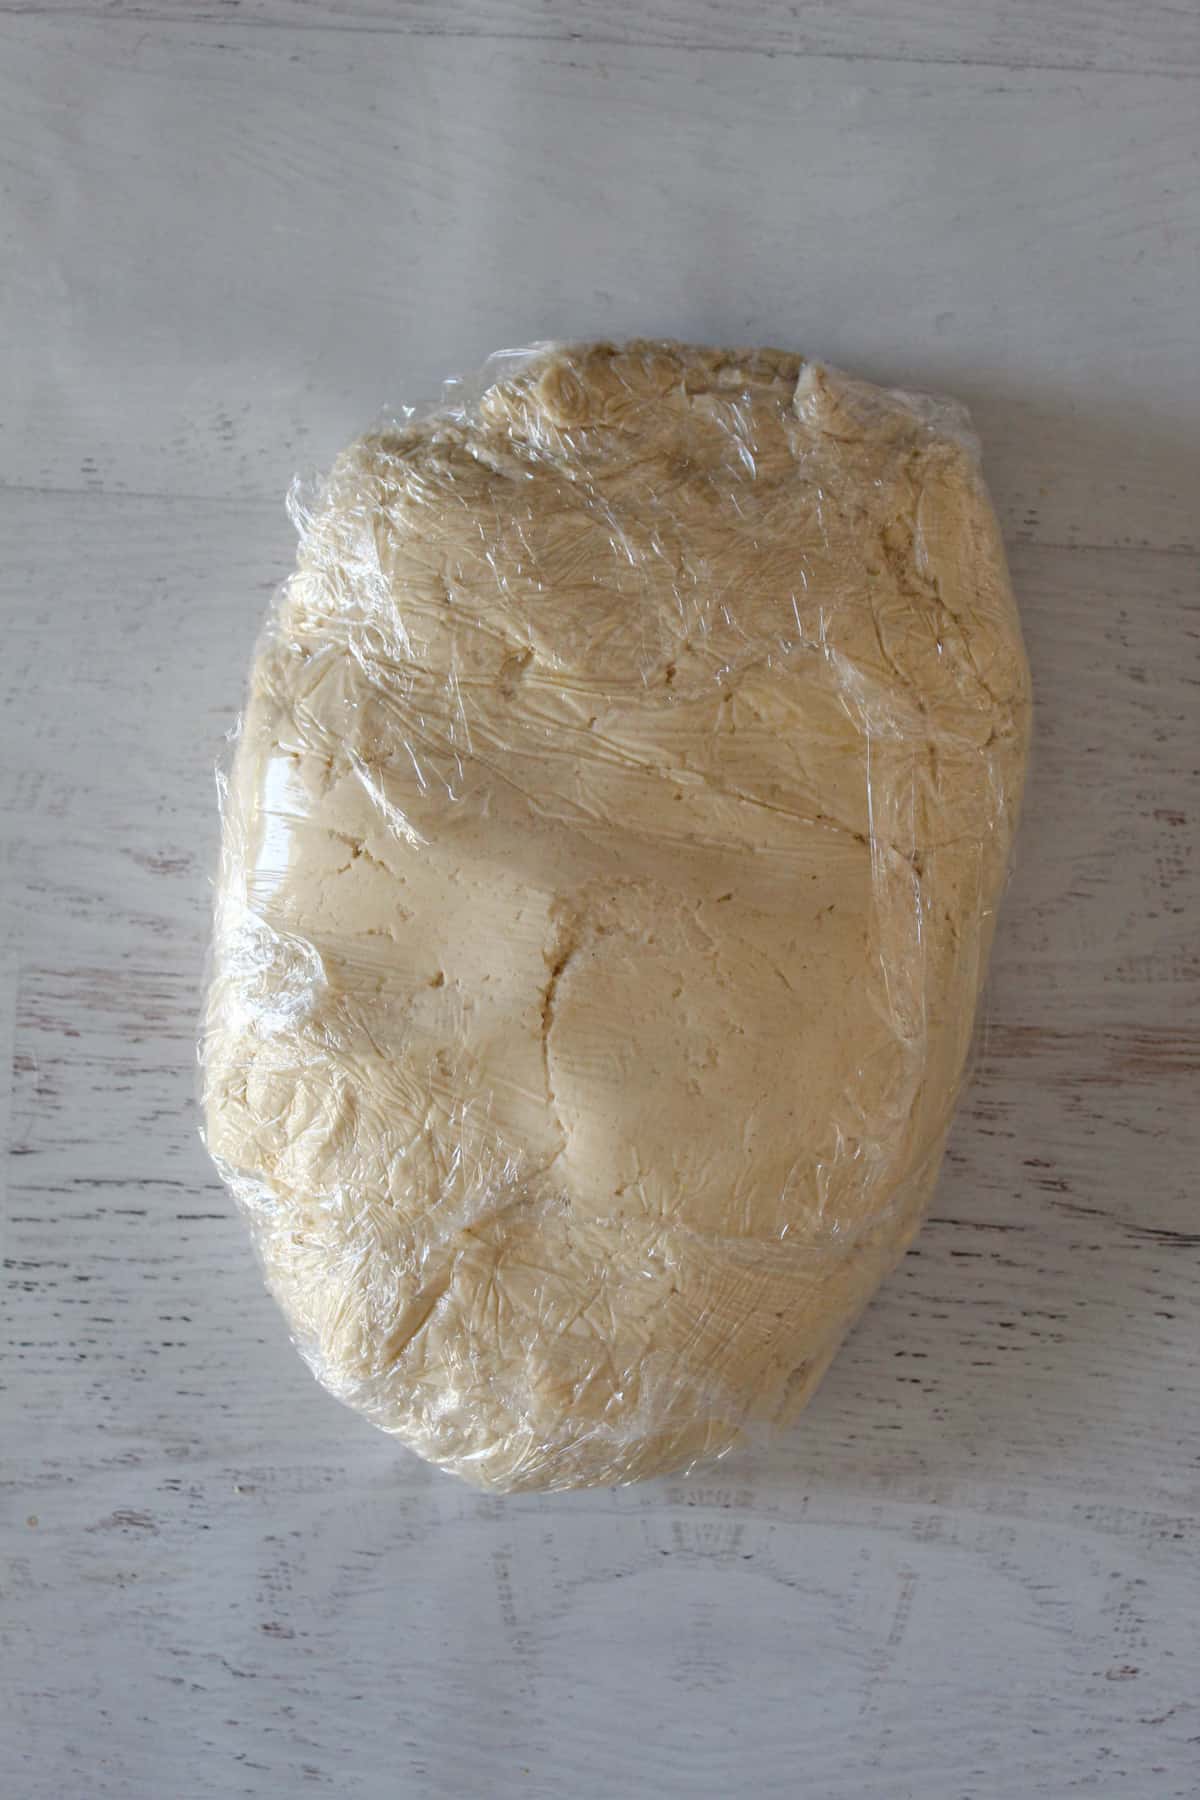
- Wrap ball of dough with plastic wrap and lightly pat it into a disk. Refrigerate for at least 2 hours or overnight.
- Preheat oven to 325°F. Prepare baking sheets with parchment paper.
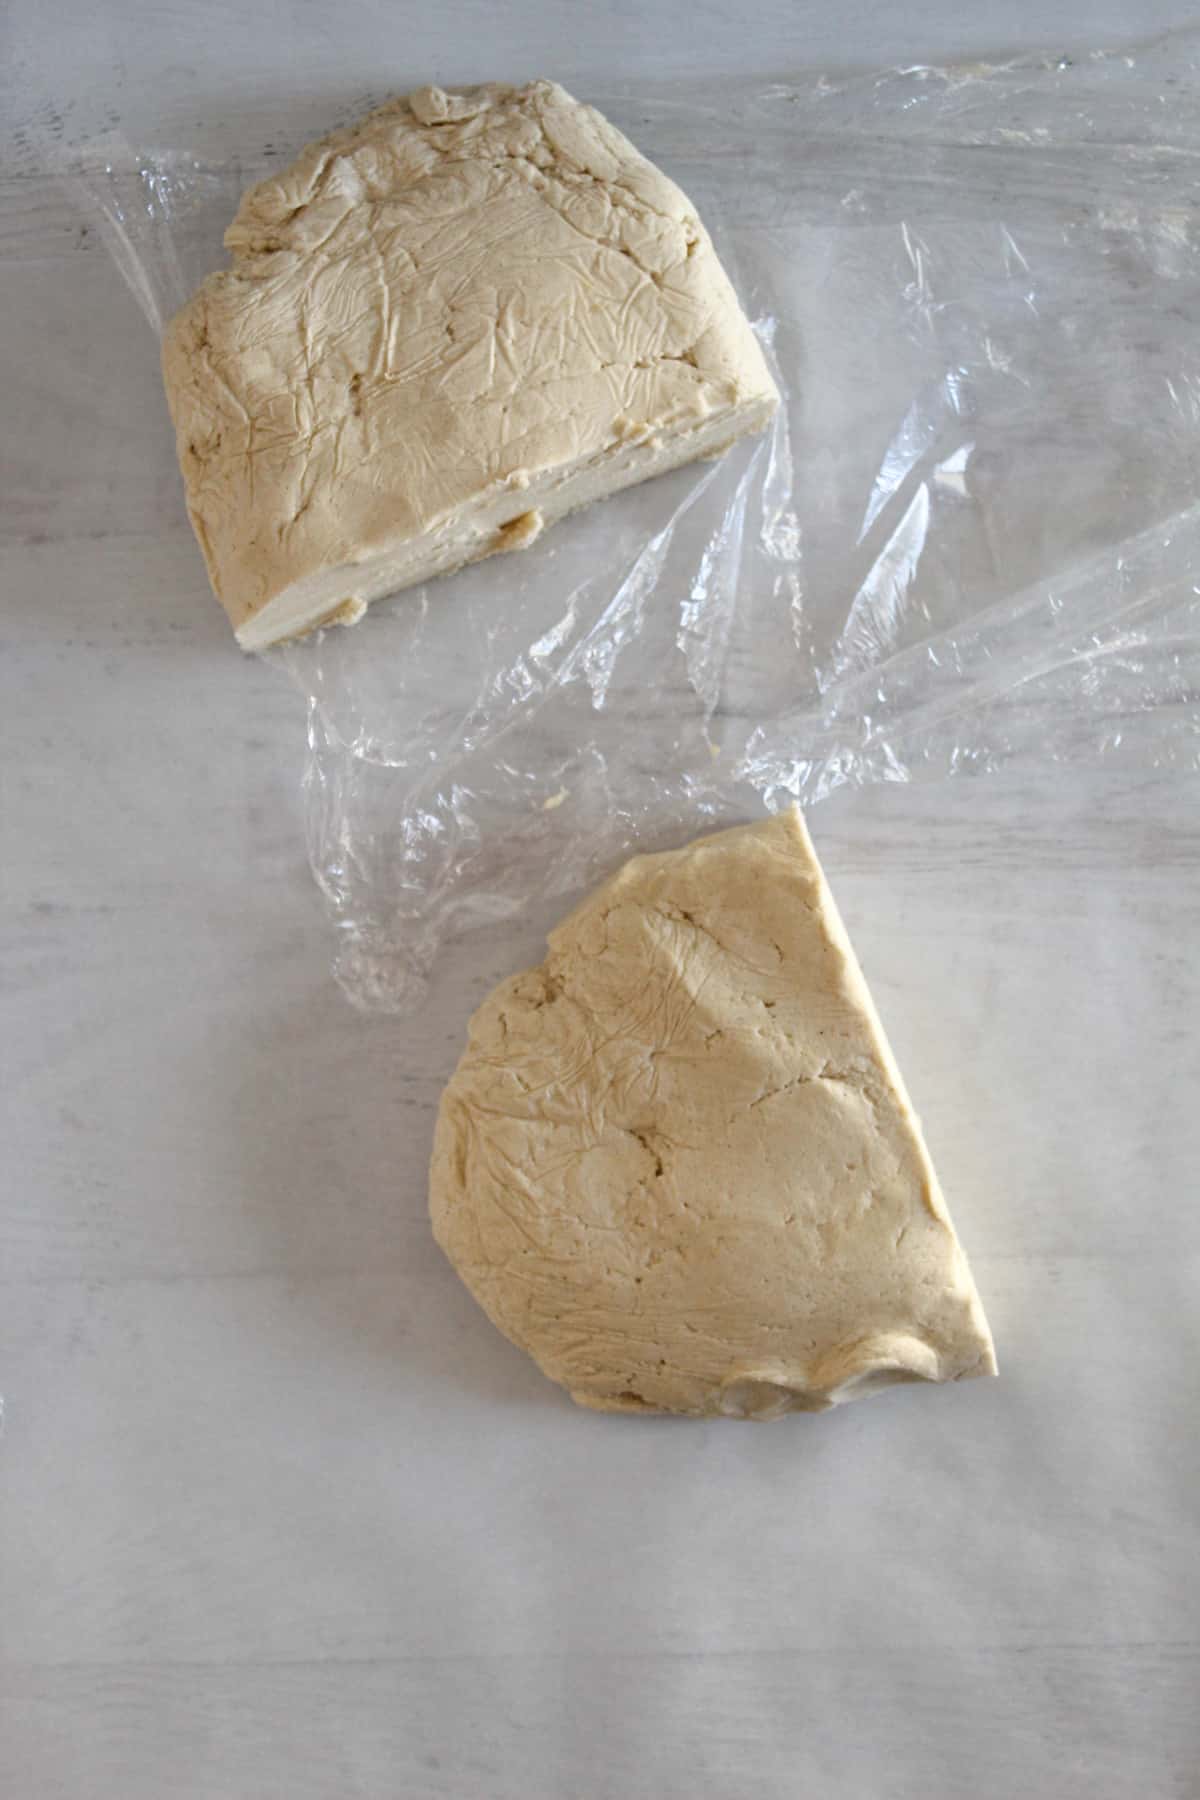
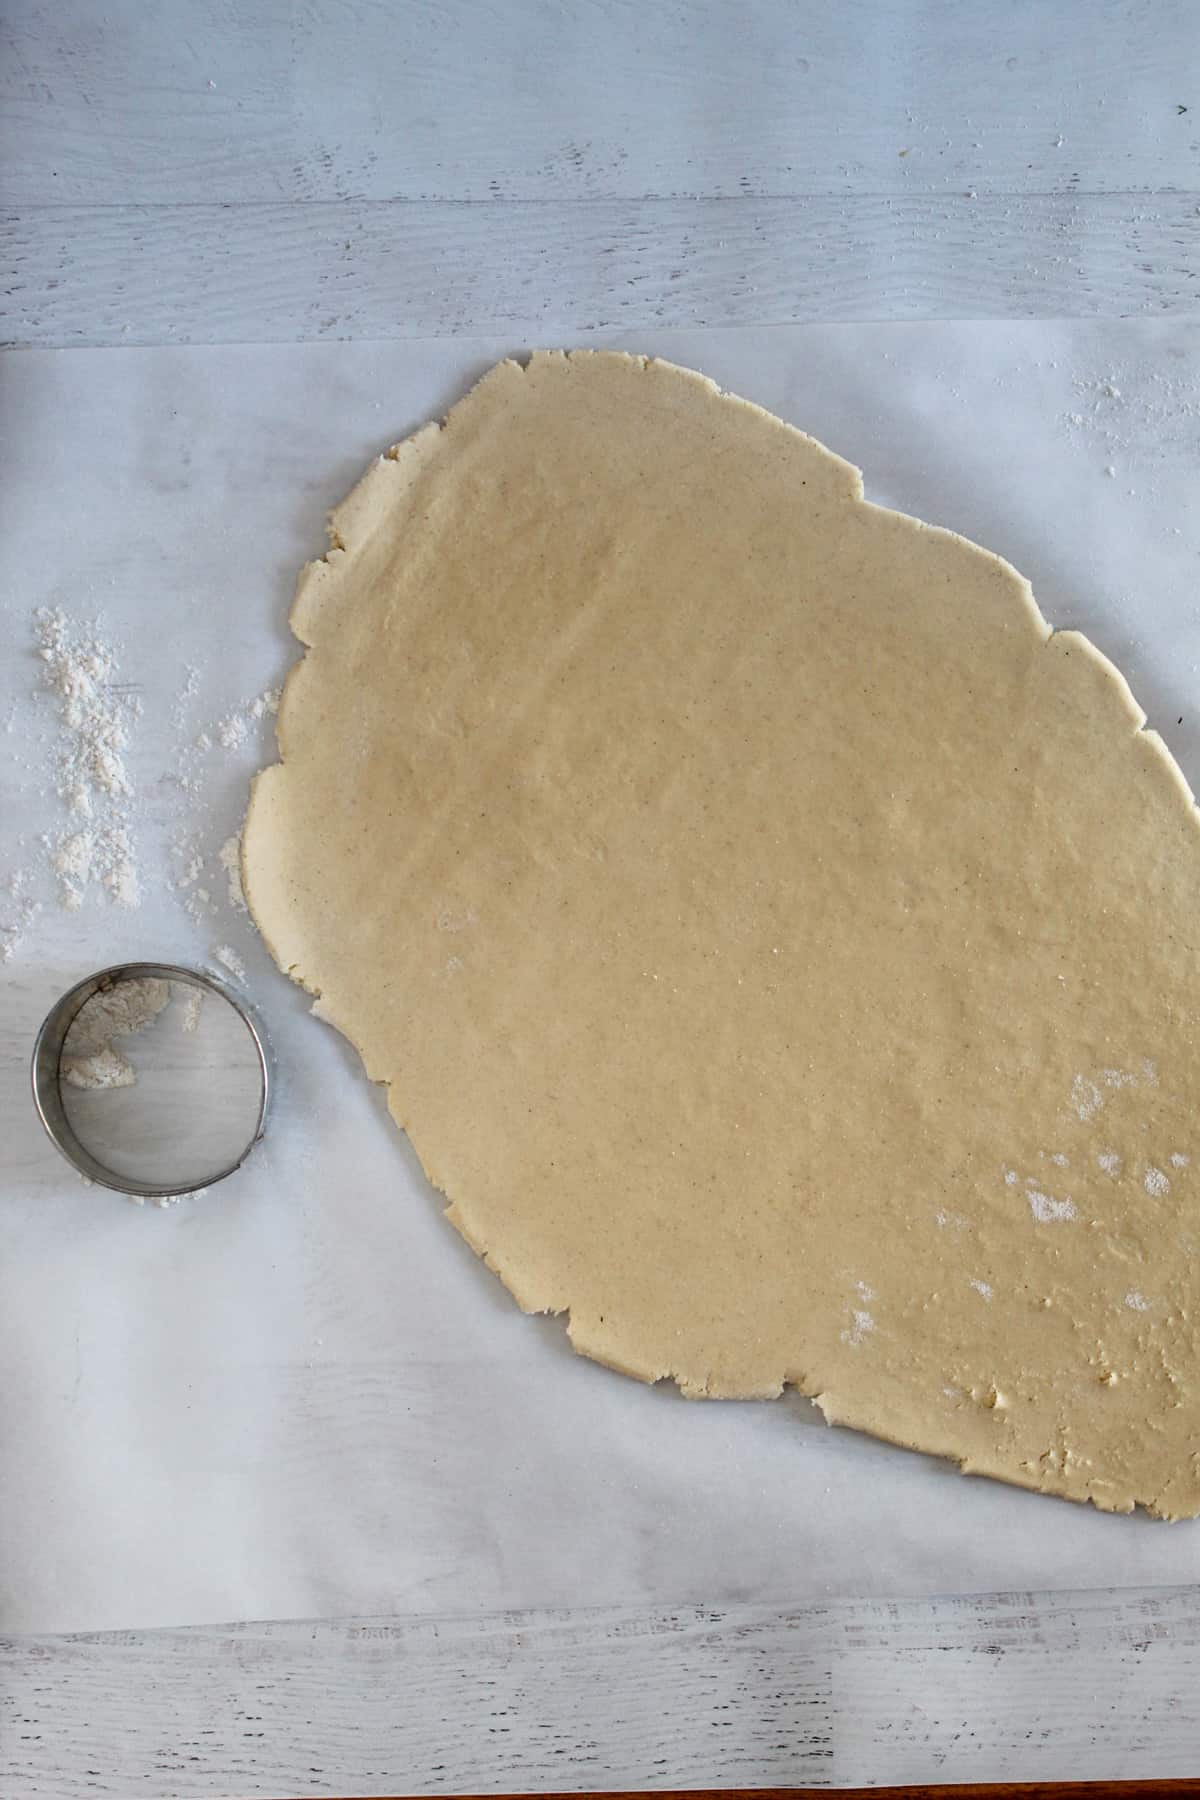
- Remove the dough from the refrigerator and divide it in half. Keep the rest in the fridge while you roll out the first half. Sprinkle the surface lightly with flour blend and roll the dough to ¼ inch thick.
- Cut desired shapes with cookie cutters. Move each cookie to the prepared baking sheets.
- Bake in the preheated oven for about 11-12 minutes. They will not brown. Cool cookies on the baking sheet for 5 minutes before transferring to a wire rack to cool completely.
- Frost using gluten free frosting (recipe linked in notes).
Notes
- Gluten-free flour mix recipe
- If you are using King Arthur flour instead of my homemade flour mix, you should omit the xanthan gum.
- Make sure ingredients are at room temperature.
- Weigh the flour with a digital scale.
- Refrigerate dough for at least 2 hours.
- Roll half the dough at a time. Keep the other half refrigerated.
- When rolling out the dough, sprinkle the counter with a bit of gluten-free flour to prevent the dough from sticking.
- Bake the cookies for the indicated time – they will not get brown.
- Frost with the gluten-free buttercream frosting.
Nutrition
Did you make and love this recipe? Give it your review and rating below! And make sure to follow me on Instagram, Pinterest, and Facebook , too!
Best Gluten-Free Flour for Sugar Cookies (Tested & Approved)
With countless new products always coming up on market shelves, it is important to know what you are looking for and also what you are looking at! There are many different types of gluten-free flours, as well as gluten-free products. Understand how to read labels so you can safely choose products to use in your gluten-free baking.
For this recipe, I prefer to use my homemade gluten-free flour mix for a few reasons:
- I know exactly what ingredients I am putting into it.
- It contains no additives.
- I only use certified gluten-free products in my kitchen, so I can always be certain it is 100% gluten-free.
I always suggest making a large batch of my flour mix to always have on hand for your gluten-free baking. But I know, life happens. Sometimes you don’t have enough for the recipe you want to make, or you simply don’t have the time to put a batch together. When that happens, all you want is a quick visit to the grocery store so you can carry on with your baking.
For this, I suggest King Arthur 1:1 Gluten-Free Flour. This recipe has been tested with both my gluten-free flour mix and this King Arthur flour. Both flour mixes work very well in this recipe.
Note: If you are using the Zest for Baking gluten-free flour mix, follow the recipe as written, adding 1 teaspoon of xanthan gum to the dry ingredients. Since this mix does not contain xanthan gum, it is needed to act as a binder and hold the cookie dough together.
If you are using the King Arthur 1:1 Flour Mix, use it as-is. You do not need to add xanthan gum as it is already in the mix.
Step-by-Step: How to Make Gluten-Free Cut-Out Sugar Cookies
Making these gluten-free sugar cookies is easy as pie (I mean, easy as cookies). Following along with these simple steps and pictures to help you understand what to look for makes this even easier. With some tips and notes along the way, this step-by-step recipe is sure to bring you lots of success and tasty treats!
Step 1
In a medium bowl, stir together the flour mix, xanthan gum, baking powder, and salt.
Note: If using King Arthur 1:1 flour, do not add xanthan gum to the recipe. Only use it if you are using my gluten-free flour blend recipe
Step 2
In the bowl of a stand mixer, on medium-high speed, beat the sugar and butter until the mixture is light and fluffy (about 3-4 minutes).
Step 3
Add the vanilla extract to the bowl and mix on low speed to incorporate. Add the eggs, one at a time, and mix until fully incorporated. You may need to scrape down the bowl to help the eggs mix in well.
Scrape down the sides and bottom of the bowl before moving on to the next step.
Step 4
Add the dry ingredients to the mixer. Mix on medium-low speed, just until it is combined. Do not overmix.
Step 5
Wrap the ball of dough in plastic wrap and gently pat it down into a disk shape. Refrigerate for at least 2 hours or overnight.
Step 6
Preheat the oven to 325ºF. Line baking sheets with parchment paper. Remove the dough from the fridge and divide it in half. Keep one half in the fridge to keep it cold while you roll out the other half.
Tip: If the dough is very cold and stiff, let it rest on the counter for about 5 minutes before you try to roll it out.
Step 7
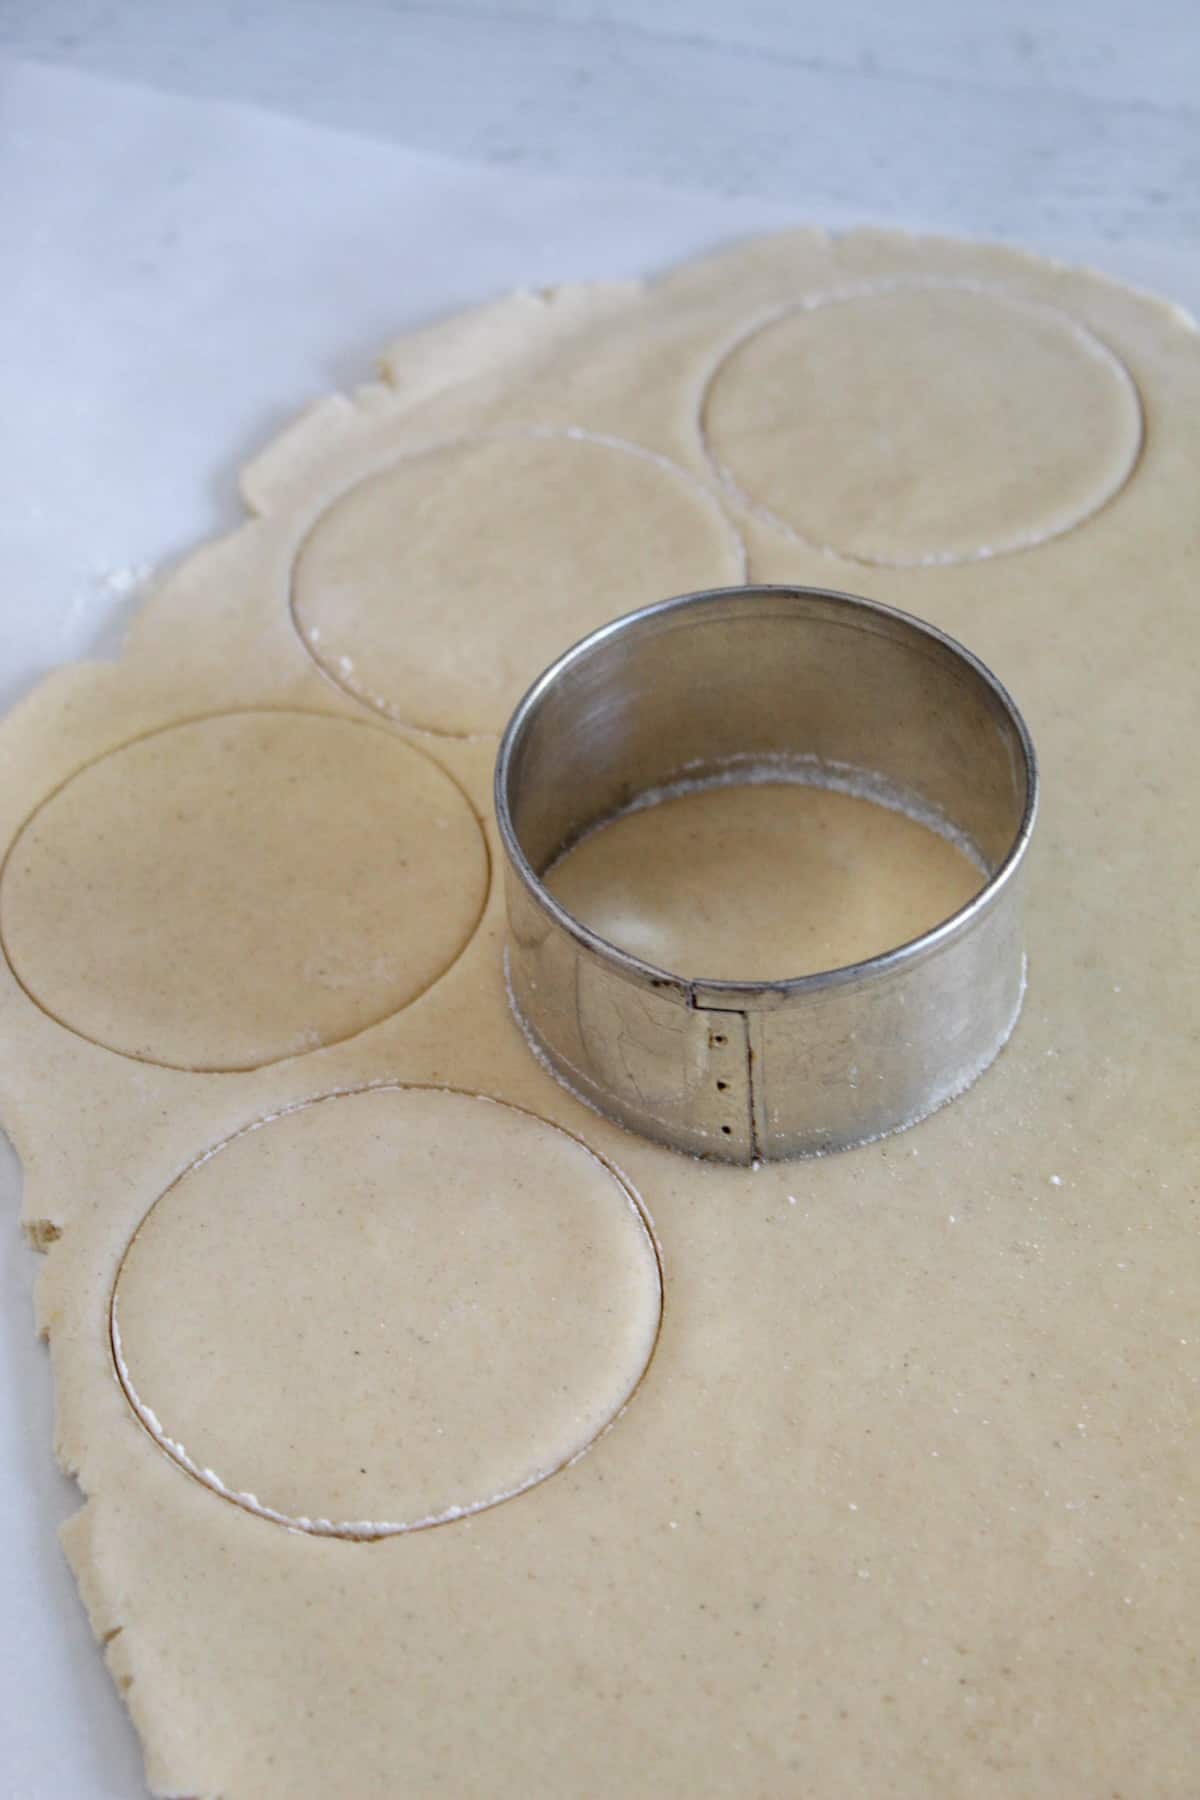
Sprinkle your counter with a bit of gluten-free flour to keep the dough from sticking. Roll the dough out to 1/2″-1/4″ thick.
Note: Do not roll out thinner than 1/4″. The cookies will be too thin and will burn and crisp in the oven.
Step 8
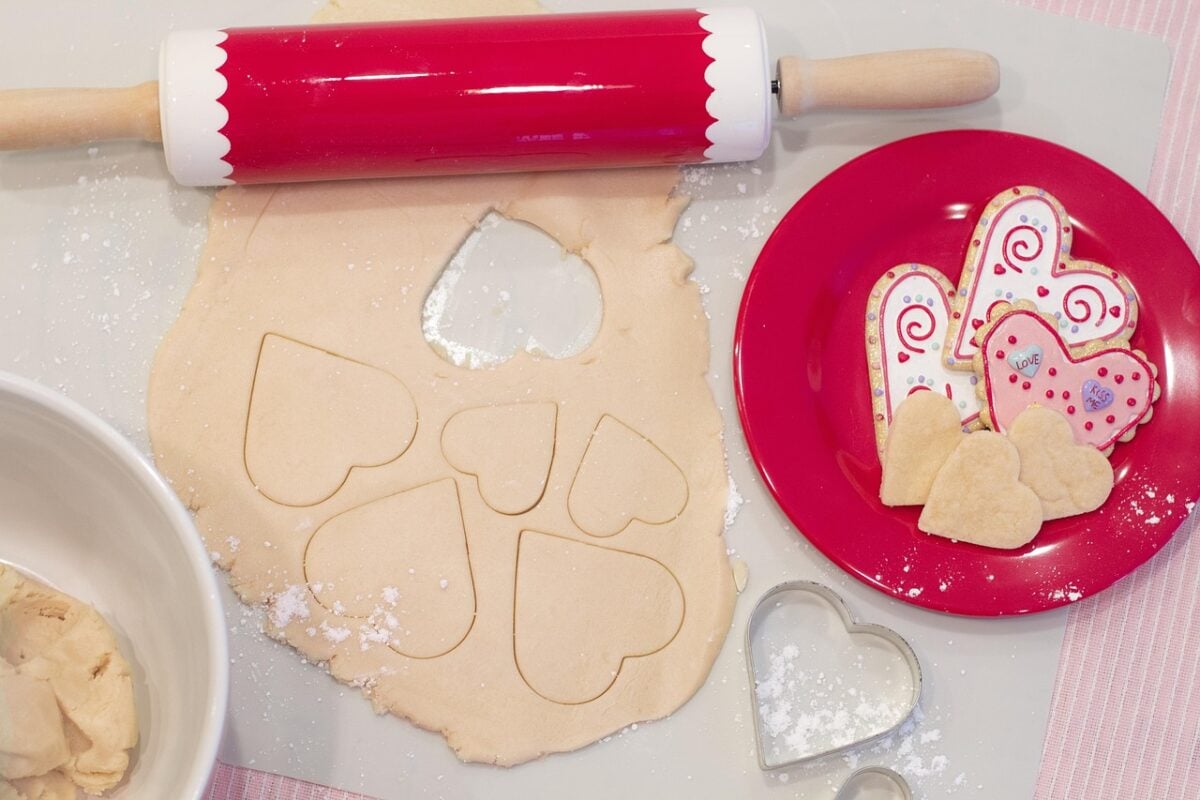
Cut desired shapes out with cookie cutters. Move each cookie to the prepared baking sheets.
Tip: Dip the cookie cutters in flour before cutting out each cookie to keep them from sticking to the dough.
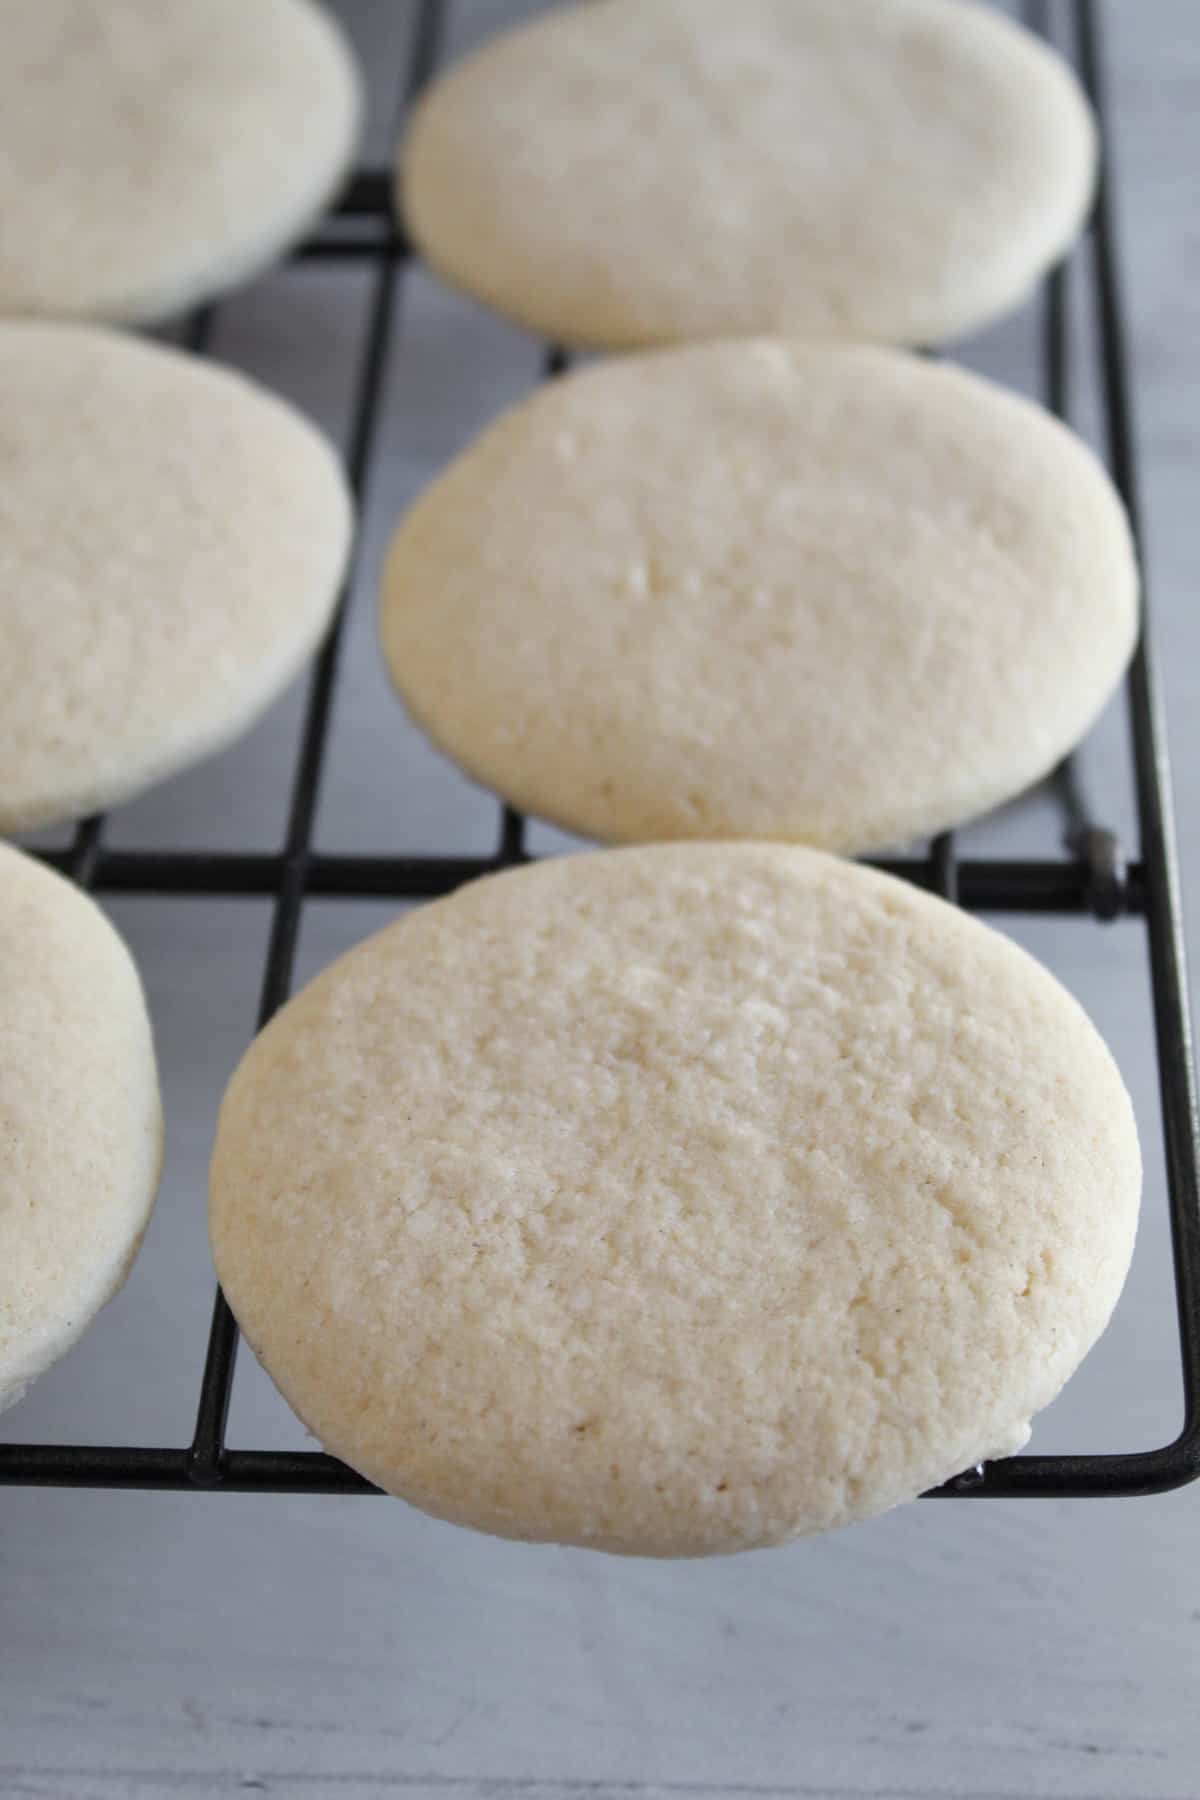
Step 9
Bake in the preheated oven for 11-12 minutes. The cookies should not brown. Cool them on the baking sheet for about 5 minutes before transferring them to a wire rack. Allow the cookies to cool completely before frosting and decorating.
Ingredient Substitutions & Allergy-Friendly Options
Whether it’s for health reasons, lifestyle reasons, or just because you want to use what’s already on hand at home, these substitution recommendations will help you to adapt this recipe based on your needs.
Flour
I’ve tested this recipe out with two types of flour: my gluten-free flour mix and King Arthur 1:1 Flour. Both options work great! I would not recommend substituting with a single flour like almond flour or rice flour, as the recipe was not developed with just a single flour.
Xanthan Gum
Xanthan gum is needed in this recipe (and many gluten-free recipes) for its binding properties. It works to help dough hold its shape and to keep ingredients from separating. If you’d like to try out a xanthan gum substitute, there are many options that I talk more about in this article.
Butter
If you are not following a strict dairy-free or vegan diet, feel free to substitute the dairy-free butter used in this recipe for regular butter.
Egg
For an egg-free sugar cookie, I would recommend the substitutes listed in this egg substitutes article. This vegan egg replacer from Bob’s Red Mill is a great gluten-free substitute as well!
Pro Tips for Perfect Gluten-Free Sugar Cookies
These simple but important tips make all the difference when working with gluten-free cookie dough. Follow them closely to achieve cookies that roll smoothly, hold their shape, and bake up soft every time.
Use Room Temperature Ingredients
Allow the ingredients about 30 minutes to sit at room temperature to warm up. Cold ingredients like eggs and butter are much harder to blend into recipes and can make for a poorly mixed dough.
Extra Tip: If you forgot to take your eggs out of the fridge ahead of time, place them in a bowl of warm water for about 5 minutes. This will quickly bring them up to temperature, and you can move along with the recipe!
Measure by Weight
A rule that many bakers live by: use a scale! Most people don’t know it, but when we measure using cups, we often mismeasure without knowing it. Weighing your ingredients is the most accurate way to ensure recipe success. Check out this article for some great tips on how to measure gluten-free flour.
The recipe card for these gluten-free sugar cookies has measurements listed in both cups and grams. But it’s worth a small purchase to simplify your baking by adding a digital kitchen scale to your toolkit!
Refrigeration Time
Don’t skip the fridge! For the best results with these sugar cookies, wrap the cookie dough in plastic wrap and refrigerate for at least 2 hours, or overnight. This will help the cookies to keep their shape when you bake them, which is especially helpful for cookies with cut-out shapes!
The dough should be firm when you remove it from the refrigerator, but not too cold and stiff to roll out. Letting it sit at room temperature for about 5 minutes before you roll out the dough can make it much easier to work with!
Note: If you don’t plan on decorating these cookies or are short on time, you can do simple, undecorated drop sugar cookies and skip the refrigeration. After mixing the dough, scoop tablespoon-sized balls of dough onto the baking sheet and lightly flatten the cookies. Bake as written in the recipe above.
Rolling out the Cookie Dough
Even though this cookie dough is easy to work with, a simple tip to avoid any frustrations is to flour your work surface. Sprinkle a bit of flour onto your counter or a piece of parchment paper before rolling out the cookie dough on it.
Use a rolling pin to roll out the cookie dough to about 1/2-1/4″ thickness. Do not roll thinner than 1/4″ or your cookies will be thin, crispy, and may burn in the oven. We’re looking for soft and tender sugar cookies!
For a great kitchen assistant, try this rolling pin with adjustable thickness rings. It helps you with accuracy and leaves you with peace of mind that your cookies are just the right size every time!
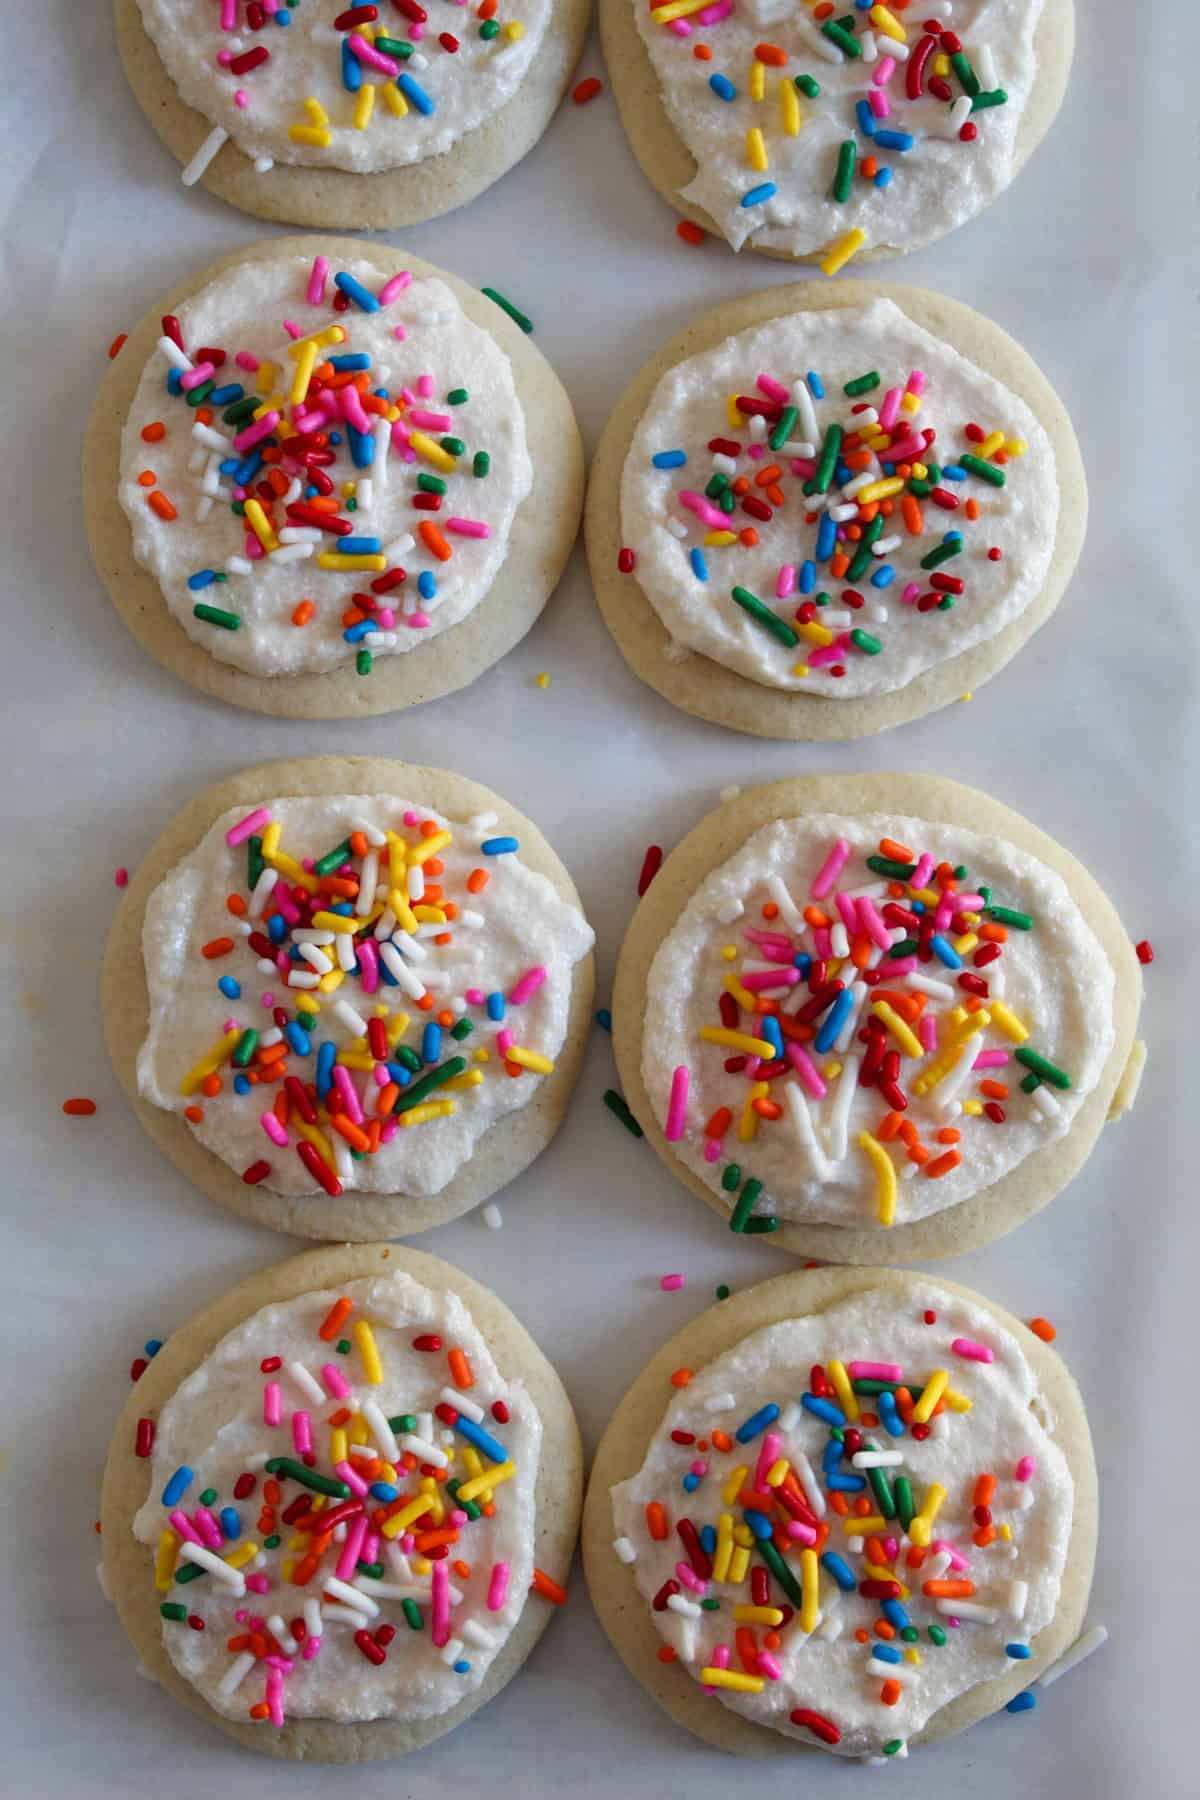
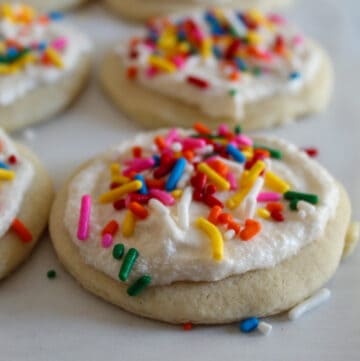
Valentine’s Day Decorating Ideas (Hearts, Colors & Frosting)
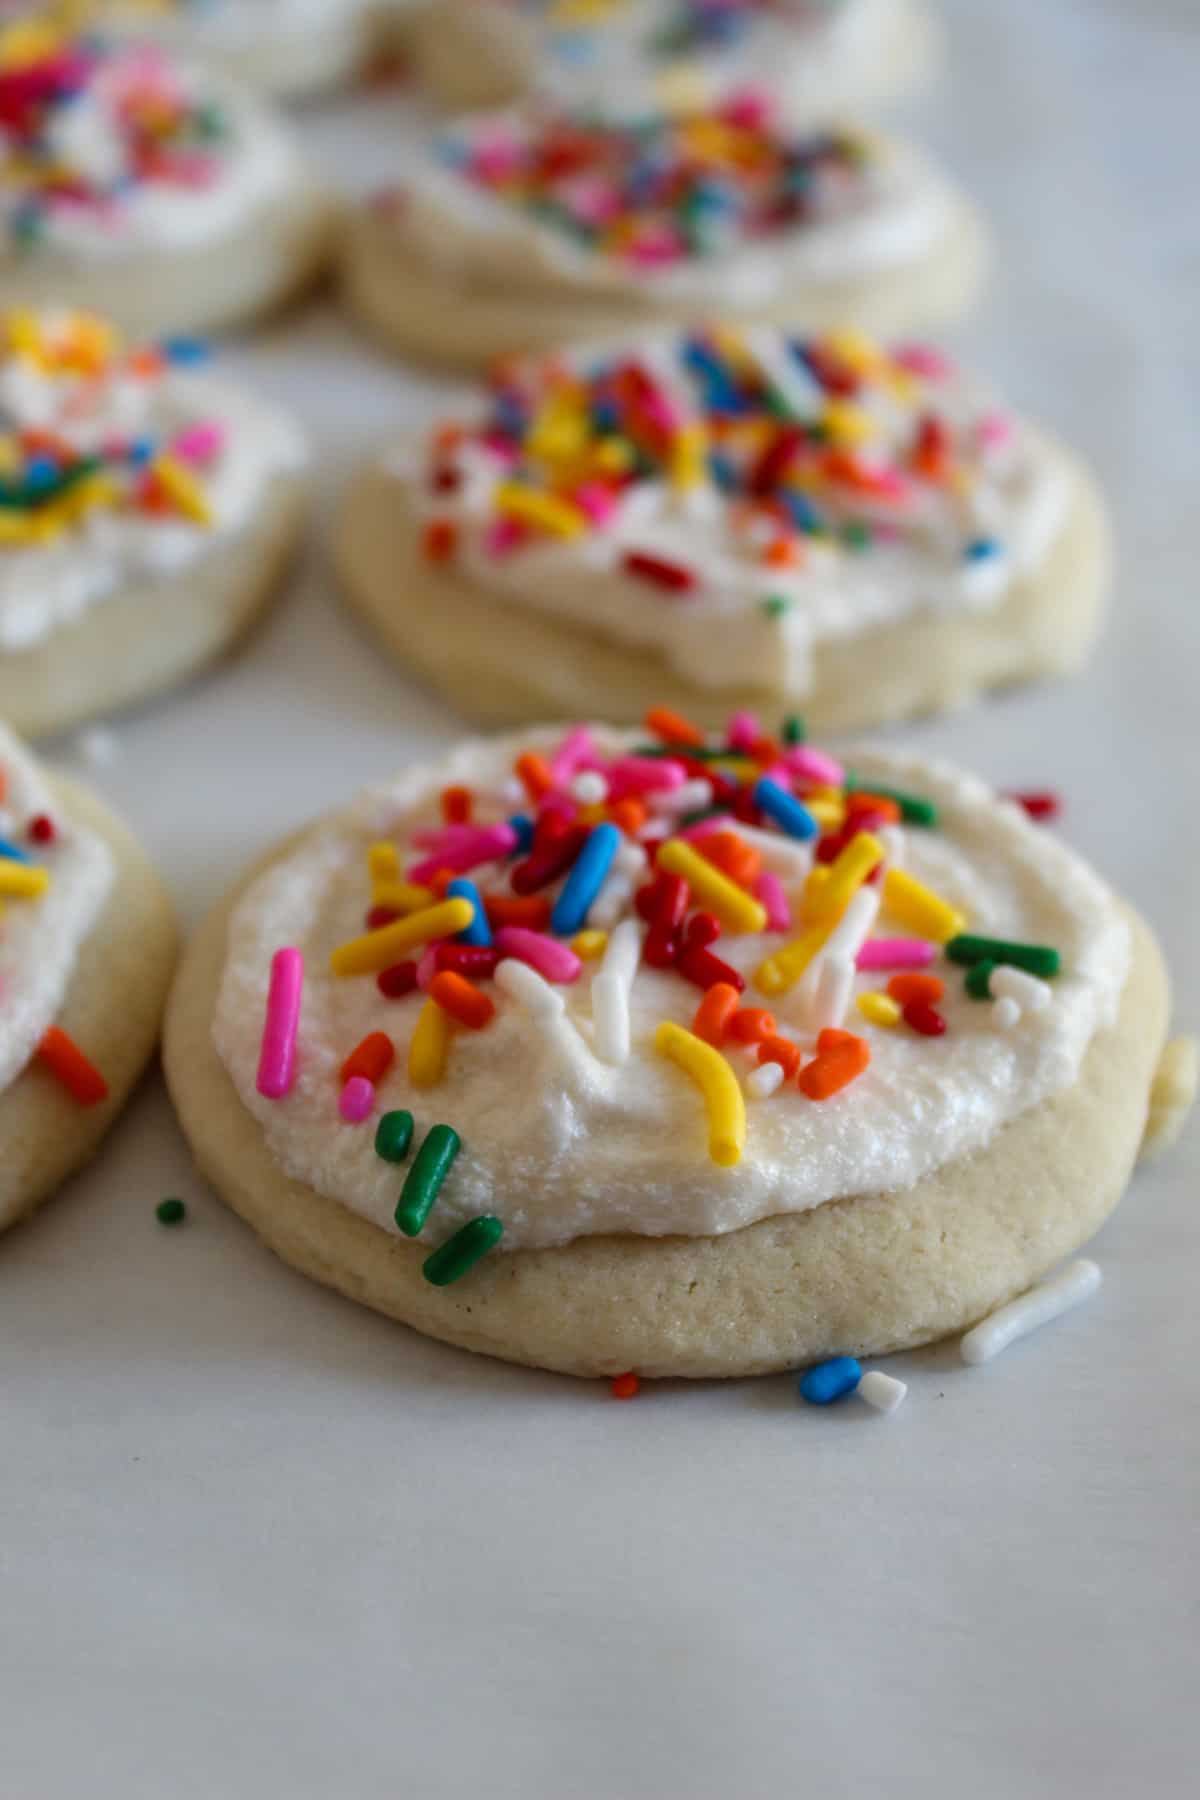
No celebration is complete unless these soft, frosted gluten-free sugar cookies are on the menu! This fun, versatile sugar cookie recipe is so simple to make and perfect to use any time of year. Top it with homemade frosting and your favorite sprinkles, and it turns any gathering into a party!
Nothing compares to a homemade cookie with homemade frosting! The recipe for my gluten-free buttercream frosting is all you’ll need for a frosting that you can easily spread and decorate with.
Here are a few fun ideas to turn these cookies into a festive and loving Valentine’s Day treat!
- Host a cookie decorating night! Make and bake the cookies along with a batch of buttercream frosting and invite your friends over for a night of sweet fun!
- Turn them into hearts! Cut the dough out with heart cookie cutters for a cute take on a classic circle cookie
- Keep it simple: frost the cookies with plain, white frosting and top them with this mix of gluten-free sprinkles!
- Make it colorful! Divide the frosting into a few bowls and color it with pink, red, and white with these gel food colorings
- Frost the cookies and throw some conversation hearts or Valentine’s Day themed m&m’s on top
- Spread the love! Package them up and surprise all your Valentines (and galentines) with these adorable Valentine’s Day-themed cookie boxes. Pair them with these Chocolate Covered Strawberries for the perfect sweet gift to show your love!
Get inspired with some easy holiday Valentine’s cookie decorating ideas in the video below! And if you have some fun, festive ideas of your own, share them with us in the comments!
Storage, Freezing & Make-Ahead Tips
The cookie dough for these gluten-free sugar cookies is perfect for making ahead of time, since it needs to be refrigerated. You can make this dough up to a day ahead of time!
Storing the Cookies
Store the baked cookies in an airtight container. Whether decorated or undecorated, they will stay fresh with the best taste for about 3-4 days at room temperature. I do not recommend storing these cookies in the fridge, as it can dry them out and they can lose some of that soft, tender taste that sugar cookies are so loved for!
You can also freeze the baked, undecorated cookies. After they have completely cooled, store the cookies in an airtight container or freezer-safe bag. They will keep in the freezer for 2-3 months. Let them come to room temperature before enjoying them.
Make-Ahead
In the fridge: After mixing the cookie dough, wrap it and refrigerate it for a minimum of 2 hours and up to 24 hours. When you’re ready to bake, remove it from the fridge and let it sit for about 5 minutes before rolling it out to make it easier to work with.
In the freezer: If you’d like to have a batch of this cookie dough on hand to use at your convenience, freeze it! You can make the cookie dough, shape it into a disk, and wrap it (I suggest double wrapping it) in plastic wrap. Storing the wrapped cookie dough in a freezer-safe bag is a great way to avoid the dough picking up any smells or ice crystals from the freezer.
When you want to use the cookie dough, move it to the fridge a day before to defrost or leave it on the countertop to defrost at room temperature for a few hours. Just be sure that the dough is nice and cold before you roll it out. (You may want to refrigerate it for about 10 minutes just before rolling it out to make sure the dough has not warmed up too much.)
The cookie dough can be stored in the freezer for up to 2 months.
Gluten-Free Sugar Cookie Frequently Asked Questions
Answers to all of your gluten-free sugar cookie doubts! Read along to see some of our bakers’ most asked questions with some expert advice to help you along your baking journey. If you have more questions about this recipe, be sure to ask in the comments below!
Why Does my Sugar Cookie Dough Crack When I Roll it Out?
Gluten-free dough cracks most often because it’s either too dry or too cold. Gluten-free flours absorb moisture differently from wheat flours and need proper rest time to become hydrated and pliable. Letting the dough rest after mixing allows the flours hydrate, which significantly reduces cracking. Ensuring the dough is cool, but not too cold, also helps keep the dough smooth and workable.
After removing the dough from the fridge, it can help to let it sit for about 5 minutes at room temperature before rolling it out. Rolling the dough out between two pieces of parchment paper can also help to keep the dough nice and smooth.
Can I Decorate These Gluten-Free Sugar Cookies?
Absolutely! These cookies bake up soft yet sturdy, so they are perfect for decorating without breaking under the weight of icing. This gluten-free buttercream frosting is a perfect recipe to use for decorating these cookies. Make sure the cookies are completely cooled before decorating to prevent the icing from melting.
How Do I Keep Sugar Cookies Soft After Baking?
The key to soft gluten-free sugar cookies is proper baking and storage. Slightly underbaking the cookies and removing them from the oven when the centers just begin to look set, but not browned, helps prevent dryness.
The cookies will continue to cook on the hot baking tray for a few extra minutes after they come out of the oven. This is called carryover cooking. So, you allow the cookies to finish baking outside the oven on the hot tray by pulling them out just as they look ready, not after they look ready.
Once cooled, store the cookies in an airtight container at room temperature to retain moisture. Adding a small piece of parchment paper between layers can also help the cookies maintain their soft texture without sticking.
The Best Gluten-Free Sugar Cookies
Gluten-free baking can feel unpredictable, especially when it comes to classic recipes like sugar cookies. But, once you have a dough you can trust, you’ll find yourself reaching for the recipe again and again. This recipe was designed to take the guesswork out of gluten-free sugar cookies, so you can focus on enjoying the process instead of worrying about the results.
Whether you’re prepping cookies ahead of time or cutting out special shapes for a celebration like Valentine’s Day, these gluten-free sugar cookies adapt beautifully. They’re simple enough for everyday baking, yet reliable enough for decorating, gifting, and sharing. That versatility is what makes this recipe a staple. You don’t need a different dough for every occasion.
As with any gluten-free recipe, small details matter. Paying attention to ingredient temperature, flour choice, and dough rest time can make all the difference. It can turn your cookies from just “okay” to cookies that people genuinely love. If this is your first time making them, don’t rush the process; enjoy it!
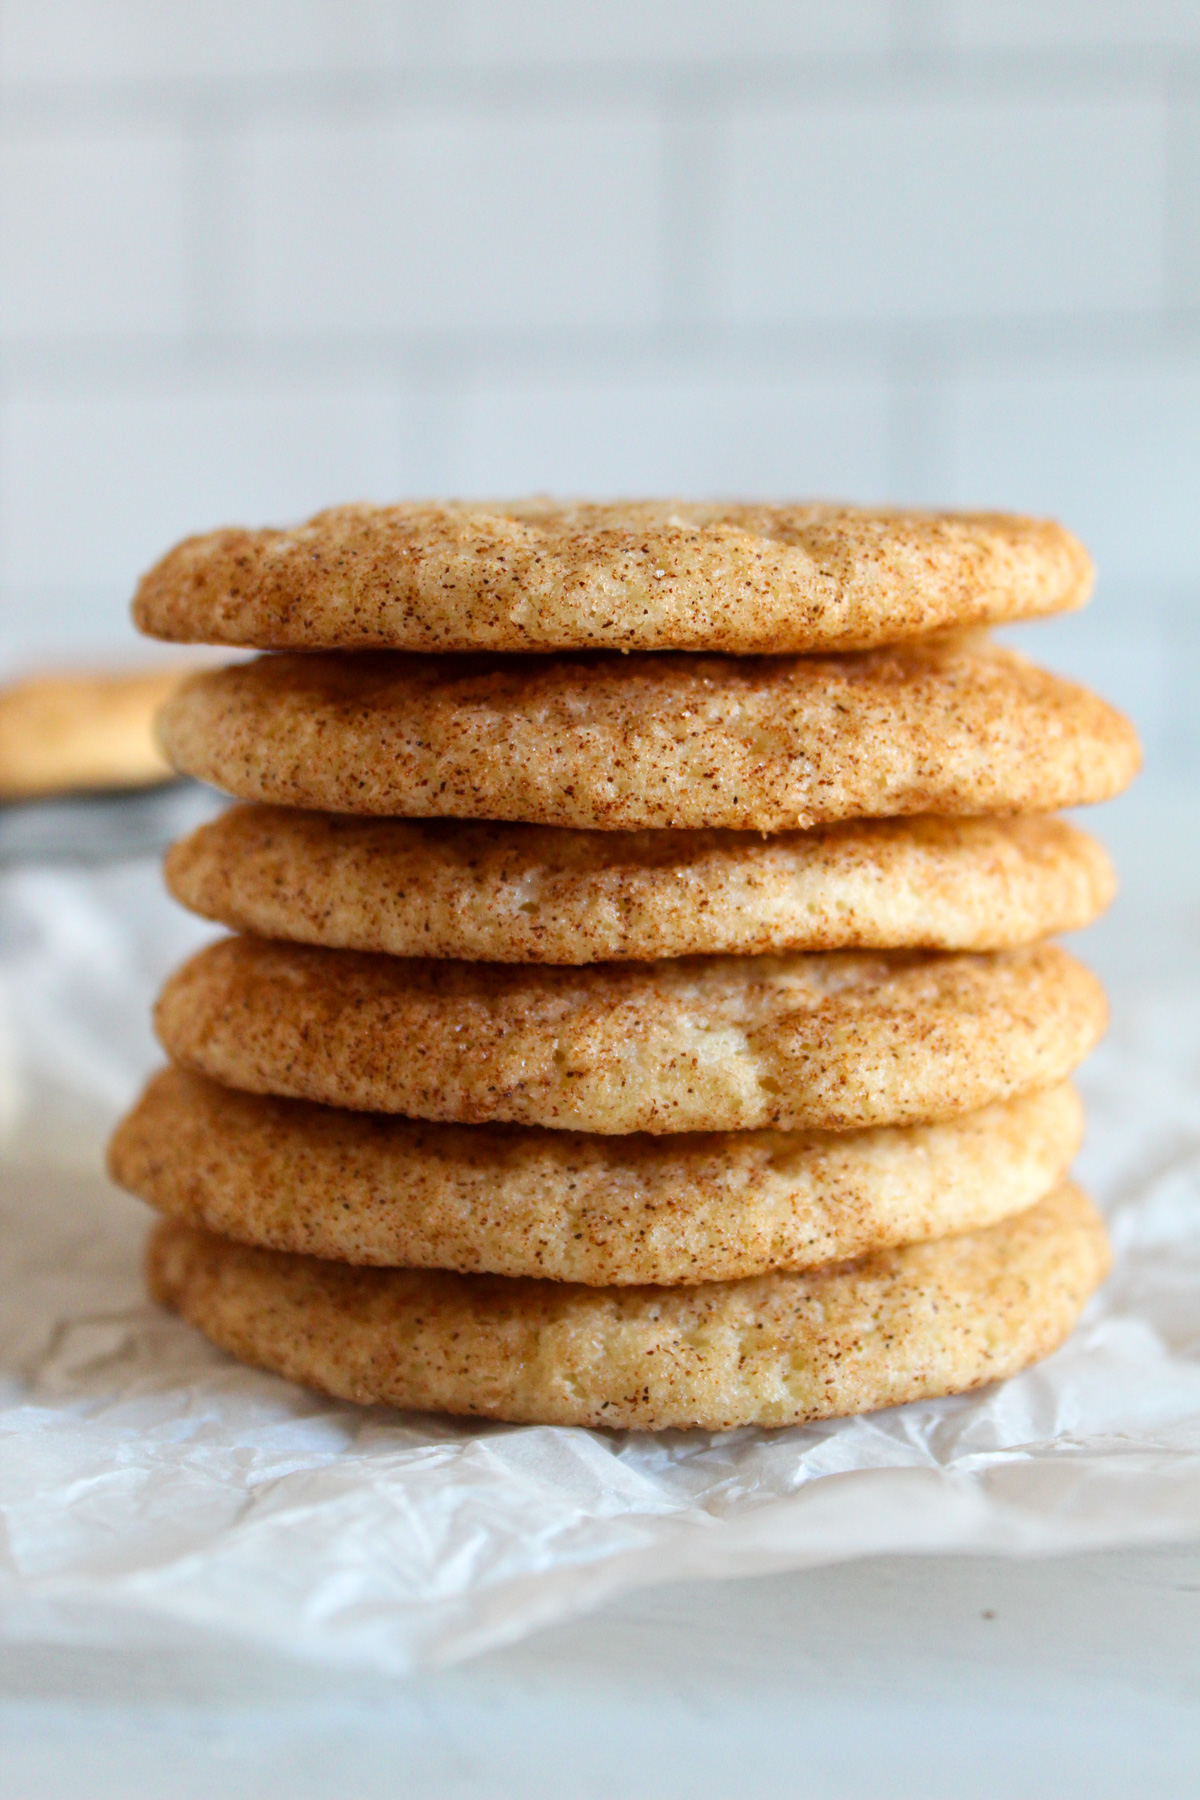
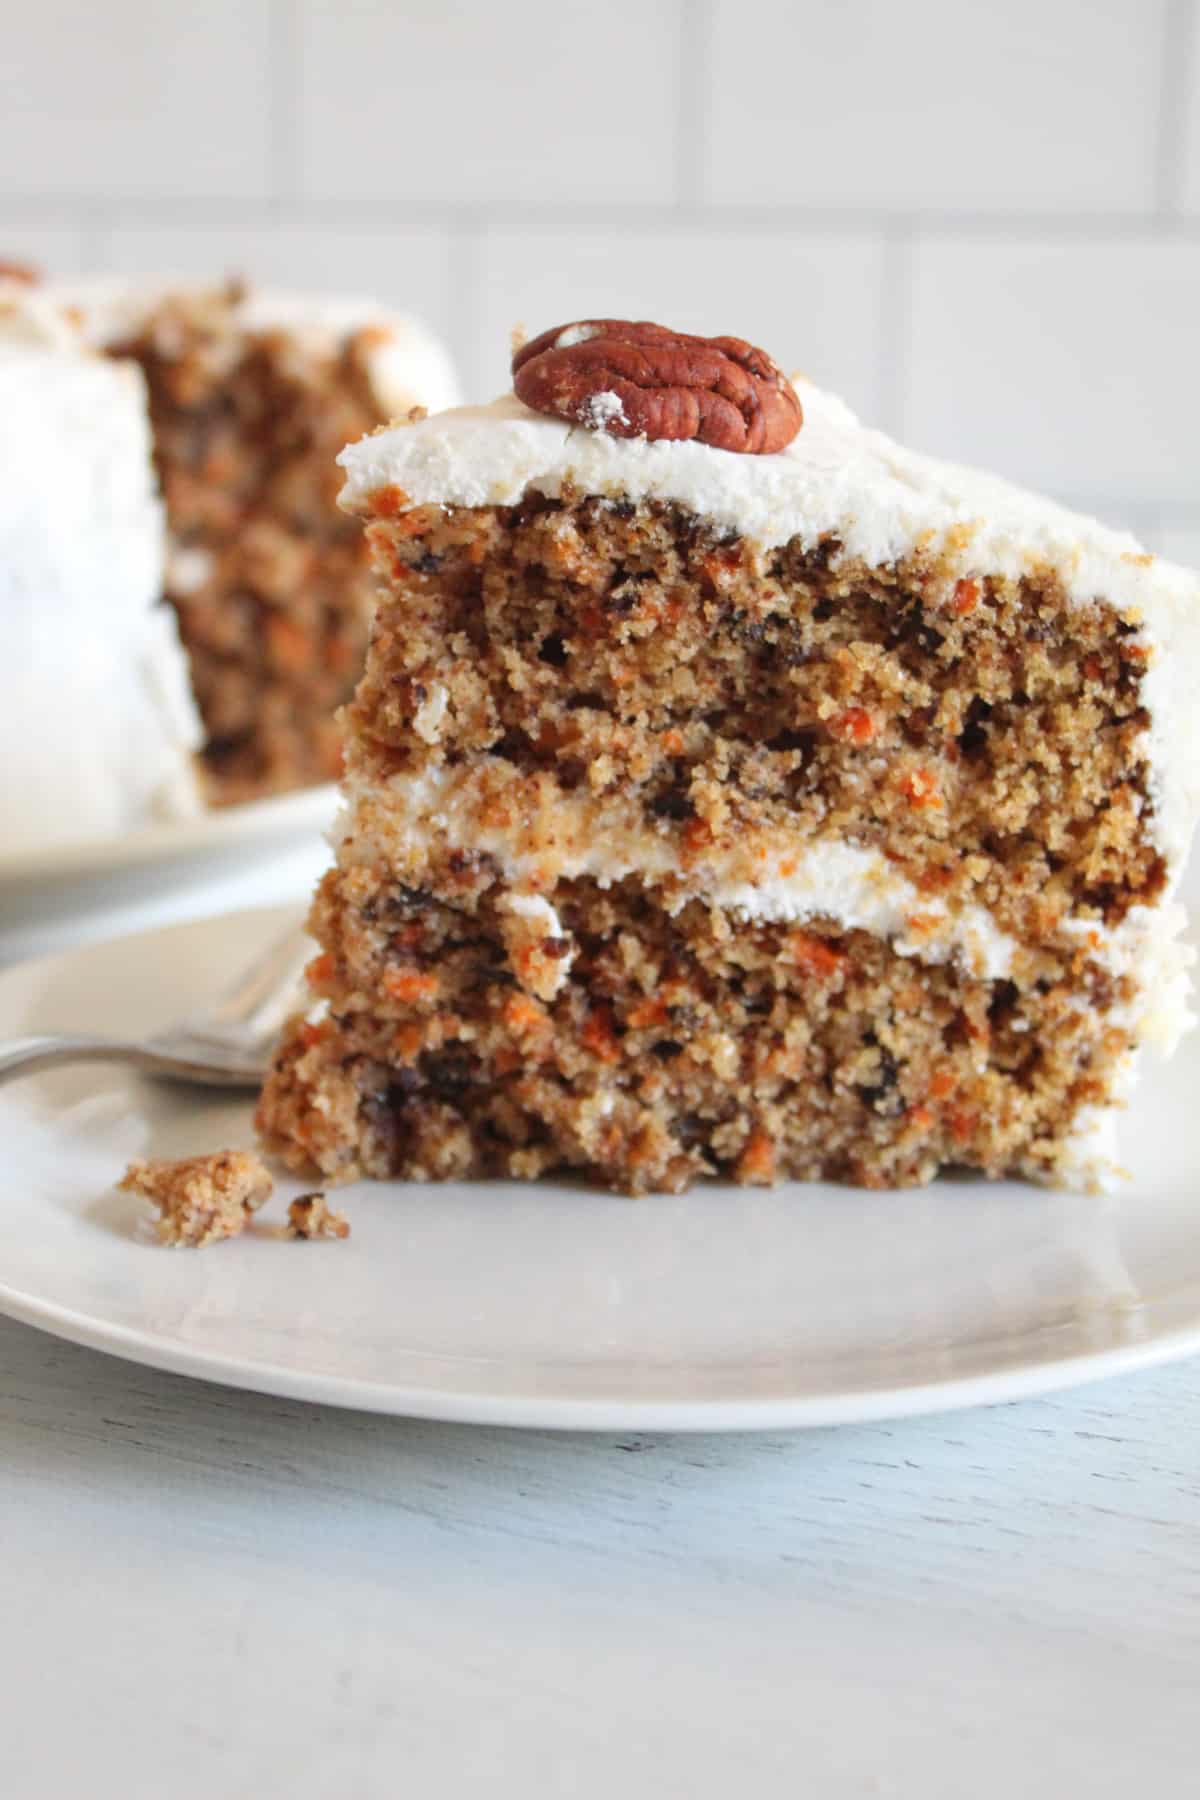
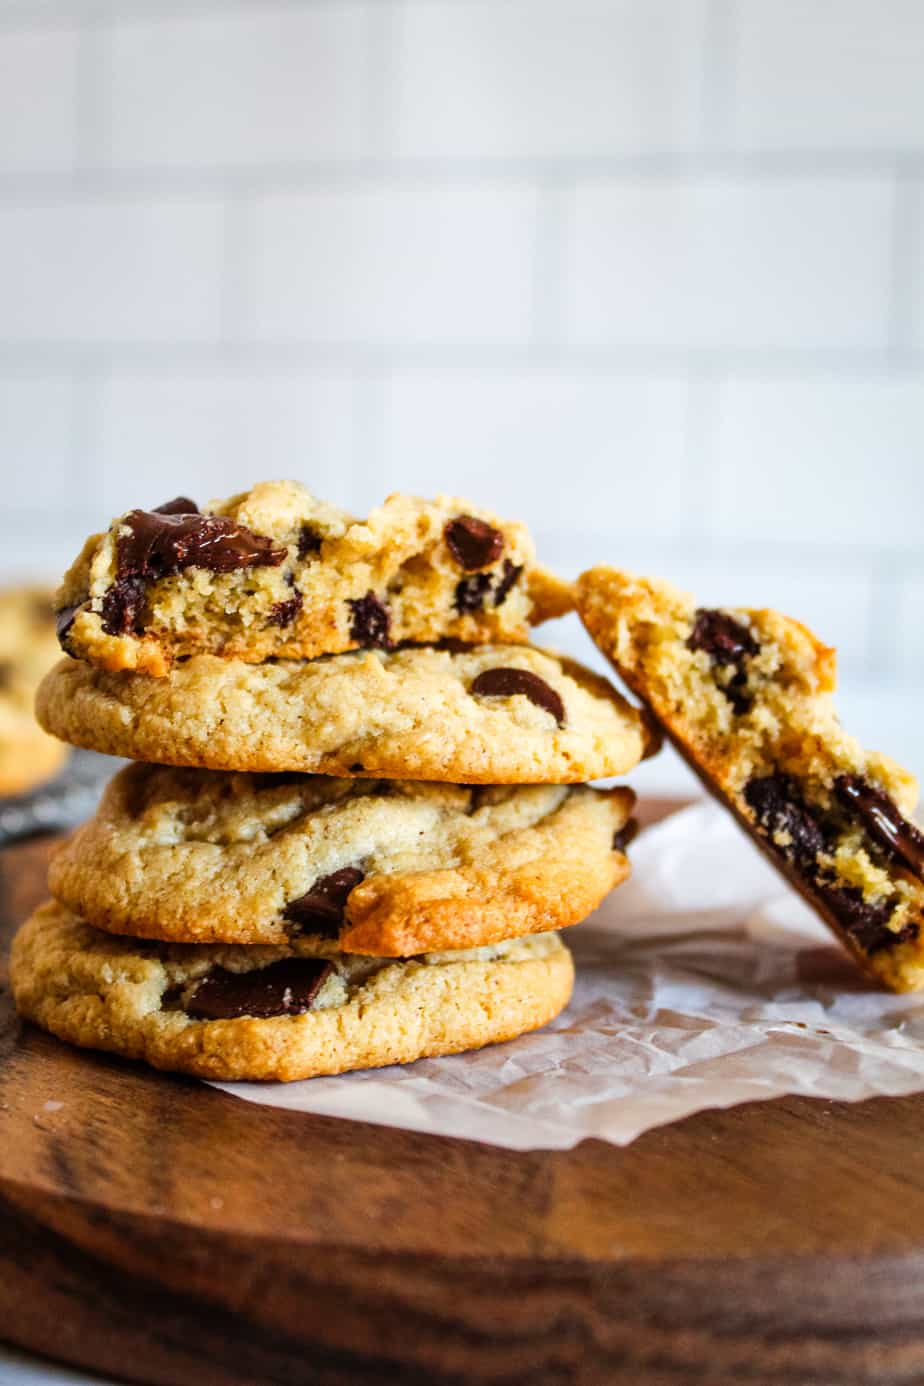
More Sweet & Festive Gluten-Free Treats
Looking for more festive gluten-free recipes? Check out the recipes below for chocolate-covered Valentine’s Day inspiration and more!
- Gift-Ready Chocolate Covered Strawberries
- Strawberry Cake Mix Cookies
- Mexican Wedding Cookies
- The Best Gluten-Free Yule Log
- Five Gluten-Free Christmas Treats
These gluten-free desserts are perfect for special occasions, homemade gifts, or simply treating yourself. Each recipe is designed to deliver great flavor and texture, so you never have to compromise when baking gluten-free.
Let’s Bake (and Share!) Together
If you give this recipe a try, I’d love to hear how it worked for you. Did you decorate them? Freeze the dough? Make them for a special occasion or just because? Leave a comment, rate the recipe, and share your experience, because gluten-free baking is even better when it’s shared!