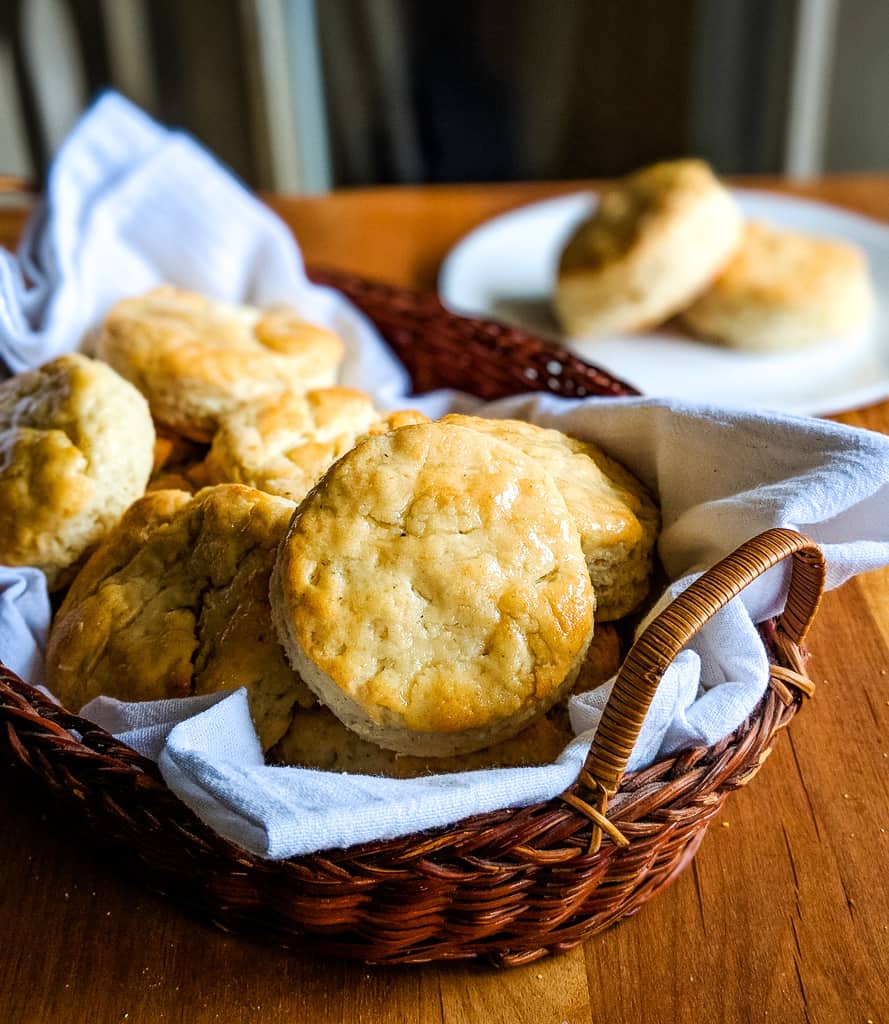
If your gluten-free biscuits usually come out crumbly or dense, these millet biscuits will be a welcome surprise. They’re soft, fluffy, and beautifully golden, with a rich buttery taste and a texture that feels like a real homemade biscuit. This easy recipe uses simple ingredients and a few key tricks to help you make biscuits that are dependable, delicious, and perfect for breakfast, brunch, or dinner.

Biscuits are a versatile, quick bread that can be served with any meal. With their amazing flavor and texture, you’d never know they were gluten- and dairy-free! These biscuits are also extremely easy to make from scratch in under an hour.
Table of Contents
Why This Recipe for Millet Flour Biscuits?
There’s nothing quite like warm, fluffy homemade biscuits straight from the oven. This millet biscuit recipe is so simple to make and only uses a few simple ingredients. Here are a few more great things about this biscuit recipe:
- The dough takes only 15 minutes to prep.
- These biscuits are gluten- and dairy-free.
- They are a great way to use millet flour in recipes.
- The rest time for the dough is only 10 minutes.
- They are easy to store in the freezer.

Equipment for Making Millet Biscuits
Here are some great tools that will help in prepping your millet biscuits:
- Digital scale
- Medium mixing bowl
- Stand mixer
- Whisk
- Parchment paper
- Rolling pin
- 2-inch biscuit cutter
- Baking sheet
Ingredients for Millet Biscuits

- Millet Flour
- Baking Powder
- Baking Soda
- Xanthan Gum
- Salt
- Vegan Butter
- Dairy Free Buttermilk
- Eggs
- Honey
About These Ingredients for Millet Biscuits
Curious about any of these ingredients? I don’t blame you, especially if you’re relatively new to gluten-free baking! Here’s a quick rundown of these ingredients.
One thing to know about gluten-free baking: Gluten-free recipes can be super finicky about the amount and type of “gluten replacement” dry ingredients you use. Adding too much or too little can cause baked goods to have the wrong texture or be too dry or too gummy when they come out of the oven. So can trying a substitute without accounting for its ability to absorb moisture, provide leavening power, or otherwise provide proper support for the baked good’s texture.
Due to the finicky nature of gluten-free recipes, I’ll often give the amounts of dry ingredients in grams for greater precision. This is one reason a good digital kitchen scale comes in handy.
Millet Flour
390 grams (about 3 cups) millet flour
Millet flour comes from a gluten-free, drought-resistant grain called millet. Taste tests show that pearl millet flour can replace up to 20% of the wheat flour in a recipe without anyone even noticing a difference. Of course, we’re using purely millet flour today, so we can make these biscuits strictly gluten-free.
What to remember about millet flour: You may see it in at least two different varieties! Pearl millet flour and finger millet flour are actually distinct types of millet flour. According to a 2020 study published in the International Journal for Research in Applied Science and Engineering Technology, finger millet flour, also called “ragi flour,” has the highest levels of crude fiber, calcium, and iron among the millets the researchers tested. Pearl millet or “bajra” flour has higher protein and fat content than other millet flours.
So it can make a difference which type of millet flour you use. I tried pearl millet flour in this recipe. It worked quite well due to its higher protein and fat content, which can help replace the gluten typically found in wheat flour.
Baking Powder
3 teaspoons baking powder
Don’t be alarmed if the amount of baking powder seems a bit high. Gluten-free baked items like these biscuits often require extra leavening to get the correct texture.
Unlike yeast, baking powder is a chemical leavening agent. Chemical leavening agents react with other ingredients in the dough to produce the carbon dioxide needed for a lighter, fluffier texture.
Baking Soda
1 teaspoon baking soda
Baking soda is another chemical leavening agent that reacts with acids in the dough to form carbon dioxide bubbles.
What’s the difference between baking powder and baking soda? That’s a good question! In the video below, Cooking for Geeks author Jeff Potter gives us a quick rundown.
Xanthan Gum
1 teaspoon Xanthan gum
Xanthan gum is a popular replacement for the gluten in wheat flour. This gum acts as a binder and mimics the performance of gluten to support texture.
I don’t like to use more than a teaspoon. Xanthan and guar gum can cause digestive discomfort if consumed in large amounts.
Salt
1/2 teaspoon salt
This amount of salt supports chemical reactions that enhance the flavor without making the biscuits too salty.
Vegan Butter
6 tablespoons vegan butter
Vegan butter adds the necessary fat without adding dairy. I used the Earth Balance brand for this recipe. Other brands might work, but I’d go for an unsalted one.
Dairy-Free Buttermilk
1/2 cup dairy-free buttermilk
Buttermilk adds the acid that the chemical leavenings can react to. It also adds most of the moisture these biscuits need.
Eggs
3 large eggs
Eggs provide most of the binding that holds these biscuits together.
Honey
2 tablespoons honey
I know that’s not much, but honey is a strong sweetener. This amount makes the biscuits slightly sweet without overdoing it.

Printable Millet Biscuit Recipe Card
Ingredients
- 390 grams millet flour about 3 cups
- 3 teaspoons baking powder
- 1 teaspoon baking soda
- 1 teaspoon xanthan gum
- 1/2 teaspoon salt
- 6 Tablespoons vegan butter softened
- 1/2 cup dairy free buttermilk
- 3 large eggs
- 2 Tablespoons honey
Instructions
- Whisk together the flour, baking powder, baking soda, xanthan gum, and salt in a medium mixing bowl.
- In the bowl of a stand mixer, combine the vegan butter, buttermilk, eggs, and honey. Mix for 2 minutes until no large chunks of butter remain.
- Add the flour mixture. Mix for 15 seconds. Stop the machine and scrape the batter off the sides of the bowl. Mix for another 15 seconds just until no obvious lumps of dry flour mixture remain.
- Set batter aside to rest for 10 minutes.
- Preheat the oven to 400 degrees Fahrenheit (204 degrees Celsius). Place a sheet of parchment paper on a baking sheet.
- Place a piece of wax paper on countertop. Dust it with flour. Place dough on the wax paper.
- When the dough is done resting, place it on the floured wax paper. Lightly roll the dough out to 1 inch thickness.
- Using a floured 2-inch biscuit cutter, cut out biscuits and place them on the baking sheet with a little space between them.
- Push the remaining dough together and roll it out again. Repeat the process until you can’t get any more 2-inch biscuits out of the remaining dough that has been rolled out to 1 inch thick.
- Bake for 14-15 minutes until the biscuits are golden brown, and a toothpick inserted into one comes out clean.
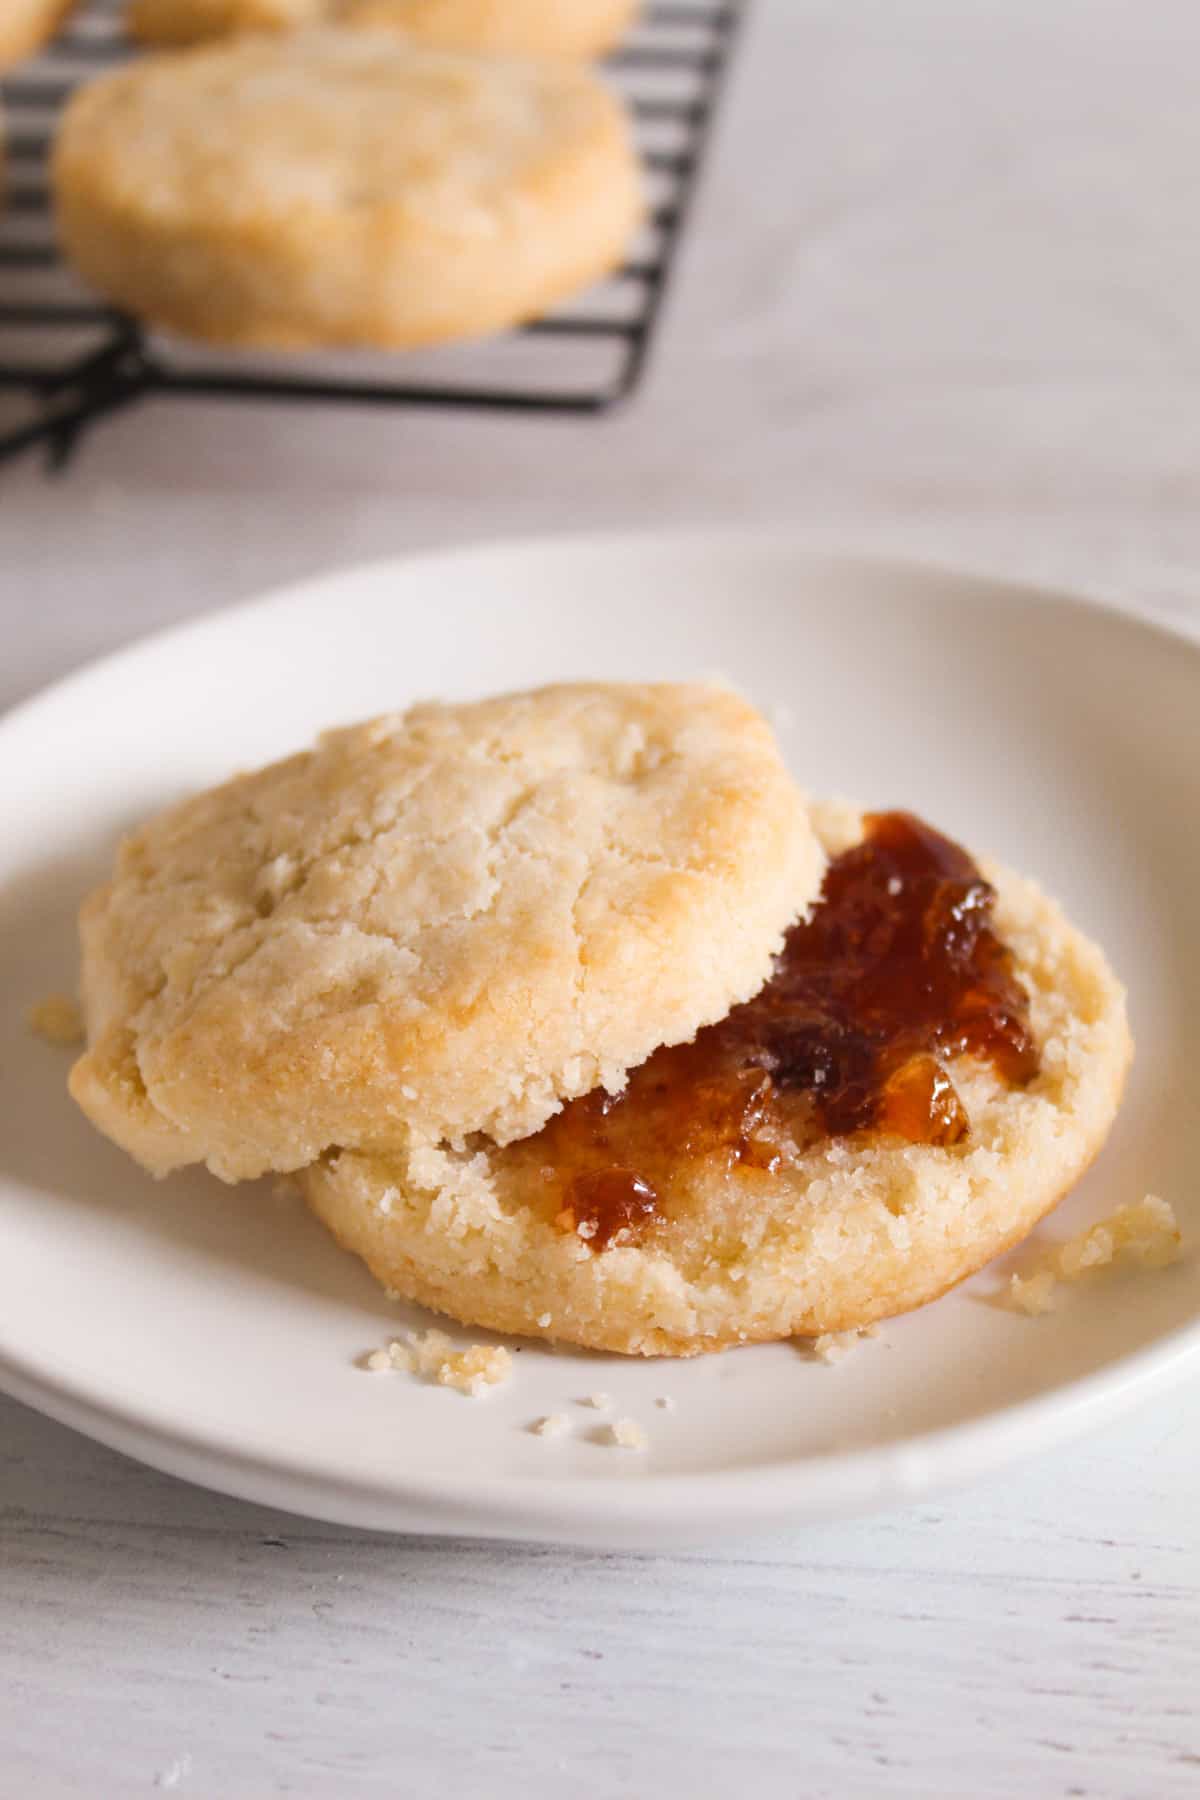
- Serve warm with your favorite toppings or a meal.
Notes
Nutrition
Did you make and love this recipe? Give it your review and rating below! And make sure to follow me on Instagram, Pinterest, and Facebook , too!
How to Make Millet Biscuits
Now that we’ve got all our ingredients, let’s jump right into making these easy biscuits. The neat part is that it takes less than 45 minutes from beginning to end.
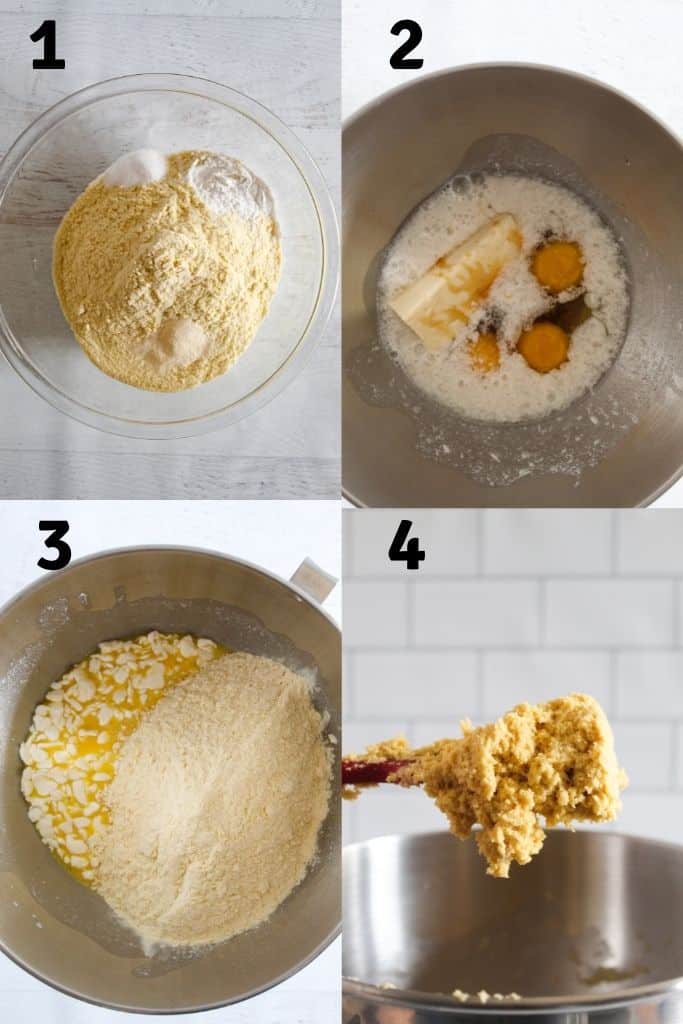
Step One: Mix Dry Ingredients
Whisk together the flour, baking powder, baking soda, xanthan gum, and salt in a medium mixing bowl.
Step Two: Mix Wet Ingredients
In the bowl of a stand mixer, combine the vegan butter, buttermilk, eggs, and honey. Mix for 2 minutes until no large chunks of butter remain. Small chunks of butter are fine.
Step Three: Add Dry Ingredients to Wet Ingredients
Add the flour mixture. Mix for 15 seconds. Stop the machine and scrape the batter off the sides of the bowl. Mix for another 15 seconds, just until no obvious lumps of dry flour mixture remain. Be careful not to overmix, or the biscuits might turn out too dense and tough.

Step Four: Let Batter Rest for 10 Minutes
Set batter aside to rest for 10 minutes.
Step Five: Preheat Oven and Prepare Baking Sheet
While the batter is resting, preheat the oven to 400 degrees Fahrenheit (204 degrees Celsius). Place a sheet of parchment paper on a baking sheet.
Step Six: Prepare Work Surface
Place a piece of wax paper on the countertop. Dust the wax paper with a little millet flour.
Step Seven: Roll Dough Out
When the dough is done resting, place it on the floured wax paper. Lightly roll the dough out to 1 inch thickness. Try not to get it too thin, or the biscuits won’t come out as thick and fluffy as you might like.
Step Eight: Cut Out Biscuits
Using a floured 2-inch biscuit cutter, cut out biscuits and place them on the baking sheet. Leave a little space between them because they will rise and gain diameter while baking.

Once you’ve gotten as many biscuits as you can, push the remaining dough together and roll it out again. Repeat the process until you can’t get any more 2-inch biscuits out of the remaining dough that has been rolled out to 1 inch thick.
Step Nine: Bake Biscuits
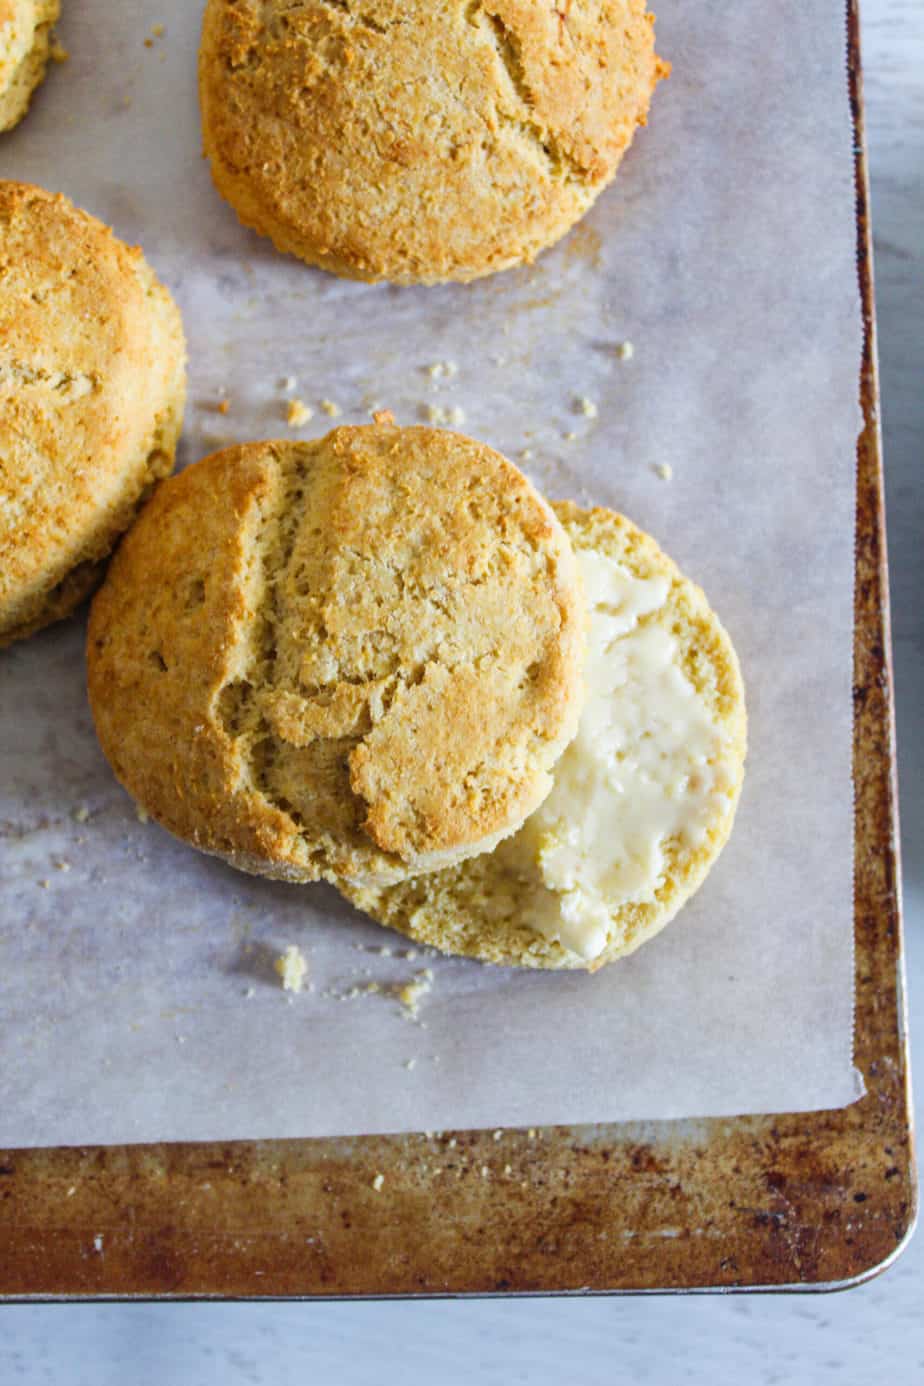
Bake for 14-15 minutes until the biscuits are golden brown, and a toothpick inserted into one comes out clean.
Step Ten: Serve Warm With Favorite Meals or Toppings
For breakfast, these biscuits make great bacon, egg, and cheese sandwiches and also go well with sausage gravy. I also like to eat these with soups and stews for lunch or dinner.
Substitutions for This Millet Biscuit Recipe
If you would like to replace Xanthan gum, there are several gluten-free substitutes that tend to work well. Our handy guide to replacing Xanthan gum makes a good reference. Psyllium husk powder does pretty much everything Xanthan gum can do, including providing a little binding to hold the baked goods together.
I haven’t really tried any vegetable oils as replacements for the vegan butter. However, dairy butter can work if you don’t mind that these biscuits aren’t dairy-free.
Likewise, dairy buttermilk can replace the dairy-free buttermilk in this recipe.
Variations for Millet Biscuits
Drop Biscuits: While these are not drop biscuits, you could make millet drop biscuits by simply spooning the dough onto the baking sheet instead of rolling and cutting it out. Bake them at the same time and temperature.
Sweet Biscuits: Add an extra teaspoon of honey to make the biscuits sweeter. Adjust liquids to suit.
Savory Biscuits: After mixing the dough, sprinkle in some crushed rosemary or other dried herbs for a savory biscuit.
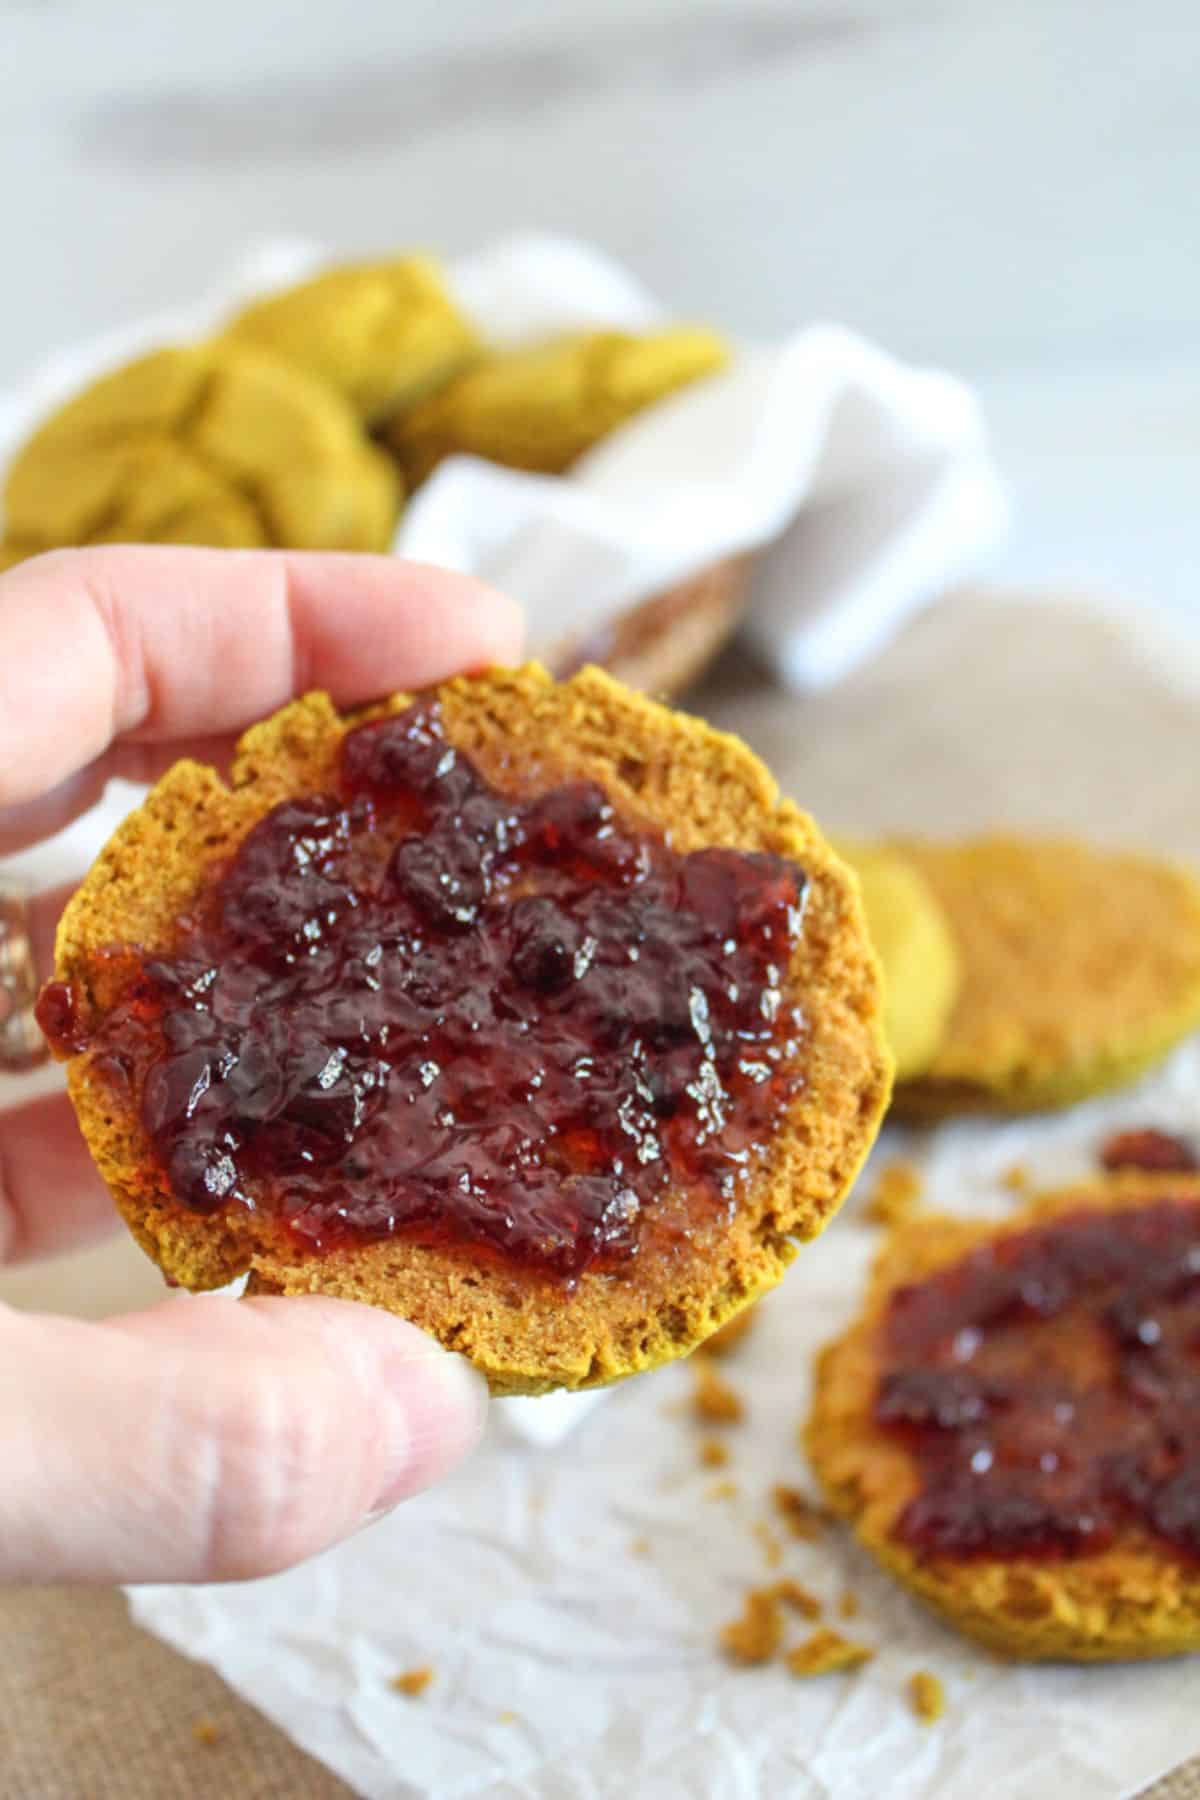
Fun Toppings for Biscuits: Use a pastry brush to lightly coat each biscuit with melted butter after you’ve taken them out of the oven. Sprinkle a sweet topping, like a little cinnamon and sugar, on each biscuit. Or you can go a little more savory with a little Everything Bagel topping.
Storing Millet Biscuits
These fluffy biscuits store very well. Keep them in an airtight container at room temperature for up to 3 days.
Any longer than that and they will need to be frozen for the best results. Place them in the fridge to thaw overnight.
Tip: Slice the biscuits first before freezing if you would like to skip the thaw time. Once sliced, they can be taken directly from the freezer and placed in the toaster.

FAQs About Millet Biscuits
While these millet biscuits look straightforward to make, we do get questions sometimes! Here, I answer a few of the most commonly asked questions. If you think of one I haven’t answered yet, feel free to ask in the comments section, and we’ll do our best to answer it as soon as possible.
Why didn’t my millet biscuits rise?
Biscuits may not rise if the batter was overmixed, the leavening agents have expired or weren’t used up quickly enough after being opened, or the batter did not have enough time to rise. Some things to remember:
- The batter only needs to be mixed for a few seconds once you’ve added the dry ingredients to the wet ingredients in the stand mixer.
- Chemical leavening agents actually don’t last more than a few months once opened. Even when you keep baking soda in the refrigerator (where it’s incidentally quite good at absorbing odors), it’s recommended to discard it within 90 days.
- Let the biscuits rise for about ten minutes. This will give the batter more time to “set” while the baking powder and baking soda do their work.
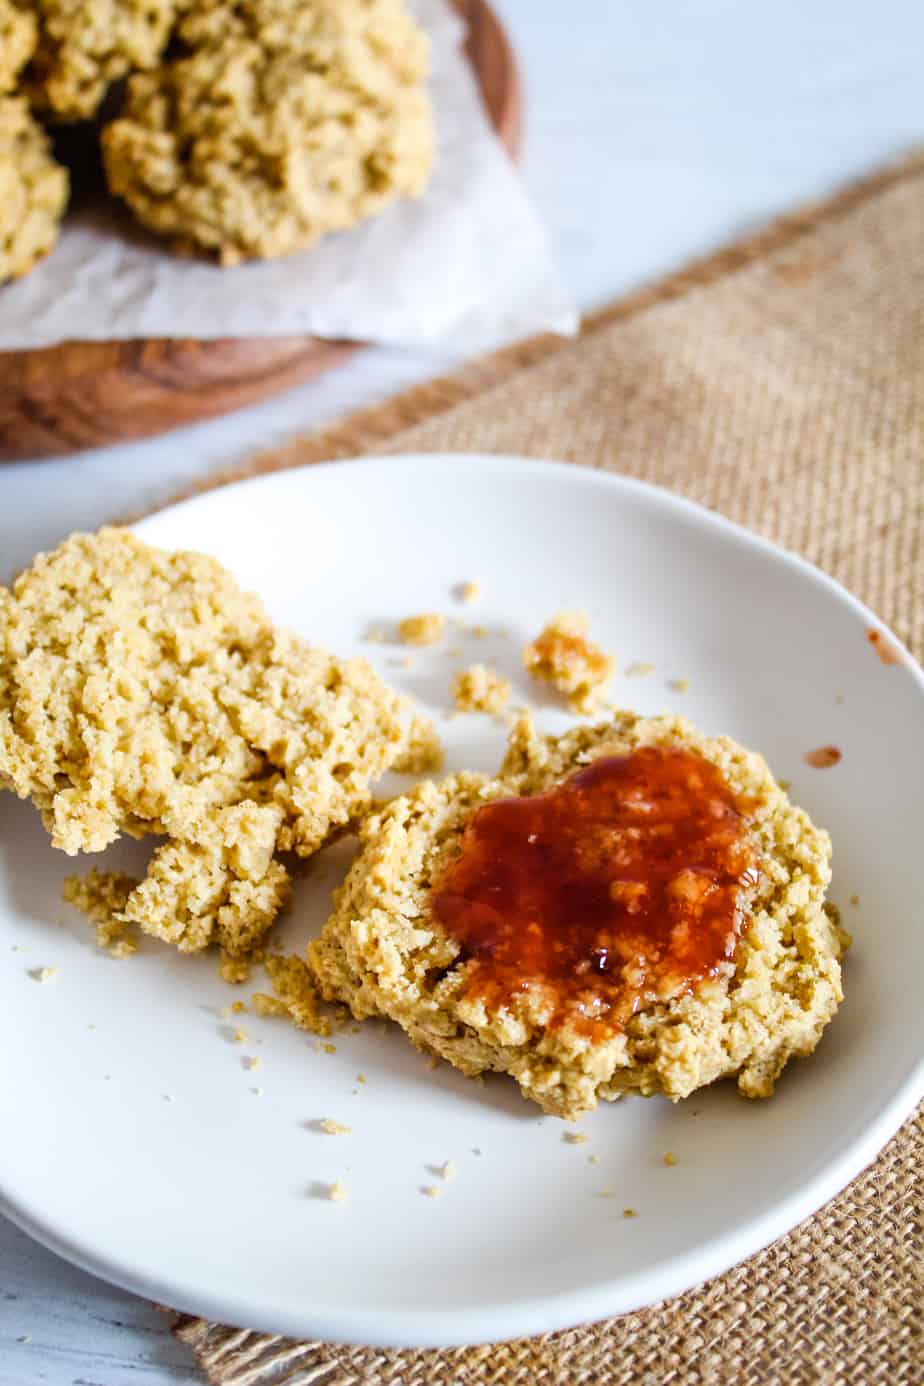
Why are my millet biscuits dry or crumbly?
Dry or overly crumbly biscuits can mean the batter had too much flour or too little liquid. It can also mean they were overbaked a little bit.
If the batter seems too dry while you’re working with it, gradually adding a spoonful of water until it’s the right consistency can help. Keep an eye on your oven timer so you can pull them out in time. If they’re a light golden brown color, they’re about done.
Why was my biscuit dough too sticky to work with?
Millet biscuit dough can feel sticky, especially before it has had time to rest. Letting the dough rest for 10 minutes allows the flour to absorb the liquid, which makes it easier to handle. If it still feels too wet, lightly flour your hands or work surface, but avoid adding too much extra flour, or the biscuits may turn out too dense or dry.
My biscuits spread out more than I thought they would, and now they’re stuck together! What happened?
If the biscuits look like they spread out more than they rose, the batter might have been too soft. The dough could have also been a little too warm. To avoid this issue, the butter should be soft but not melted, and none of the ingredients should be much warmer than room temperature when you add them.
If you’re sure the batter was perfect, the biscuits might have been placed too closely together on the baking sheet. I usually go with one of my larger baking sheets or use two of my smaller ones when making these biscuits. (I’ll also use more than one baking sheet if I’m doubling or tripling this recipe for some reason.)
Why are my millet biscuits dense instead of light and fluffy?
Dense biscuits are often caused by packing in too much flour, skipping the rest time, or overmixing the dough. They can also become too dense if they’re packed down too much during the shaping process (rolling out the dough and cutting the biscuits).
Why did my biscuits turn out gummy in the middle?
Too little flour or too much liquid can cause gummy biscuits. I insist on using a digital kitchen scale to measure dry ingredients because exact measurements help avoid issues like “too gummy” or “too dry”.
Here’s a trick that a science teacher told me a long time ago: Holding liquid measuring cups (or the lab equivalent) at eye level can help you get more accurate measurements for the liquids.
Underbaking them can also cause this issue. They should be baked until they are a perfect golden brown. Make sure your oven is fully preheated before baking, and check that the centers are set before removing them. If your biscuits are thicker than the recipe suggests, they may need an extra minute or two in the oven.
Some Ideas to Accompany Your Biscuits
Once you’ve got a warm batch of biscuits ready, the only question is what to serve with them. Whether you’re planning a cozy breakfast, a hearty brunch, or a comfort-food dinner, these recipes can help round out the meal.
- Biscuits and Gravy
- Make Your Own Dairy-Free Buttermilk!
- Easy Meatless Gluten-Free Sausage Casserole
- Vegetarian Savory Gluten Free Stuffing Recipe with Sausage
- Gluten-Free Cornbread Dressing Recipe
However you serve them, these recipes make it easy to turn simple biscuits into part of a meal that feels extra cozy and complete.
How Did You Serve Yours?
Leave a comment and let us know how you enjoyed these biscuits. Whether you went with gravy, casserole, or something totally different, your ideas might inspire someone else’s next meal.