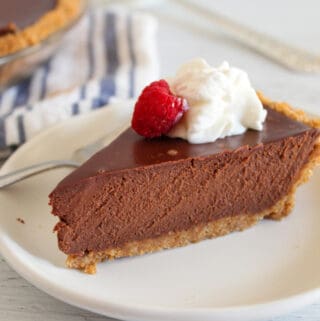
Imagine slicing into a chocolate pie so silky and rich it looks straight from a bakery case… but it only took you 10 minutes to prep.
The filling sets into a velvety, melt-in-your-mouth texture that’s deeply chocolatey with a subtle hint of coffee to intensify every bite. It’s smooth like mousse, rich like fudge, and balanced enough that it never feels too heavy. This is the kind of dessert people go back for “just one more sliver.”
Table of Contents
It’s my go-to for holidays and gatherings because it delivers maximum impact with minimal effort — and as a bonus, it happens to be naturally gluten-free and dairy-free, so everyone at the table can enjoy a slice. Make it ahead, top it with whipped cream and fresh berries, and watch it disappear.

Why You’ll Love This Creamy Chocolate Pie
When I said this gluten-free chocolate pie was simple to make, I meant it! I love this recipe because all you need is eight ingredients and a few minutes to put it together. Using a blender or food processor makes the preparation even easier! Here are a few more things you’ll love about this rich and velvety chocolate pie recipe:
- The pie filling can be prepped in just 10 minutes.
- It’s both gluten and dairy-free.
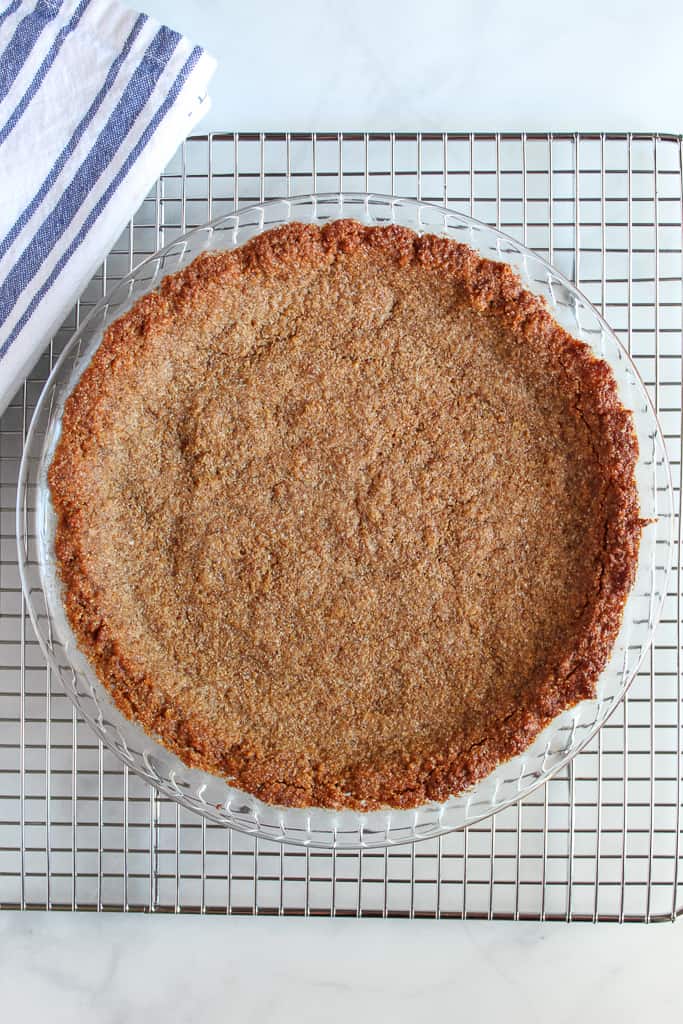
- I think it goes well with a homemade graham cracker crust.
- It’s a terrific make-ahead dessert for those times when you’re getting ready for a holiday party and don’t have time to do it all in a single day.
Paired with my homemade gluten and dairy-free graham cracker crust, the creamy chocolate pie filling will have everyone begging for more. If you’re short on time and looking for a 100% no-bake option, a pre-made gluten-free pie crust will do the trick.
Equipment Needed for This Gluten-Free Chocolate Pie Recipe
Here are some tools that will help in prepping your gluten-free chocolate pie:
- Digital scale
- Blender or food processor
- Saucepan
- Whisk
- Rubber spatula
- 9” pie pan
Just 8 Simple Ingredients
The neat part about this chocolate pie is that it’s easy to make and only takes eight ingredients.
- Canned Coconut Milk
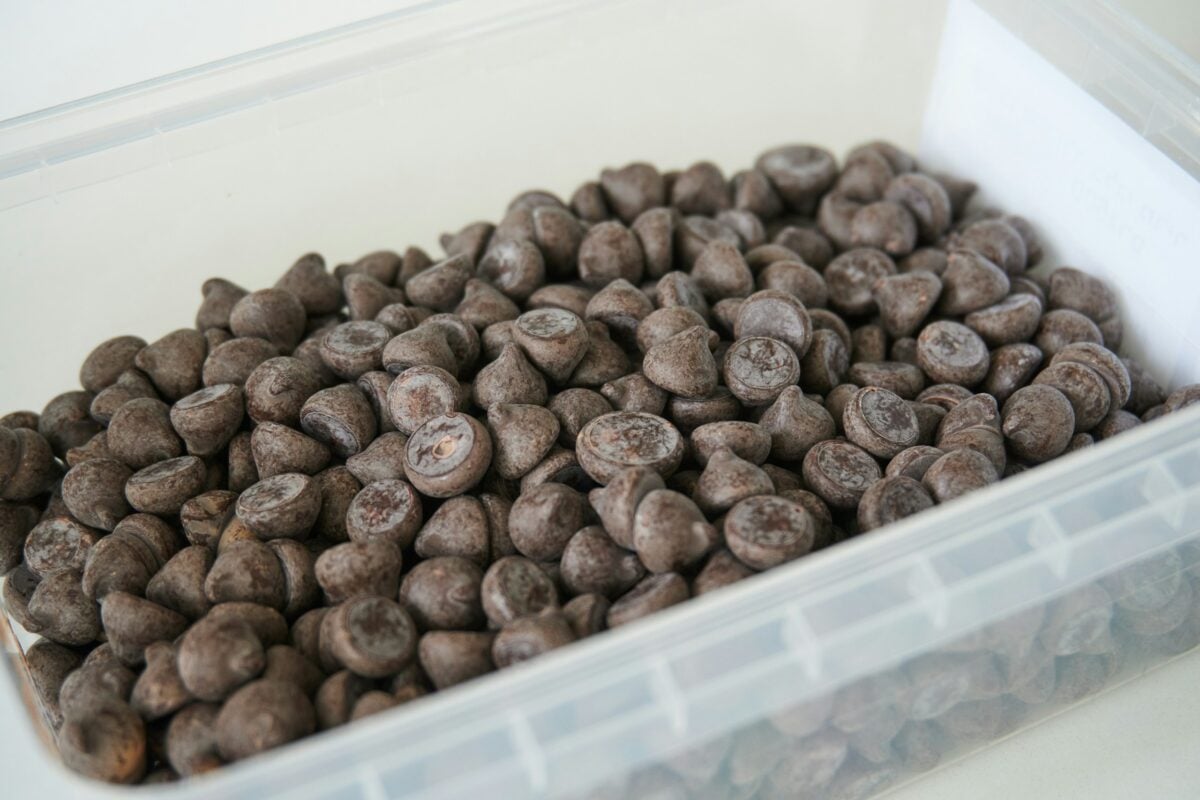
- Dairy-Free Chocolate Chips
- Instant Coffee
- Cashew Butter
- Cocoa Powder
- Vanilla Extract
- Salt
- Your Favorite 9-inch Gluten-Free Pie Crust
Why These Ingredients Work
The really important thing is to measure many of these ingredients on your food scale to make sure the amounts are 100% accurate. You’d be surprised by how much of a difference measuring things by grams can make in your cooking and baking.
Coconut Milk
400 grams (about 14 ounces) coconut milk
Coconut milk is pretty much my go-to when I need a dairy milk alternative that’s super creamy. The thing about it is that it has a tendency to separate while still in the can, so we’ll need to mix it up really well before we use it for the filling.
Dairy-Free Chocolate Chips
380 grams (≈ 2 ¼ cups) of chocolate chips
Chocolate chips give us a start on making this chocolate pie, well, chocolate.
Cashew Butter
1/2 cup cashew butter
Cashew butter adds a bit of nuttiness to balance the chocolate flavor.
Cocoa Powder
12 grams (≈ 2 tablespoons) cocoa powder
Cocoa powder adds more chocolate flavor!
Vanilla Extract
1 teaspoon vanilla extract
Vanilla extract adds a little extra robustness to the sweet, chocolate-y flavor of this chocolate pie.
Instant Coffee
1 teaspoon instant coffee powder
If you’re always ordering the mocha latte at your favorite cafe, you’ll like this! The instant coffee adds a slight coffee flavor to the chocolate pie.
Salt
1/8 teaspoon salt
We don’t need much salt to get its support for the chemical reactions that make this chocolate pie taste good. Just be really careful not to add too much.
Gluten-Free Graham Cracker Pie Crust
1 9″ gluten-free graham cracker pie crust
And of course, we’ll need a pie crust to put our pie filling in. A graham cracker crust is my favorite pie crust to use for this chocolate pie.
Printable Gluten-Free Chocolate Pie Recipe Card
Ingredients
- one 9" gluten-free graham cracker crust baked and cooled
- 2¼ cups dairy-free semi-sweet chocolate chips (380 grams)
- 1⅔ cup coconut milk (400 grams) canned and blended until smooth
- 1/2 cup cashew butter
- 2 tbsp cocoa powder (12 grams)
- 1 teaspoon vanilla extract
- 1 teaspoon instant coffee powder
- 1/8 teaspoon salt
Instructions
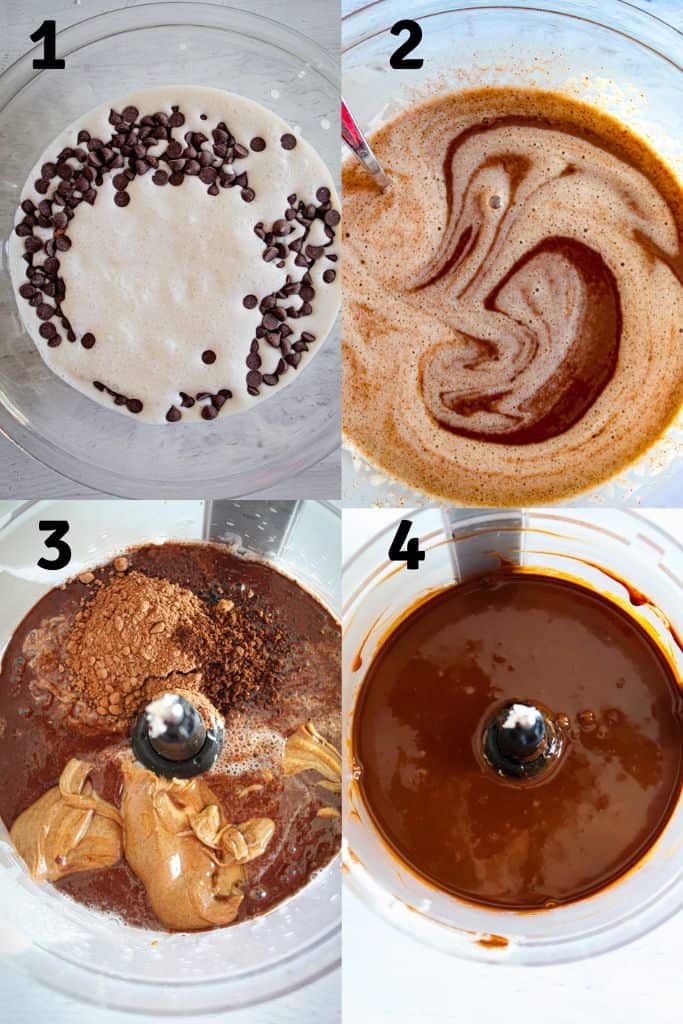
- Start by opening the can of coconut milk and blending it in the blender or food processor until the consistency is smooth and even.
- Combine coconut milk and chocolate chips in a saucepan. Heat until the chocolate chips are melted and mixed evenly with the coconut milk, stirring frequently. I like to use a whisk for this.
- Let the chocolate mixture cool until it is no longer steaming. Pour the chocolate mixture into the bowl of a food processor. Add the cashew butter, cocoa powder, vanilla extract, instant coffee powder, and salt to the food processor as well. Blend the mixture on high for 30 seconds. Then, scrape down the bowl with a rubber spatula and blend again for 15 more seconds until smooth.
- Place the pie crust into a pie pan if it isn’t in a pie pan already. Make sure it's completely cool if you just baked it.
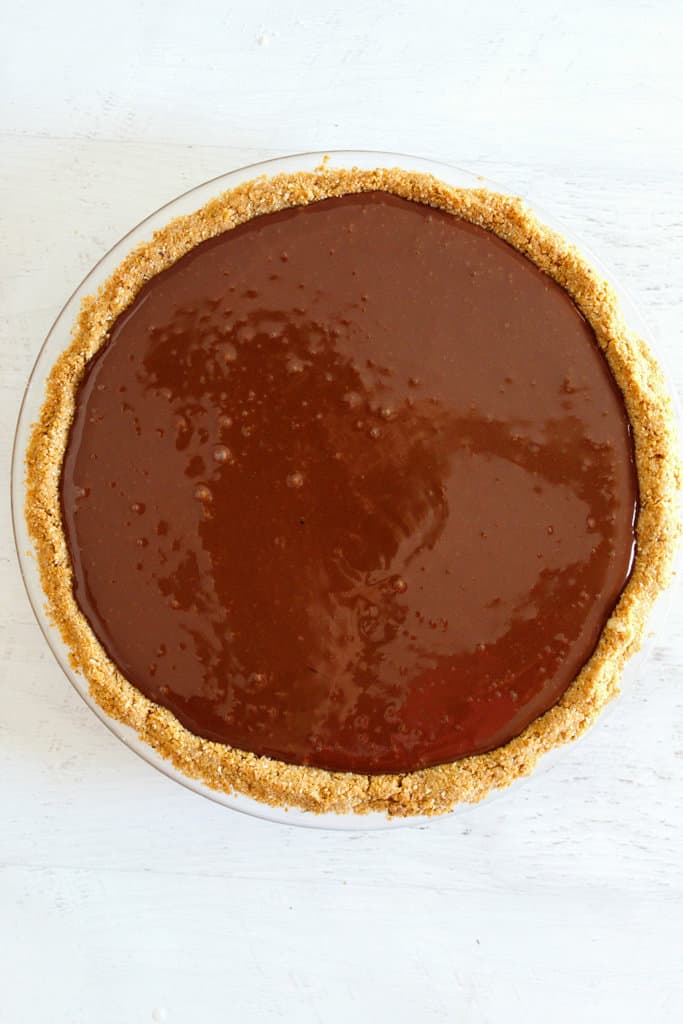
- Pour the pie filling mixture into the baked and cooled graham cracker crust. You may have a little bit of extra filling. Just fill the crust until the chocolate filling reaches the top but doesn’t overflow.
- Carefully move pie to the refrigerator and let chill for at least 4 hours before serving.
- Cut into 6 to 8 slices. Serve with favorite toppings.
Nutrition
Did you make and love this recipe? Give it your review and ![]() rating below! And make sure to follow me on Instagram, Pinterest and Facebook too!
rating below! And make sure to follow me on Instagram, Pinterest and Facebook too!
How to Make This No-Bake Chocolate Pie
Preparing this melt-in-your-mouth gluten-free chocolate pie doesn’t take long at all! You really just need to stick with it, and especially avoid getting distracted while combining the coconut milk and chocolate chips in the saucepan.
Step One: Prep the Coconut Milk
Start by opening the can of coconut milk and blending it in the blender or food processor until the consistency is smooth and even.
Step Two: Heat Coconut Milk and Chocolate Chips Together
Combine coconut milk and chocolate chips in a saucepan. Heat until the chocolate chips are melted and mixed evenly with the coconut milk, stirring frequently. I like to use a whisk for this.
This is really the most time-consuming part of making this pie filling, so be patient with it.
Step Three: Blend the Filling Until Silky Smooth
Let the chocolate mixture cool until it is no longer steaming.
Pour the chocolate mixture into the bowl of a food processor. Add the cashew butter, cocoa powder, vanilla extract, instant coffee powder, and salt to the food processor as well. Blend the mixture on high for 30 seconds.
Then, scrape down the bowl with a rubber spatula and blend again for 15 more seconds until smooth.
Step Four: Prepare Pie Crust
I often make my own pie crust, usually a gluten-free graham cracker crust for ones like this chocolate pie. There’s nothing wrong with store-bought pie crust, but I tend to be obsessive about reading the ingredients to make sure it’s legitimately gluten-free.
Place the pie crust into a pie pan if it isn’t already. (You can get as fancy with the pie pan as you like. It won’t even have to go in the oven if the crust is already baked.)
Step Five: Fill & Smooth the Pie
Pour the pie filling mixture into the baked and cooled graham cracker crust. You may have a little bit of extra filling. Just fill the crust until the chocolate filling reaches the top, but doesn’t overflow.
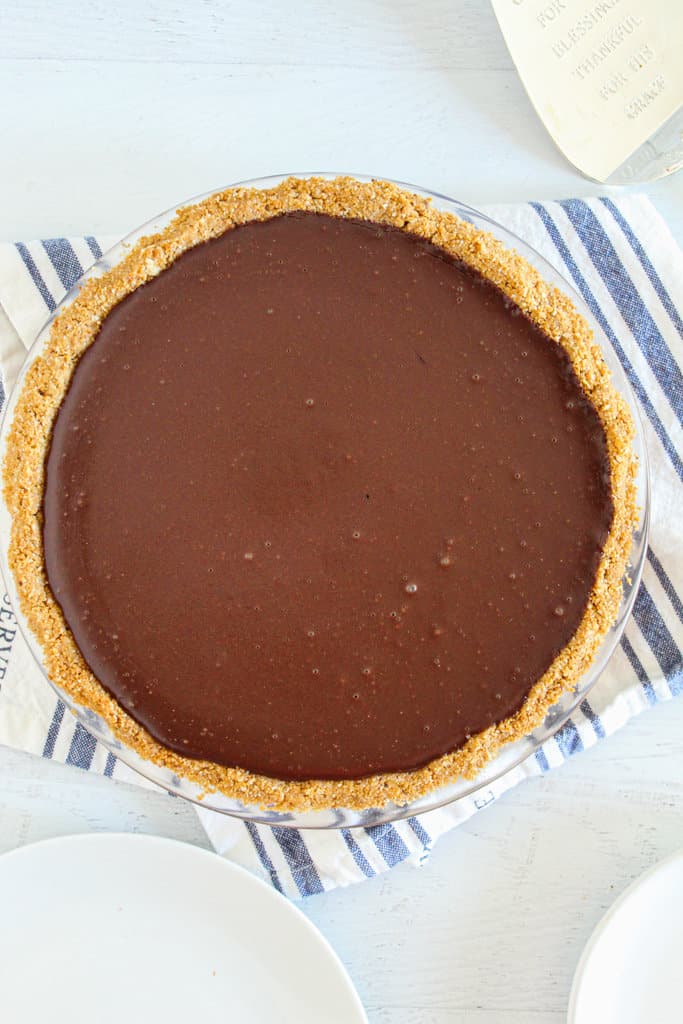
Step Six: Chill Pie
This is one pie where you don’t have to bake the filling with the pie. Prepare a big enough flat surface to hold the pie in your refrigerator. Carefully move the pie to the refrigerator and let it chill on the flat surface for at least 4 hours before serving.
This is where I like to be really careful! Often, I’ll move the space for the pie away from the front of the fridge to make sure it’s not going to fall out by accident.
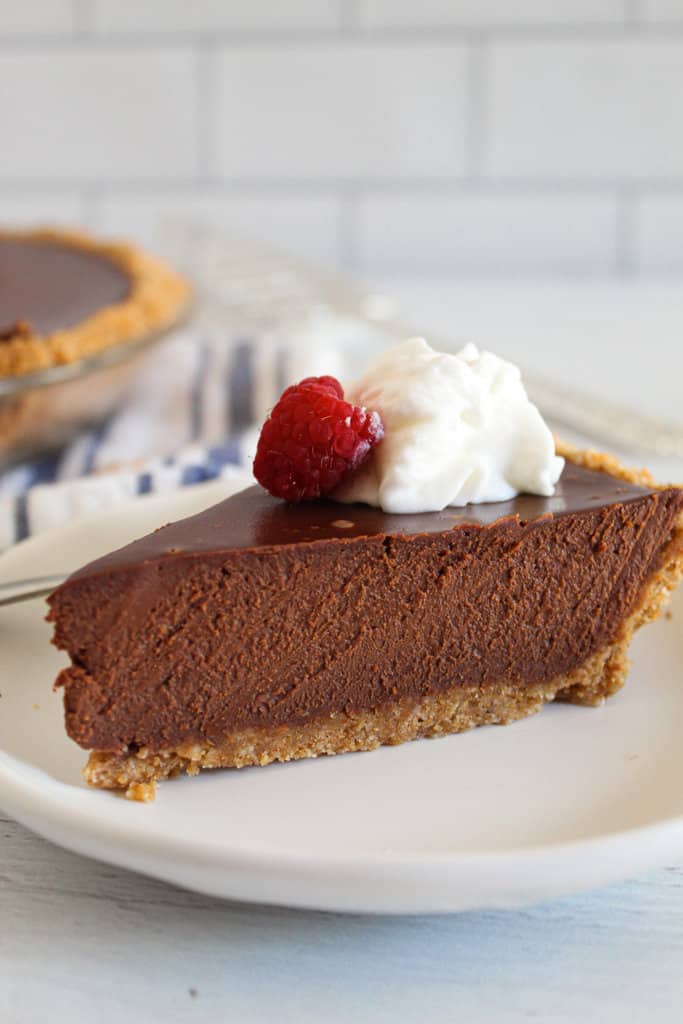
Step Seven: Serve With Favorite Toppings
Slice and serve with whipped topping, berries, chocolate or caramel chips, nut slivers, or whatever you like to top a chocolate pie with.
Storing
If you have any pie left over, it can be refrigerated for 2-3 days. Just wrap or cover it well and store it in the refrigerator for up to a week. It does not freeze well as the crust gets soggy after defrosting.
Substitutions for Gluten-Free Chocolate Pie
This recipe is designed to be reliable, but it’s also adaptable. Below are tested substitutions that maintain the pie’s smooth texture and deep chocolate flavor while allowing you to customize based on preferences or pantry availability.
- I use a homemade gluten-free graham cracker crust to make this pie. If you don’t want graham crackers, here’s another recipe for easy gluten-free pie crust that doesn’t include graham crackers. A store-bought gluten-free graham cracker crust can also be used if desired.
- This recipe was tested with Enjoy Life brand dairy-free chocolate chips. Regular chocolate chips can be used as a substitute if needed. I like to use dark chocolate to minimize the dairy and sugar content if I can’t find the Enjoy Life brand.
- I used the 365 by Whole Foods brand cashew butter for this recipe. Almond butter makes a good substitute for all or part of the cashew butter in a pinch.
- Nut-Free Option: Replace cashew butter with sunflower seed butter for a nut-free version. The flavor will be slightly earthier but still rich.
Don’t Substitute These Key Ingredients
This pie sets beautifully because of the specific balance of fat, chocolate, and emulsifiers. Changing the ingredients below can prevent it from firming properly or alter the texture. To guarantee a silky, sliceable filling, stick with these as written:
- There is no alternative to the cocoa powder in this recipe.
- There is no substitute for the coconut milk in this pie recipe. Make sure to use canned coconut milk. I used the 365 by Whole Foods brand coconut milk for this recipe.
- There is no substitute for the vanilla extract in this recipe. Any high-quality pure vanilla extract will work fine.
- There is no substitute for the coffee powder. However, you can leave it out or use your favorite brand of instant coffee. I recommend using legit coffee, not “mushroom coffee” or any coffee alternatives.
- There is no substitute for salt in this pie.
Flavor Variations
Once you’ve mastered the base recipe, it’s easy to customize this chocolate pie to match your taste or the occasion. These simple flavor tweaks keep the same creamy texture while adding a subtle twist.
Espresso Chocolate Pie
Add an extra ½ teaspoon instant coffee to deepen the chocolate flavor. It won’t taste like coffee — just richer and more intense.
Orange Chocolate
Stir in ½ teaspoon finely grated orange zest for a bright, citrusy contrast that pairs beautifully with dark chocolate.
Sea Salt Chocolate
Sprinkle flaky sea salt over the top before chilling for a sweet-and-salty finish that enhances every bite.
Dark Chocolate Lovers Version
Use 70% or higher dark chocolate chips for a bolder, less sweet pie with extra depth.
No matter which variation you choose, the result is still a smooth, sliceable chocolate pie that feels bakery-worthy, just with your own personal spin.
4 Reasons Why This Chocolate Pie Sets Perfectly (No Baking Required)
One of the best things about this chocolate pie is that it firms up beautifully in the fridge — no oven needed. Here’s why it works:
1. The Role of Full-Fat Coconut Milk
Full-fat coconut milk contains a high percentage of natural fat. When chilled, that fat solidifies and helps the filling set into a smooth, sliceable texture. Using light coconut milk can result in a softer pie that doesn’t hold its shape as well.
2. How Chocolate Helps It Firm Up
Chocolate contains cocoa butter, which hardens as it cools. When melted chocolate is blended with warm coconut milk and then chilled, the cocoa butter re-solidifies and gives the pie structure, similar to how ganache sets.
3. Why Cashew Butter Makes It Creamy
Cashew butter acts as a natural emulsifier. It helps bind the fat and liquid together, preventing separation while adding body and richness. The result is a silky filling that slices cleanly without being dense.
4. The Coffee Secret
The instant coffee doesn’t make the pie taste like coffee. Instead, it enhances the chocolate flavor and balances sweetness, making the overall flavor deeper and more intense.
When these ingredients chill together, they create a smooth, mousse-like texture that feels indulgent while staying stable enough for clean, beautiful slices.
5 Expert Tips for the Best Texture
Want bakery-level results? These small details make a big difference:
- Use Full-Fat Coconut Milk Only: Shake the can before opening. If the cream and liquid are separated, warm gently and stir until smooth before using.
- Melt Chocolate Gently: Overheating chocolate can cause it to seize or become grainy. Heat it slowly with the coconut milk until just melted.
- Blend Until Completely Smooth: If using a food processor or blender, scrape down the sides and blend until the filling looks glossy and fully emulsified.
- Chill Long Enough: For clean slices, refrigerate at least 4 hours — overnight is even better. This allows the cocoa butter and coconut fat to fully firm up.
- Use a Warm Knife for Perfect Slices: Run a knife under hot water, wipe dry, then slice. Repeat between cuts for smooth, clean edges.
Chocolate Pie Questions, Answered
If this is your first time making a no-bake chocolate pie, a few questions might pop up along the way — especially about texture and setting. I’ve answered the most common ones below to help you get perfect results the first time.
If you don’t see your question here, leave it in the comments below. I’m happy to help, and your question may help other readers, too!
Can I make this chocolate pie without a blender or food processor?
Yes. Using a blender or food processor to make this pie filling makes the process super quick and easy, though. That said, it can be made with a hand mixer if needed. I would not recommend mixing this up by hand just because it will require some vigorous mixing.
What does the instant coffee powder do in this recipe?
The instant coffee powder enhances the chocolate flavor of the pie filling to make it even richer and more flavorful. It can be omitted from the recipe if needed, but I definitely recommend it for a stronger chocolatey taste!
Why did my pie filling get uneven or spill a little while it was in the fridge?
If it spilled a little, it’s very possible that the pie crust was overfilled. Spilling or uneven filling can also mean that it wasn’t refrigerated on a completely flat surface.
How do I know when it’s fully set?
The pie is ready when the center feels firm to the touch and no longer looks glossy or soft in the middle. It should not jiggle when you gently shake the pan.
Refrigerate for at least 4 hours, but overnight chilling is ideal for the cleanest slices. If you try to cut it too early, the filling may appear soft even though it will firm up properly with more time in the fridge.
If in doubt, give it another hour; patience makes all the difference with no-bake pies.
Why doesn’t this pie need to be baked with the filling in it?
Unlike pumpkin pie or apple pie, chocolate pie is a cream or custard-type pie that does just fine if allowed to chill in the fridge for a few hours for the filling to set. Most of the “cooking” necessary to make this type of pie filling, like melting together the coconut milk and chocolate chips, is typically done on the stovetop.
Does this pie taste like coconut?
No, it doesn’t have a strong coconut flavor. The chocolate is the dominant taste, and the small amount of instant coffee helps deepen and balance it even more.
Full-fat coconut milk is used primarily for its texture and fat content, which allows the pie to set without baking. Once blended with melted chocolate and chilled, any subtle coconut notes fade into the background. Most people won’t even realize coconut milk is in the recipe unless you tell them.
More Pie Recipes
If you’re already in pie-making mode, why stop at just one? Whether you’re planning for the holidays, hosting a gathering, or simply craving something sweet, these pies are just as reliable and crowd-pleasing.
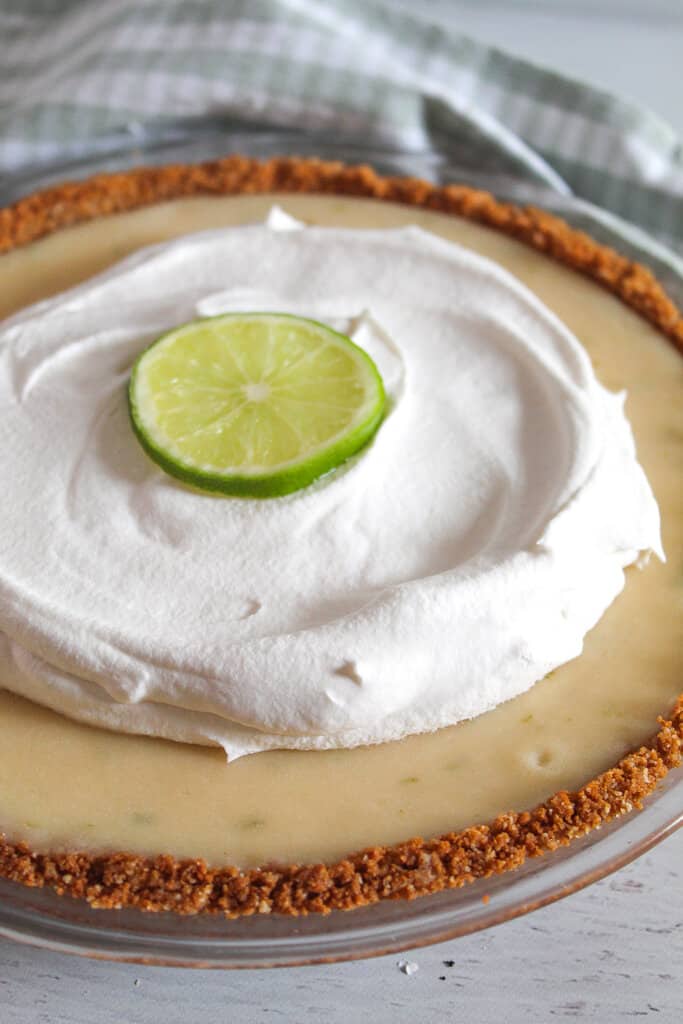
- Easy Gluten-Free Key Lime Pie (Dairy Free)
- Gluten-Free Buttermilk Pie: Custardy, Tangy & Irresistible
- Gluten-Free Cherry Pie Recipe: Easy & Dairy-Free
- Gluten-Free Pumpkin Pie {Dairy-Free}
Each one is made with the same focus on rich flavor and simple, approachable ingredients, so you can bake with confidence and enjoy every slice.
How Did Yours Turn Out?
I’d love to hear how your chocolate pie turned out. Did it set perfectly? Did you try a flavor variation?
Leave a comment below and let me know. Your feedback helps other readers and makes this recipe even better.