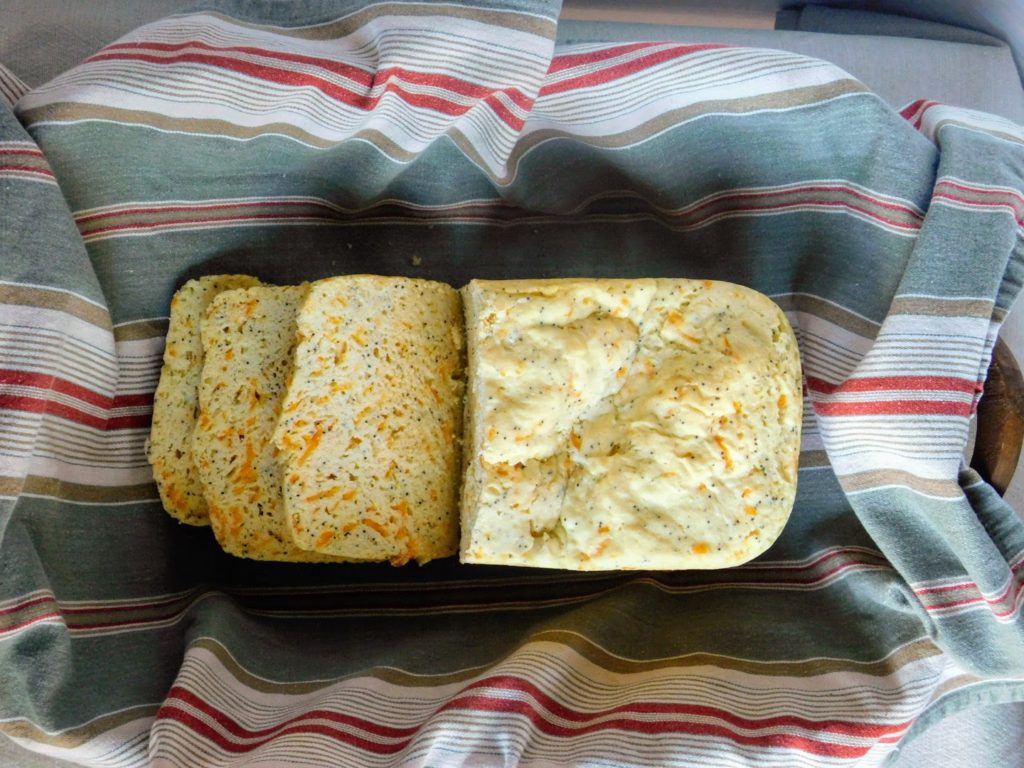
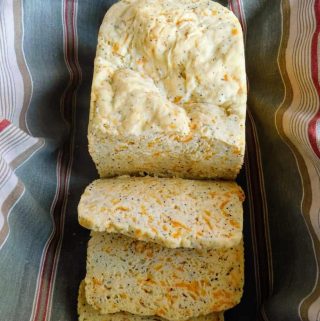
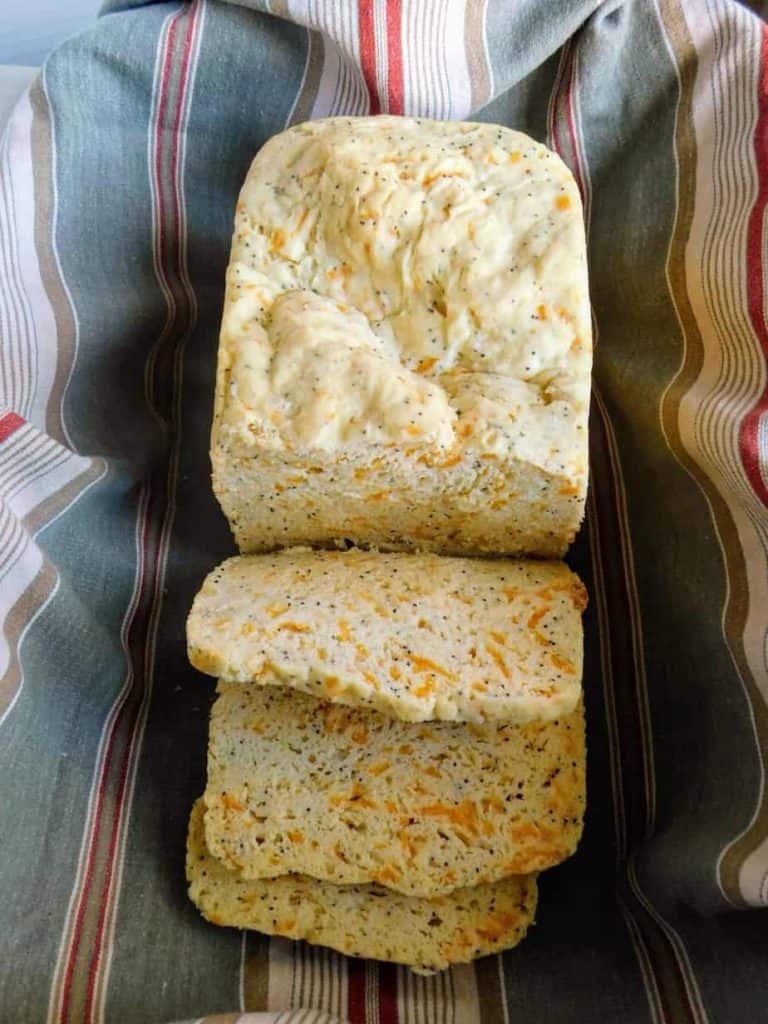
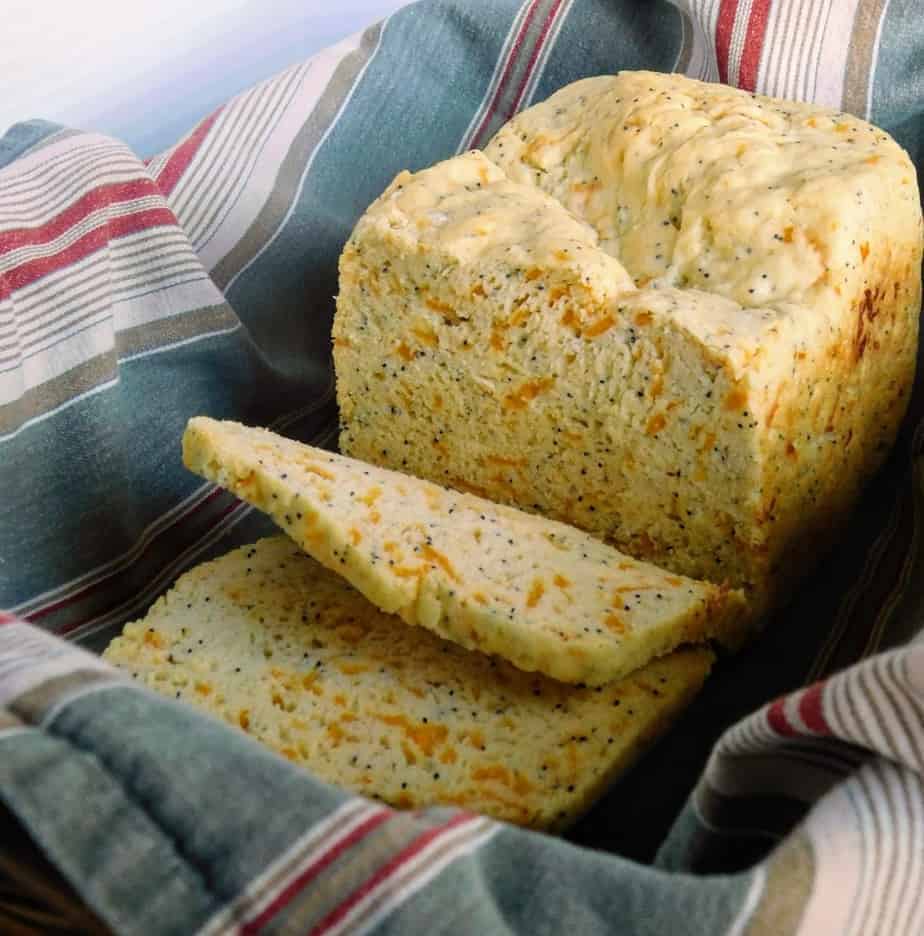
Let’s be real: gluten-free cheddar cheese bread can be tricky to get right in the oven. Sometimes the top looks golden and cheesy, but the middle is still gooey. Other times, the center finally bakes through, but the cheese on top has gone too far.
After enough not-quite-right loaves, I finally reached for my bread machine. And yes, it can feel a little like “cheating” when the machine does most of the work. But for this recipe? It’s the most reliable way I’ve found to get a soft, savory cheddar loaf that bakes evenly all the way through.
Table of Contents
The bread machine helps balance the cheese, herbs, and gluten-free dough so the loaf comes out tender, flavorful, and fully baked in the center. You still need to choose the right setting and keep an eye on the dough as it mixes, but once it gets going, the machine does the heavy lifting.
Why Bake Cheddar Cheese Bread in the Bread Machine?
If you make gluten-free bread often, especially recipes with extras like cheese and herbs, a bread machine can be a huge help. The right setting gives the loaf enough time to mix, rise, and bake without the oven guesswork.
This cheddar cheese bread can be fussy in a regular oven because the cheese browns quickly, while the inside of the loaf needs more time to set. In the bread machine, the heat is more controlled, which helps the bread bake through while still giving you that cozy cheddar flavor in every slice.
A bread machine helps because it:
- Will mix the dough evenly so the cheese, herbs, and dry ingredients are well distributed.
- Keeps the process simple with less hands-on time than traditional bread making.
- Controls the rise and bake time better than guessing in the oven.
- Helps prevent burnt cheese on top while giving the center time to bake through.
- Creates a softer, more consistent loaf once you find the right setting for your machine.
It may take a try or two to get comfortable with your machine’s settings, especially if you do not use it often. But once you know which cycle works best, this recipe gives you a soft, cheesy loaf with a great balance of herbs, cheddar, and tender bread.
Equipment Needed for Cheddar Cheese Bread
Because we’re making this in the bread machine, we don’t need a ton of equipment. That means less to clean up later, right?
- Medium Mixing Bowl
- Large Mixing Bowl
- Bread Machine
- Rubber Spatula
- Wire Cooling Rack
- Bread Knife (for slicing)
Ingredients for Cheddar Cheese Bread
For a bread like this, the ingredients aren’t very surprising. If you need to run to the grocery store for one or two items, feel free to print or save the recipe card below for easy reference.
- Eggs
- Warm (but not too hot!) water
- Vegetable oil
- Active dry yeast
- White rice flour
- Brown rice flour
- Dry milk powder
- White granulated sugar
- Poppy seeds
- Dried dill weed
- Xanthan gum
- Salt
- Shredded sharp cheddar cheese
Key Ingredient Roles
Curious about any of these ingredients? Each of them brings something unique to this recipe. Here’s a quick rundown.
Eggs
3 eggs
Eggs are the most common binder for baked goods because their unique proteins bind with other ingredients to keep the bread from falling apart. The yolks also contain an emulsifier that helps the oil and water mix together more thoroughly.
Water
1 1/2 cups water
Besides adding most of the moisture to this bread, warm water activates the yeast, creating the perfect texture for your bread. The important thing is to get it warm but not too hot, since the yeast is actually alive and can be killed if the water gets above 120 degrees Fahrenheit.
Vegetable Oil
2 tablespoons vegetable oil
Vegetable oil is a relatively healthy way to add the fat this bread needs to turn out perfectly tender and moist. It also adds a bit of flavor.
What’s the difference? Isn’t all fat the same? Not necessarily! Some sources of fat are healthier than others, and it mostly depends on the structure of the fat molecules. The right vegetable oil contains high levels of monounsaturated fat, which is a heart-healthy fat. (Personally, I tend to default to olive oil when I don’t need something super rich, since it has one of the highest levels of monounsaturated fat.) That makes it different from butter, which has a high level of saturated fat.
Active Dry Yeast
2 1/4 teaspoons active dry yeast
Active dry yeast is a biological leavening agent that ferments sugar, creating air pockets that make this bread perfectly fluffy. For this bread recipe, the yeast is enough to handle the job, which means we won’t need common chemical leavening agents like baking powder and baking soda.
White Rice Flour
2 cups rice flour
You may have noticed that this recipe calls for two types of flour. A mix of multiple types of flour is actually common in gluten-free recipes.
White rice flour adds a lighter texture to baked goods because the rice’s bran and germ have been removed before it is ground into flour. Removing the bran and germ removes some of the fiber and nutrients that rice would normally have. It also makes white rice flour suitable for baked goods intended to be lighter and fluffier.
Brown Rice Flour
1 cup brown rice flour
Brown rice flour is a little denser than white rice flour because it retains the bran and germ. It also has higher fiber and nutrient content. The additional fiber makes brown rice flour suitable for helping retain moisture in this bread.
Dry Milk Powder
1/4 cup dry milk powder
Dry milk powder can enhance the flavor and tenderness of this bread. It also helps the bread stay fresh longer and improves its ability to rise in the bread machine.
White Granulated Sugar
2 tablespoons white granulated sugar
Granulated sugar gives the yeast something to work with as it creates the carbon dioxide bubbles that make this bread rise to a perfect, fluffy texture. It can also add a bit of sweetness to balance the savory flavor of the cheese and herbs.
Poppy Seeds
1 tablespoon poppy seeds
Poppy seeds add a bit of crunch and a mildly sweet, nutty flavor to this bread.
Dried Dill Weed
1 1/2 tablespoons dried dill weed
Dill weed adds a nice herbal flavor with hints of anise and lemon that perfectly complements the cheese in this bread.
Xanthan Gum
3 1/2 teaspoons xanthan gum
Xanthan gum is most often used as a binder and thickener. It can also add elasticity to a recipe. It’s most commonly used as a replacement for the gluten in a gluten-free recipe.
Salt
1 teaspoon salt
Salt supports many of the chemical reactions that add flavor to this bread. In this case, it’s a good complement to sharp cheddar cheese. Of course, we have to be careful not to add too much so we don’t overwhelm the bread with salt!
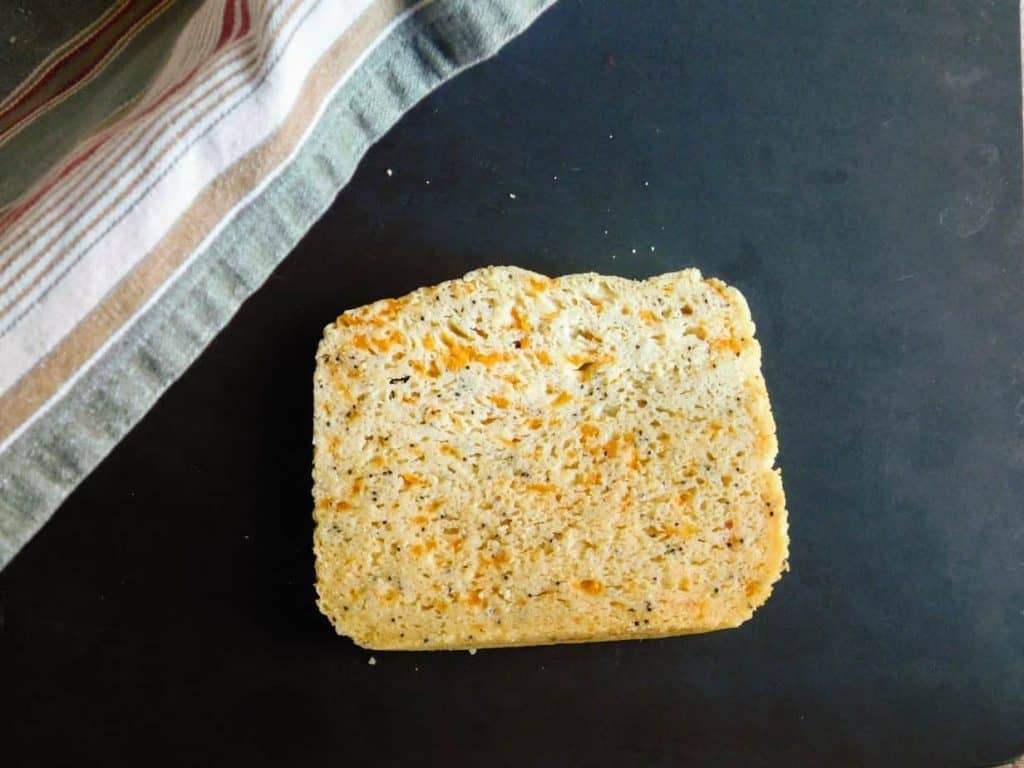
Sharp Cheddar Cheese
1 1/2 cups sharp cheddar cheese, shredded
I like to go as sharp as possible when buying cheddar cheese for a recipe where the cheese is the star of the show! It brings a tangy richness to this bread that I really like. I’ll often also buy a block of cheese and shred my own to be sure it’s relatively fresh.
Printable Gluten-Free Cheddar Cheese Bread Recipe Card
Ingredients
WET INGREDIENTS
- 3 eggs
- 1 ½ cups water
- 2 Tbsp. Vegetable oil
DRY INGREDIENTS
- 2 ¼ tsp. Active dry yeast
- 2 cups white rice flour
- 1 cup brown rice flour
- ¼ cup dry milk powder
- 2 Tbsp. white sugar
- 1 Tbsp. poppy seeds
- 1 ½ Tbsp. dried dill weed
- 3 ½ tsp. xanthan gum
- 1 tsp. salt
- 1 ½ cups shredded sharp Cheddar cheese
Instructions
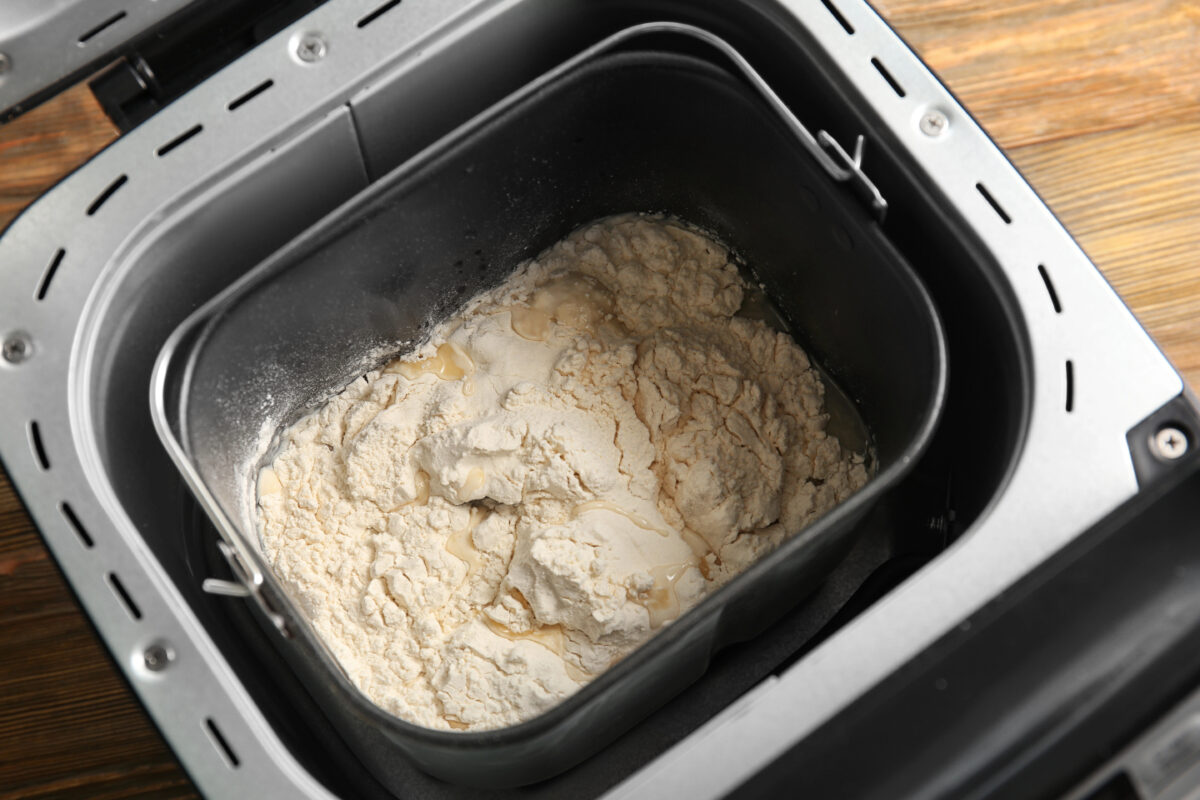
- Let the wet ingredients sit on the counter until they reach room temperature. Warm the water up a little more to activate the yeast, but don’t boil it. Then mix the eggs, water, and vegetable oil in a medium bowl.
- Mix the white rice flour, dry rice flour, yeast, sugar, dry milk powder, poppy seeds, dill weed, xanthan gum, salt, and cheddar cheese in a large bowl until evenly mixed.
- Pour the wet ingredient mixture into the bread machine’s basket. Then pour the dry ingredient mixture into the basket. Don’t worry about mixing them, because the bread machine will handle that.
- Select the "gluten-free" or "whole wheat" setting and press start.
- For the first 5 minutes or so, keep a spatula handy to push the mixture down and make sure it’s mixing well.
- Leave the machine alone to work. On my machine, it takes about four hours.
- Let the bread cool for about 5 minutes before removing it from the bread machine. Then transfer it to a wire cooling rack. Let it finish cooling before slicing it.
Notes
- Mix the dry ingredients and wet ingredients separately before adding to the bread machine pan.
- Check the batter as it’s mixing to scrape down any flour.
- Remove the bread from the bread machine pan after 5 minutes of cooling.
Nutrition
How To Make Gluten-Free Cheddar Cheese Bread in a Bread Machine
Let’s jump right into it, because this bread can take a while! I recommend making yourself a snack while you wait, because it smells delicious as it bakes.
Step One: Mix Wet Ingredients
I prefer to let the wet ingredients sit on the counter until they reach room temperature first. Warm the water up a little more to activate the yeast, but don’t boil it. Then mix the eggs, water, and vegetable oil in a medium bowl.
Step Two: Mix Dry Ingredients
Mix the white rice flour, dry rice flour, yeast, sugar, dry milk powder, poppy seeds, dill weed, xanthan gum, salt, and cheddar cheese in a large bowl until evenly mixed.
Step Three: Add Ingredients to Bread Machine
Pour the wet ingredient mixture into the bread machine’s basket. Then pour the dry ingredient mixture into the basket. Don’t worry about mixing them, because the bread machine will handle that.
Why not activate the yeast first? I know activating the yeast in warm water is normal for other bread recipes that don’t call for letting the bread machine do most of the work. However, the bread machine will handle that for you, too!
Step Four: Turn On the Bread Machine
Select the gluten-free setting on your bread machine if it has one. If it doesn’t, the whole wheat setting should work. (I have it memorized that whole wheat is Setting 3 on my machine, but it might be different on yours, so be sure to check your manual if you aren’t sure!)
Step Five: Watch It Mix the Ingredients
I like to watch it for about five minutes while it mixes the ingredients. The reason is that I might need to scrape down the sides of the basket with the spatula to make sure everything mixes in evenly.
Step Six: Let the Machine Work
On my machine, it takes about 4 hours from the time I turn it on until it’s done. This gives the bread time to rise and then bake.
Step Seven: Let Bread Cool Slightly Before Removing From Machine
Let the bread cool for about 5 minutes before removing it from the bread machine. Then transfer it to a wire cooling rack. Let it finish cooling before slicing it. This gives the center of the bread time to finish setting, so it’s not gummy.
5 Bread Machine Tips for Best Results
Bread machines make this recipe easier, but a few small details can make a big difference in the final loaf.
- Use the gluten-free setting if your machine has one. This setting is usually designed with a different mixing, rising, and baking cycle than a standard wheat bread setting.
- Scrape the sides during the first few minutes. Gluten-free dough can leave dry flour pockets in the corners of the pan, so use a rubber spatula to help everything mix evenly.
- Do not walk away right away. Once the loaf is mixing smoothly, the machine can do the rest, but the first 5 minutes are worth watching.
- Let the bread cool before slicing. Gluten-free bread needs time to finish setting. If you slice it too early, the center may seem gummy even if it is fully baked.
- Check your machine manual. Bread machines vary, so the exact timing and setting names may be different from mine.
Troubleshooting Gluten-Free Cheddar Cheese Bread
Gluten-free bread machine recipes can behave a little differently than traditional bread recipes, especially when cheese is added. If your loaf sinks, turns out gummy, or has dry flour in the corners, these tips can help.
The Middle Sank While Baking
This usually means the loaf had too much liquid, too much yeast, or not enough structure to hold the rise. It can also happen if the bread rises too quickly before the center has time to set.
Next time, measure the ingredients carefully, especially the liquid and flour. If the loaf sinks again, reduce the water by 1–2 tablespoons and make sure you are using the correct bread machine setting.
The Bread Is Gummy in the Center
A gummy center can happen if the bread did not bake long enough or if it was sliced too soon after baking. Gluten-free bread needs time to cool and finish setting.
Let the loaf cool before slicing. If your bread machine has a bake-only setting, you can also add a few extra minutes of bake time next time.
There Is Dry Flour Stuck in the Corners
Gluten-free dough does not always move around the bread machine pan the same way wheat dough does. Flour can get trapped in the corners if the paddle does not pull everything in.
During the first few minutes of mixing, use a rubber spatula to scrape the sides and corners of the pan so everything gets incorporated.
The Loaf Is Dense or Heavy
A dense loaf may mean the yeast was old, the liquid was too hot or too cold, or the dough did not mix evenly.
Use fresh yeast, make sure the liquid is warm but not hot, and watch the first few minutes of mixing so you can scrape down the pan if needed.
The Top Browns Too Much
Cheese can brown quickly, especially if your bread machine runs hot or the loaf sits on the warm setting too long after baking.
Remove the loaf from the machine soon after the baking cycle ends. If your machine has crust settings, choose a lighter crust next time.
The Cheese Flavor Is Too Mild
Mild cheddar or pre-shredded cheese may not give the loaf as much flavor.
For a stronger cheese flavor, use sharp cheddar and shred it from a block if possible.
The Loaf Is Crumbly When Sliced
Crumbly slices can happen if the bread is too dry, overbaked, or sliced while still warm.
Let the bread cool before slicing, and use a serrated knife. If it still turns out crumbly next time, double-check your flour measurement and avoid adding extra flour.
The Dough Looks Too Wet While Mixing
Gluten-free bread dough is usually softer and stickier than wheat dough. It may look more like thick batter than traditional bread dough.
Do not add extra flour too quickly. Let the machine mix for a few minutes first. If the dough looks thin and soupy instead of thick and sticky, add flour 1 tablespoon at a time.
The Paddle Leaves a Large Hole in the Loaf
This is normal with bread machine bread. The paddle bakes into the bottom of the loaf and leaves a space when removed.
If your machine timing allows it, you can remove the paddle before the final rise. Otherwise, let the loaf cool and slice around the hole.
The Loaf Sticks to the Pan
This can happen if cheese or dough bakes onto the sides of the pan or around the paddle.
Let the bread cool in the pan for a few minutes, then gently loosen the sides with a silicone spatula before turning it out. Make sure the bread pan is clean before starting the recipe.
Substitutions for Gluten-Free Cheddar Cheese Bread
Don’t want to use xanthan gum? Psyllium husk powder is the easiest to substitute for xanthan gum at a 1:1 ratio. Ground chia seeds and flaxseed meal also work well as replacements for xanthan gum. Here’s our handy guide to replacing xanthan gum in a recipe.
While I don’t think “flax eggs” work quite as well in a bread recipe as eggs do, it’s possible to replace one or two eggs with flaxseed. For each egg you want to replace, mix one tablespoon of flaxseed meal with three tablespoons of water. Let the mixture sit for a few minutes before adding it to the recipe so it forms a gel.
Gouda and Gruyere make a good replacement for cheddar if you want to try different cheeses in your bread. It’s also possible to find dairy-free cheddar cheese if you prefer to reduce the amount of dairy in your bread. I prefer the Never Better dairy-free cheese for baking.
I haven’t tried any replacements for white rice flour. Sorghum flour and oat flour can serve as replacements for brown rice flour. Here’s a quick guide to replacing brown rice flour.
FAQ About Gluten-Free Cheddar Cheese Bread
While I think making bread in the bread machine is pretty easy, we do sometimes get questions! I did my best to answer some of the most common questions here. If you think of one I haven’t answered yet, feel free to ask in the comments section, and we’ll do our best to answer as soon as possible!
What bread machine setting should I use?
Use the gluten-free setting if your bread machine has one. If it does not, use the basic or rapid setting with only one rise, if available. Gluten-free bread does not need the same kneading and multiple-rise cycle as wheat bread.
Why should I watch the bread during the first few minutes?
Gluten-free dough can leave dry flour in the corners of the bread machine pan. Watching the first few minutes lets you scrape down the sides with a rubber spatula so everything mixes evenly.
The middle fell on my bread loaf while it was baking! Why is that?
The most common reason is that the ratio of liquids to flour was off by just a smidge! Try reducing the amount of water by a couple of tablespoons or making sure you use the right amount of flour.
I’ll often weigh my flour in grams using a good digital food scale to be sure. There are 128 grams of brown rice flour or 160 grams of white rice flour in a cup. (Yes, the grams of flour per cup can vary!)
What can I do if my bread machine doesn’t have a “gluten-free” setting?
Compensating for the lack of gluten is always the tricky part of gluten-free baking, but the whole wheat setting on my bread machine seems to work just as well.
Can I use pre-shredded cheddar cheese?
Yes, but freshly shredded cheddar usually gives the bread a better flavor and texture. Pre-shredded cheese often contains anti-caking ingredients, which can affect how smoothly the cheese melts into the loaf. For the best cheddar flavor, shred sharp cheddar from a block.
How can I make this if I don’t have a bread machine?
I haven’t really tried making this specific cheddar cheese bread without a bread machine. However, it’s probably somewhat similar to my other cheesy bread recipe (with Italian herbs). I know, I can’t get enough cheese!
Can I use a 1:1 gluten-free flour blend instead of the flours listed?
The thing about substituting one gluten-free flour or flour blend for another is that they can produce different baking results. I wouldn’t recommend using a flour blend labeled “1:1” (King Arthur is a common 1:1 brand) because it may contain ingredients like xanthan gum or starches that can throw off the texture.
How should I store gluten-free cheddar cheese bread?
Let the bread cool completely, then wrap it tightly and store it at room temperature for 1–2 days. For longer storage, slice the loaf and freeze the slices in an airtight freezer bag. Thaw the slices out at room temperature for a couple of hours when you need them.
What kind of foods go well with this cheddar cheese bread?
I like to serve savory breakfast and dinner dishes with this bread! It goes well with soup, chili, stew, scrambled eggs, omelets, salads, and roasted vegetables.
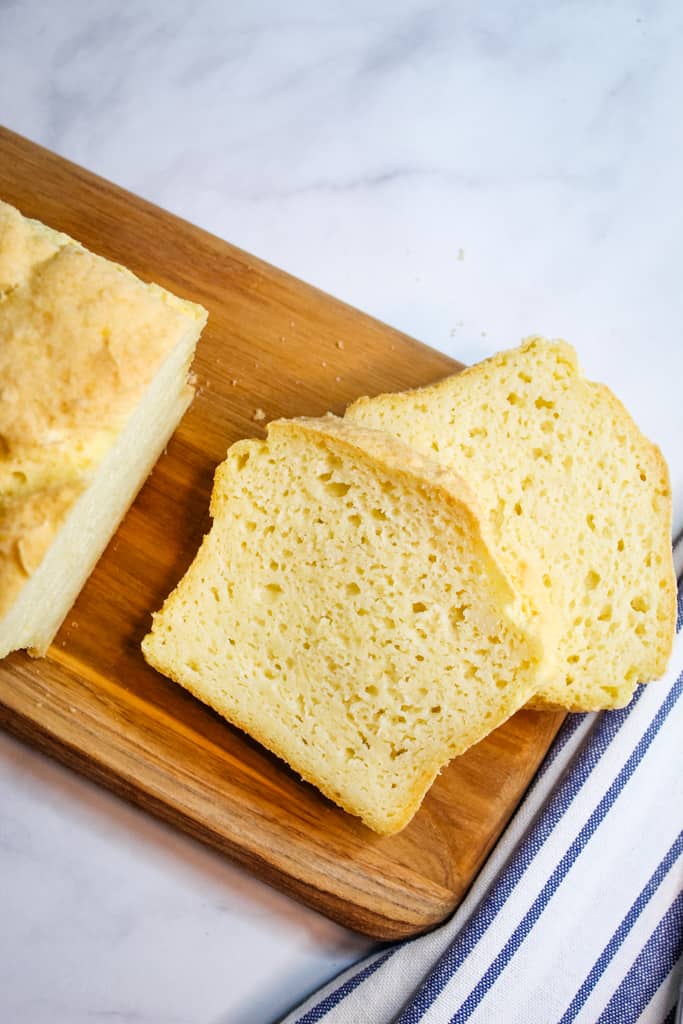
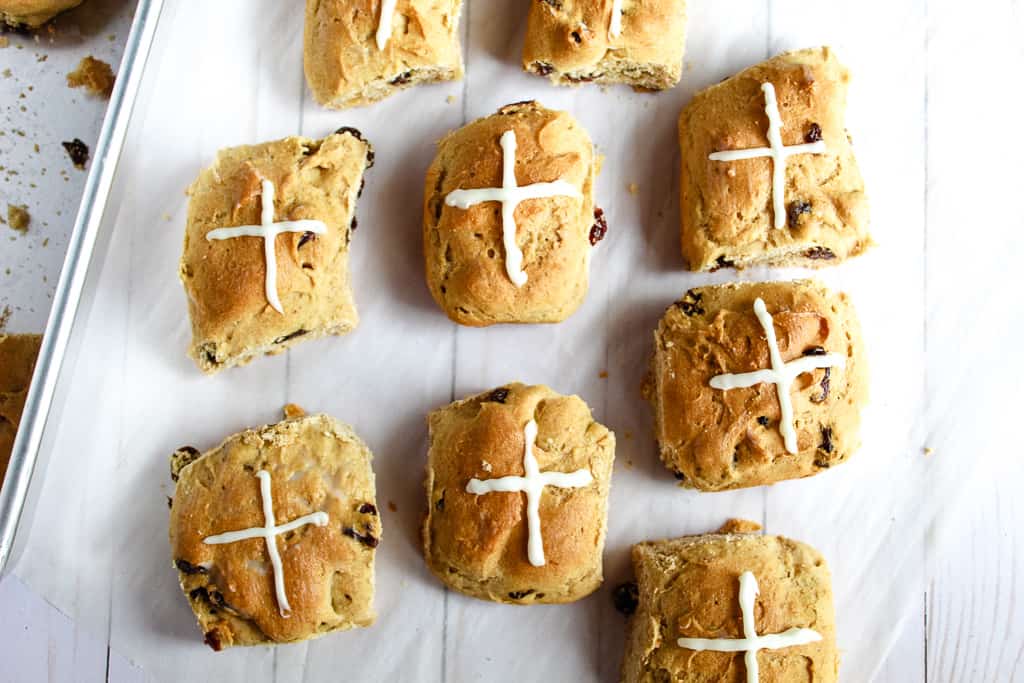
More Easy Bread Machine Recipes
Want to try other breads in your bread machine? Here are a few favorites!
Whether you’re making a savory loaf, a sweet breakfast bread, or soft dinner rolls, these recipes are easy ways to get more use out of your bread machine.
Did You Make This Cheddar Cheese Bread?
I’d love to hear how it turned out for you! Leave a comment and star rating below to share what bread machine setting you used, whether you made any swaps, and what you served it with.
Your feedback helps other bakers feel confident trying the recipe, and it lets me know which bread machine recipes you’d like to see next.