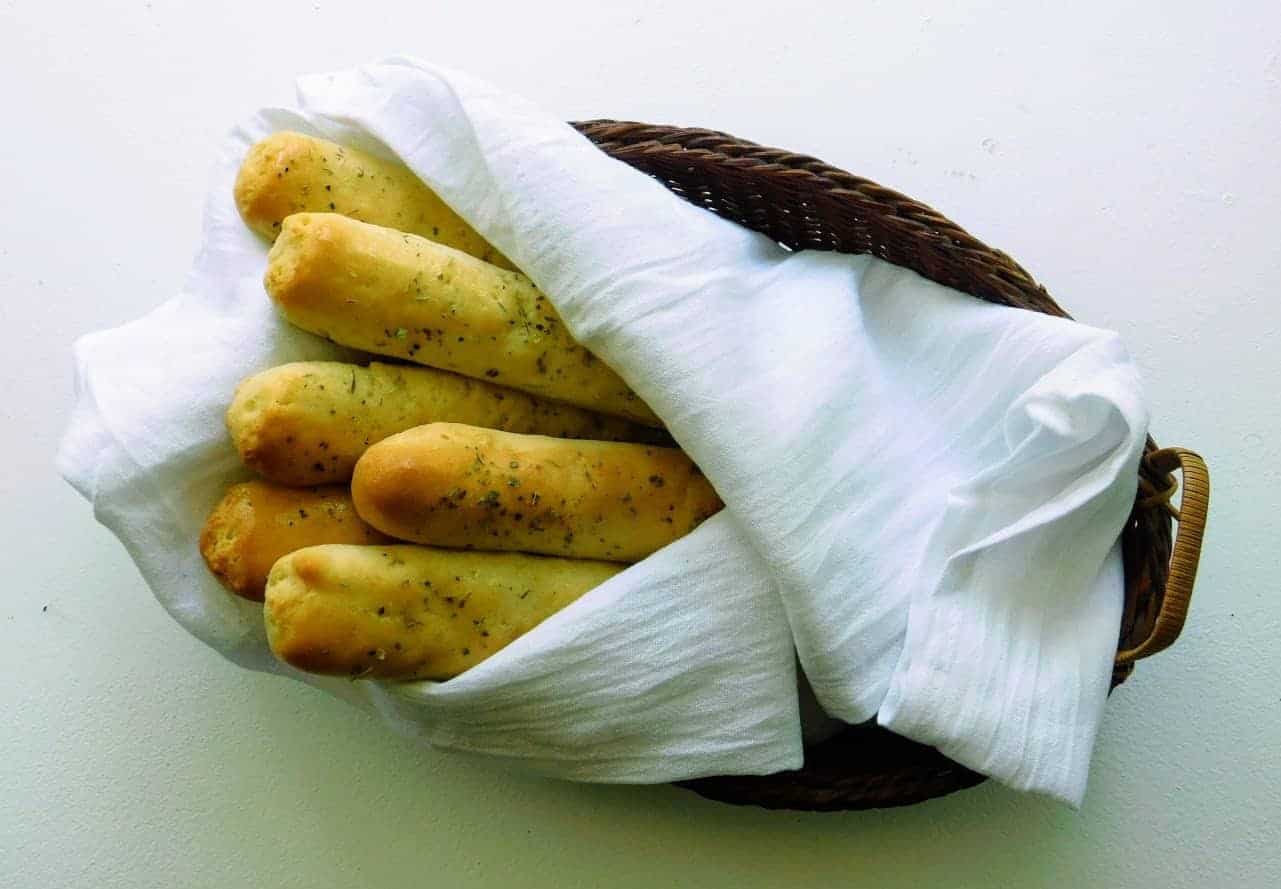
Nothing beats warm, buttery, gluten-free breadsticks for soaking up soup or dipping into a sauce. Yet many gluten-free recipes trade softness for structure, leaving you with something closer to a cracker than a light, pillowy breadstick.
If that sounds familiar, you’re not alone. The good news? In just 45 minutes, you can make soft, restaurant-style gluten-free breadsticks that are golden on the outside, fluffy on the inside, and so delicious no one will guess they’re gluten-free.
Table of Contents
Looking for more quick gluten-free treats? Try our Peanut Butter Cookies for a simple, 5-ingredient snack that comes together in no time.
In this article, you’ll learn everything you need to make these gluten-free breadsticks right at home. By the end, you’ll know exactly how to bake warm, satisfying breadsticks you can serve straight from the oven.
Why You’ll Love These Gluten-Free Breadsticks
These gluten-free breadsticks are everything you want in a homemade side dish: soft, flavorful, easy to make, and incredibly satisfying. Whether you’re serving them with dinner, enjoying them as a snack, or dipping them into your favorite sauces, they’re guaranteed to become a repeat recipe in your kitchen.
They’re also surprisingly simple to prepare. Even if it’s your first time making homemade breadsticks, the process is straightforward. The dough comes together quickly, and shaping it into thin logs is easier than you might expect.
These breadsticks are far from bland. The dough is enriched with olive oil for added depth, then finished with a sprinkle of Italian seasoning, which brings a fragrant, savory flavor to every bite.
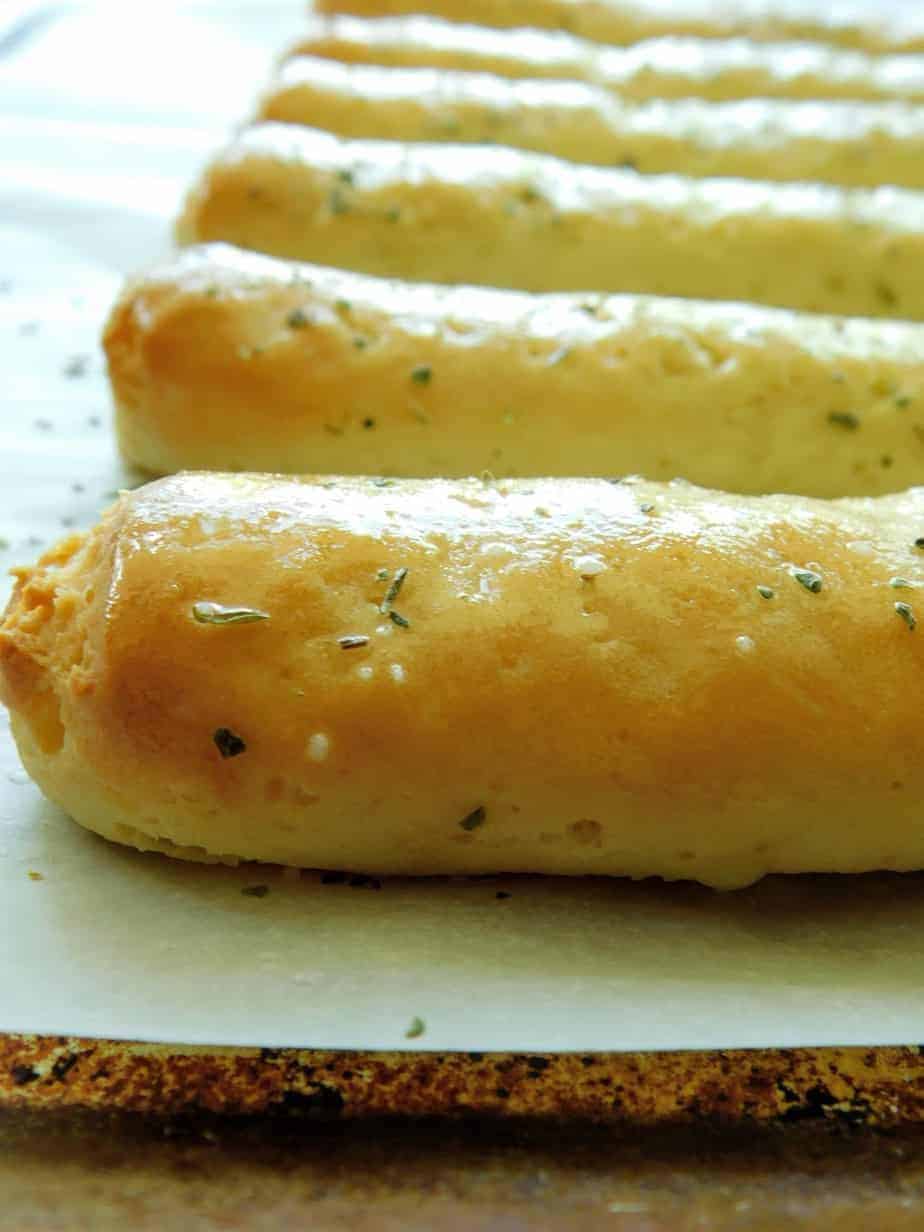
And let’s talk about texture. Brushed with garlic butter right after baking, they have a soft, chewy, pillowy interior with a lightly crisp exterior. They’re satisfyingly hearty, and even days later, they still hold up well.
Their versatility is another reason to love them. Whether you’re dipping them in marinara, cheese sauce, or even something sweet, they pair beautifully with pasta dishes, soups, or fresh salads.
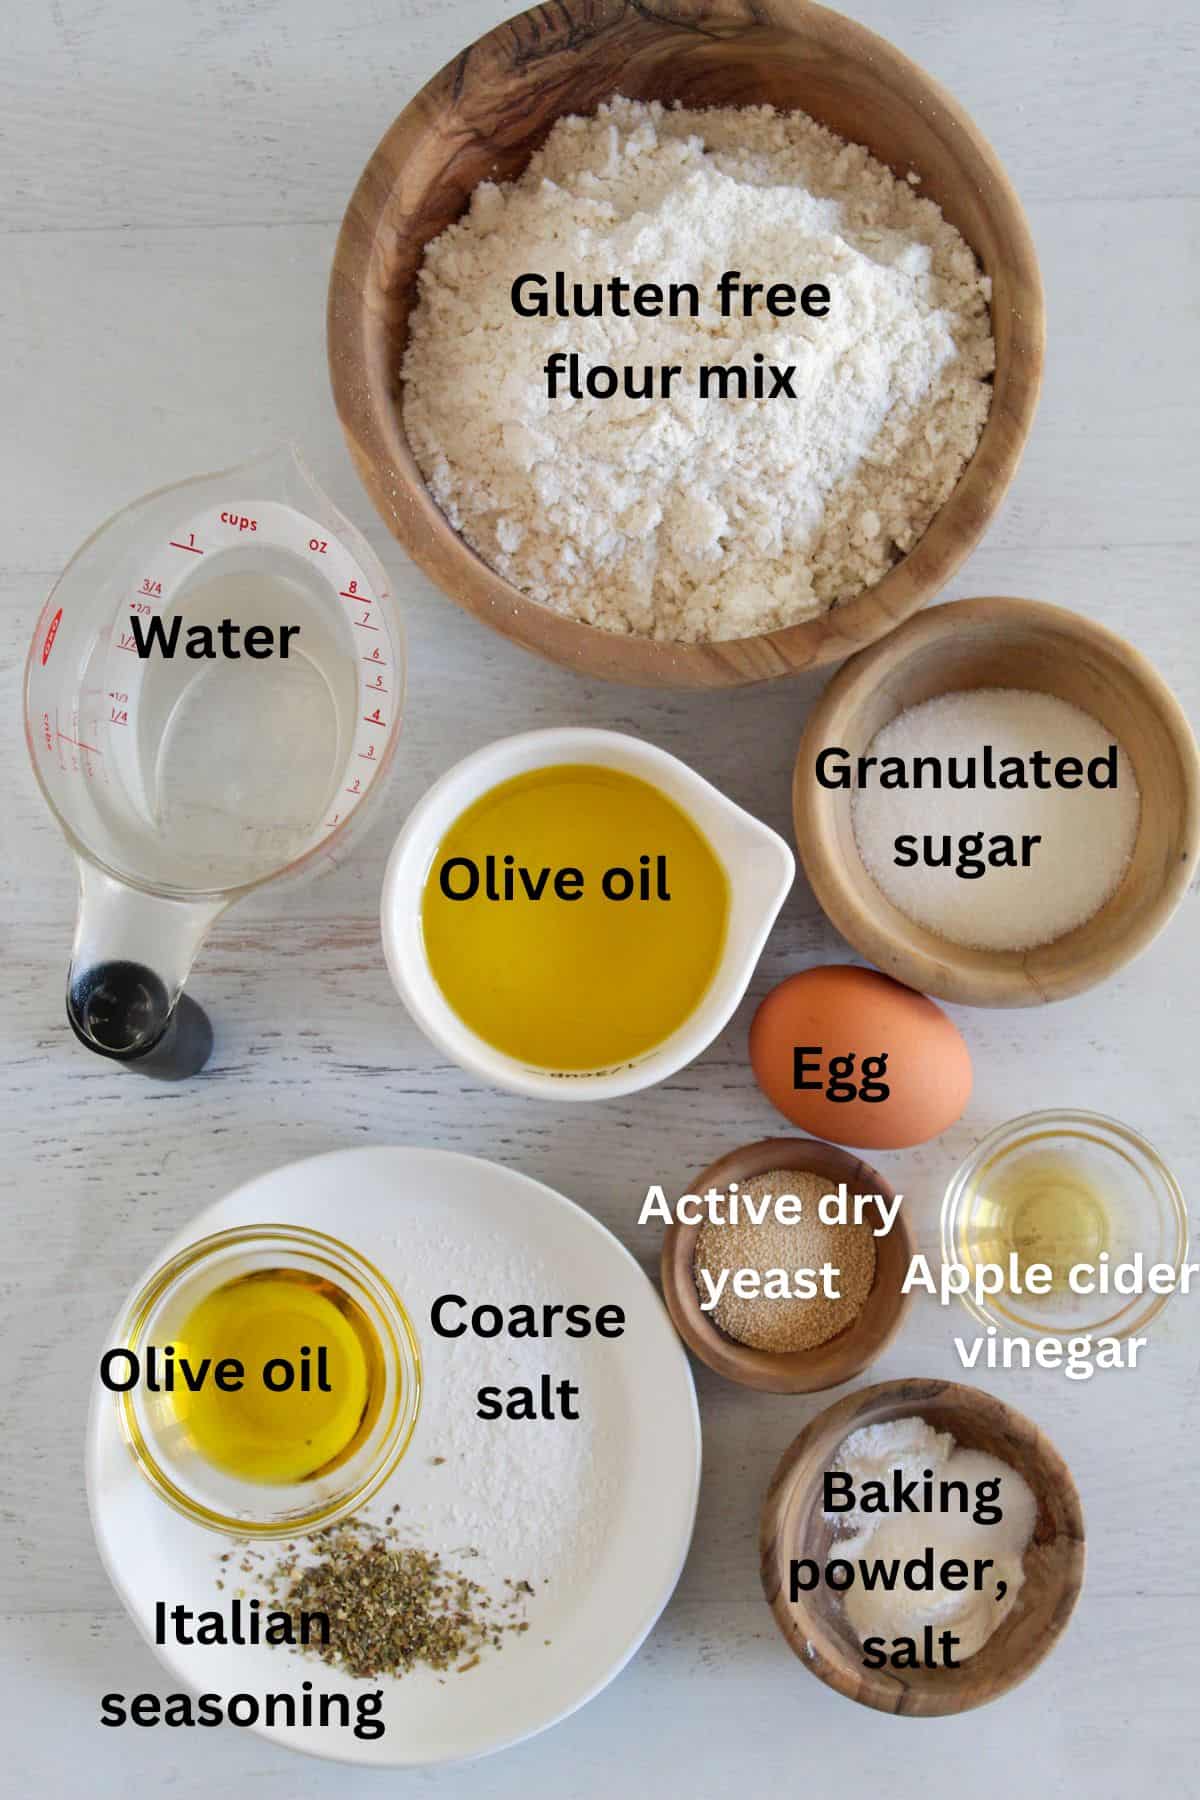
Ingredient Quick Scan List
The ingredients in this recipe are easy to find and come together with simple, no-fuss steps. Before you begin baking, here’s a quick look at what makes these soft, flavorful gluten-free breadsticks truly delightful:
- Water
- Active dry yeast
- Granulated sugar
- Gluten-free flour blend
- Xanthan gum
- Salt
- Baking powder
- Egg
- Olive oil
- Apple cider vinegar
- Italian seasoning
- Coarse salt
Ingredients and What They Do
To get optimal results with this recipe, you have to fully understand the role of each ingredient. Here, we’ll break them down one by one, explaining how each contributes to the breadstick’s flavor, texture, and structure:
Dry Ingredients
These dry ingredients create the structure, lift, and soft texture that help the breadsticks bake up tender instead of dense or crumbly.
Gluten Free Flour Mix
The gluten-free flour blend serves as the foundation for these breadsticks. Because gluten-free flours lack the elasticity of traditional wheat flour, the blend combines different flours and starches to help mimic the chewiness, softness, and structure typically provided by gluten.
Using the right balance of flour and starch is essential for making breadsticks soft and chewy rather than dry or cracker-like.
For best results, use a cup-for-cup gluten-free flour blend that contains rice flour and starches. If your blend already contains xanthan gum, reduce or omit the added xanthan gum depending on the blend.
| Flour blend type | Expected result |
|---|---|
| Cup-for-cup blend with xanthan gum | Best structure; may not need extra gum |
| Homemade flour blend without binder | Add xanthan gum |
| Almond/coconut flour | Not recommended as a 1:1 swap |
Granulated Sugar
The granulated sugar helps activate the yeast, resulting in a lighter, fluffier texture. It also balances savory flavors and enhances the richness of the garlic butter and Italian seasoning.
In gluten-free baking, sugar also helps improve moisture retention, giving the breadsticks a softer crumb instead of a dry or gummy texture.
Baking powder
Baking powder provides extra lift in this gluten-free breadstick recipe. When mixed with wet ingredients and baked, it releases carbon dioxide, creating air bubbles that give the breadstick a taller, fluffier texture.
Salt
From amplifying the garlic butter topping to offsetting the sweetness of sugar, salt strengthens and flavors the gluten-free breadstick dough. It also slows yeast fermentation and firms the dough for easier shaping and a crisper exterior, while keeping the interior soft.
Xanthan Gum
As a binder and thickener, this ingredient is necessary for this recipe. By thickening the dough and retaining moisture, it delivers the chewy interior and crisp exterior you want, while extending freshness beyond baking day.
Active Dry Yeast
Active dry yeast serves as the primary leavening agent in these gluten-free breadsticks, producing gas for lift and structure. It ferments granulated sugar in warm water, releasing carbon dioxide that forms air pockets and creates a light, fluffy crumb.
Italian Seasoning
The aromatic, herbaceous depth in these gluten-free breadsticks comes from Italian seasoning. It infuses an earthy, Mediterranean profile that complements the chewiness of the flour mix and pairs perfectly with salty toppings.
Coarse Salt
Coarse salt is used as a finishing touch to add texture, flavor, and visual appeal.
Sprinkled over warm breadsticks after baking, it enhances the herbs and garlic butter, adding little bursts of savory flavor in every bite.
Wet Ingredients
The wet ingredients bring the dough together, activate the yeast, and add the moisture needed for soft, fluffy gluten-free breadsticks.
Warm Water
At 100-110°F, water rehydrates dormant yeast cells and kickstarts fermentation with sugar. It also evenly dissolves dry ingredients like your flour blend, xanthan gum, and salt, creating a smooth, sticky batter that shapes easily before baking.
Olive oil
Brushed on before or after baking, olive oil adds richness to gluten-free breadsticks. Its high smoke point promotes golden browning and shine, complementing coarse salt and Italian seasoning without sogginess.
Use melted butter instead of olive oil for a richer, more classic garlic-breadstick flavor, or stick with olive oil for a lighter, dairy-free option.
Egg
In this gluten-free breadstick recipe, eggs act as a multi-purpose binder and leavener. The proteins coagulate during baking to hold the flour mix together, preventing crumbliness, while egg whites whip air for extra rise alongside yeast.
Apple Cider Vinegar
Apple cider vinegar adds acidity to the gluten-free breadstick dough, improving rise and texture in this recipe. Its mild acidity reacts with baking powder and yeast, releasing extra CO2 and enhancing lift in dense gluten-free flours.
Substitutions Table
Below are smart swaps that match dietary needs while preserving texture and rise:
| Ingredient | Substitution | What It Offers |
|---|---|---|
| Gluten-free flour blend | Store-bought gluten-free blend | Keeps chew. Adjust xanthan if the blend has none |
| Granulated sugar | Honey or maple syrup | Same volume. Boosts yeast equally |
| Active dry yeast | Instant yeast | Skip proofing and use the same amount |
| Italian seasoning | ½ tsp oregano + ½ tsp basil | Custom herbaceous flavor |
| Coarse salt(topping) | Flaky sea salt | Same crunch and pop |
| Warm water | Almond/oat milk (warmed) | Hydrates; dairy-free option |
| Olive oil | Melted vegan butter or coconut oil | Same richness. Coconut adds subtle sweetness |
| Egg | Aquafaba or flax meal + water | Vegan binder. Let gel for 5 minutes |
| Apple cider vinegar | Lemon juice or white vinegar | Equal acid for tenderness |
With these simple substitutions, you can tailor the breadsticks to suit your dietary needs, health goals, and flavor preferences without compromising their texture or overall quality.
If you’re looking for another interesting variation of this recipe, try this Easy Gluten-Free Bruschetta with Homemade Baguette. It’s a gluten-free bruschetta that actually holds together and tastes bakery-quality.
More on Xanthan Gum
Xanthan gum is a key component of a good breadstick. Some gluten-free bread recipes use effective substitutes for xanthan gum. However, with rolls and these breadsticks, where the results are in individual servings, xanthan is the best at mimicking that bread texture. You can check out more info about substituting xanthan gum here.
Printable Gluten-Free Breadsticks Recipe Card
Ingredients
- ⅔ cup water ,warmed to 100F
- 2¼ teaspoons active dry yeast
- 2 Tablespoons granulated sugar ,about 30 grams
- 2 cups gluten-free flour blend ,about 260 grams
- ½ teaspoon xanthan gum
- ½ teaspoon salt
- ½ teaspoon baking powder
- 1 large egg
- ⅓ cup olive oil or melted butter
- 1 teaspoon apple cider vinegar
Topping
- 1 Tablespoon olive oil
- Sprinkling of Italian seasoning
- Sprinkling of coarse salt
Instructions
- Prepare a baking sheet by lining it with parchment paper and brushing it with a dab of olive oil. Set aside.
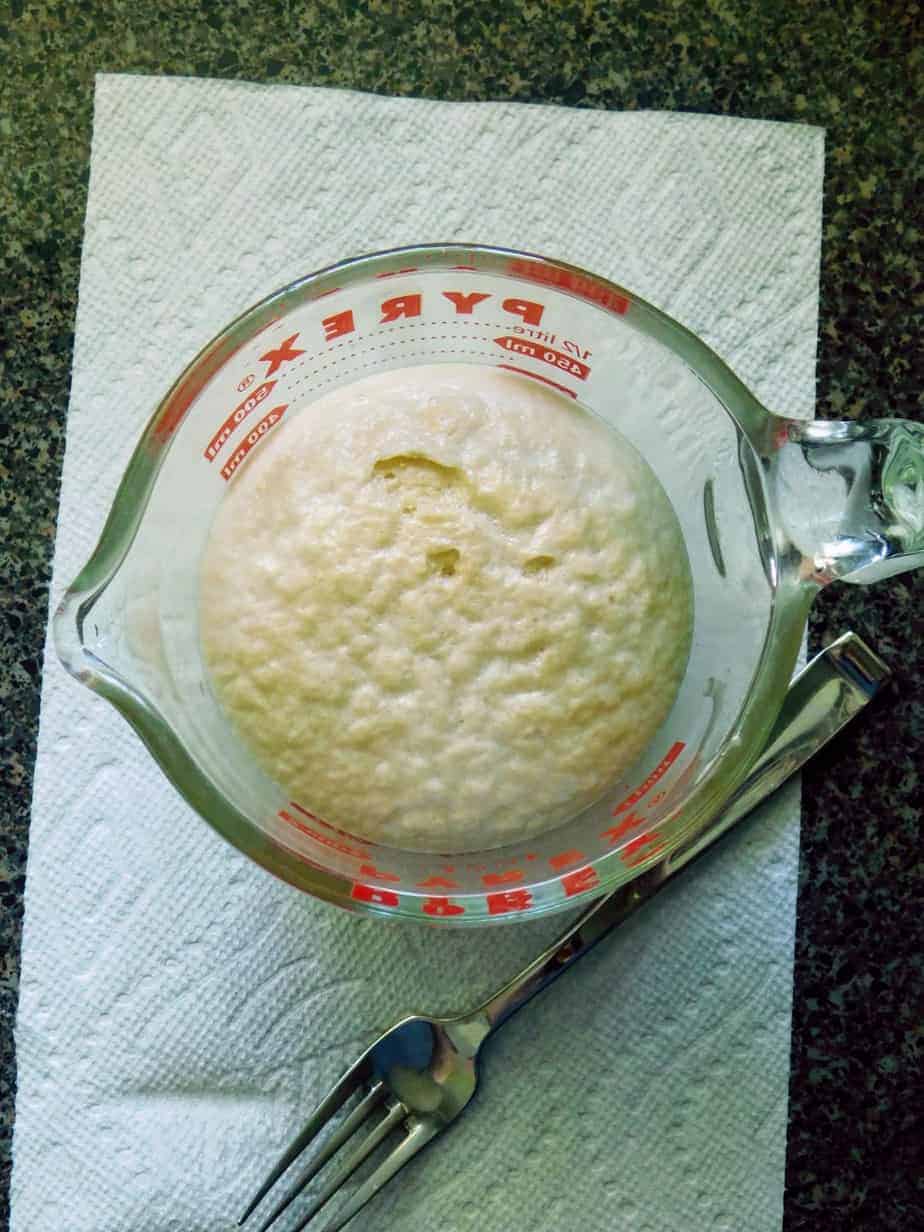
- To the warm water, add the yeast and granulated sugar and mix well. Set aside to proof for 5 minutes.
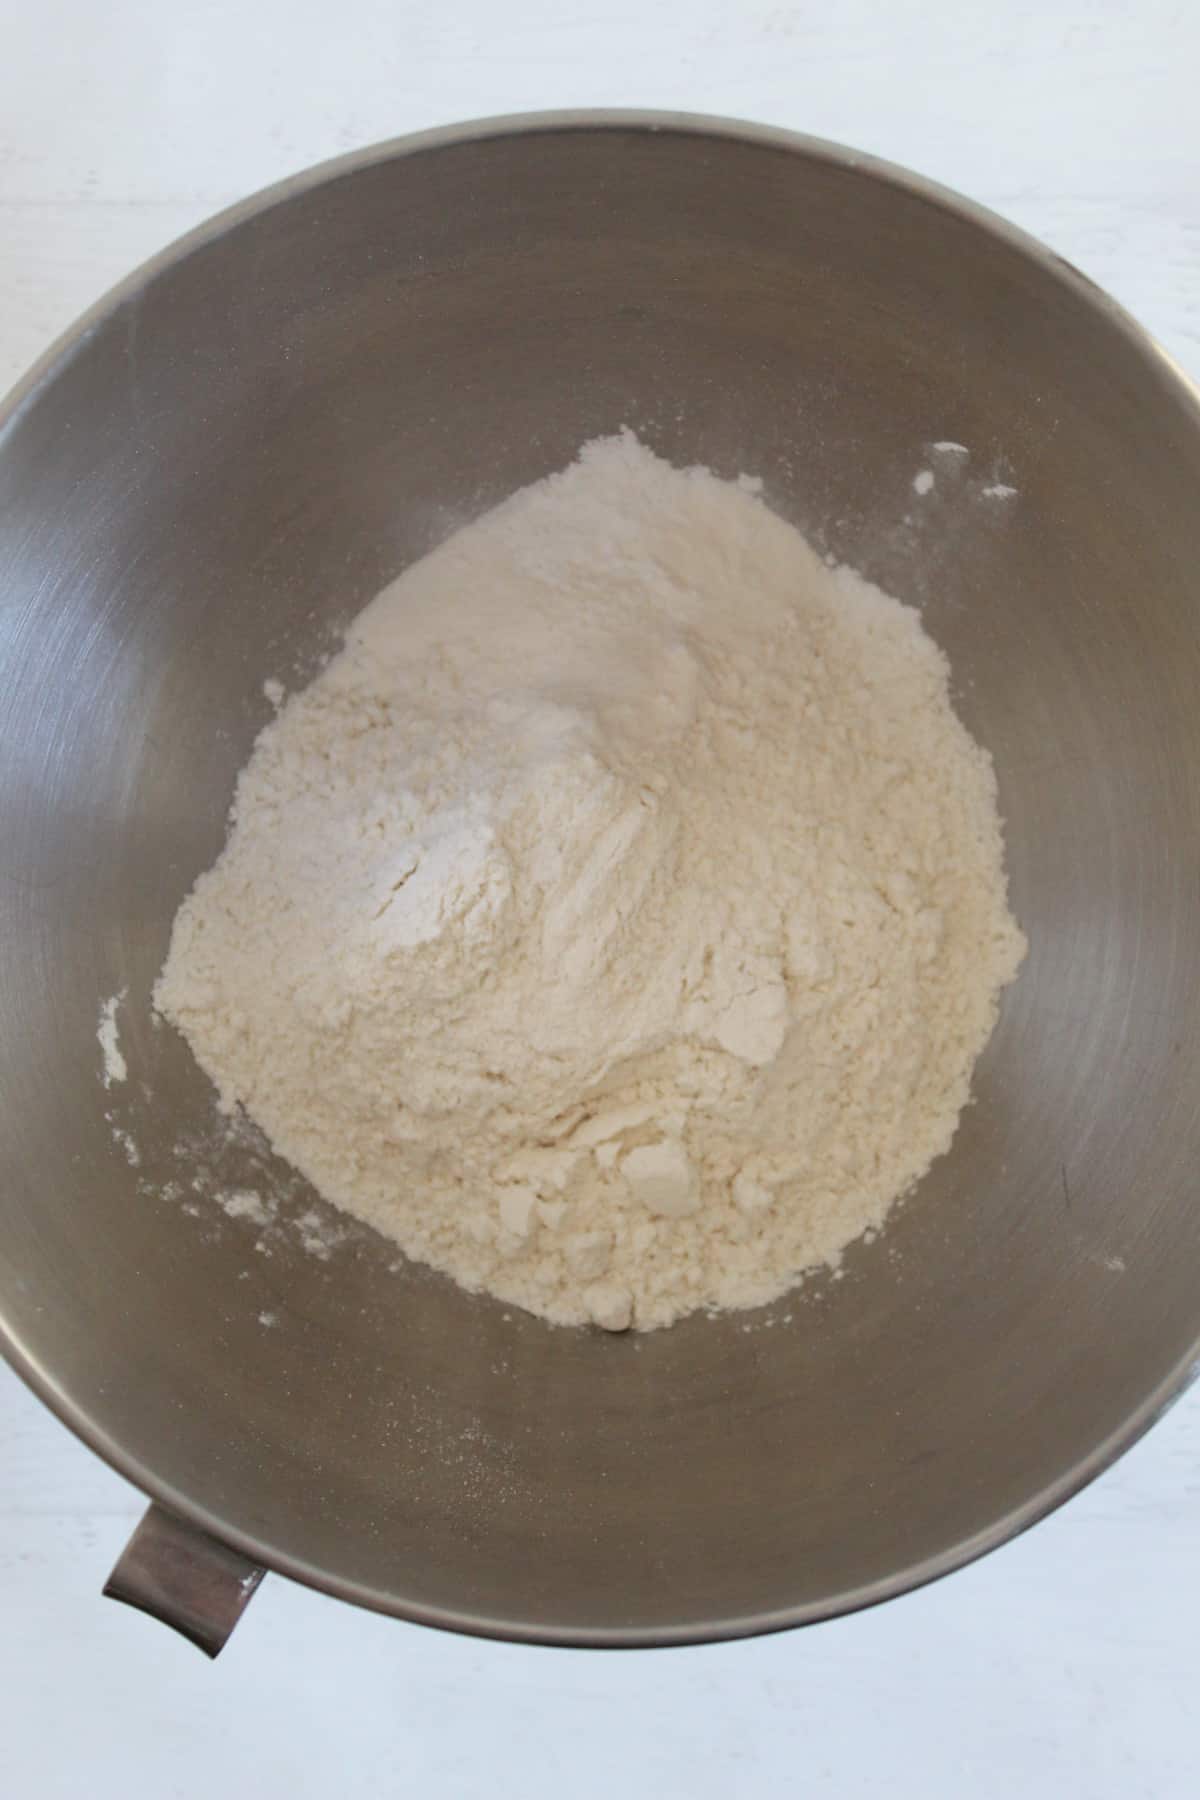
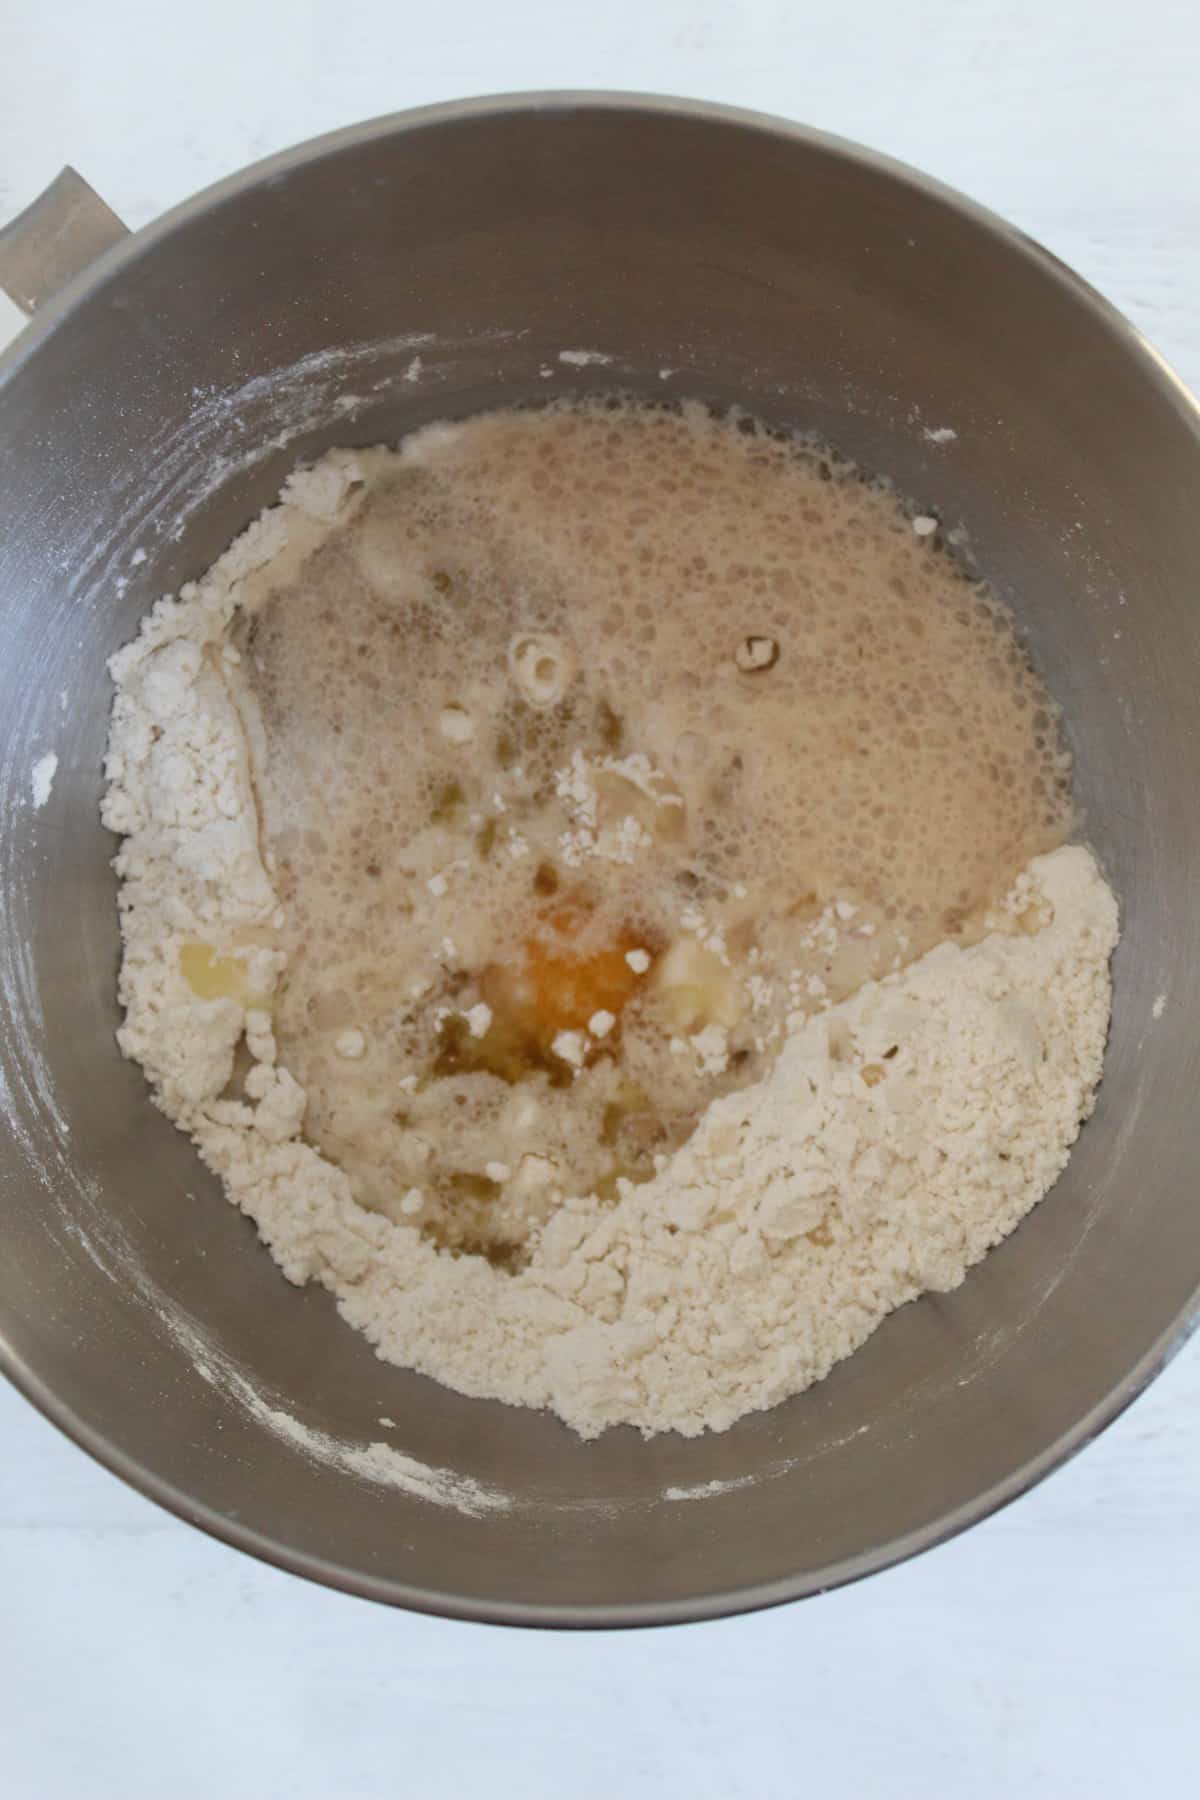
- While the yeast is proofing, in the bowl of a stand mixer, add the flour blend, xanthan gum, salt, and baking powder. Mix until incorporated.
- Add the egg, olive oil, apple cider vinegar, and yeast mixture to the flour mixture.
- Mix on low speed for 20 seconds. Stop the mixer and scrape down the sides of the bowl.
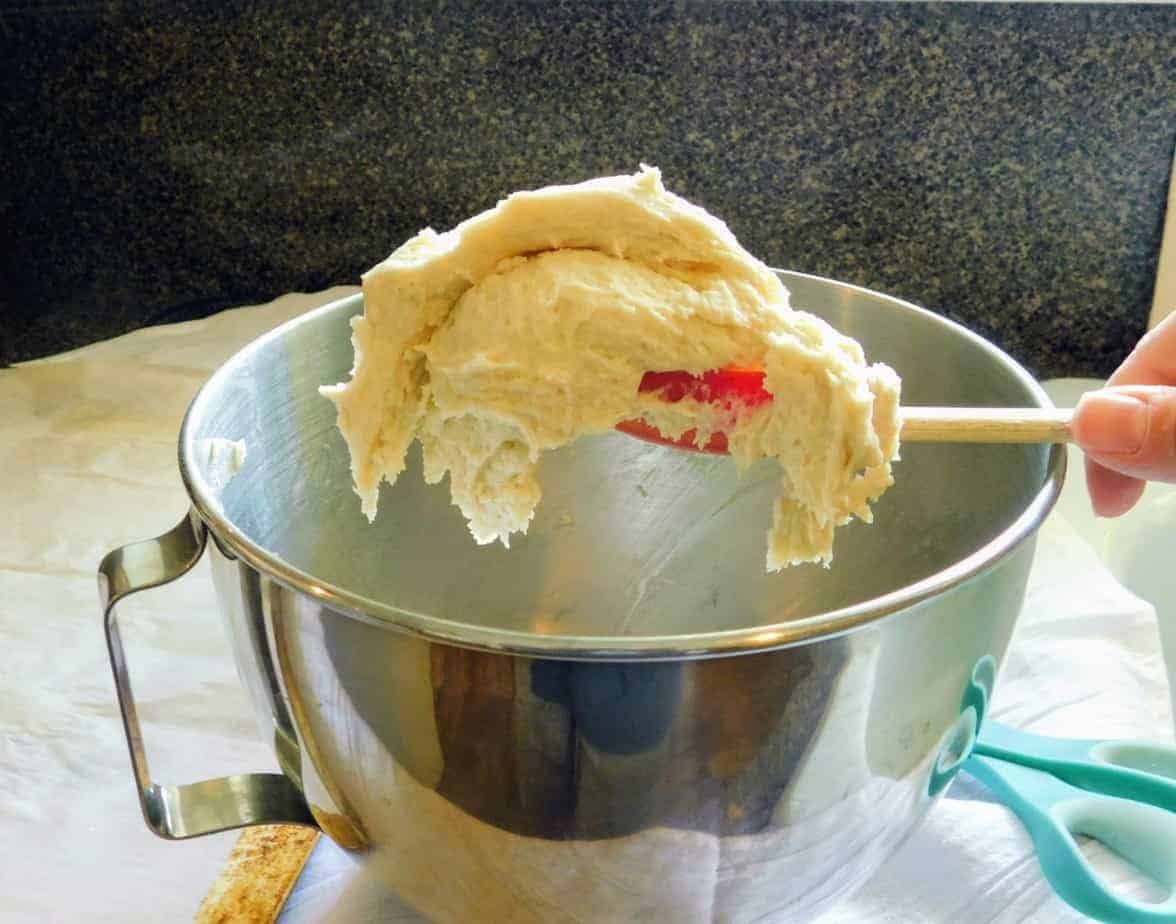
- Turn the mixer to medium speed and mix for 3 minutes.
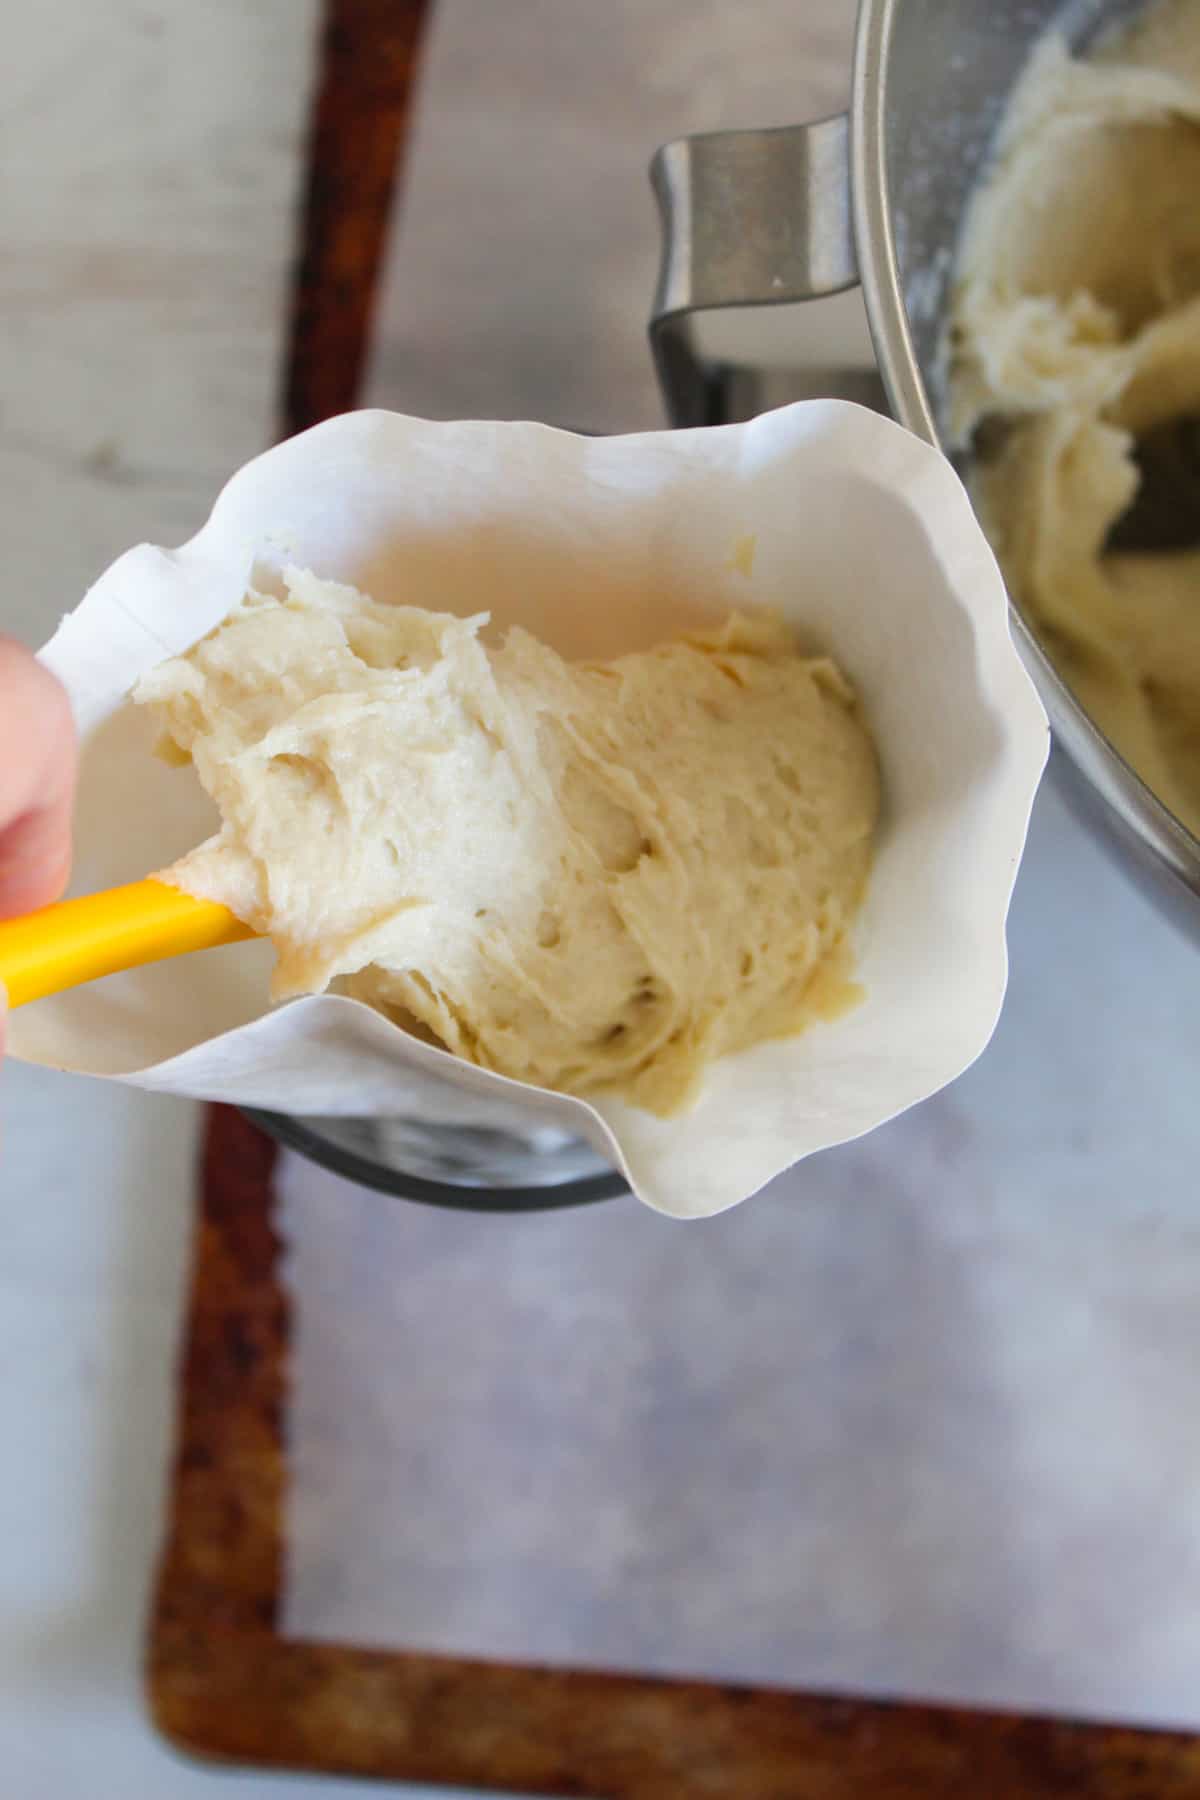
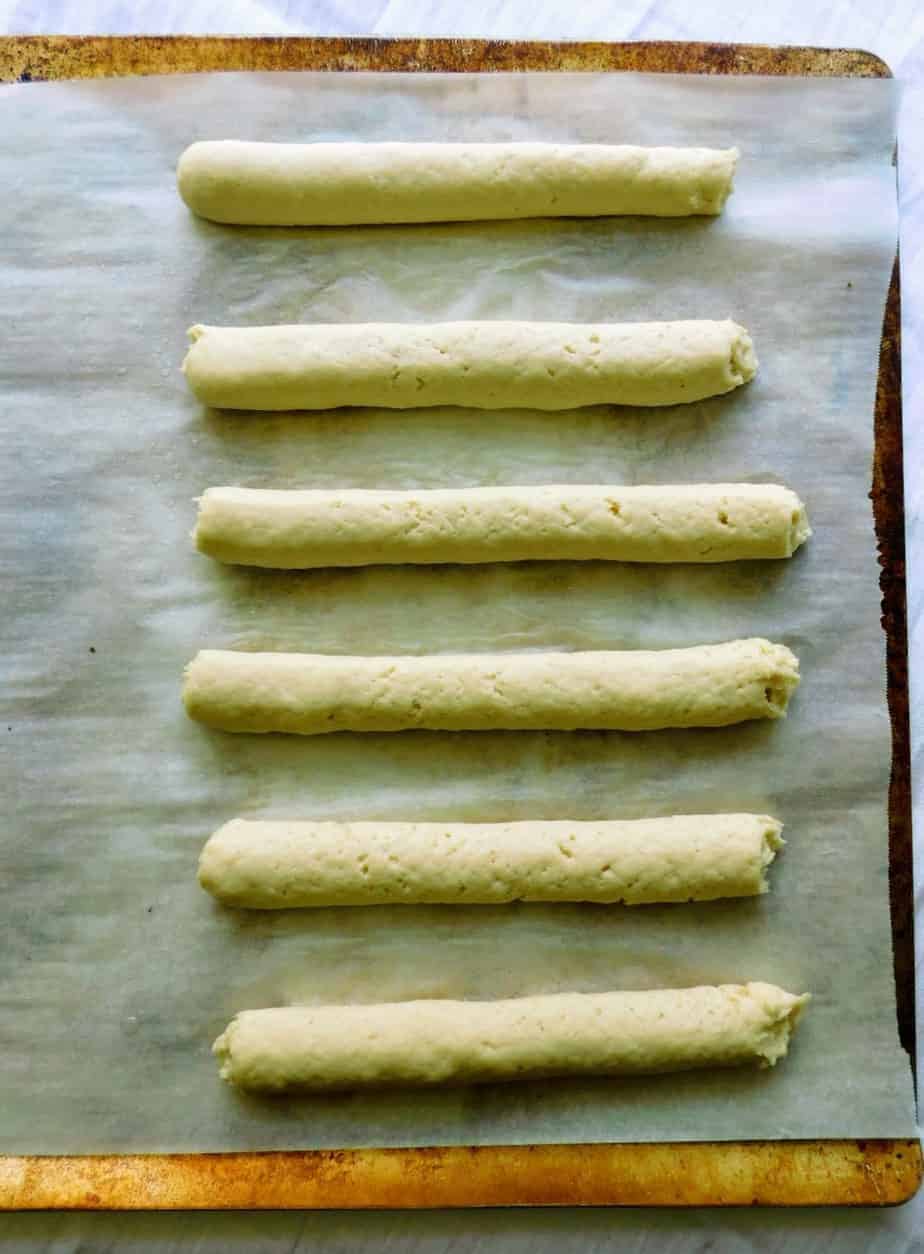
- Scoop dough into a gallon-size plastic baggie and cut a 3/4-inch-wide hole in a corner of the bag.
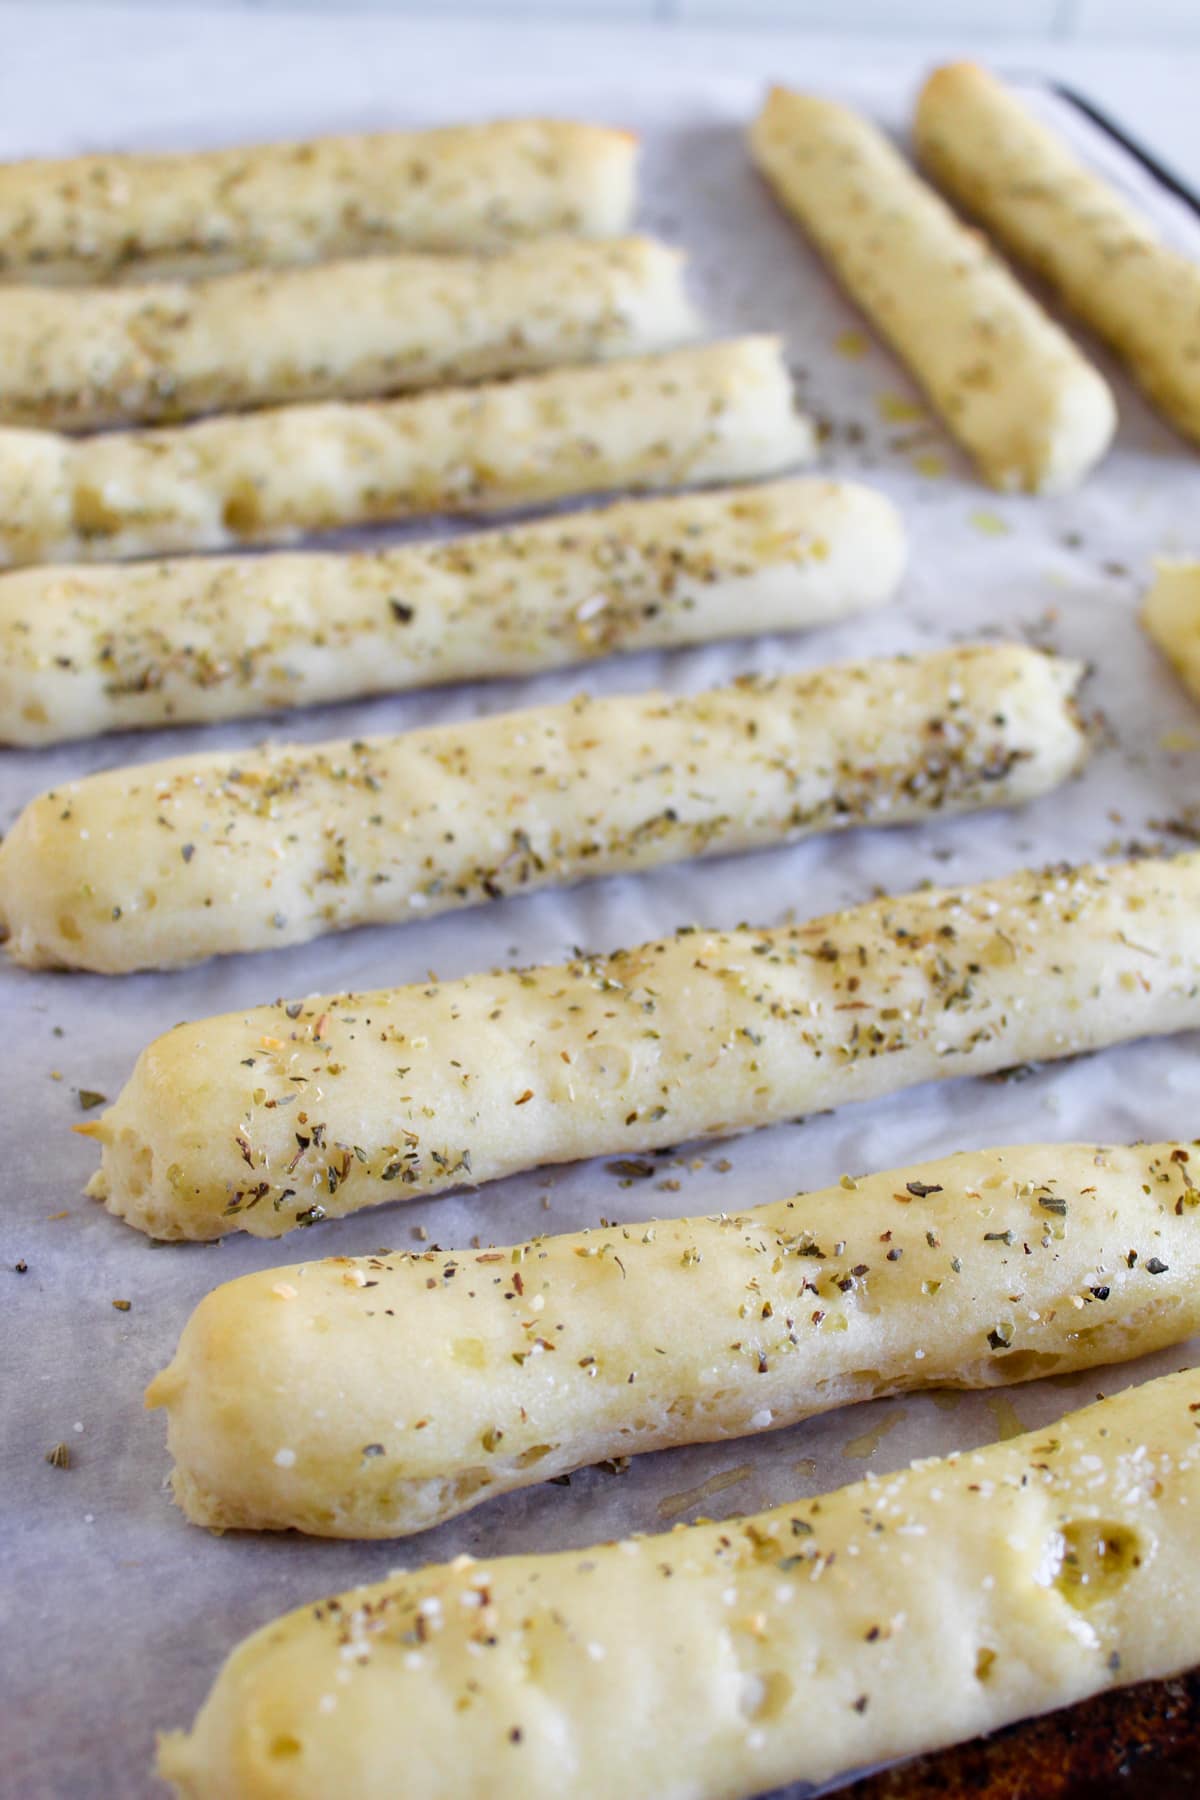
- Pipe 12 breadsticks onto the prepared pan in 7-inch-long tubes.
- Set the pan in a warm place to rise slightly, about 10 minutes.
- While breadsticks are rising, preheat the oven to 375 F.
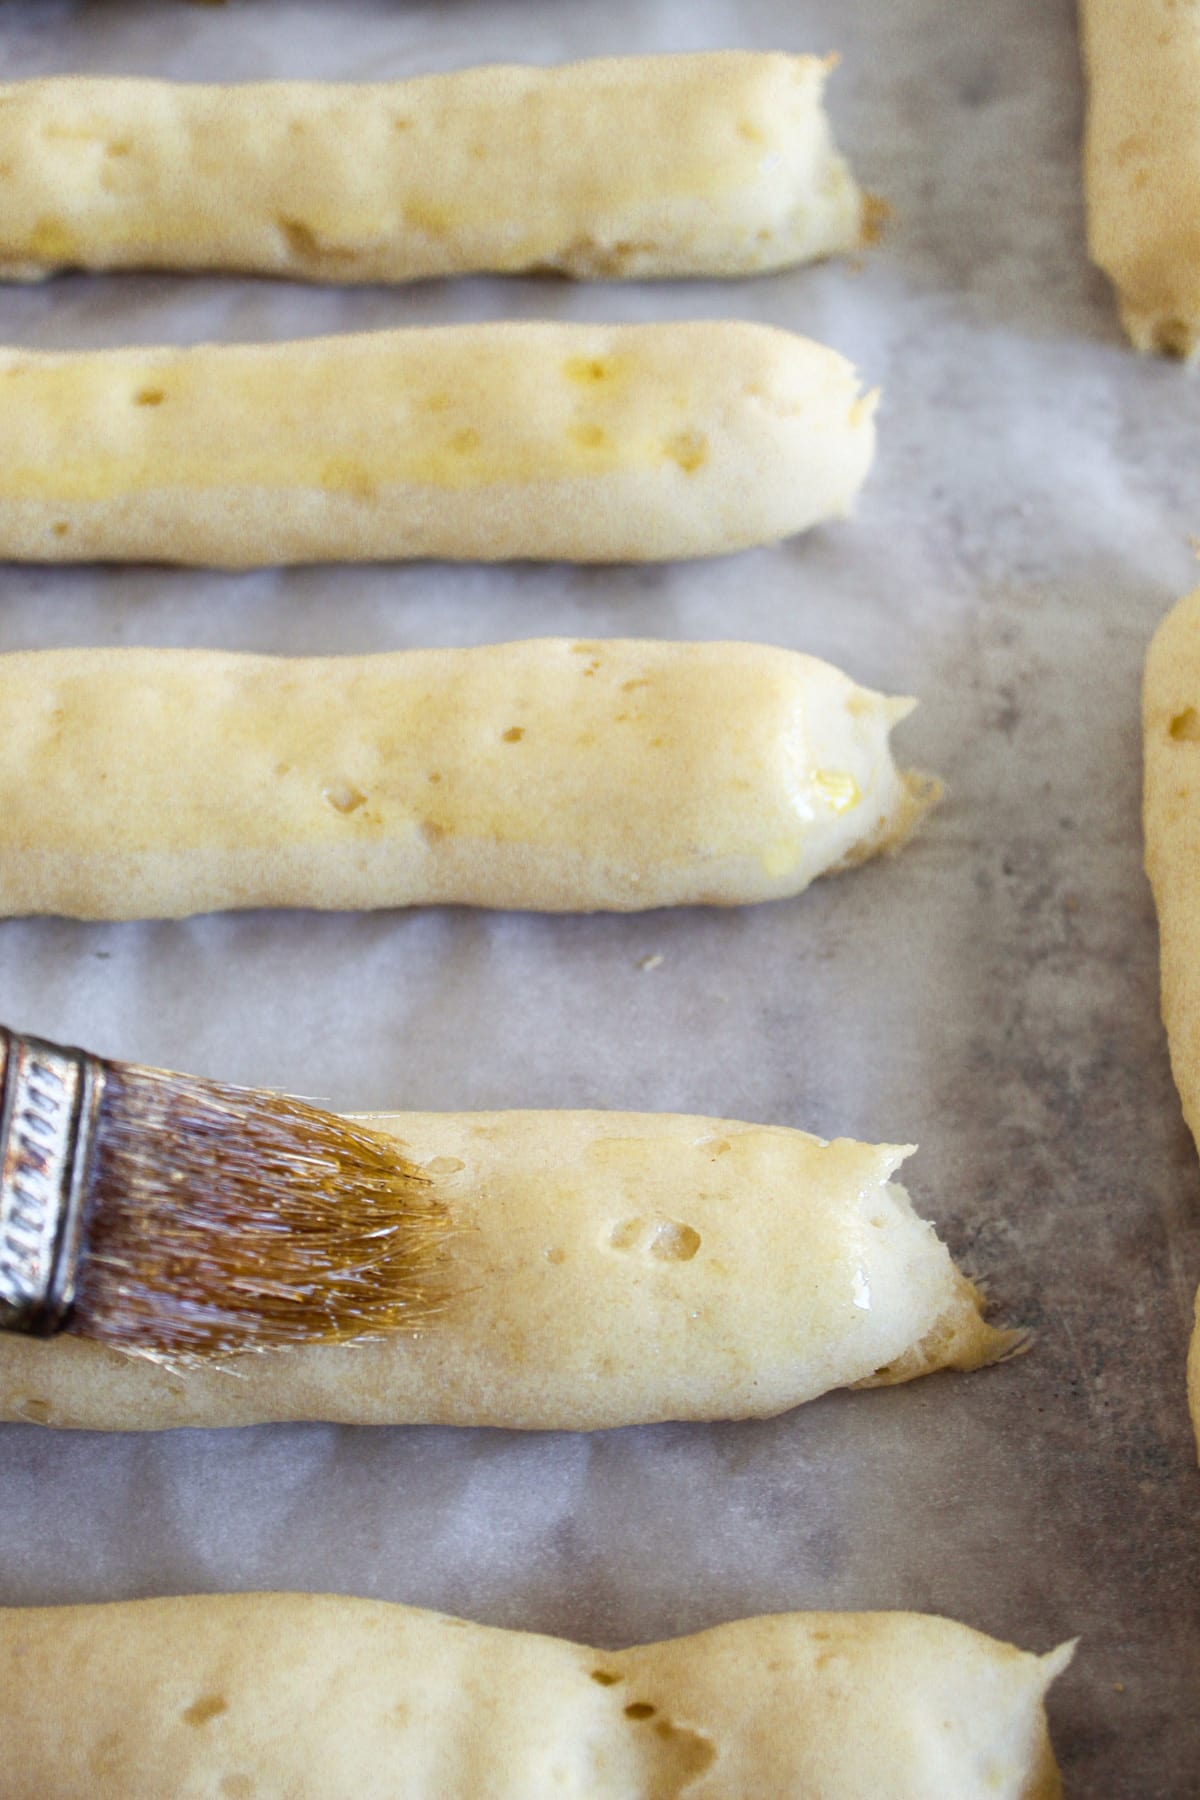
- Bake for 15 – 18 minutes or until the tops are golden brown. Remove from the oven and set aside to cool slightly.
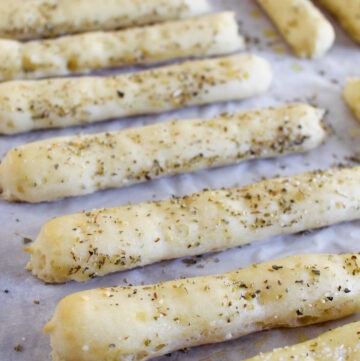
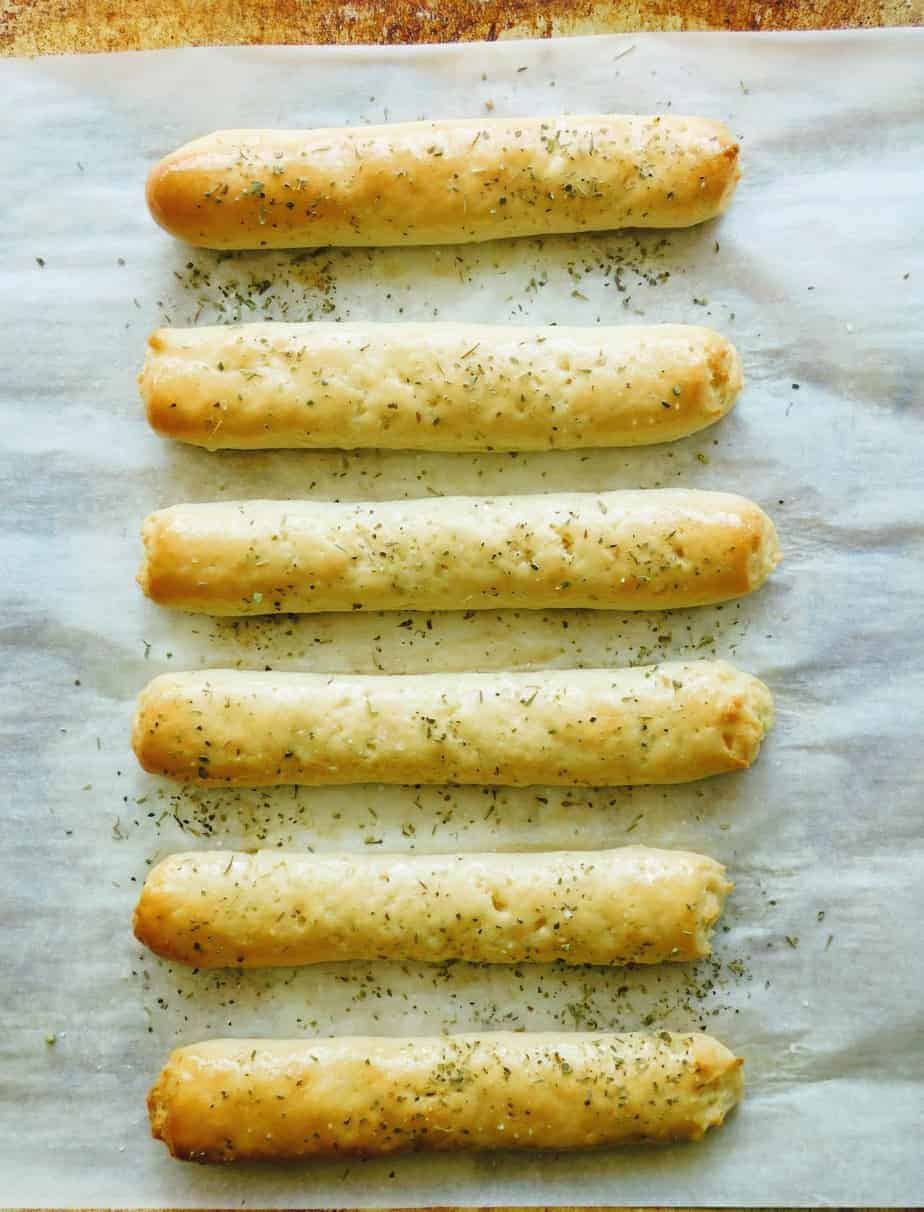
- Brush each breadstick with olive oil or melted butter and sprinkle with Italian seasoning and coarse salt. Serve warm.
Notes
- Ingredients should be at room temperature, except warm water.
- Make sure to proof the yeast before adding it to the recipe.
- Use a plastic baggie to act as a ‘piping bag’ for uniform-sized breadsticks.
- Serve warm.
- Do not double the recipe. If you want more breadsticks, make 2 batches, side by side.
Storage Notes
- Store airtight at room temperature for 2 days for the best texture, or up to 5 days if reheating.
- Freeze baked breadsticks up to 2 months
- You can also prepare the dough in advance and freeze it for up to 3 months.
Nutrition
Did you make and love this recipe? Give it your review and rating below! And make sure to follow me on Instagram, Pinterest, and Facebook , too!
How to Make The Easiest Gluten-Free Breadsticks
Making homemade gluten-free breadsticks is much easier than you might think. With a few simple ingredients and the right technique, you’ll get breadsticks that are soft, flavorful, chewy, and perfectly golden every time.
Follow these easy step-by-step instructions for bakery-style gluten-free breadsticks with minimal effort.
Essential Kitchen Tools
Before you begin, make sure you have these tools on hand for the best results:
- Mixing bowls — To hold and mix dry and wet ingredients
- Electric hand whisk — Stand mixer with paddle attachment preferred; hand mixer also works.
- Measuring cups and spoons — To ensure accurate measurement of every ingredient
- Spatula – For lifting sticky dough.
- Baking trays — To prevent sticking during proofing and baking
- Pastry brush — For applying olive oil, garlic butter, coarse salt, and Italian seasoning after baking.
Step 1: Activate the dry yeast
In a small measuring cup, combine the warm water and granulated sugar, then stir in the active dry yeast. Let the mixture sit for about 5 minutes until it becomes foamy and activated.
Step 2: Mix the dry ingredients
In a large mixing bowl or the bowl of a stand mixer, whisk together the gluten-free flour blend, xanthan gum, salt, and baking powder until evenly combined.
Step 3: Add the wet ingredients
Add the egg, olive oil, apple cider vinegar, and proofed yeast mixture to the dry ingredients.
Step 4: Stir together
Using a paddle attachment or hand mixer, mix on low speed for about 30 seconds until combined. Scrape down the sides of the bowl, then continue mixing on medium speed for 3 minutes.
The dough will resemble a thick cake batter, which is completely normal for gluten-free breadstick dough.
Step 5: Prepare to pipe the dough
Transfer the dough into a pastry bag or a large zip-top plastic bag with a ¾-inch opening cut into one corner.
Step 6: Preheat and line
Preheat your oven to 375°F and line a large baking sheet with parchment paper.
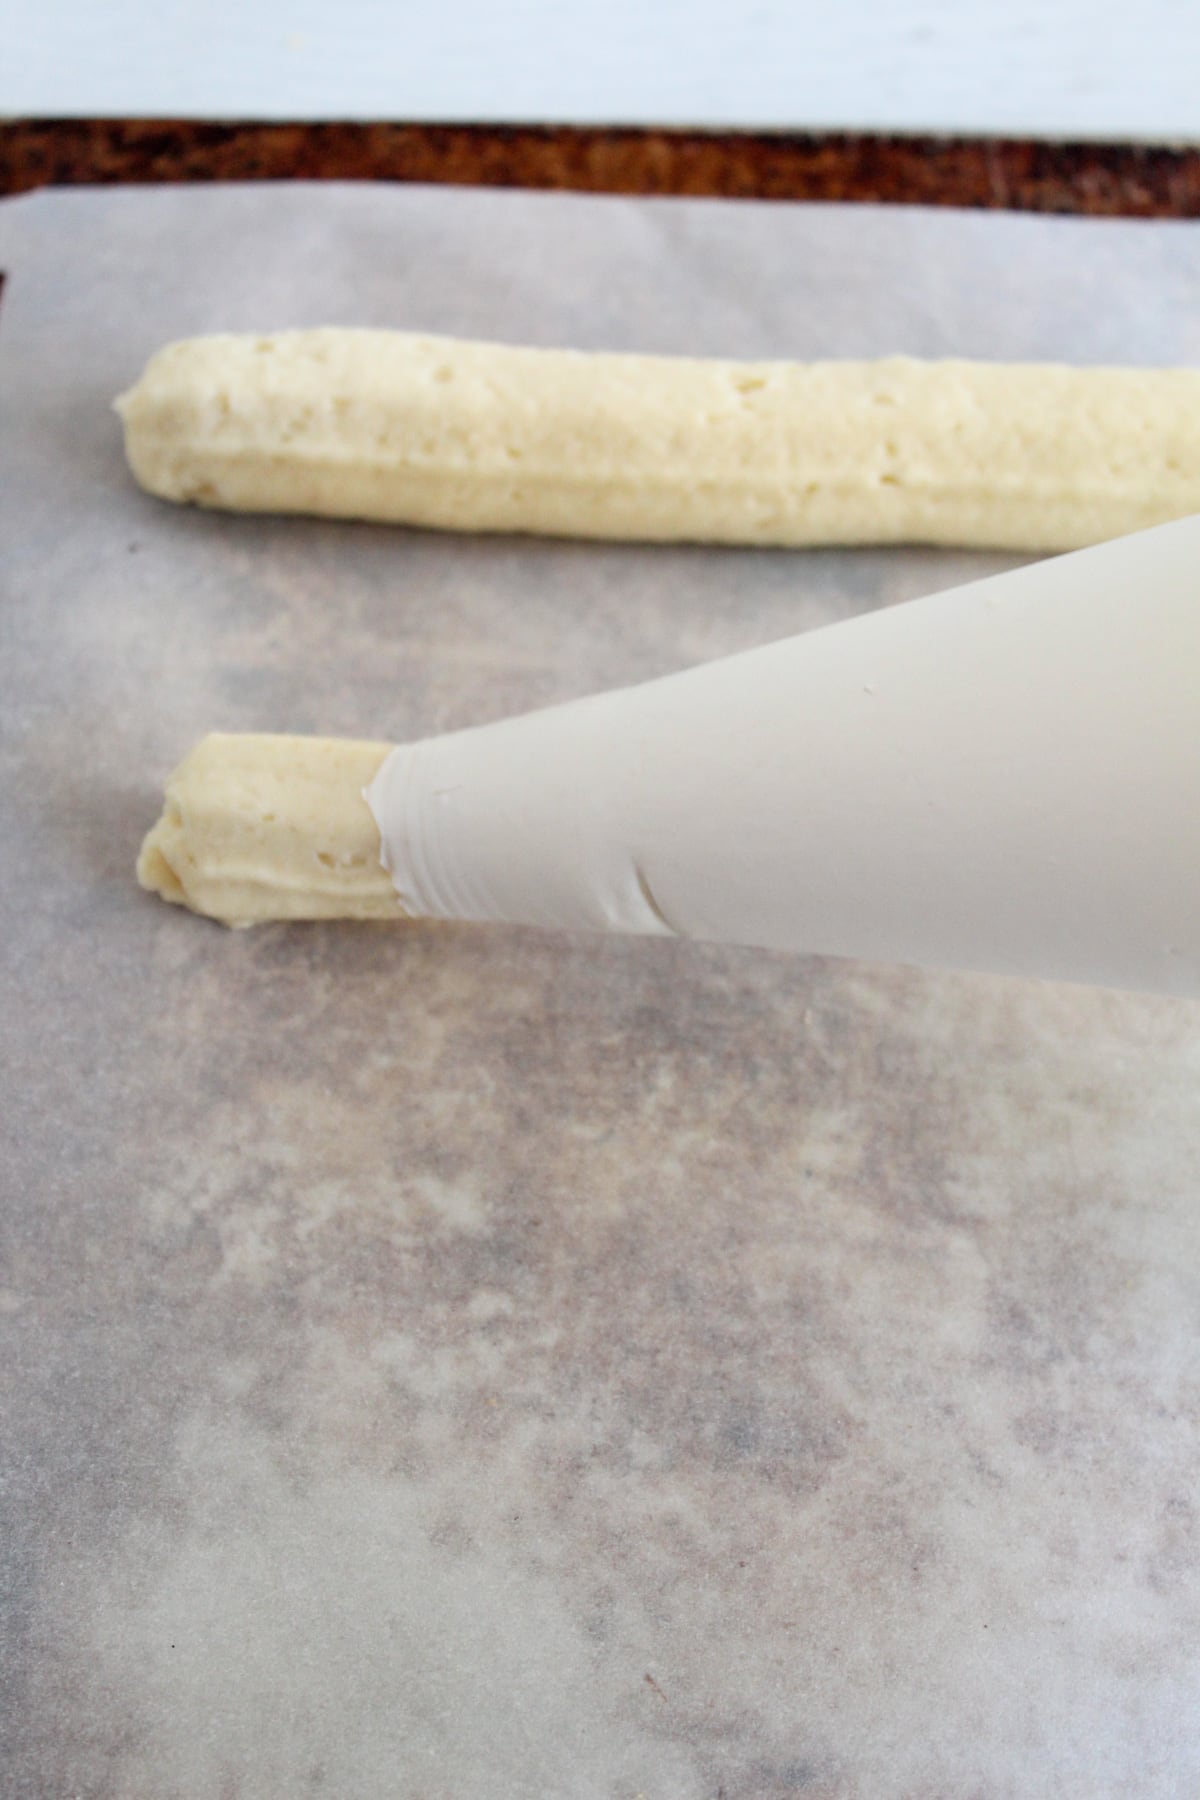
Step 7: Pipe the dough
Pipe the dough into 12 breadsticks, each approximately 7 inches long, spacing them slightly apart on the prepared baking sheet.
Allow the breadsticks to rise for about 10 minutes before baking.
Step 8: Bake until golden
Bake for approximately 15 minutes, or until the breadsticks are lightly golden brown on top.
Immediately brush each breadstick with olive oil or garlic butter while still warm.
Step 9: Season and serve
Finish with a sprinkle of Italian seasoning and coarse salt before serving.
For the best texture, allow the gluten-free breadsticks to cool slightly before enjoying or storing.
Effective Tips for Making These Gluten-Free Breadsticks
Taking the following steps will ease your baking experience and ensure your gluten-free breadsticks turn out perfectly every time:
- Brush the olive oil or garlic butter on the breadsticks the moment you pull them from the oven.
- Avoid adding too much extra flour. A wetter dough yields softer, fluffier breadsticks, so trust the texture rather than the urge to keep adding flour.
- Use a stand mixer. With this breadstick recipe, all you need to do is add the ingredients and turn it on. It’ll do the hard work for you.
- Make sure your eggs are at room temperature so they don’t interfere with the yeast’s activation.
- Use instant yeast within its best-by date. Expired yeast won’t activate properly, resulting in dense breadsticks with little to no rise.
- For uniform breadsticks that bake evenly and look amazing, use a plastic bag for piping the dough.
- Avoid overbaking, as it can dry out the breadsticks. Bake until the tops are just beginning to turn golden.
Creative Variations Of These Gluten-Free Breadsticks
Gluten-free breadsticks are incredibly versatile and easy to customize. Whether you prefer savory flavors or sweet dessert-style twists, there are plenty of delicious ways to make this recipe your own.
Savory Twists
Add extra flavor by mixing shredded Parmesan or Asiago cheese into the dough or sprinkling it over the top before baking for a rich, savory finish. You can also brush the breadsticks with garlic butter or olive oil mixed with chili flakes for a subtle spicy kick.
For extra texture, top the dough with everything bagel seasoning, sesame seeds, or flaky sea salt before baking. If you enjoy Mediterranean-inspired flavors, try adding chopped olives or finely diced sun-dried tomatoes to the dough.
Sweet Variations
Flip the savory nature of these breadsticks into dessert by dusting them with cinnamon sugar after baking. You can also swap Italian herbs for cinnamon in the dough. Then pair with honey butter or chocolate dipping sauce.
Dipping Boards
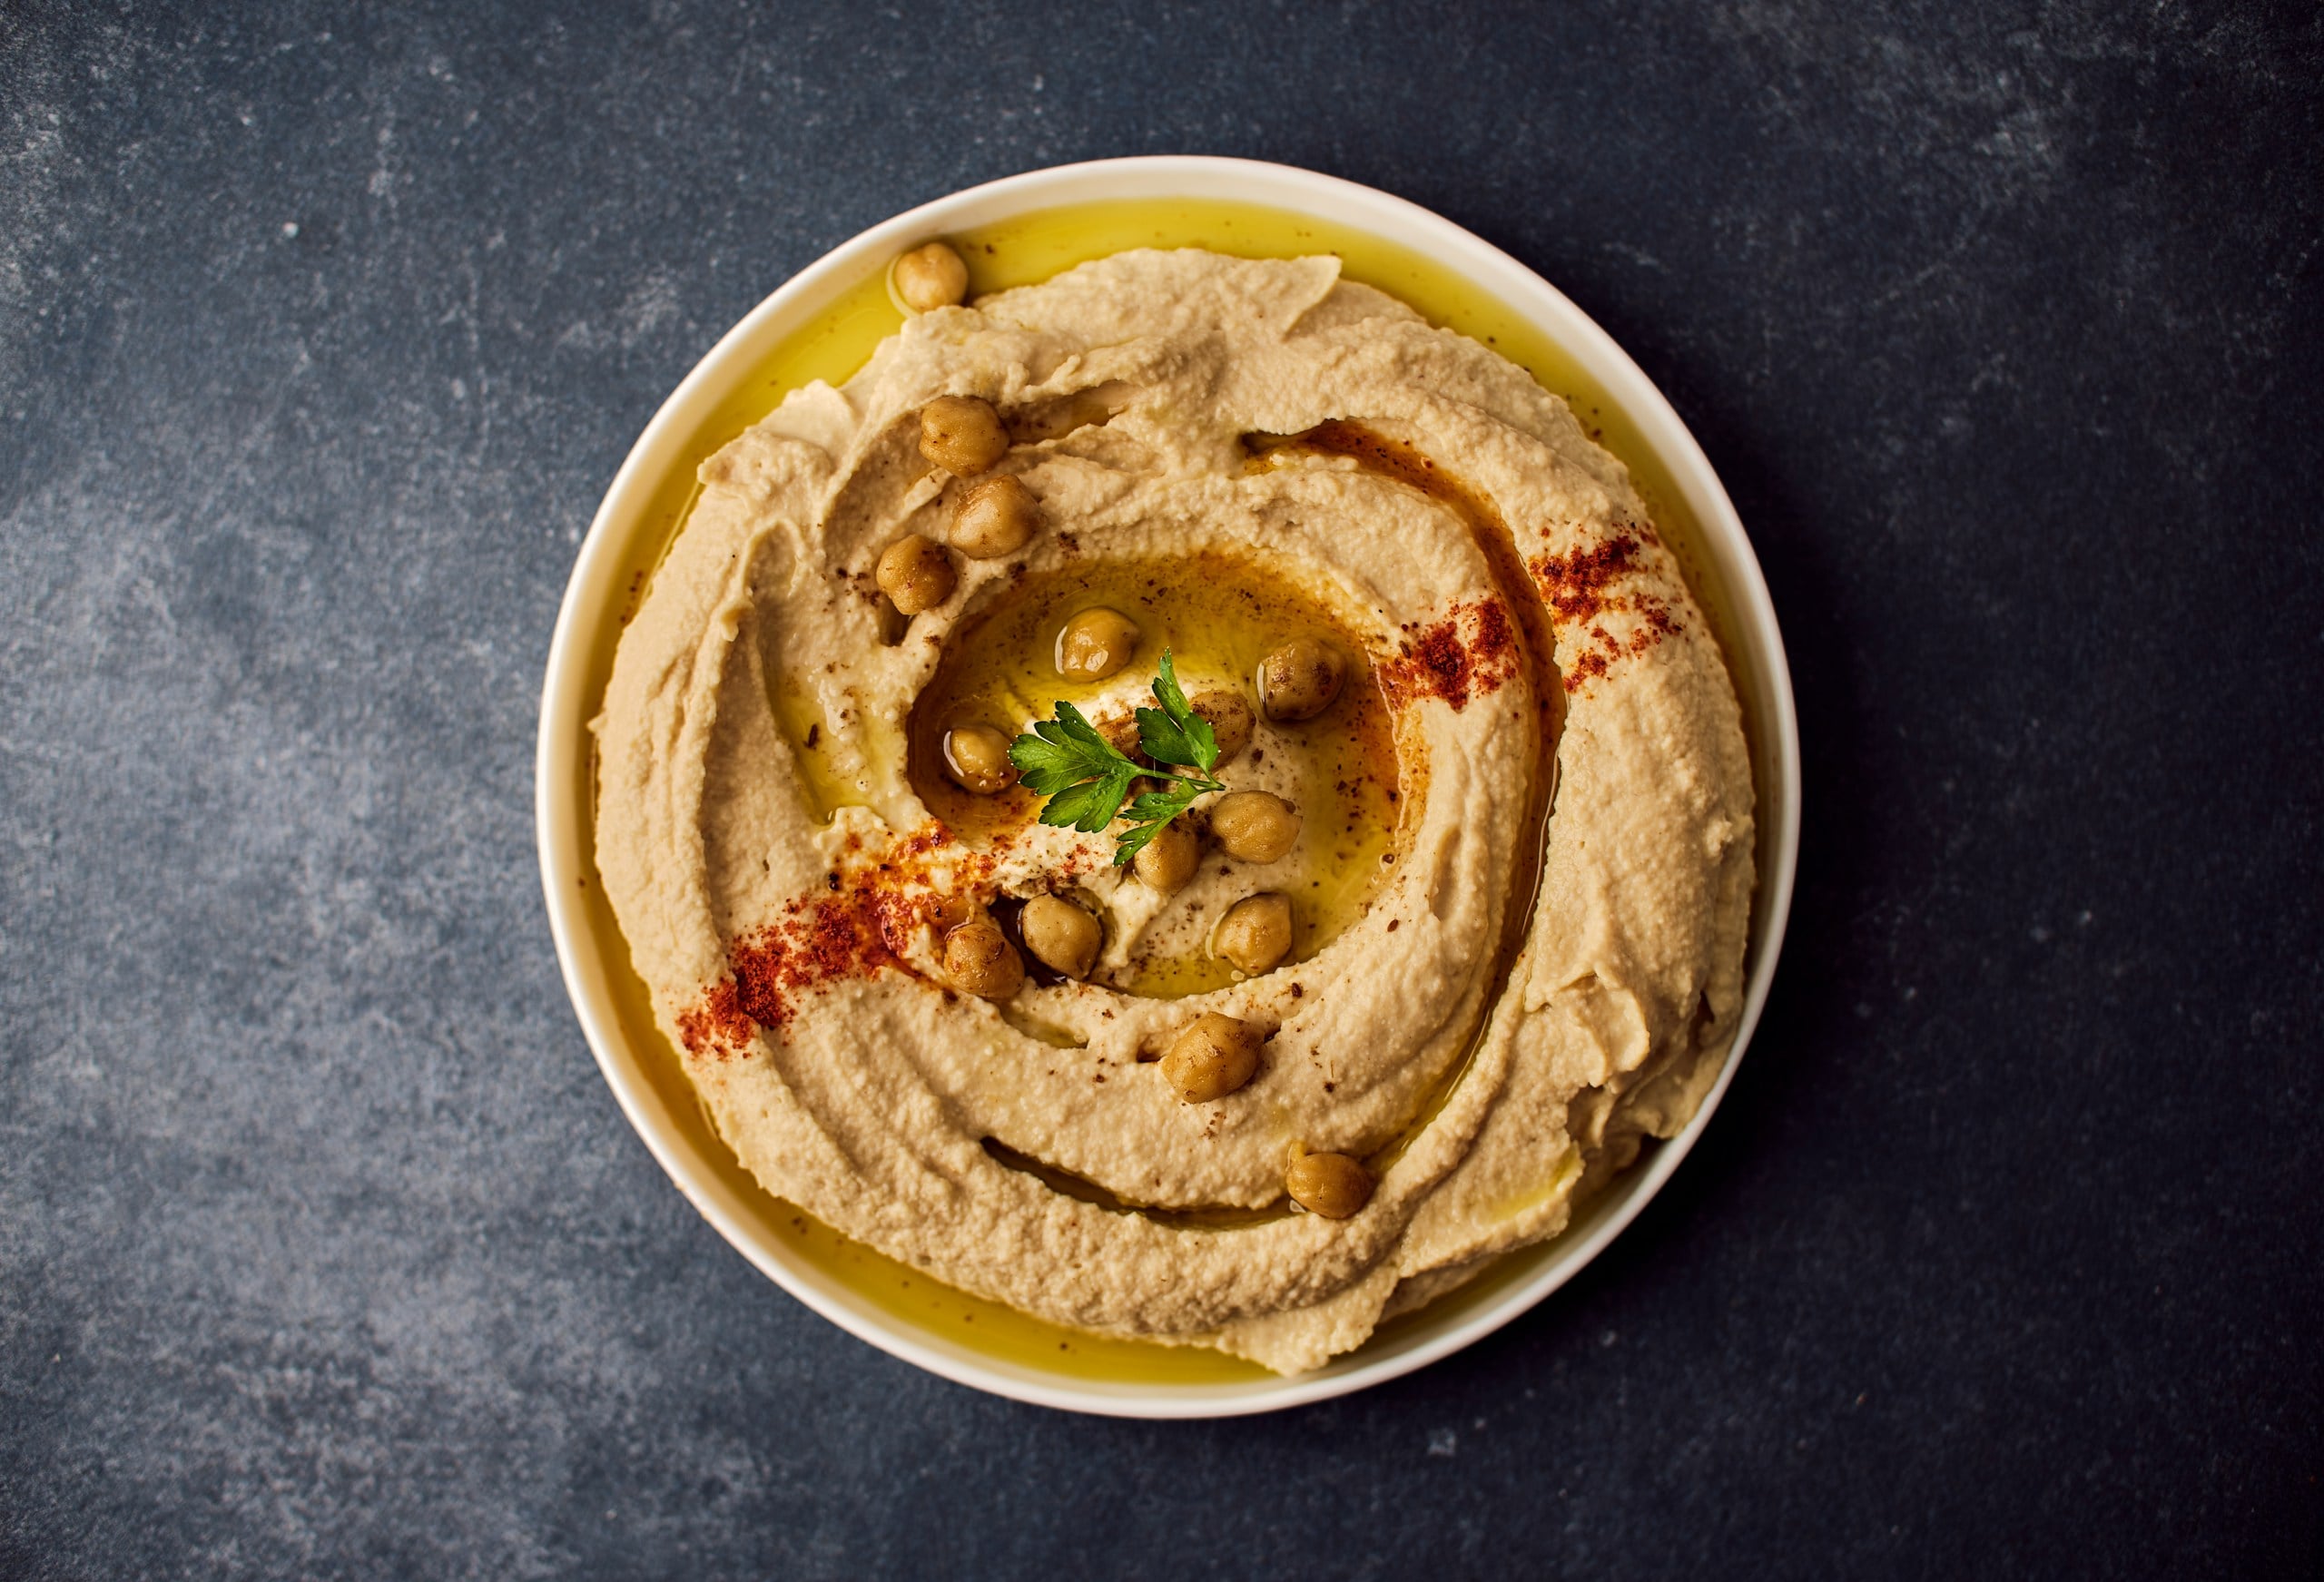
For shareable fun, create a breadstick board with hummus, pesto, spicy sriracha mayo, marinara, or balsamic-olive oil. This is perfect for parties.
Fun Shape Ideas
Instead of traditional breadsticks, shape the dough into twists, braids, or mini knots for a more decorative presentation. You can also spread the dough into an 8×8 pan to make a focaccia-style version topped with rosemary, olives, and olive oil.
For crispier snacks, roll the dough thinner to create crunchy grissini-style breadsticks.
Best Serving Suggestions for Gluten-Free Breadsticks
Gluten-free breadsticks pair beautifully with hearty meals and dips, turning simple snacks into memorable spreads. In light of this, here are some great serving ideas:
Serve With Dipping Sauces
Serve warm with marinara or arrabbiata for classic Italian flair, or elevate with basil pesto, sunflower butter hummus, and spicy sriracha mayo on a shareable breadstick board.
Pair With Main Meals
They sop up sauces from pasta dishes like cauliflower and green peas or Cajun Jambalaya pasta, and shine alongside soups such as vegan tomato cream, broccoli leek, or chicken noodle.
Add Extra Toppings
For a bakery-style finish, brush the breadsticks with garlic butter and sprinkle with Parmesan cheese immediately after baking. You can also top them with shredded mozzarella and broil briefly for cheesy breadstick bites.
How To Freeze, Store, and Rewarm Your Gluten Free Breadsticks
Gluten-free breadsticks store surprisingly well when handled properly, making them great for meal prep or make-ahead baking.

Room Temperature Storage
Let the breadsticks cool completely before storing to prevent excess moisture from making them soggy. Place them in an airtight container or sealed storage bag and keep at room temperature for up to 2 days.
Freezing Instruction
To freeze, let the breadsticks cool completely, then transfer them to a freezer-safe bag or an airtight container. Store for up to 2 months.
How To Reheat
To restore their freshly baked texture, place the frozen breadsticks directly in a 325°F oven and warm for 10–15 minutes, until heated through. For extra flavor and softness, brush with melted butter or olive oil just before serving.
Frequently Asked Questions (FAQs)
We want your gluten-free breadstick experience to be simple, enjoyable, and successful every time. Below are answers to some of the most common questions readers ask when making homemade gluten-free breadsticks.
If you still have questions, need ingredient substitutions, or run into any issues while baking, feel free to leave a comment. We’re always happy to help.
Why do my breadsticks turn out dense or gummy?
Dense or gummy breadsticks are usually caused by inaccurate flour measurements, overproofing, or insufficient xanthan gum. For best results, weigh your flour with a kitchen scale and allow the dough to proof just until slightly puffy, not overly risen.
Can I double the recipe?
It’s better to prepare two separate batches rather than doubling the recipe at once. Gluten-free dough can be more delicate, and smaller batches usually produce better texture and more consistent results.
Can I make these vegan?
Absolutely. Replace the egg with aquafaba or a flax egg, use olive oil instead of butter for the topping, and make sure your gluten-free flour blend is certified vegan.
How do I substitute instant yeast for active dry yeast?
If using instant yeast, simply mix it directly into the dry ingredients. Then add the warm water along with the wet ingredients. No proofing step is needed.
How do I fix sticky dough?
Gluten-free dough is naturally stickier than traditional dough. Lightly wet or oil your hands before handling the dough, rather than adding extra flour, which can make the breadsticks dry or dense.
Do gluten-free breadsticks freeze well?
Absolutely. Once fully baked and cooled, store the breadsticks in a freezer-safe bag for up to 3 months. Reheat at 350°F for 5–10 minutes to restore their soft interior and slightly crisp exterior.
More Quick and Easy Gluten-Free Bread Recipes You’ll Like
Whether you’re looking for a bread to pair with dishes or enjoy as a snack, here are some easy-to-make gluten-free bread recipes that you can whip up in no time:
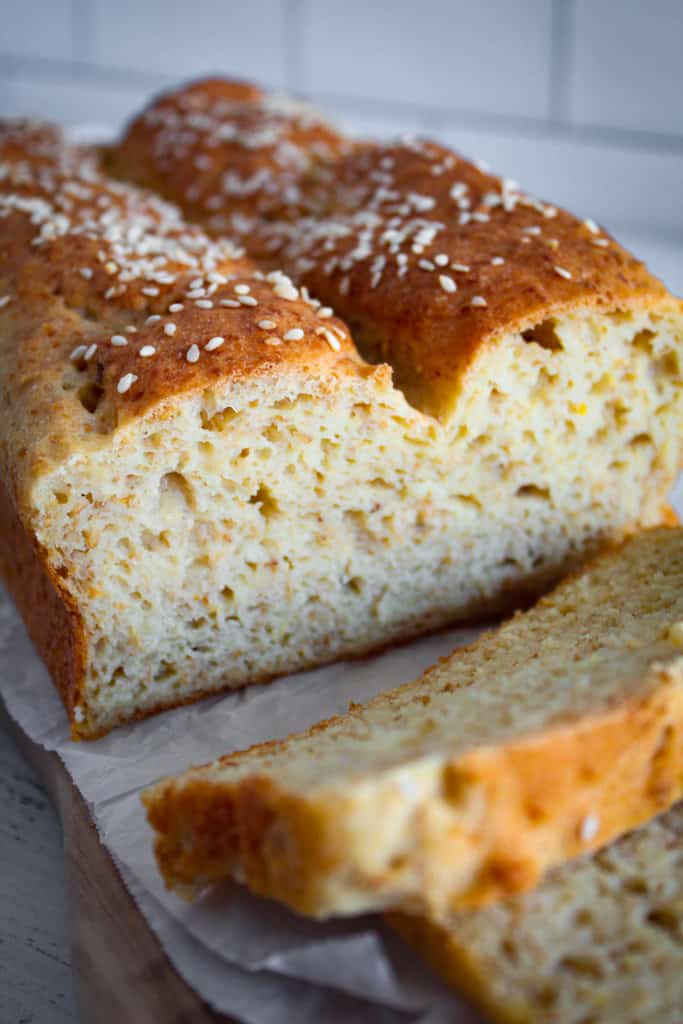
- Gluten Free Focaccia Bread – with just 15 minutes of prep time, this quick and delicious recipe comes together easily, making a bread you can pair with virtually any meal.
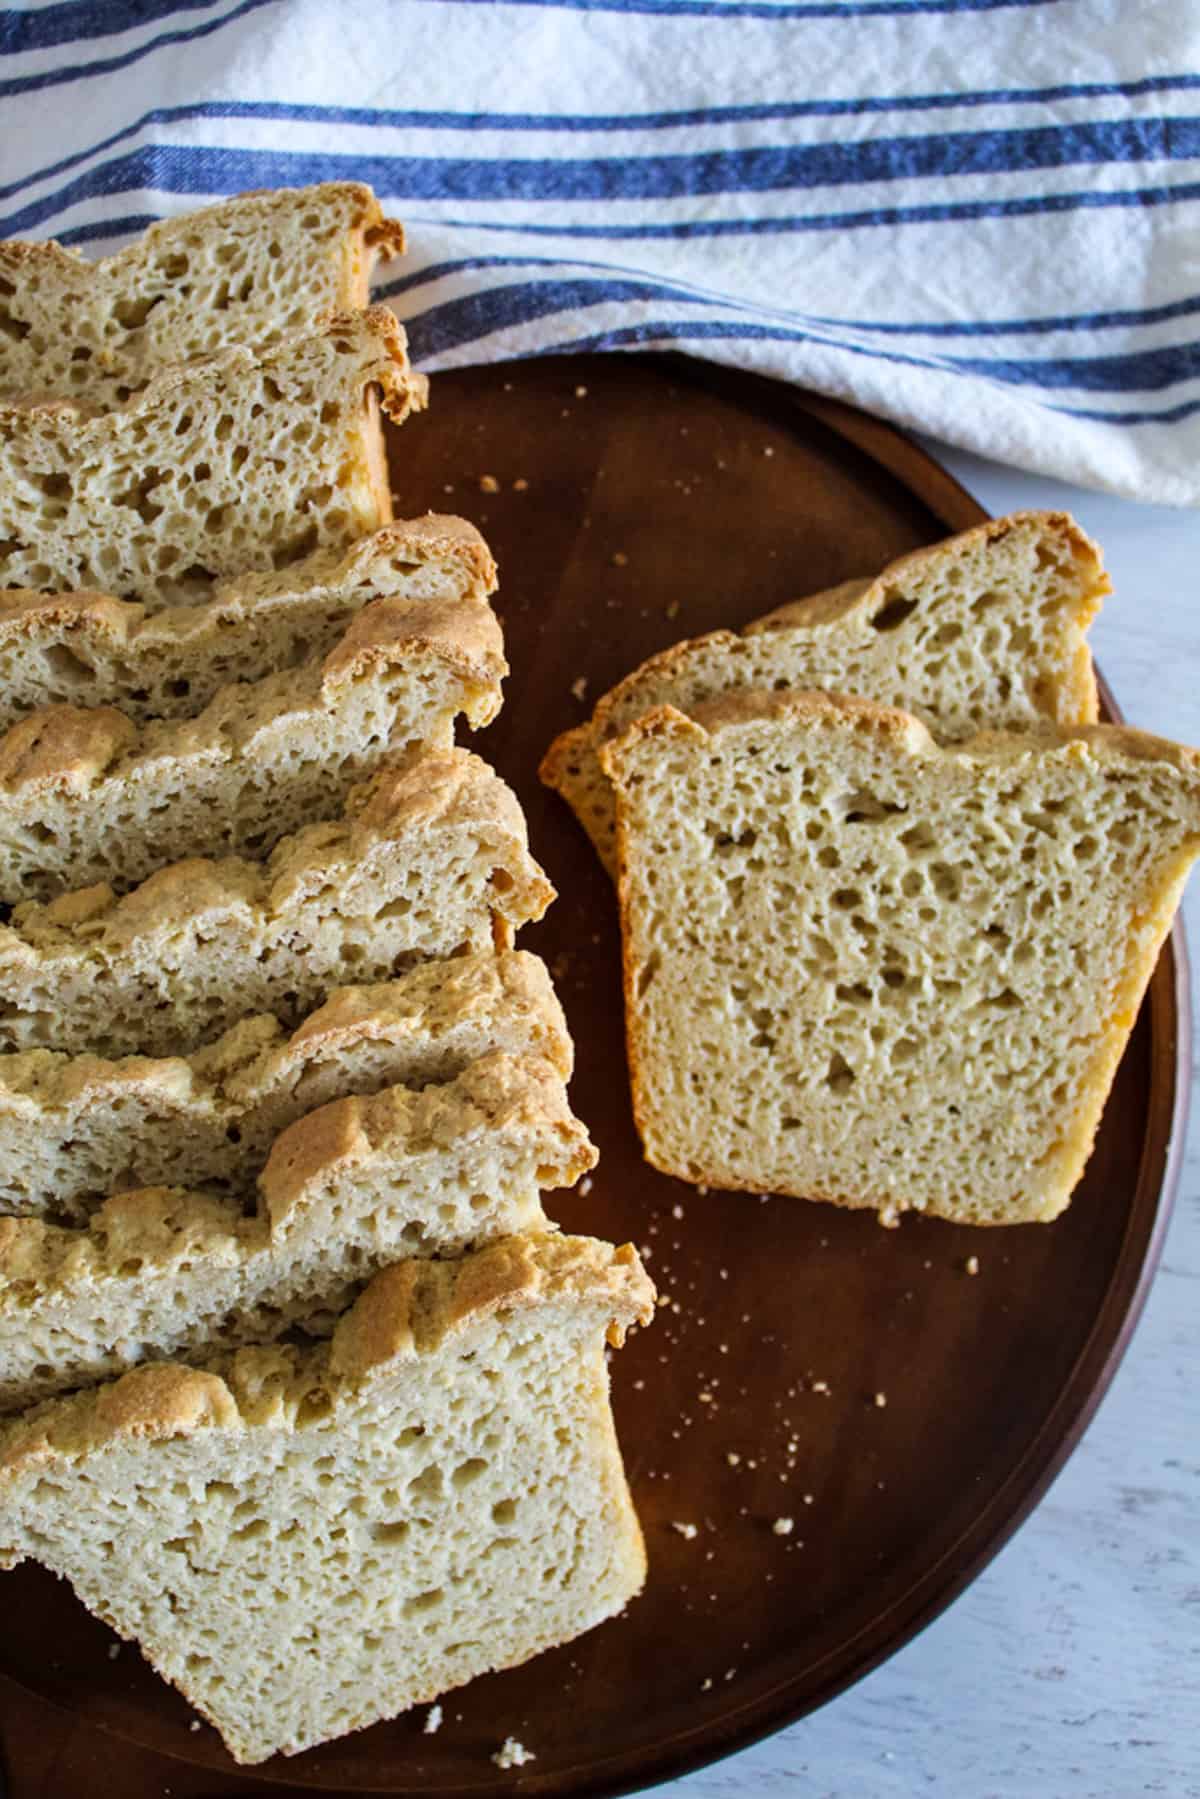
- Low Carb Bread — this incredible low-carb bread is entirely flourless and gluten-free, yet delivers a taste and texture that rivals traditional wheat-based loaves.
- Gluten-Free Pita Bread — these fluffy, tender breads are super simple to make with just 5 ingredients.
- Protein-Packed Gluten-Free Peanut Butter Sandwich Bread — whether as a sweet snack or dessert, this bread is wonderfully fluffy, moist, and very easy to whip up.
- Gluten Free Blueberry Bread — bursting with juicy, sweet blueberries, this bread is a delicious way to make the most of peak-season fruit.
There are many hearty occasions when you can carry these gluten-free breadsticks, and they will be finished in no time.
Let Us Know in the Comments!
How did your gluten-free breadsticks turn out? Were they perfectly crisp on the outside, soft on the inside, and full of flavor?
If you gave this recipe a try, we’d love to hear about it. Leave a comment and share how it went. Tell us all the swaps you used, the creative twists, or helpful tips you discovered. Your insights can help others get even better results.