If you’ve been gluten-free for any length of time, you’ve probably experienced the disappointment of biting into a store-bought English muffin that promised fluffy texture and classic nooks and crannies, only to discover something dry, dense, crumbly, or oddly gummy.
It’s one of the most frustrating challenges in gluten-free baking. Traditional English muffins rely heavily on gluten to achieve their signature chewy interior, airy texture, and sturdy structure. Remove the gluten, and suddenly you’re dealing with doughs that don’t rise properly, muffins that fall apart when sliced, or bread that tastes more like a hockey puck than breakfast.
Table of Contents
The good news is, it doesn’t have to be that way. After lots of recipe development and gluten-free baking, the important thing that I’ve learned is that with gluten-free bread, it’s all about understanding how different ingredients work together to create structure, moisture, and texture.

Whether you’re newly diagnosed with celiac disease, baking for a gluten-sensitive family member, or simply looking for a better homemade alternative to expensive store-bought options, this recipe was designed to deliver reliable results.
Keep reading, and you’ll learn exactly how to make gluten-free English muffins step by step, why each ingredient matters, and expert tips for achieving the best possible texture so you can feel confident throughout the entire process.
Want our human-written content to rank above AI-generated garbage? Help us out by clicking this button!
Why This Recipe Works
Gluten-free baking can be notoriously difficult, especially when you’re trying to recreate a yeast-based bread like English muffins. Traditional English muffins rely on gluten to trap gas bubbles, create structure, and develop the chewy texture that makes them so recognizable. Without gluten, many recipes end up dense, crumbly, gummy, or dry.
This recipe works because each ingredient has a specific job. Instead of mimicking wheat flour with a single substitute, the recipe uses a combination of gluten-free flours, starches, proteins, and moisture-rich ingredients that work together to create the texture and flavor people expect from a classic English muffin.
This recipe also benefits from:
- A carefully balanced flour-to-starch ratio
- Lots of moisture for a softer crumb
- Yeast for both flavor and rise
- A slow cooking process that allows the muffins to cook evenly
Most importantly, this recipe has been designed to be repeatable. You don’t need advanced baking skills or hard-to-find ingredients to achieve excellent results.
Homemade vs Store-Bought Comparison
Walk down the gluten-free aisle of almost any grocery store, and you’ll likely find a few English muffin options. While convenient, many packaged gluten-free English muffins come with compromises in texture, flavor, freshness, and price.
Homemade gluten-free English muffins give you complete control over the ingredients and often deliver superior results.
Many commercial products contain preservatives, artificial flavors, added gums, and excess sugar. When baking at home, you choose exactly what goes into your muffins. As well, a typical package of gluten-free English muffins can cost up to $10 for a small pack! Making them at home can significantly reduce the cost per serving and allows you to make larger batches to suit your needs. Plus, store-bought products sit in warehouses and on shelves for weeks or months. Homemade muffins are fresh and flavorful, and you always know you’re getting a better quality.
Store-bought English muffins certainly have their place when convenience is the priority. However, if you’re looking for the best flavor, texture, and value, homemade gluten-free English muffins are difficult to beat.
Many readers find that after making their own batch, it’s hard to go back to commercial versions.

Ingredients & Substitutions
Below is a list of the ingredients you’ll need to make these English Muffins, along with any substitutes that can work in this recipe.
- Tapioca Starch: I used this organic tapioca starch for this recipe. Since tapioca starch is the main ingredient in these English muffins, I wouldn’t substitute it unless you need to. It can be substituted for potato starch or cornstarch.
- Buckwheat Flour: The variety I use and recommend is this buckwheat flour. Acceptable substitutes for buckwheat include sorghum or millet flour.
- Salt: Most varieties of table salt or sea salt can be used.
- Almond Milk: Oat milk or another plant-based milk can be used. Dairy milk will also work.
- Vegan Butter: The Country Crock vegan butter sticks were used in the recipe. Dairy butter will also work.
- Active Dry Yeast: Make sure your yeast is certified gluten-free.
- Granulated Sugar: As a substitute for the sugar, Swerve sweetener can be used in equal amounts.
- Water: Use warm water to proof the yeast.
- Egg Whites: A substitute for the egg whites has not been tested.
Measurements for each ingredient, along with instructions for making Gluten-Free English Muffins, are in the printable recipe card below.
Equipment You’ll Need
One of the best things about making gluten-free English muffins is that you don’t need a professional bakery setup, but a few essential baking tools will make it much easier to produce excellent results.
- Non-Stick Skillet: For cooking the muffins and for an easy release.
- Stand Mixer: For mixing the dough. I use my KitchenAid mixer for everything cooking- and baking-related!
- English Muffin Rings: For traditional English muffins, I don’t always use rings, but for gluten-free English muffins, because they’re much more of a batter than a dough, the rings are essential for shaping the muffins. This recipe makes 8, so this 8-pack of rings is perfect!
- Flat Spatula: To flip the English muffins. I use this rubber flat spatula so it doesn’t scratch my nonstick pan.

Printable Gluten-Free English Muffins Recipe Card
Ingredients
- 234 g tapioca starch , about 2 cups
- 150 g light buckwheat flour, about 1 cup + 1 teaspoon
- 1 tsp salt
- 1 cup almond milk
- 3 tbsp vegan butter
- 2 ¼ tsp active dry yeast
- 1 tsp white sugar
- ⅓ cup water, very warm (not hot)
- 2 large egg whites, room temperature
Instructions
- In the bowl of a stand mixer, combine the tapioca starch, buckwheat flour and salt. Stir until combined.
- In a small saucepan, bring the milk and butter to a boil, stirring constantly.
- Once the mixture is boiling, immediately pour the liquid into the dry ingredients and mix on low speed for 15 seconds, until blended. Allow the mixture to cool for 20 minutes.
- In the meantime, in a 1 cup measuring cup, combine the water and sugar and mix. Add the yeast. Let the mixture proof for 5 minutes.
- Add the yeast mixture to the cooled dough and mix for 1 minute on low speed, until combined.
- Scrape the dough down in the bowl and cover it with a cloth. Allow it to rise for 30 minutes.
- Preheat the oven to 350°F and prepare the baking sheet and 8 English muffin rings by greasing them well along the inside with butter. Set aside.
- Once the dough has risen, add the egg whites to the dough and mix again on medium speed for 1 minute.
- Preheat a non-stick, flat bottom skillet and position 3 English muffin rings in the pan.
- Portion roughly ⅓ cup of batter into each ring and smooth the top slightly. Let it cook for 5-10 minutes, under golden brown on the bottom. Using a flat spatula, flip the entire muffin and ring over and cook another 5-10 minutes, or until browned on both sides.
- Place each cooked muffin on the prepared baking sheet and carefully remove the ring.
- Once all English muffins are cooked and on the baking sheet, place them in the oven and bake for 10-15 minutes or until the internal temperature reaches 210℉.
- Remove the English muffins to a wire rack to cool for about 1 hour.
Notes
- Cooking these English muffins is along like flipping pancakes, only with a ring around them. Carefully slide the spatula under the muffin, ring and all, and flip it all over.
- The cooking time will vary depending on your heat – cook them till the bottom is nice and brown.
- A quick bake in the oven for a few minutes and they’ll be ready to eat!
Did you make and love this recipe? Give it your review and rating below! And make sure to follow me on Instagram, Pinterest, and Facebook , too!
Step-by-Step Instructions for Perfect English Muffins
Follow along with these steps and images for an easy-to-follow format while cooking at home!
Step 1
In the large bowl of a stand mixer, combine the dry ingredients: 234g tapioca starch, 150g buckwheat flour, and 1 tsp salt. Mix just to combine (about 15 seconds).

Step 2
In a small saucepan, bring the 1 cup of almond milk and 3 tbsp butter to a boil, stirring constantly. When it comes to a boil, remove it from the heat, turn the mixer to low speed, and slowly pour the milk and butter into the mixer bowl with the dry ingredients. Mix on low speed for about 15 seconds, until everything is completely combined. Set the dough aside for about 20 minutes to cool to room temperature.


Step 3
In the meantime, combine the 1/3 cup of warm water, 1 tsp sugar, and 2 1/4 tsp yeast in a measuring cup. Allow it to sit for about 5 minutes.

Step 4
Once the dough has cooled (about 20 minutes), add the yeast mixture and mix on low speed for about 1 minute. Scrape down the sides of the bowl, cover with plastic wrap, and let the dough rise in a warm spot for 30 minutes.

Step 5
Meanwhile, prepare 8 English muffin rings by buttering the insides with the vegan butter and set them aside. Preheat the oven to 350ºF, and prepare the rest of your equipment (nonstick pan, spatula, baking sheet).

Step 6
After the dough has rested/risen for 30 minutes, add the 3 large egg whites to the dough and mix on medium speed for 1 minute. The batter should be thick, but not the type that needs kneading.

Step 7
Heat a large skillet over medium heat. If it is not nonstick, spray it with cooking spray. Add 3-4 muffin rings to the pan and portion about 1/3 cup of batter into each ring, gently smoothing out the top if needed. Cook for 5-10 minutes on each side, or until golden brown. If they are getting brown too quickly, turn the heat down to medium-low.

Step 8
Using a spatula, flip the muffins over and cook until the other side is golden brown (5-10 minutes). At this point, the ring may slip off, which is fine. When all muffins have been browned, place them on a baking sheet and bake in the preheated oven for 10-15 minutes, or until the internal temperature reaches 210ºF.
Remove them from the oven, place them on a cooling rack, and allow them to cool for about 1 hour before slicing them open.

Serving Ideas
One of the reasons English muffins are so popular is their versatility. They can be enjoyed for breakfast, lunch, dinner, or even as snacks. Once baked, allow them to cool for at least 1 hour before slicing and serving. Here are some tasty options for serving these English muffins:
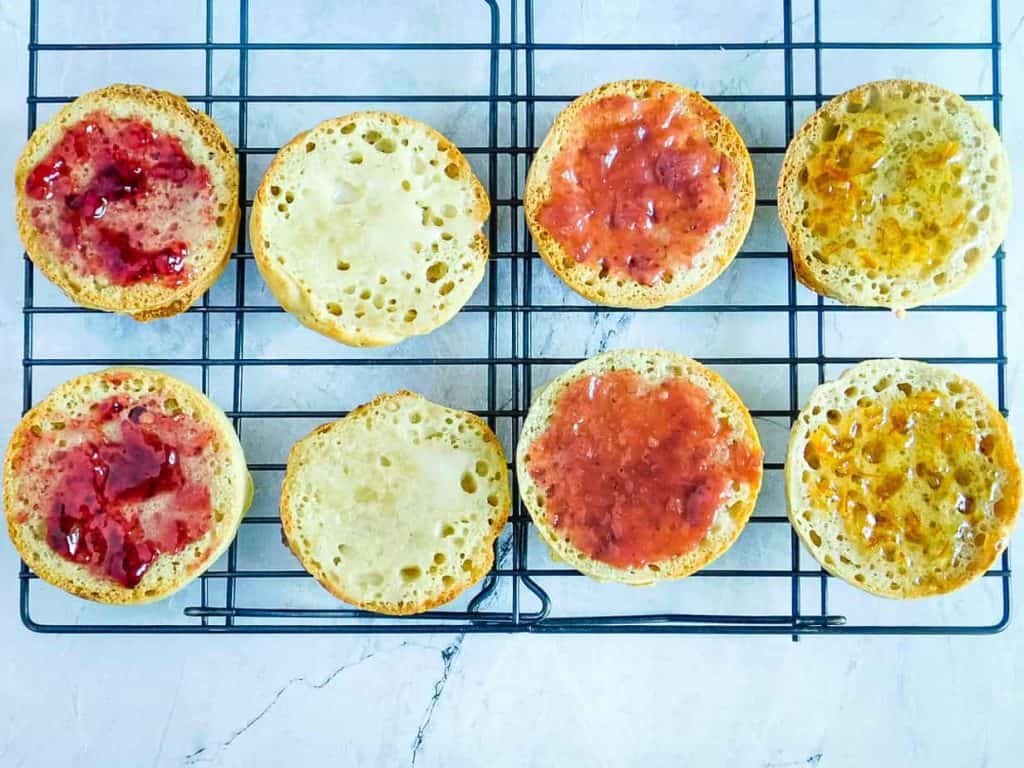
- Classic Breakfast: Spread them with butter, jam, honey, or peanut butter.
- Breakfast Sandwiches: These are ideal for holding eggs, cheese, and all your favorite add-ins for a morning egg sandwich. Or, use them to replace the buns on these breakfast sandwiches.
- Savory Lunch: Enjoy them for tuna melts, chicken salad sandwiches, turkey melts, and more.
- Homemade Mini Pizzas: For quick personal pizzas, split the English muffins in half and top them with pizza sauce, cheese, and your favorite toppings. Then bake them until golden and bubbly.
- Sweet Treats: Top a toasted muffin with cinnamon and sugar, cream cheese and jelly, or Nutella and banana for a dessert-style treat.
- Gluten-Free Eggs Benedict: Use these muffins as a base to make your own eggs Benedict at home!
Storing, Freezing, and Reheating
One of the many great things about these gluten-free English muffins is how well they store. Making a large batch ahead of time can be a lifesaver for busy mornings.
At Room Temperature: Once the muffins have cooled completely, store them in an airtight container or a plastic bag for up to 2 days. As with other gluten-free breads, they will dry out rather quickly, so freezing is recommended for longer storage.
In the Fridge: Refrigeration can help extend the freshness of the English muffins, but always store them in an airtight container, as refrigerating breads can dry them out faster. They generally last up to one week in the fridge.
Freezing: Freezing is the best option for long-term storage. Follow the same prep as storing at room temperature, only place the muffins in a freezer-safe bag or container. It can also help to wrap them individually in parchment paper for extra protection and easier removal. Store them for up to 1 month.
How to Reheat: Frozen English muffins can be toasted directly from the freezer. I find the toaster my favorite option for reheating to restore its original texture, but the oven or air fryer is also a great choice.
Meal Prep Tip: Many readers make double batches specifically for freezing. Having homemade gluten-free English muffins ready to toast can make breakfast significantly easier throughout the week while ensuring you always have a reliable gluten-free option available.
Pro Tips for the Best Gluten-Free Baking
Some helpful tips for all our home bakers!
Don’t Skip the Rise
Whether it’s your first time making these or your 20th, the rise time is super important for English muffins! Where some bread can get away with shaving a minute or two off the rise time, these gluten-free English muffins need every minute to fully develop the bubbles that give them that amazing texture.
It’s what makes an English muffin, an English muffin!
Weigh the Ingredients
Just like in this dinner roll recipe, weighing the dry ingredients is really important for accuracy. Not only does it ensure you have the correct amount, but it is a true way of accounting for differences in flours and starches. Not all brands are created equal, and when you measure them, the actual measurement can vary from brand to brand. Check out more on measuring flour in this post.
Portioning the Batter
If you’ve never used English muffin rings before, you’re really going to love them. Not only are they good for making these English muffins, but when you crack an egg into it, they form a perfect-sized egg for breakfast sandwiches.
Flipping the English Muffins
Flipping these English muffins is super simple with the right tools. Before portioning the batter into the rings, make sure you have all your equipment handy.
After the English muffins have cooked for about 5-10 minutes on each side, or until they are golden brown, carefully slide your spatula underneath the muffin, and do one quick flip to the other side. The muffins will be firm enough to hold their shape.
Let the other side cook for 5 minutes, then slide the spatula under again and transfer it to a baking sheet to cool.
Gluten-Free English Muffins FAQs
A few answers to common questions to help you along the way. For any questions or comments, write to us below!
Can English Muffins be Frozen?
English muffins freeze very well! Follow the steps under “Storing, Freezing, and Reheating” above for more tips on freezing these muffins.
Can I Make These English Muffins Vegan?
I have not tested this gluten-free English muffin recipe as vegan, but aquafaba is often a really good substitute for egg whites in vegan recipes.
Why Are My English Muffins Gummy in the Middle?
For any gluten-free bread with a gummy center after baking, it is likely because it was either not baked long enough or cut open too early. Be sure to cook the English muffins at the right stovetop temperature for a full 5-10 minutes on each side (or until golden brown), then finish the cooking in a preheated oven for 10-15 minutes. Finally, allow them to cool for about an hour before slicing them open.

Final Thoughts
Making homemade gluten-free English muffins may seem intimidating at first, especially if you’ve struggled with gluten-free bread recipes in the past. But once you understand the process and see how the dough comes together, you’ll realize that creating bakery-quality English muffins at home is absolutely achievable.
One of the biggest advantages of making your own gluten-free English muffins is having complete control over the ingredients. You can avoid unnecessary preservatives, customize flavors to suit your preferences, and enjoy fresher, better-tasting results than many packaged alternatives. Plus, homemade versions are often more economical in the long run, especially if gluten-free products are expensive in your area.
Don’t be discouraged if your first batch isn’t absolutely perfect. Gluten-free baking often comes with a learning curve, and small adjustments in proofing time, dough consistency, humidity, and cooking temperature can all affect the final outcome. The more familiar you become with the dough, the easier it will be to consistently achieve those soft interiors and signature nooks and crannies that make English muffins so satisfying.
If you try this recipe, I’d love to hear how it turned out for you. Leave a comment below and share any modifications, tips, or serving ideas that worked well in your kitchen. Your feedback not only helps improve the recipe but also helps other readers achieve success.
More Gluten-Free Baking
Be sure to check out these other gluten-free bread recipes!
Connect With Us!
Did you enjoy this recipe and make successful gluten-free English muffins at home? Let us know your thoughts or any tricks you used in the comments!