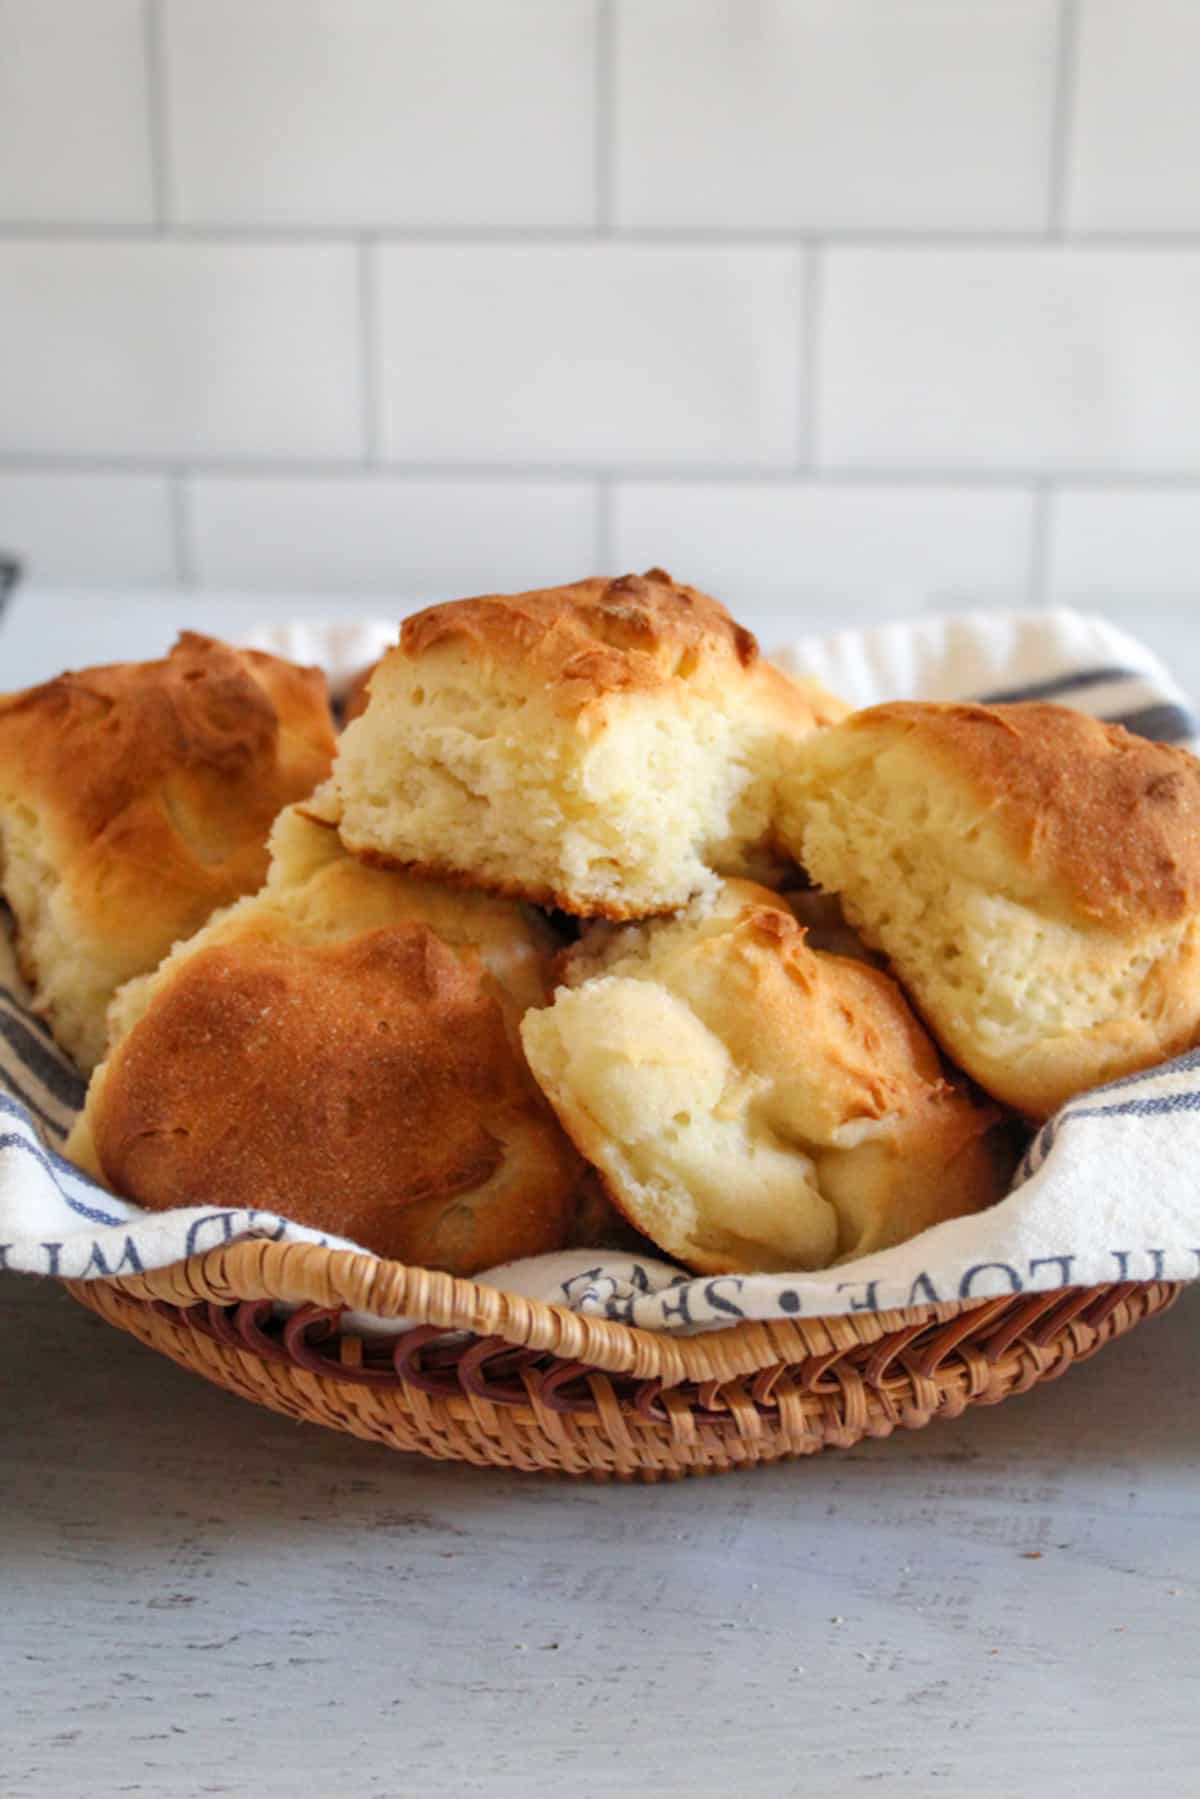
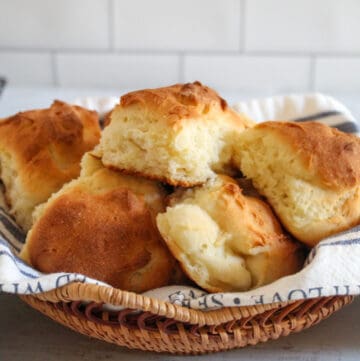
Don’t you love it when you finally find gluten-free dinner rolls so good that even gluten-eaters ask for the recipe? These gluten-free, dairy-free dinner rolls are those rolls.
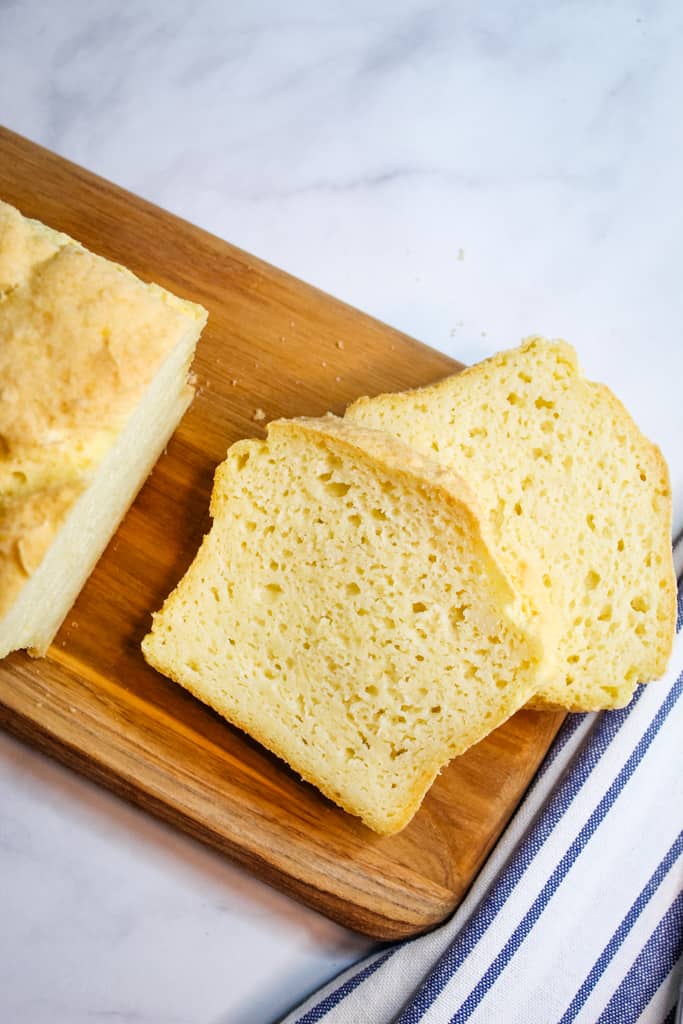
Soft, fluffy, and rich without being heavy, they have the kind of texture most gluten-free rolls only promise. No weird aftertaste. No gumminess. Just real, pull-apart bread that works for holidays, weeknight dinners, and yes… even breakfast with jelly.
Table of Contents
If you’ve ever been disappointed by gluten-free rolls before, this recipe will change your expectations.
Why These Gluten-Free Dairy-Free Dinner Rolls Actually Work
If you’ve baked gluten-free dinner rolls before, you already know the usual problems: dense centers, crumbly edges, gummy texture, or a strange aftertaste. Dairy-free versions often make those issues even worse.
These dinner rolls avoid all of that, and they do it intentionally.
What Makes These Different From Typical Gluten-Free Rolls
Most gluten-free roll recipes fail because they rely too heavily on starch or a single flour, which creates bread that looks good at first but falls apart as soon as you pull it apart.
This recipe uses:
- A balanced gluten-free flour blend designed for yeast baking
- The correct hydration level (yes, the dough should look like thick cake batter)
- A longer mixing time to build structure
Instead of fighting gluten-free dough, this recipe works with it.
How Elasticity Is Created Without Gluten
Gluten normally gives bread its structure and elasticity, which is why gluten-free dough behaves differently. According to Harvard’s School of Public Health, gluten plays a key role in trapping air and creating structure in baked goods.
Since it’s not here, elasticity is created through a combination of:
- Xanthan gum, used sparingly to mimic gluten’s binding ability
- Proper mixing, which helps the dough trap air
- Apple cider vinegar, which strengthens the dough and improves the rise
Together, these elements create rolls that are soft and pull apart, without tearing or crumbling.
Why the Texture Stays Soft (Not Crumbly or Gummy)
Gluten-free rolls often turn out dry because they don’t hold moisture well, or gummy because they rely on too much binder.
These rolls stay soft because:
- The dough is fully hydrated
- The mixing time is long enough to develop structure
- The binder is carefully balanced (enough to hold, not enough to overpower)
The result is a light, fluffy roll with a tender crumb that tastes like real bread—no grit, no gumminess, and no weird aftertaste.
Best Gluten-Free Dinner Rolls at a Glance
These dairy-free rolls will make any holiday meal, Thanksgiving dinner, or potluck super special because of these characteristics:
- Soft, fluffy texture with a tender, pull-apart crumb
- Elastic and bread-like, even without gluten
- Reliable rise in as little as 25–45 minutes
- No weird aftertaste or gummy texture
- Dairy-free and gluten-free, with simple ingredients
- Perfect for holidays, weeknights, and potlucks
Ingredients & Substitutions (What Works—and What Doesn’t)
This recipe uses just nine ingredients, but each one plays a specific role in creating soft, fluffy, gluten-free, dairy-free dinner rolls. Because gluten-free yeast baking is sensitive to balance, not all substitutions will work equally well.
Quick Look: Ingredients
- Gluten-free flour blend
- Xanthan gum (if needed)
- Instant yeast
- Granulated sugar
- Salt
- Warm water
- Coconut oil or dairy-free butter
- Egg
- Apple cider vinegar
Gluten-Free Flour Blend
Why it matters: The flour blend determines structure, moisture, and how well the rolls rise.
I use the Zest For Baking gluten-free flour blend because it’s balanced specifically for yeast baking. It provides enough structure without making the rolls dense or dry.
Tested alternative: King Arthur Measure for Measure Gluten-Free Flour has been tested with good results. If using it, omit the xanthan gum.
Avoid: Single flours (like rice flour) or unbalanced blends, which can lead to crumbly or gummy rolls.
Xanthan Gum
Why it matters: Xanthan gum acts as a binder, replacing gluten’s ability to hold structure and trap air.
This recipe uses a small amount to provide elasticity without creating gumminess or an off flavor. Too much xanthan gum can overpower the texture.
If your flour blend already contains xanthan gum, do not add more.
If you want to substitute xanthan gum, I recommend referencing our baking substitutes guide.
Instant Yeast
Why it matters: Yeast provides rise, structure, and classic bread flavor.
Instant yeast (also called fast-acting or bread machine yeast) works best here. Active dry yeast can be used, but it must be proofed first in some of the warm water.
There is no yeast-free substitute for this recipe. If you want something yeast-free, check out this yeast-free bread.
Granulated Sugar
Why it matters: Sugar feeds the yeast and helps the rolls brown properly.
Regular granulated sugar, I like Imperial, works best. Sugar substitutes may affect the rise, and brown sugar is not recommended.
If you want to sub the sugar, opt for something like Swerve granulated sugar.
Coconut Oil
Why it matters: Fat adds moisture, tenderness, and richness to the rolls. I use and recommend the coconut oil from Thrive Market because it’s a good, high-quality brand.
Melted coconut oil works well, but melted vegan butter, olive oil, or regular butter may also be used.
Egg
Why it matters: The egg adds structure and richness to the dough.
An egg substitute can be used if needed, but the texture may be slightly different.
Apple Cider Vinegar
Why it matters: Apple cider vinegar strengthens gluten-free dough, improves rise, and balances flavor.
This ingredient is essential and should not be substituted. Other vinegars are too strong and can affect both taste and texture.
Exact measurements and full instructions for making these gluten-free, dairy-free dinner rolls can be found in the recipe card below.
The Best Gluten-Free, Dairy-Free Dinner Rolls Recipe Card
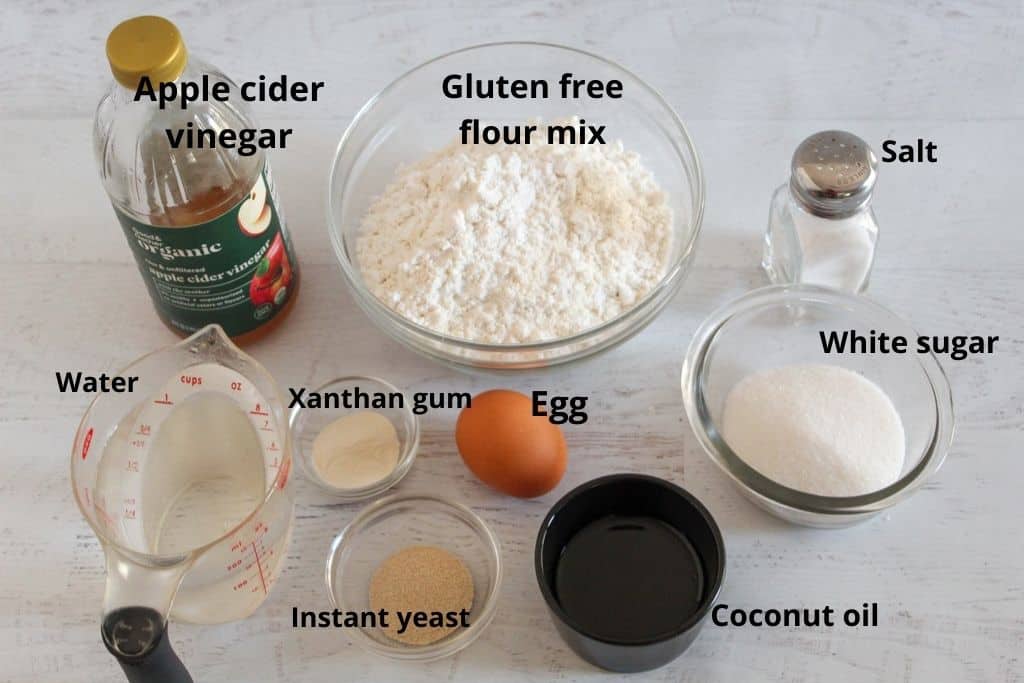
Ingredients
- 280 grams gluten-free flour mix about 2 cups
- 1 teaspoon xanthan gum
- 2 teaspoons instant yeast
- 50 grams granulated sugar about 1/4 cup
- 1 teaspoon salt
- 1 cup warm water 105-110°
- 2 Tablespoons coconut oil melted
- 1 large egg
- 1 teaspoon apple cider vinegar
Instructions
- Add the gluten-free flour blend, xanthan gum (if using), instant yeast, sugar, and salt to the bowl of a stand mixer. Briefly whisk or stir to combine.
- In a small bowl, measure the egg, warm water (105–110°F), melted coconut oil, and apple cider vinegar.
- Whisk the wet ingredients until fully combined and smooth.
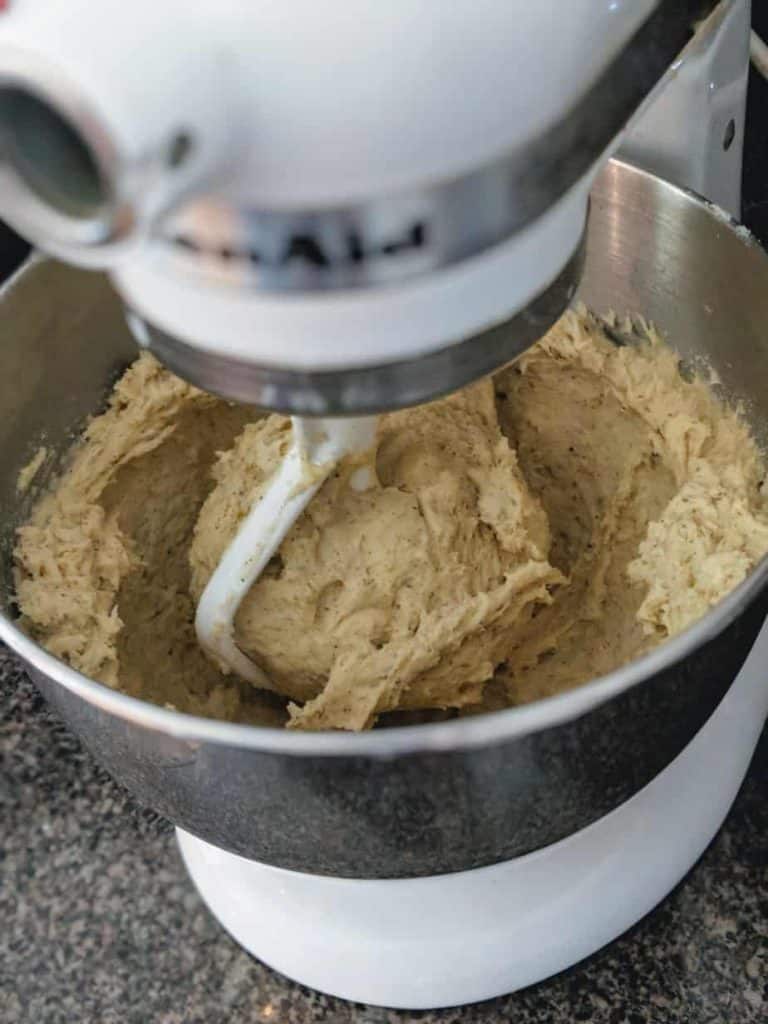
- With the paddle attachment in place (or a rubber spatula) turn the mixer to low speed and slowly add the wet ingredients to the dry ingredients. Scrape down the bowl once, then increase to medium speed and mix for 3 minutes.
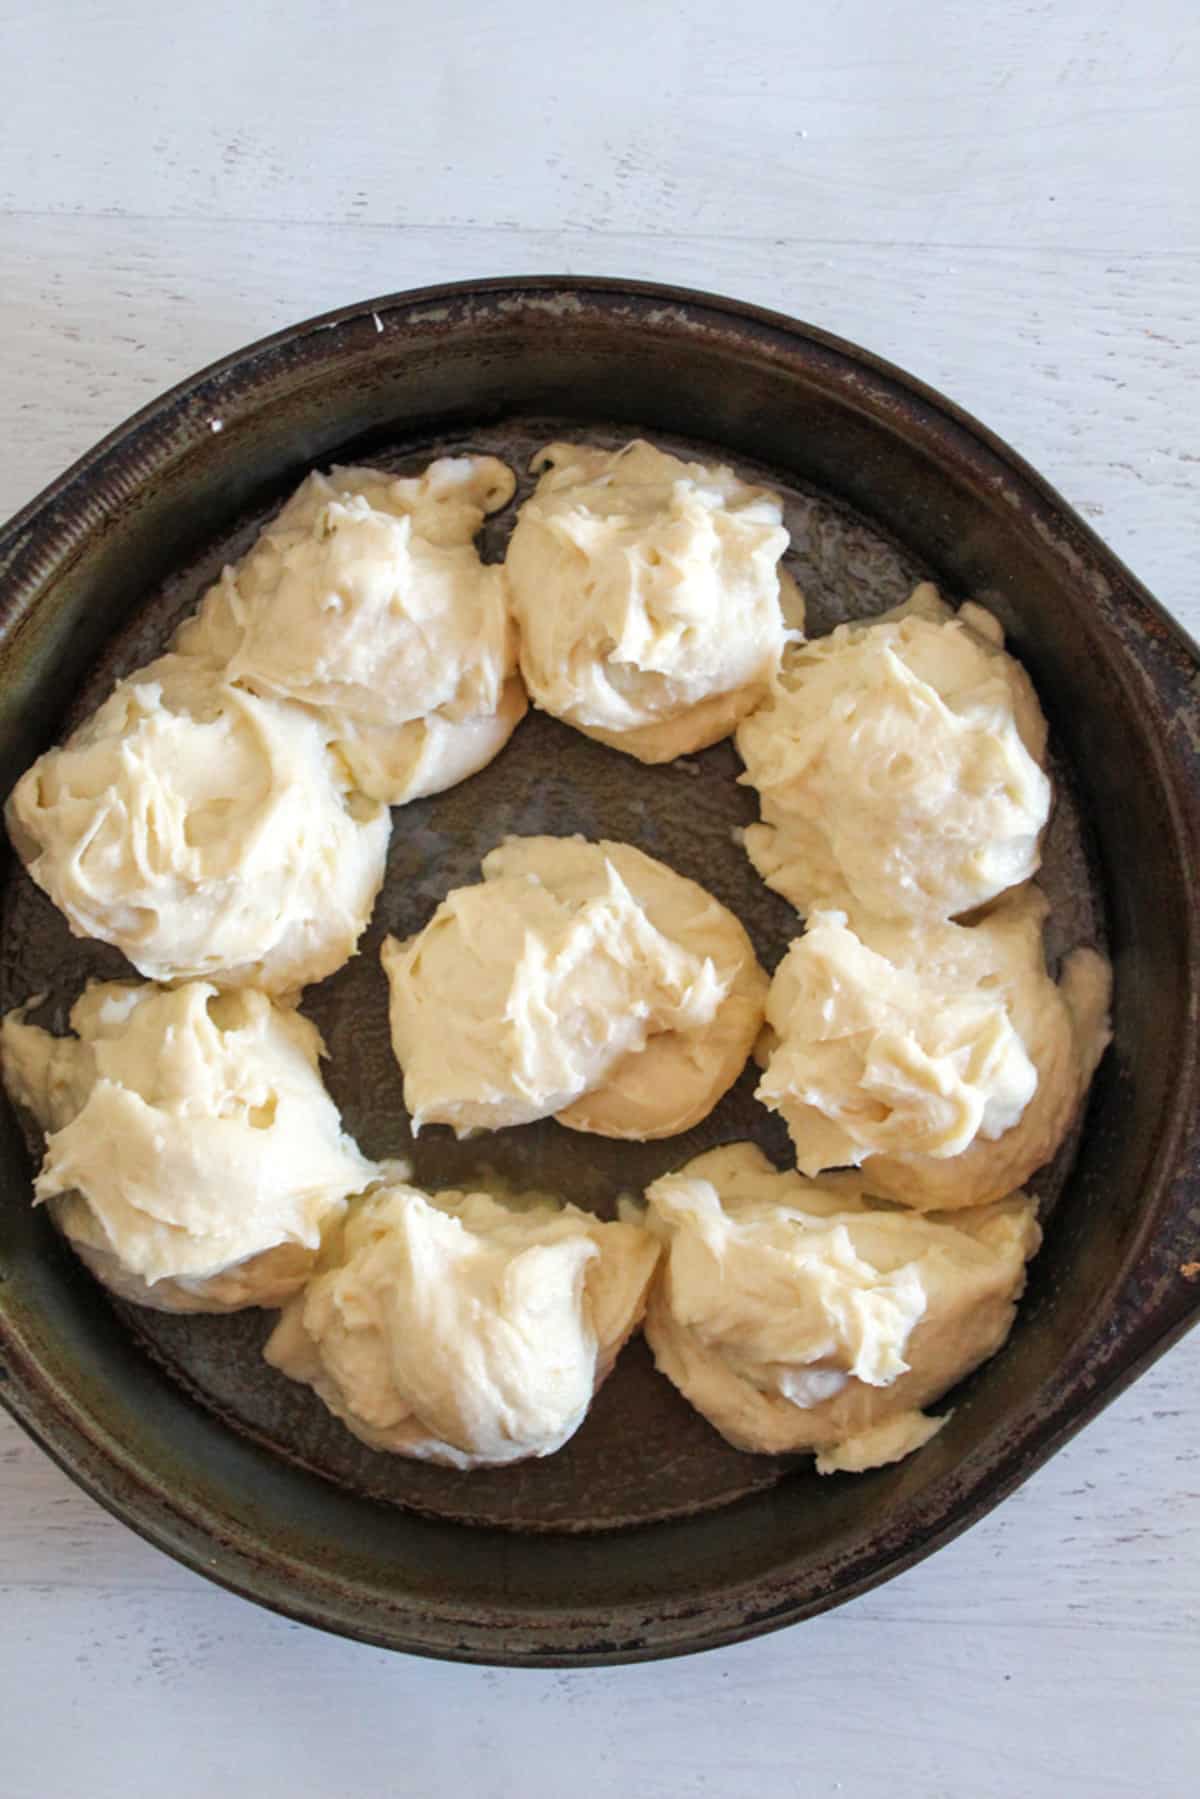
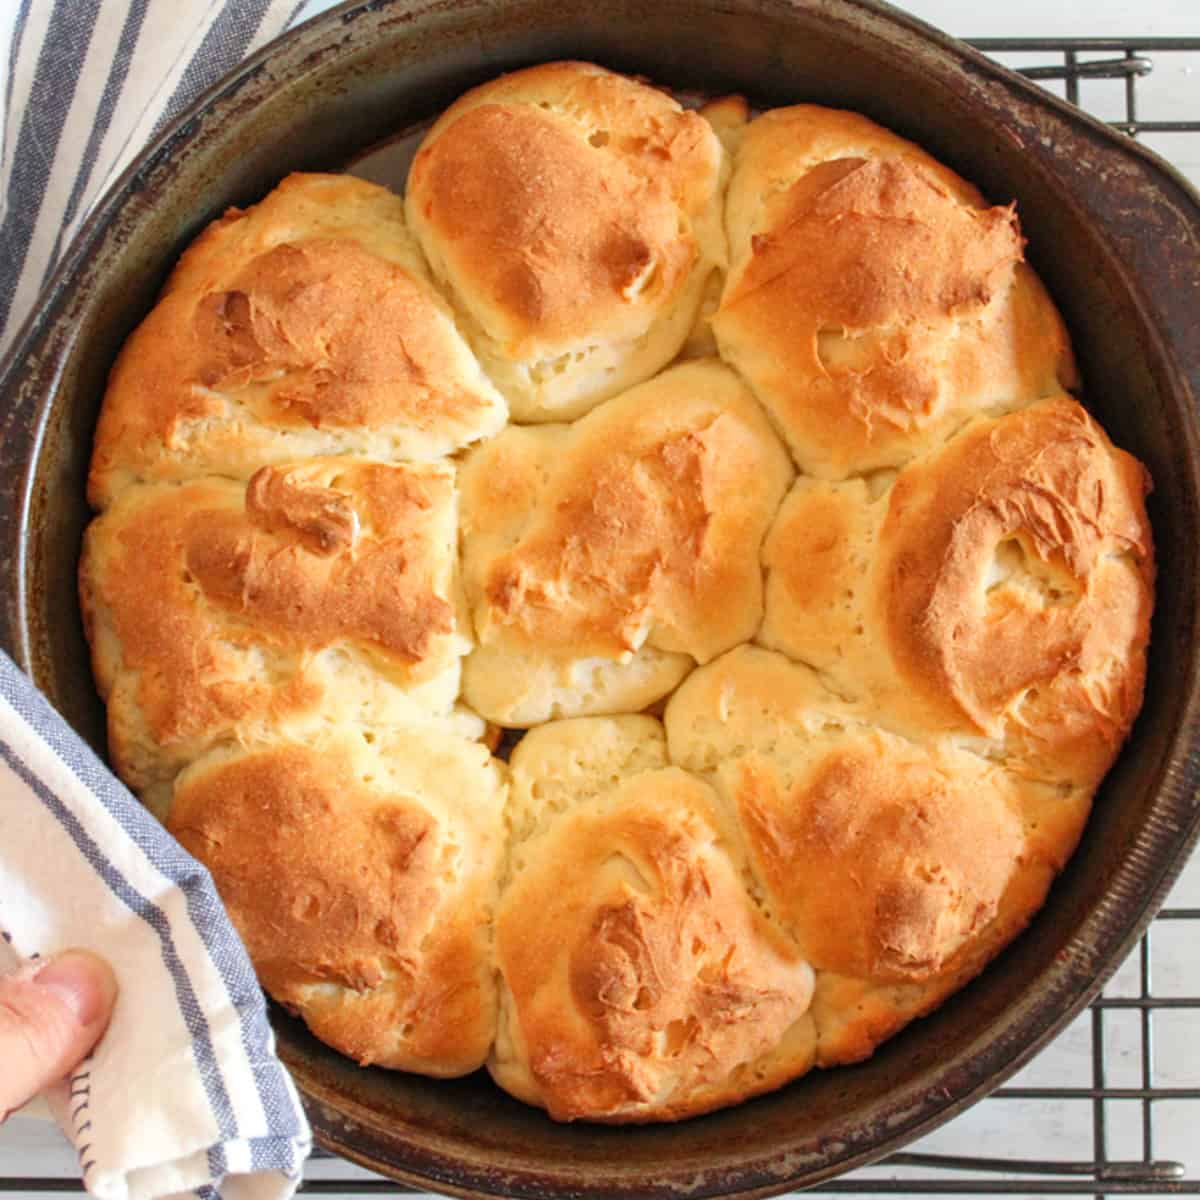
- Spray a 9-inch round cake pan evenly with cooking spray.
- Using a 1/4-cup measuring cup or large scoop, portion 9 mounds of dough into the pan, one in the center and 8 around it. If desired, lightly wet a rubber spatula and gently smooth the tops of the rolls.
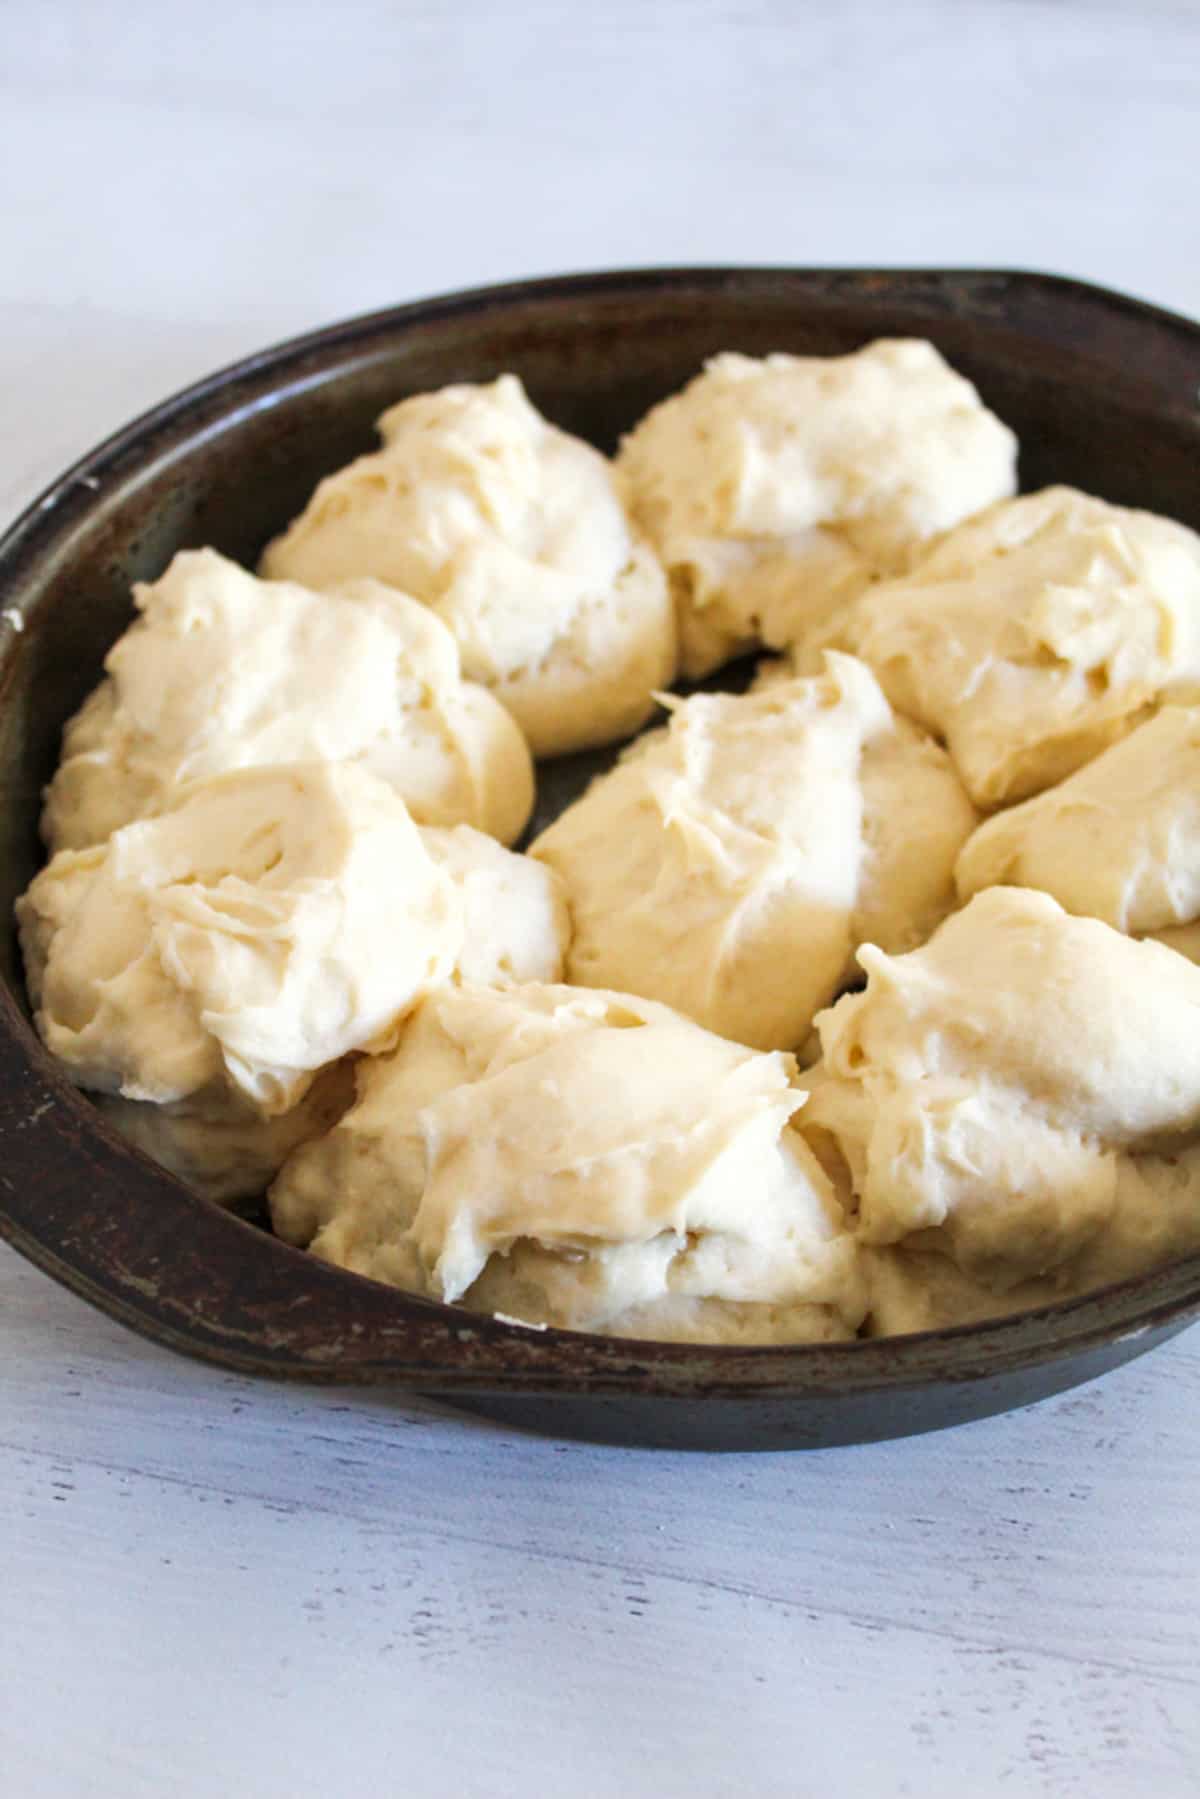
- Cover the pan with a clean towel or plastic wrap and let the rolls rise in a warm place for 25–35 minutes, or until about 50% larger in volume.
- Preheat the oven to 400°F. Bake the rolls for 26–28 minutes, or until golden brown. If the tops brown too quickly, loosely cover with foil near the end of baking.For best results, the internal temperature should register about 210°F on an instant-read thermometer. Cool slightly, then serve warm.
Notes
- Don’t double the recipe – make 2 batches side by side instead
- Let the rolls rise only until 50% larger in size
- The batter will look like thick cake batter – and that’s ok!
Nutrition
Nutrition (Per Roll)
Approximate nutrition per roll: 157 calories. Values may vary based on ingredient brands and substitutions.
A gluten-free diet is essential for people with celiac disease, who must avoid gluten in all forms to prevent symptoms and intestinal damage. Reliable gluten-free baking guidance can help you enjoy homemade bread while following these dietary needs. Celiac Disease Foundation provides education and support for living gluten-free.
Essential Tools for Gluten-Free Roll Success
Gluten-free yeast dough behaves very differently from traditional wheat dough. Using the right tools makes the process easier and greatly improves your results.
Why a Stand Mixer Matters for Gluten-Free Dough
Gluten-free dough needs extended, even mixing to develop structure. A stand mixer provides the consistent speed and power required to properly hydrate the flour and activate the binder.
Hand-mixing or under-mixing often leads to dense or uneven rolls because the dough never fully develops.
When a Hand Mixer Will Still Work
A hand mixer can be used if you don’t have a stand mixer, but it’s important to:
- Mix for the full recommended time
- Use a medium-high to high speed
- Scrape down the bowl frequently
Expect the dough to be thick and smooth when fully mixed.
Why Weighing Ingredients Changes Everything
Gluten-free baking is especially sensitive to ingredient ratios. Measuring by weight ensures the correct balance of flour and liquid every time.
A digital kitchen scale removes guesswork and helps prevent common issues like dry, dense, or gummy rolls.
Good to Have
- Round cake pan – use the 9″ size to give the rolls room to expand
- 1/4 cup measuring cup – this is roughly the size of each roll
- Rubber spatula – you’ll need this to both scrape the dough down in the stand mixer bowl and to scrape the dough out of the measuring cup into the pan
Step-by-Step: How to Make Gluten-Free Dairy-Free Dinner Rolls
Gluten-free yeast dough looks and behaves differently from traditional wheat dough, but the process is simple and reliable. Follow the steps below and use the visual cues as your guide for success.
Step 1: Measure the Dry Ingredients
Add the gluten-free flour blend, xanthan gum (if using), instant yeast, sugar, and salt to the bowl of a stand mixer. Briefly whisk or stir to combine.
Step 2: Measure the Wet Ingredients
In a small bowl, measure the egg, warm water (105–110°F), melted coconut oil, and apple cider vinegar.
Step 3: Mix the Wet Ingredients
Whisk the wet ingredients until fully combined and smooth.
Step 4: Mix the Dough
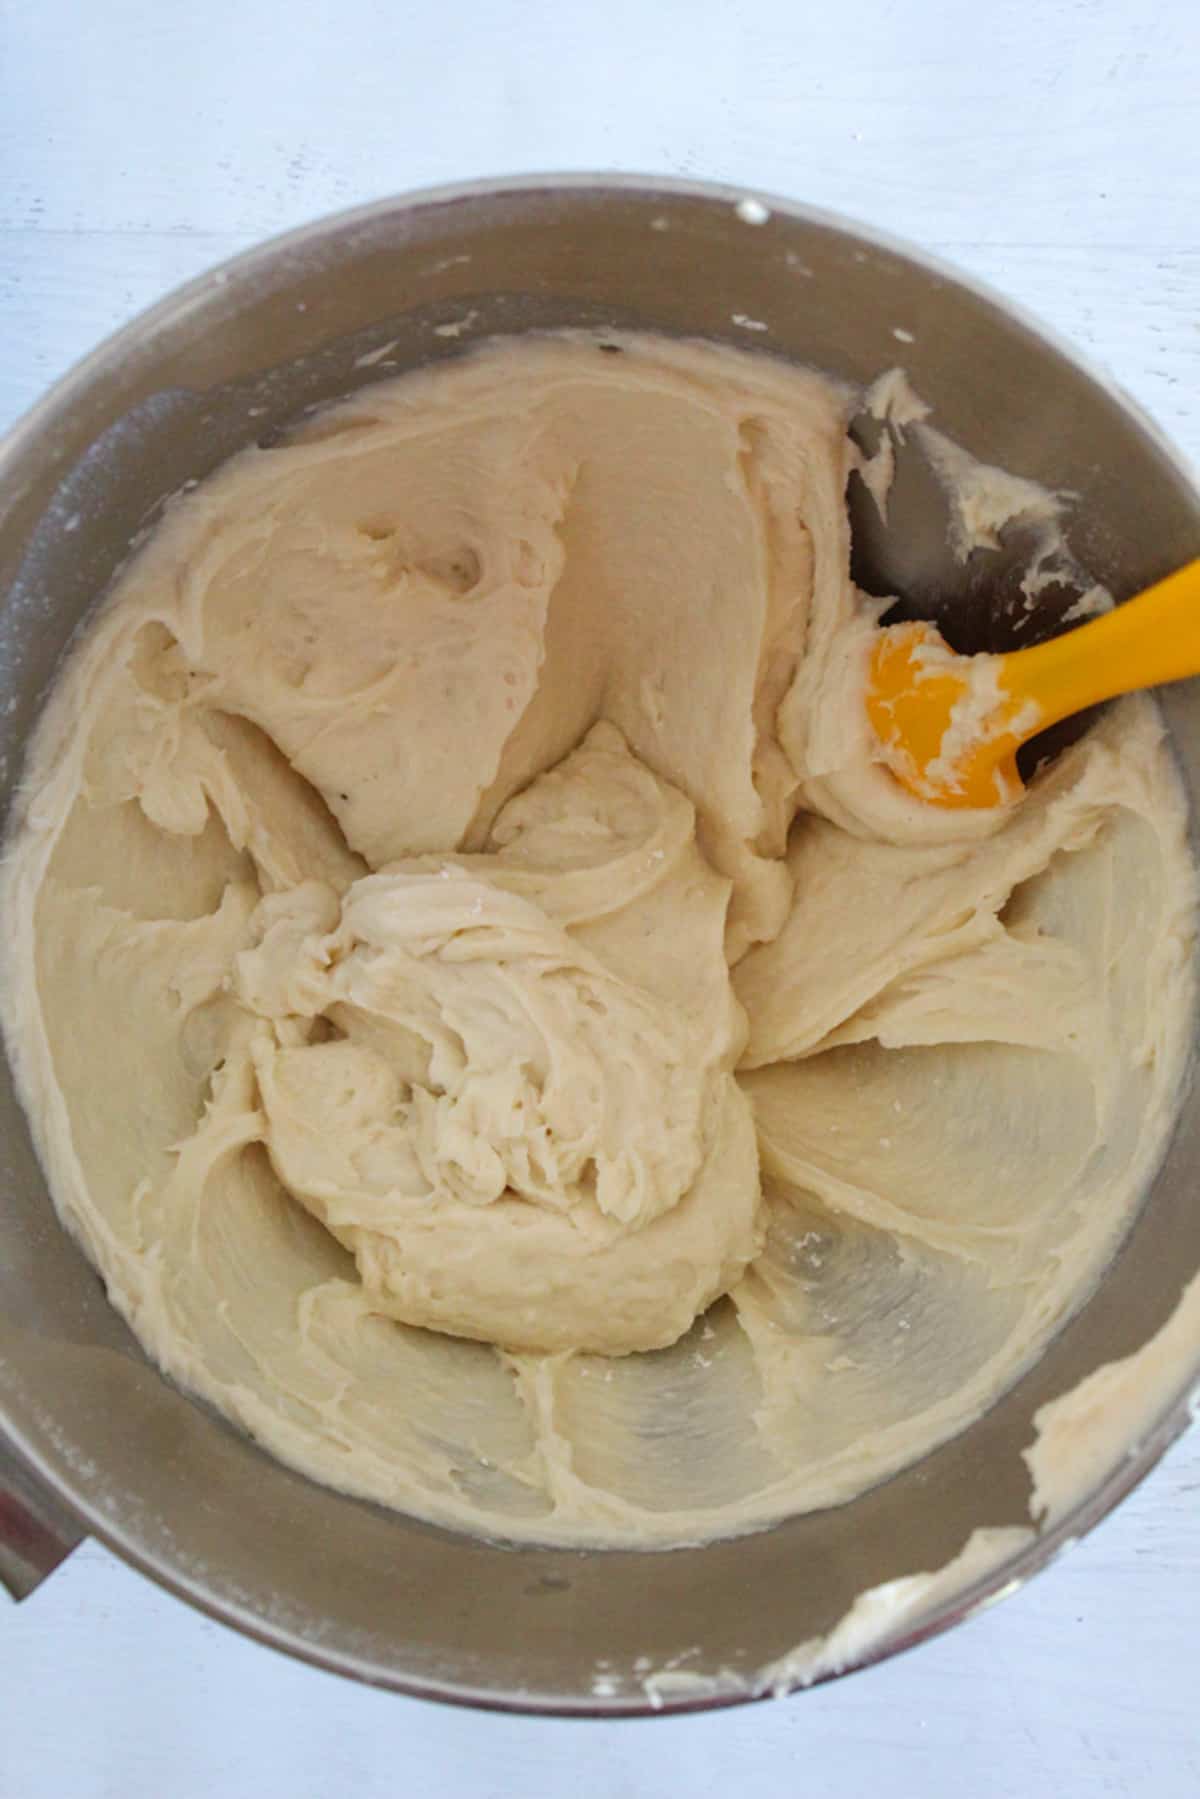
With the paddle attachment in place (or with your rubber spatula, turn the mixer to low speed and slowly add the wet ingredients to the dry ingredients. Scrape down the bowl once, then increase to medium speed and mix for 3 minutes.
Visual cue: The dough should look pale, smooth, and like thick cake batter. It will be too sticky to knead by hand, and that’s exactly right.
Step 5: Prepare the Pan
Spray a 9-inch round cake pan evenly with cooking spray.
Step 6: Portion the Dough
Using a 1/4 cup measuring cup or large scoop, portion 9 mounds of dough into the pan, one in the center and 8 around it. If desired, lightly wet a rubber spatula and gently smooth the tops of the rolls.
Step 7: Let the Rolls Rise
Cover the pan with a clean towel or plastic wrap and let the rolls rise in a warm place for 25–35 minutes, or until about 50% larger in volume.
Visual cue: The rolls should look noticeably puffier but not doubled. Over-proofing can cause the rolls to lose structure.
Step 8: Bake the Rolls
Preheat the oven to 400°F. Bake the rolls for 26–28 minutes, or until golden brown. If the tops brown too quickly, loosely cover with foil near the end of baking.
For best results, the internal temperature should register about 210°F on an instant-read thermometer. Cool slightly, then serve warm.
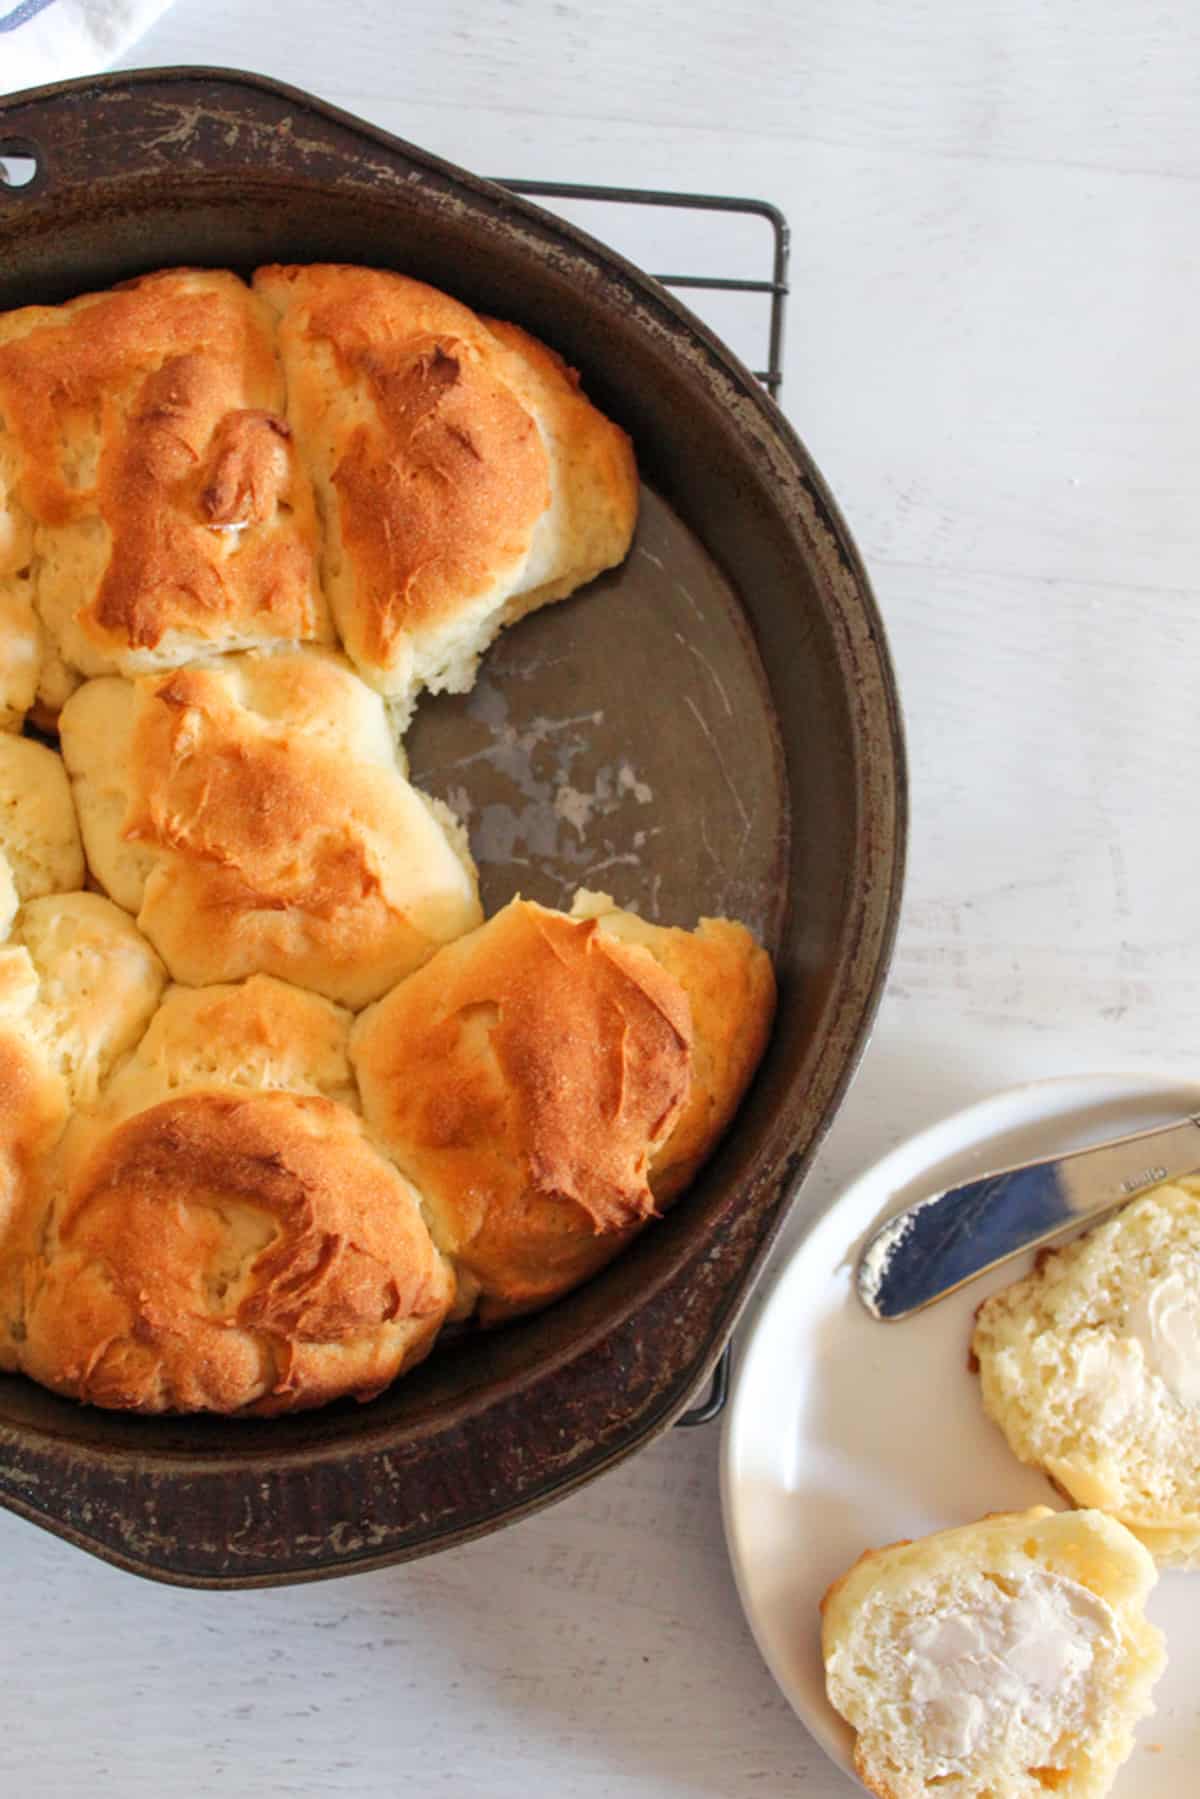
Best Ways to Enjoy These Gluten-Free Dinner Rolls
These soft, fluffy gluten-free dairy-free dinner rolls are versatile enough to serve in more ways than just alongside dinner. Here are a few of our favorite ways to enjoy them.
- As a classic dinner roll: Serve warm with butter or dairy-free spread alongside soups, stews, roasted vegetables, or holiday meals.
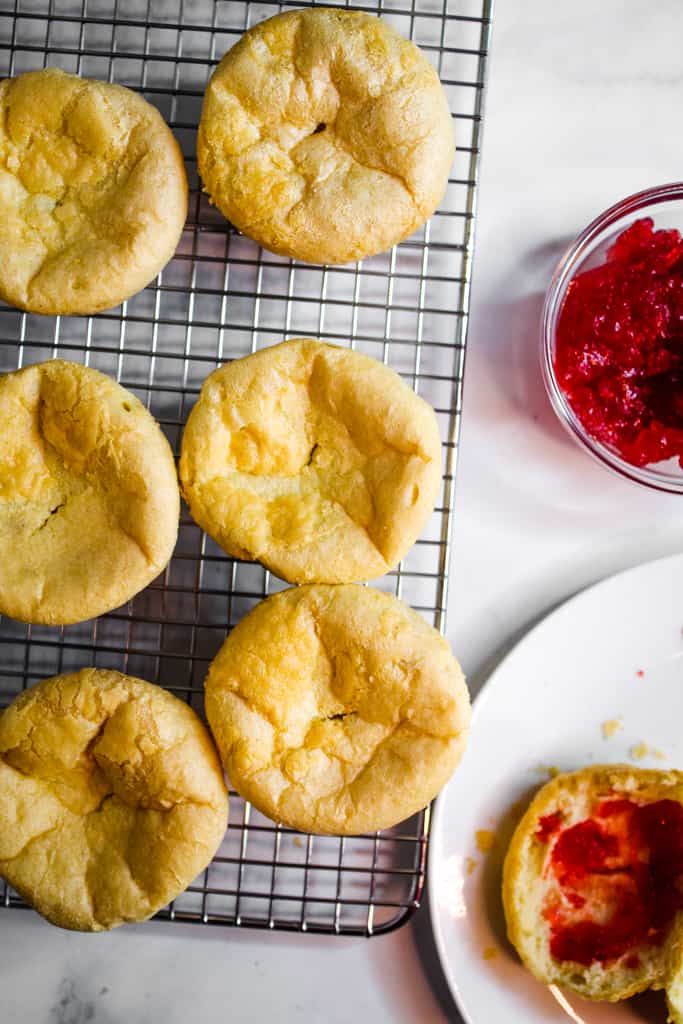
- For breakfast: Slice and toast lightly, then top with jam, honey, or nut butter for a quick and satisfying breakfast.
- As mini sandwich rolls: Use them for sliders with pulled chicken, turkey, or roasted vegetables.
- For holiday meals: These rolls are a great option for Thanksgiving, Christmas, or potlucks where gluten-free and dairy-free guests are at the table.
- As a side for dipping: Serve warm with soups, chili, or olive oil and herbs for dipping.
However you serve them, these rolls are best enjoyed warm and fresh from the oven.
Make-Ahead, Storage & Freezing Instructions
These gluten-free, dairy-free dinner rolls are best enjoyed warm, but they can also be made ahead and stored successfully with the right method. Use the instructions below for the best texture and flavor.
How to Store Baked Rolls
Freshly baked rolls are at their best the same day they’re made. If needed, they can be stored at room temperature for short-term use.
- Allow rolls to cool completely
- Store in an airtight container or resealable bag
- Keep at room temperature for up to 1 day
For storage longer than one day, freezing is recommended.
Gluten-free bread products often stale more quickly due to differences in structure and moisture retention compared with wheat bread, which is why freezing leftovers or baking just before serving works best. Research on gluten-free bread technology discusses these shelf life factors in detail.
How to Refrigerate Dough Overnight
The dough can be prepared in advance and refrigerated before baking.
- Prepare the dough and portion it into the baking pan
- Cover the pan tightly with plastic wrap, then foil
- Refrigerate overnight
- Remove from the refrigerator and let it come to room temperature
- Allow the rolls to continue rising until about 50% larger in volume
- Bake as directed
The rolls will rise slowly in the refrigerator, which helps develop flavor without over-proofing.
How to Freeze Unbaked Rolls
Unbaked rolls can be frozen and baked later with good results.
- Prepare and portion the dough into the pan
- Cover tightly with plastic wrap and foil, or place in a freezer-safe bag
- Freeze for up to 1 month
- When ready to bake, thaw at room temperature
- Allow the rolls to rise until about 50% larger in volume
- Bake as directed
Best Way to Reheat Without Drying Out
To reheat frozen or leftover rolls, place them in a 400°F oven for 5–7 minutes. Heating them in the oven helps restore the soft interior without drying out the crust.
4 Pro Tips for Perfect Gluten-Free Dinner Rolls
Gluten-free yeast baking is all about balance. These tips will help you get consistently soft, fluffy rolls every time.
1. Flour Blend Choice Matters Most
Not all gluten-free flour blends are suitable for yeast baking. A balanced blend provides structure without drying out the dough.
Stick with a tested flour blend whenever possible. Substituting unbalanced blends or single flours can result in dense or crumbly rolls.
2. Pay Attention to Temperature
Temperature plays a major role in how well gluten-free yeast dough rises. Water that is too hot can kill the yeast, while water that is too cool can slow or prevent rising.
Use warm water between 105–110°F and let the rolls rise in a warm, draft-free spot for the most reliable results.
3. Mixing Time Is Essential
Gluten-free dough requires longer mixing than traditional wheat dough. Mixing for the full recommended time allows the ingredients to fully hydrate and develop structure.
Under-mixing can lead to poor rise and uneven texture, even if all other steps are followed correctly.
4. Doubling the Recipe (What to Expect)
This recipe works best when made as written. However, some readers have successfully doubled the recipe with minor adjustments.
If you choose to double the recipe, increase the mixing time by 1 minute and expect a slightly thicker batter. For the most consistent results, making two separate batches side by side is recommended.
Your Gluten-Free Dinner Roll Questions, Answered
Gluten-free yeast baking can raise a lot of questions, especially if you’ve had mixed results with other recipes. Below are answers to the most common questions about these gluten-free, dairy-free dinner rolls.
If you don’t see your question answered here, feel free to leave it in the comments. I’m happy to help.
Can I use another gluten-free flour blend?
This recipe works best with a balanced gluten-free flour blend designed for yeast baking. Using untested blends or single flours can lead to dense or crumbly rolls.
King Arthur Measure for Measure Gluten-Free Flour has been tested with good results. If using it, omit the xanthan gum.
Why does this dough look more like batter than traditional dough?
Gluten-free yeast dough is much wetter than traditional wheat dough because it needs more hydration to stay soft and rise properly. Instead of forming a kneadable dough, it should resemble thick cake batter.
This texture is intentional and helps prevent dry, crumbly rolls. If the dough looks scoopable and sticky rather than firm, you’re on the right track.
Why didn’t my rolls rise properly?
There are a few common reasons gluten-free rolls may not rise as expected:
- Yeast is expired or inactive
- Water was too hot or too cool
- The dough was under-mixed
- The rolls were not allowed to rise in a warm environment
Make sure your yeast is fresh, your water temperature is between 105°F and 110°F, and the dough is mixed for the full time.
How do I know if I’ve over-proofed gluten-free rolls?
Over-proofed gluten-free rolls often look overly puffy, may collapse slightly, or bake up unevenly. Unlike wheat dough, gluten-free dough doesn’t recover once it’s risen too far.
For best results, let the rolls rise only until they’re about 50% larger in size, not doubled.
Can I serve these rolls to non–gluten-free guests?
Absolutely. These rolls are designed to taste like classic dinner rolls, with a soft interior and light, fluffy texture.
Many readers report that gluten-eating friends and family can’t tell they’re gluten-free, which makes them a great option for mixed-diet gatherings.
More Gluten-Free Bread & Roll Recipes
If you love these gluten-free, dairy-free dinner rolls, here are a few more reader-favorite bread recipes to try next:
- Gluten-Free Dairy-Free Gum-Free Dinner Rolls – A great option for those avoiding xanthan gum or other binders.
- Easy Bite-Size Gluten-Free Rolls – Perfect for parties, appetizers, or holiday bread baskets.
- Soft Gluten-Free Breadsticks (Ready in 45 Minutes) – A quick, yeast-based option when you need bread fast.
- Step-by-Step Gluten-Free English Muffins – Detailed instructions for perfect nooks and crannies.
- Hearty Gluten-Free Oatmeal Bread – A wholesome, sliceable loaf with great texture.
From weeknight dinners to holiday tables, these gluten-free breads are designed to fit every occasion.
Have You Tried These Gluten-Free Dinner Rolls?
Have you tried these gluten-free, dairy-free dinner rolls? Let me know in the comments below how they turned out for you, especially if you served them to non–gluten-free guests.
Did you make and love this recipe? Give it your review and rating below! And make sure to follow me on Instagram, Pinterest, and Facebook , too!