A gluten-free Italian bread recipe often turns out dry, dense, and lacking chew. Now, most recipes you’ve come across don’t explain how to fix that.
Fortunately, this guide shows how to achieve a soft interior, crisp crust, and true Italian-style texture. We will give you the complete procedure, key techniques, and variations, as in our guide on How to Make Gluten-Free Bread without Xanthan Gum.
Table of Contents
What is a Gluten-Free Italian Bread Recipe?
A gluten-free Italian bread recipe is a way to make soft, chewy bread without wheat or dairy. It requires using gluten-free flours and binders to recreate the structure normally gotten from gluten.
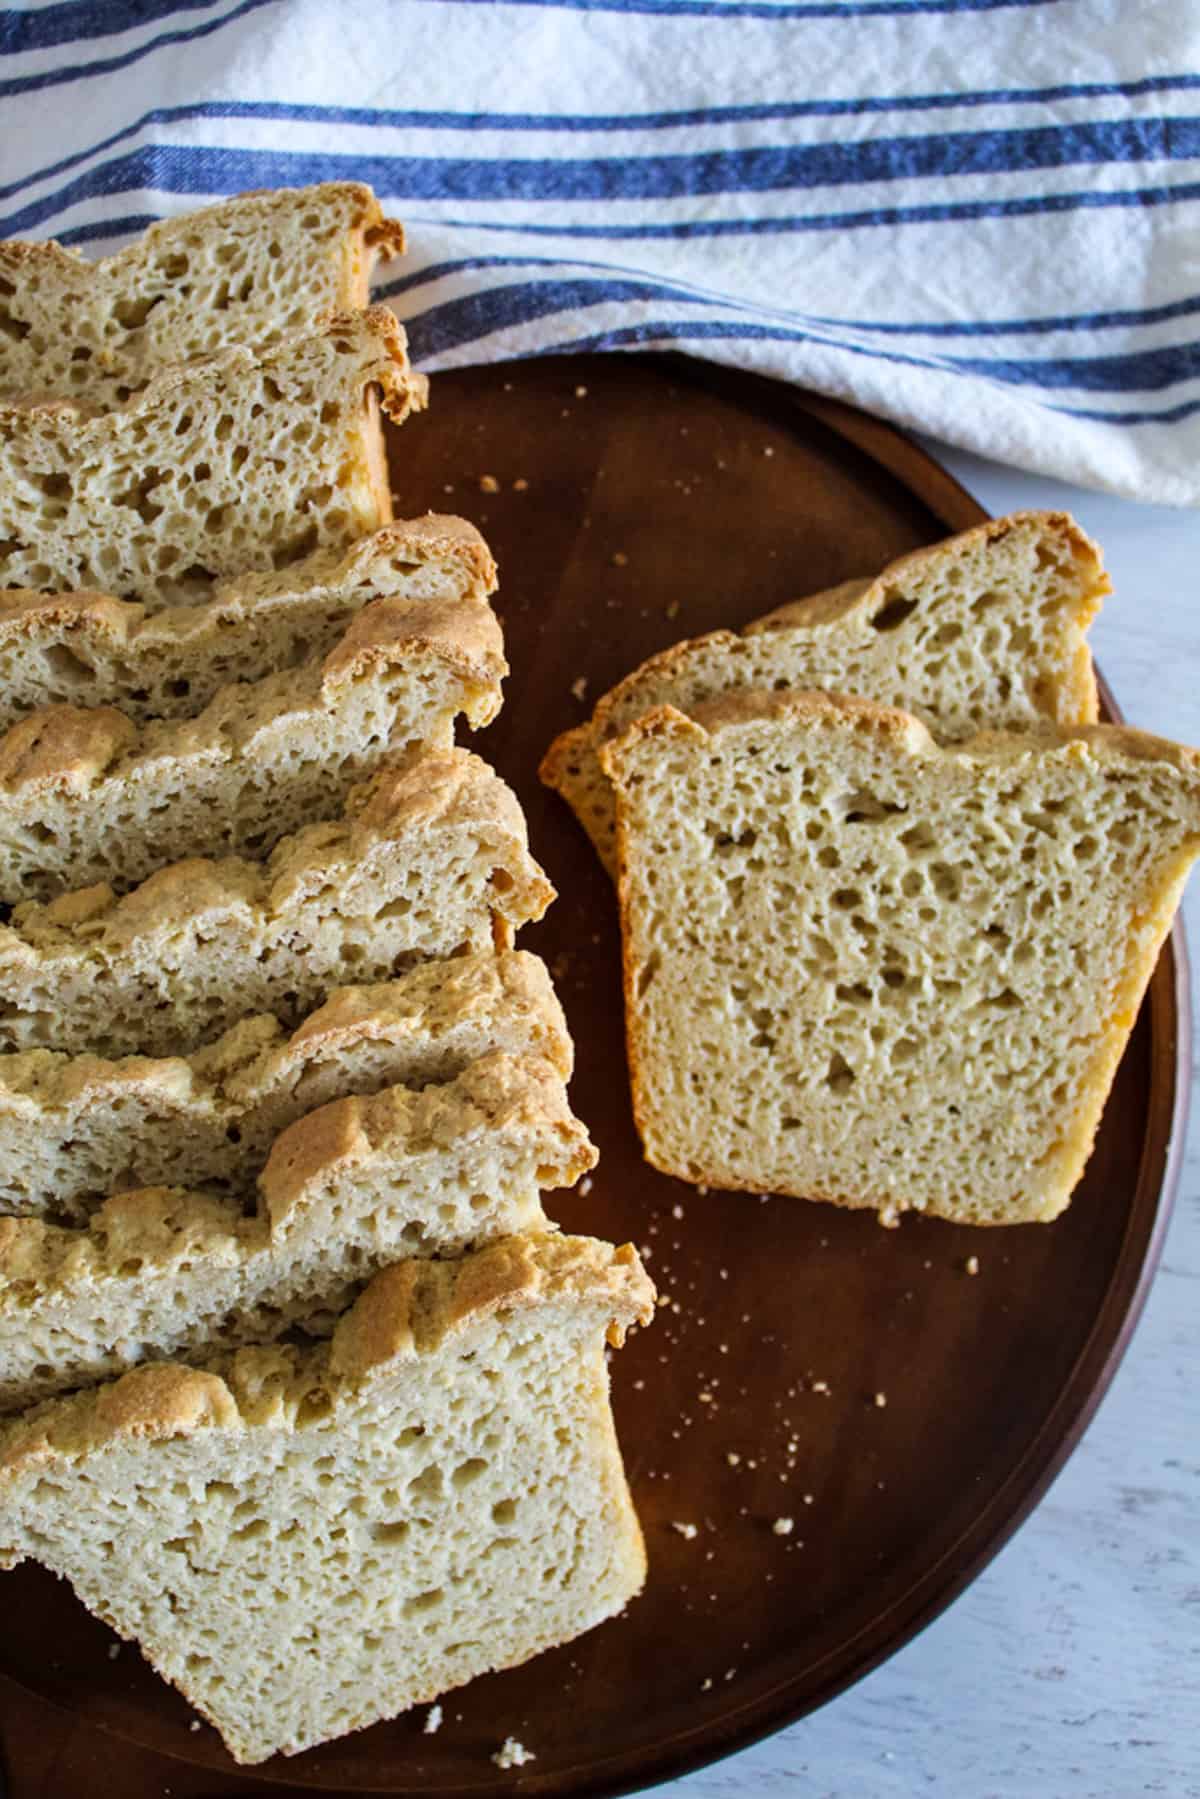
We’ve put this recipe together to produce a light crumb and crisp crust just like traditional Italian bread. The best part is that it remains completely gluten-free and dairy-free.
What Makes Italian Bread Different?
Before exploring this gluten-free Italian bread recipe, you must understand what defines traditional Italian bread.
Crust vs Crumb Structure
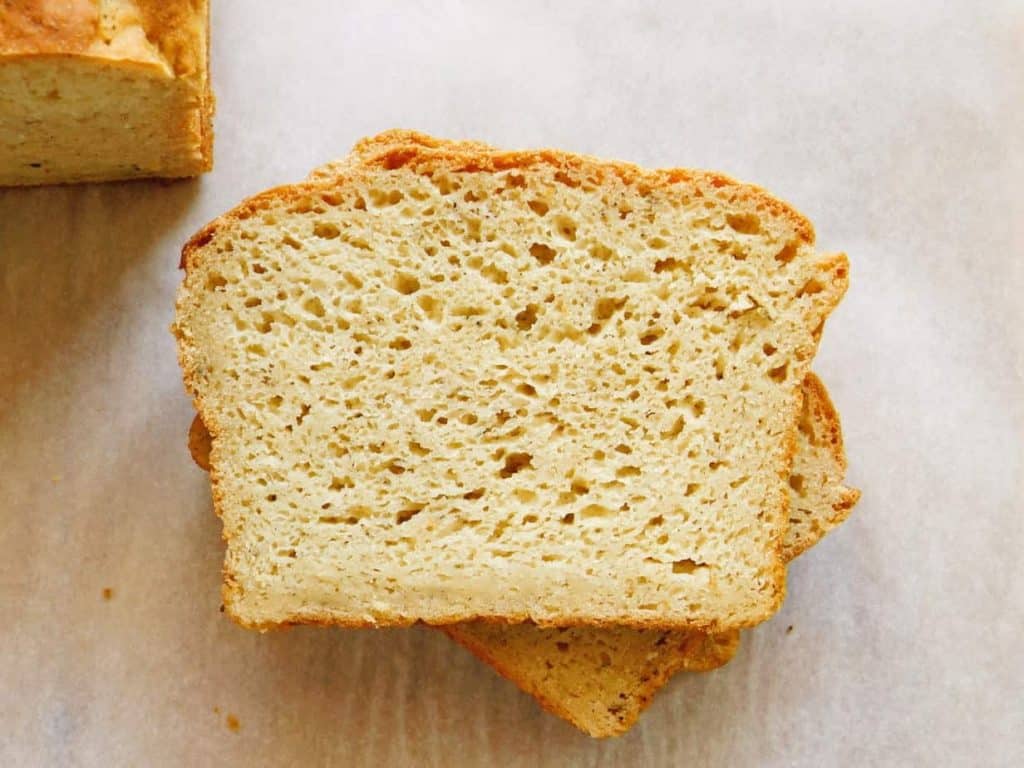
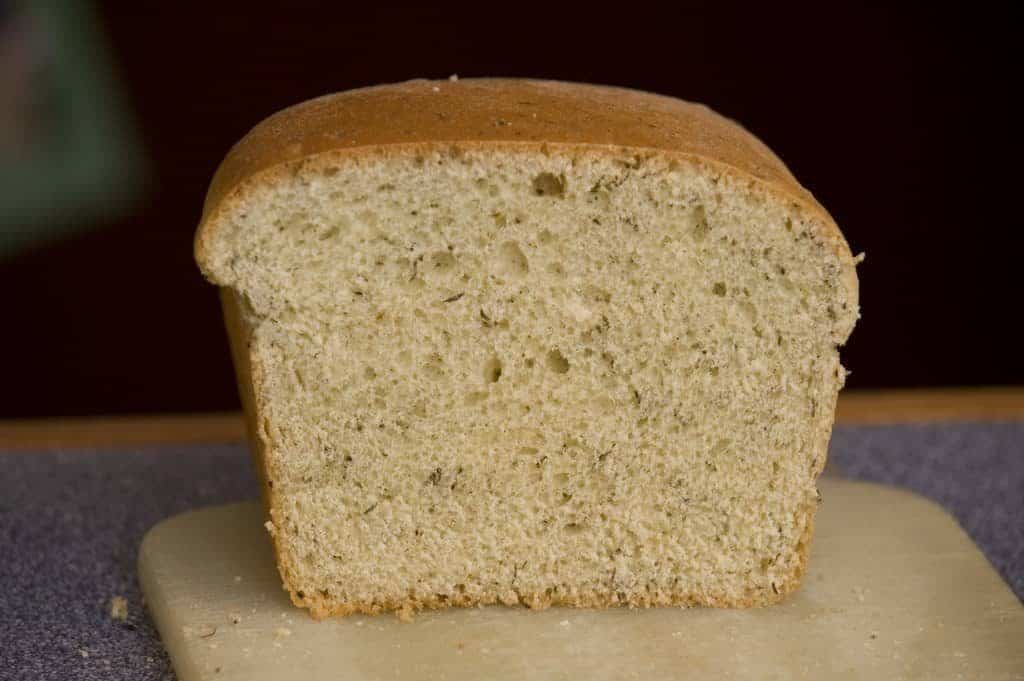
Italian bread is known for its contrast: a crisp outer crust and a soft, airy interior. The crust forms during baking, while the inside develops a light structure with small air pockets.
Chewy Interior
Traditional Italian bread gets its chewiness from gluten, which creates elasticity and allows the dough to stretch during fermentation.
Light but Structured Rise
Because of this elasticity, the dough rises while maintaining shape, resulting in a loaf that is light but stable.
The Gluten-Free Challenge
Without gluten, this natural structure is missing. A gluten-free Italian bread recipe relies on ingredient balance and technique to recreate that same stability and texture.
You’ll find this in various methods, including the techniques used in our 21 Gluten-Free Yeast Bread Recipes.
Ingredient Quick Scan List
Before we get into the details, below is a quick, skimmable look at everything required in this recipe so you can see exactly what goes into it at a glance:
- Warm water
- Active dry yeast
- Eggs
- Vegetable oil
- White rice flour
- Potato starch
- Tapioca flour
- Sorghum flour
- Potato flour
- White sugar
- Xanthan gum
- Dried Italian seasoning
- Salt
Ingredients and Substitutes
Before diving into the details, it helps to understand how each ingredient contributes to the final result. This section breaks down their roles and how they work together.
Key Ingredient Breakdown
Let’s take a closer look at the functionalities of the main ingredients.
Water
Water hydrates the flour and activates the yeast, helping the dough come together to the right consistency.
Active Dry Yeast
Yeast creates the rise and forms air pockets, giving the bread a light, airy texture.
Eggs
Eggs add moisture and stability, helping the bread hold its shape after baking.
Vegetable Oil
Oil keeps the crumb soft and helps prevent the bread from drying out too quickly.
White Rice Flour
This flour serves as the base of the recipe, giving the bread a light structure, though it works best when combined with other ingredients.
Potato Starch
Potato starch improves softness and helps the bread stay moist for longer.
Tapioca Flour
Tapioca flour adds elasticity, which gives the bread a slightly chewy bite.
Sorghum Flour
Sorghum flour deepens the flavor and adds more body to the loaf.
Potato Flour
Along with the starches, potato flour helps retain moisture and creates a softer texture.
White Sugar
Sugar feeds the yeast and also helps the crust develop a better color during baking.
Xanthan Gum
Without gluten, xanthan gum steps in to hold everything together and prevent the dough from falling apart.
Dried Italian Seasoning
This adds a subtle layer of flavor, making the bread more aromatic.
Salt
Salt sharpens the overall flavor while also keeping the yeast activity in check.
Substitutions
Some ingredients can be swapped without affecting the recipe too much, though small changes will still be noticeable in the final texture.
- Vegetable oil can be replaced with olive oil, which adds a bit more flavor while maintaining the structure.
- Xanthan gum can be swapped for psyllium husk, though the bread will turn out slightly firmer.
What Changes Texture
Texture depends on how the ingredients interact, so even small adjustments can make a noticeable difference.
- Flour ratios
- Binder type
- Starch balance
What has No True Substitute
Some ingredients, however, are non-negotiable if you want the bread to turn out right.
- Yeast is essential for creating rise and air pockets.
- Binder (xanthan gum or psyllium husk) gives the dough structure and prevents it from collapsing.
Printable Gluten-Free Italian Bread Recipe Card
Ingredients
- 1 ½ cups water ,heated to 110 – 115 F
- 2 ¼ tsp. active dry yeast
- 3 eggs ,room temperature
- ¼ cup vegetable oil
- 1 cup white rice flour
- 1 cup potato starch
- ½ cup tapioca flour
- ½ cup sorghum flour
- ½ cup potato flour
- 3 Tbsp. white sugar
- 1 Tbsp. xanthan gum
- 1 Tbsp. dried Italian seasoning
- 1 ½ tsp. salt
Instructions
- Prepare a 9” x 5” baking pan by spraying it with cooking spray. Set aside.
- In the bowl of a stand mixer, add warm water and yeast. Let the mixture sit for 5 minutes to get foamy.
- While yeast is proofing, in another large bowl, add the flours, starch, sugar, xanthan gum, Italian seasoning, and salt. Stir with a whisk until blended.
- When the yeast mixture is ready, add the eggs and oil. Mix on medium speed for a few seconds.
- Gradually add the flour mixture to the yeast mixture, mixing on low speed until fully blended.
- Increase speed to medium and mix for 5 minutes to build structure.
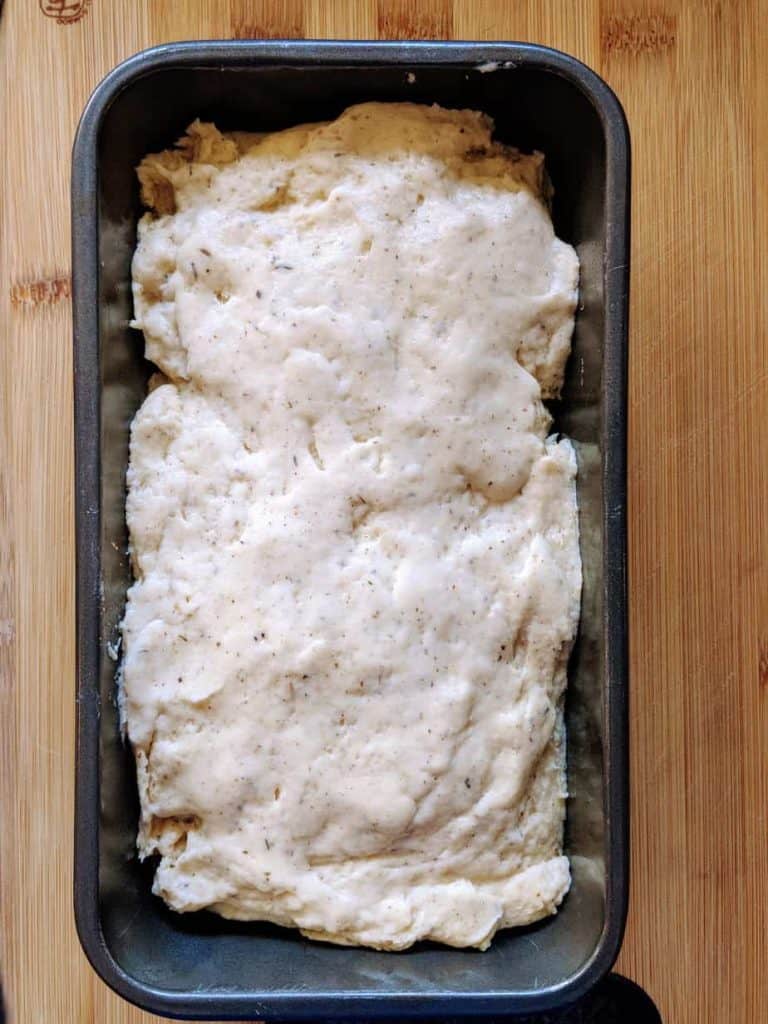
- Transfer batter into the prepared pan and smooth the top.
- Cover and let rise for 1 hour, until the loaf has almost doubled in size.
- Preheat the oven to 350 F. Bake the loaf for 45 – 50 minutes, or until a toothpick inserted into the center comes out clean.
Notes
- The dough should look like a thick batter rather than a typical bread dough.
- Proper mixing time helps build structure in gluten-free baking.
- Use room-temperature eggs for better consistency.
Doneness Cues
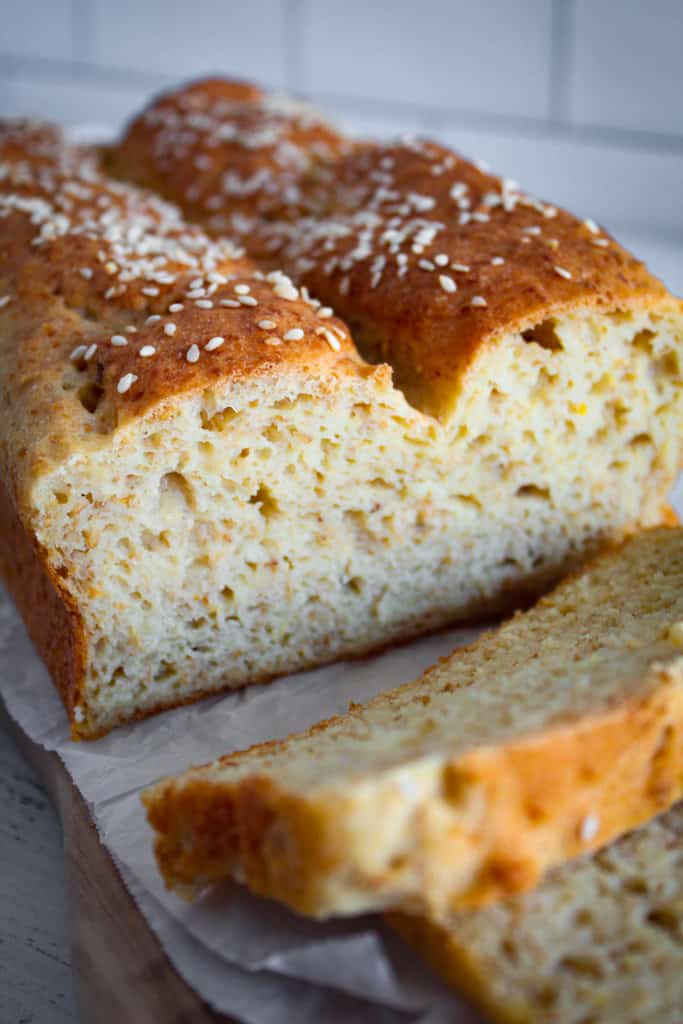
- The top should be golden brown.
- The bread should feel firm when pressed.
- The toothpick you insert in the center should come out clean.
Storage
- Store at room temperature for up to 2 days (wrapped).
- Refrigerate for longer freshness (up to 5 days).
- Freeze slices individually for up to 3 months.
Nutrition
Why This Gluten and Dairy-Free Bread Recipe Works
This is where the recipe’s core mechanics come together, as each element plays a role in how the bread rises, sets, and maintains its structure.
Hydration Balance
Gluten-free dough depends on the right level of hydration to expand and set properly, so this balance determines whether the bread turns out soft or dense.
Binding Agents
Since gluten is absent, xanthan gum provides the structure needed to hold the dough together and support the rise.
Yeast Fermentation Behavior
At the same time, yeast produces gas that forms the internal structure, so the dough must be strong enough to hold that gas while baking.
If these elements are not properly balanced, the bread may not rise well or could fall apart after baking. Because of this, the same principle is used across similar recipes, including our Easy Coconut Bread Recipe.
Step-by-Step Instructions
Follow the steps below to bring this gluten-free Italian bread recipe together. This procedure is focused on timing, temperature, and exactly what to look for at each stage.
Essential Kitchen Tools for this Recipe
The right tools make a noticeable difference, especially since gluten-free dough relies more on precision and consistency.
- Mixing Bowls (Multiple Sizes): Stainless steel is the most practical choice because it’s durable, lightweight, and easy to handle during mixing.
- Stand Mixer or Hand Mixer: A mixer is essential because gluten-free dough needs extended mixing (about 5 minutes) to build structure.
- 9×5-Inch Loaf Pan: This recipe is designed specifically for a standard-sized loaf pan.
- Digital Kitchen Scale: Gluten-free baking is sensitive to ratios, so weighing ingredients improves accuracy.
- Oven Thermometer (Optional but Important): Baking at the correct 350°F ensures proper rise and prevents a gummy center.
Step 1: Activate The Yeast (5 Minutes)
Combine warm water (110–115°F) with active dry yeast and let it sit for about 5 minutes. Once ready, you should see a foamy surface, which indicates the yeast is active.
Step 2: Mix Dry Ingredients (2–3 Minutes)
In a separate bowl, whisk together all flours, starches, sugar, xanthan gum, seasoning, and salt until evenly combined, so the final loaf has a consistent structure.
Step 3: Combine Wet Ingredients (1–2 Minutes)
Add eggs and vegetable oil to the yeast mixture and mix until smooth, making sure everything stays at room temperature for better consistency.
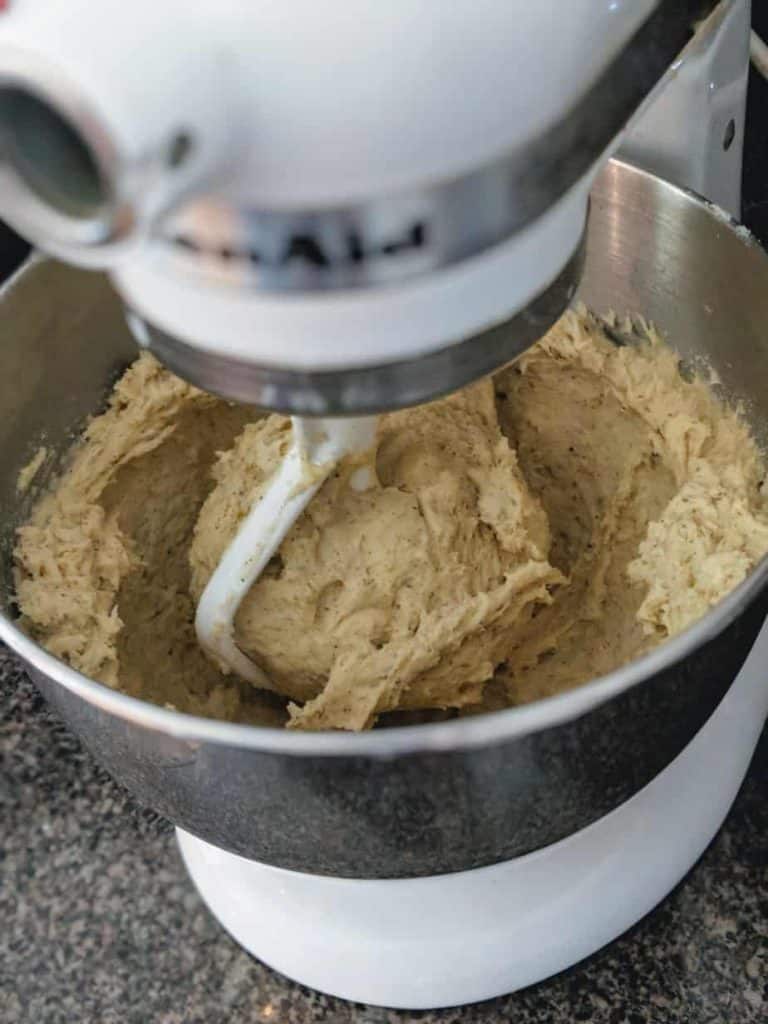
Step 4: Build the Dough (5 Minutes Mixing)
Gradually add the dry ingredients into the wet mixture while mixing on low speed. As the mixture comes together, increase the speed to medium and mix for about 5 minutes.
The dough should look like thick batter rather than traditional dough, which is completely normal for gluten-free recipes.
Step 5: Shape and Prepare for Rise (2–3 Minutes)
Transfer the mixture into a greased 9×5-inch loaf pan and smooth the top evenly so it rises uniformly.
Step 6: First Rise (1 Hour)
Cover and let the dough rise in a warm place for about 1 hour, or until it nearly doubles in size and looks slightly airy on top.
Step 7: Bake (45–50 Minutes at 350°F / 175°C)
Preheat the oven to 350°F (175°C), then place the loaf on the center rack and bake for 45–50 minutes.
Step 8: Check Doneness
The top should be golden brown, and the bread should feel firm when pressed. In addition, a toothpick inserted in the center should come out clean.
If needed, bake for an extra 5 minutes to ensure the center is fully set.
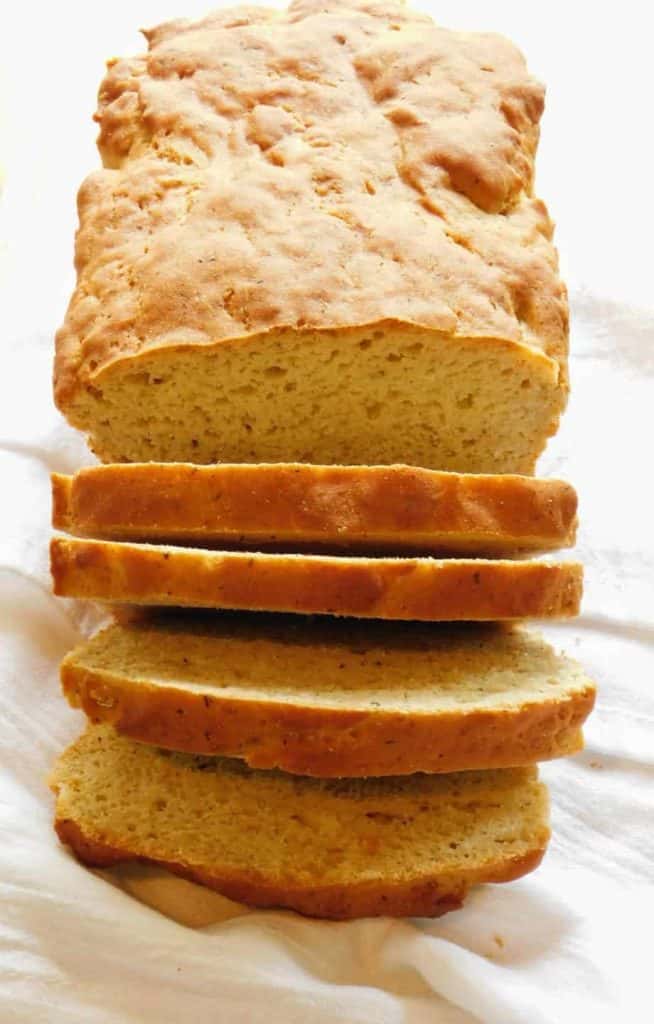
Step 9: Cool Before Slicing
Let the bread cool completely before cutting, as this allows the structure to set and prevents a gummy texture.
Rise Time & Proofing Guide
Getting the rise right is what separates a dense loaf from a light, structured gluten-free Italian bread. Because structure is more delicate without gluten, this stage plays a bigger role in the final result.
How Long to Proof
Let the dough rise for about 1 hour in a warm environment. Gluten-free dough doesn’t require multiple long rises, so one steady proof is enough to build structure.
Visual Cues to Look For
Rather than relying only on time, watch the dough as it rises:
- It should nearly double in size.
- The surface should look slightly airy and puffed.
- The top may appear soft and lightly domed.
These signs show that fermentation has created enough gas for a proper rise.
Signs of Over-Proofing
Because structure is weaker without gluten, over-proofing happens quickly:
- Dough rises too much, then starts to sink or collapse.
- Surface looks overly fragile or uneven.
- The final bread turns out flat or dense after baking.
Once it reaches the right size, bake immediately, because waiting too long weakens the structure. This same balance between timing and structure applies in our How to Make Gluten-Free Cornbread Without Flour guide.
Common Gluten-Free Bread Problems (And How to Fix Them)
Even small changes can affect the result, so this section helps you identify issues quickly and correct them without guesswork.
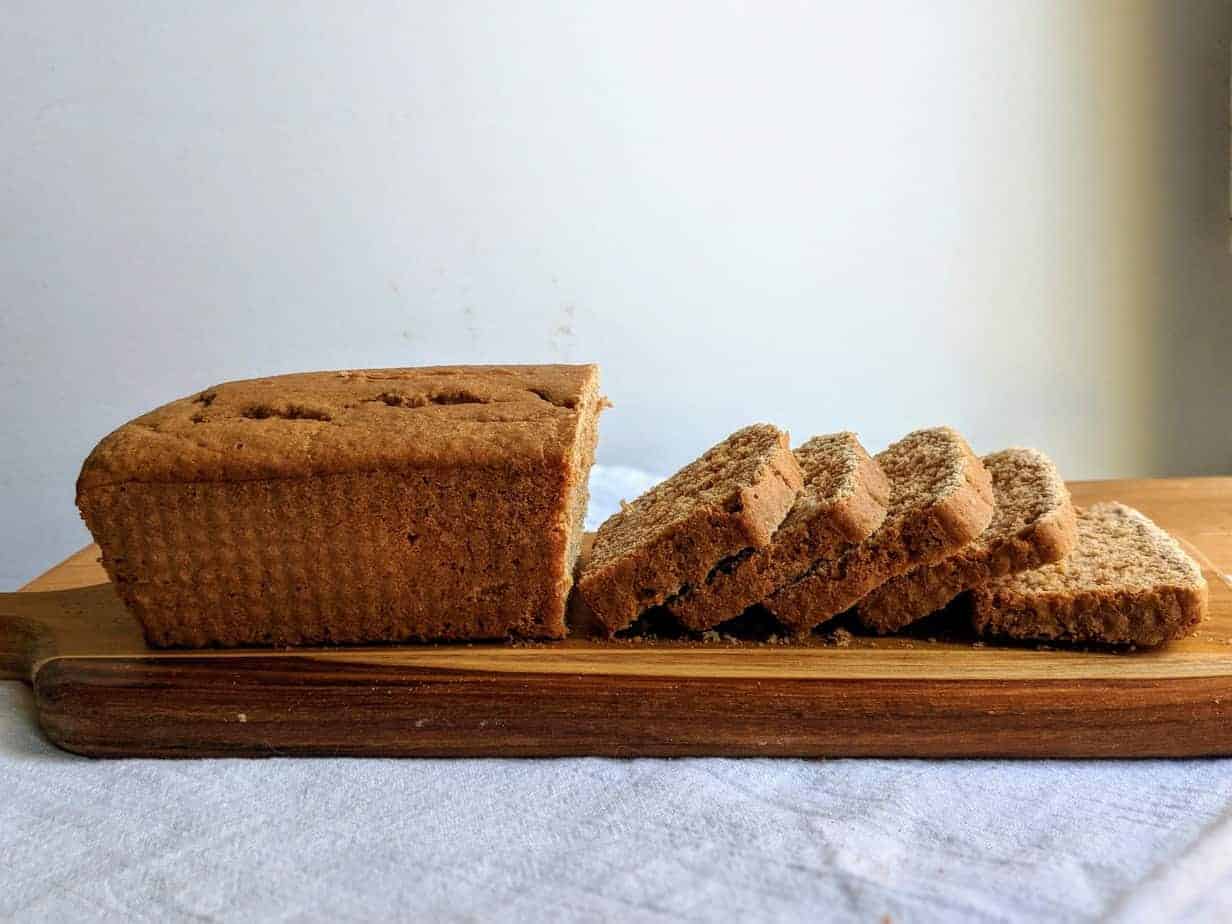
Why Is My Bread Dense?
Dense bread is often caused by an imbalance in hydration or incorrect flour ratios, which can weigh the dough down. In this case, adjusting the liquid slightly or rebalancing the flour mix usually improves the texture.
Why Didn’t It Rise?
This usually happens when the yeast is inactive or the environment is too cold. As a result, the dough doesn’t develop enough gas, so checking yeast activity and proofing in a warm space will help fix the issue.
Why Is The Texture Gummy?
A gummy texture is typically linked to underbaking or excess starch. When this happens, baking a little longer or slightly reducing the starch content can make a noticeable difference.
Why Is the Crust Too Hard?
This is often due to a high oven temperature or improper oven placement. Lowering the heat to 350°F and keeping the loaf on the center rack usually prevents the crust from becoming too tough.
Exploring the Best Gluten-Free Flours for Italian Bread
Each flour affects the final texture differently, which is why the right combination matters.
Light Structure
Rice flour creates a light base, although it needs support from other flours to avoid a dry texture.
Chewiness
Tapioca flour adds elasticity, so the bread has a more satisfying bite.
Depth of Flavor
Sorghum flour brings a more balanced, natural taste, making the bread feel less bland.
Moisture & Softness
Potato starch and potato flour help retain moisture, which keeps the interior soft for longer.
Gluten-Free vs Regular Italian Bread
To get the best results, you must understand how a gluten-free Italian bread compares to traditional Italian bread. The differences come down to structure, texture, and how the dough behaves during baking.
| Feature | Gluten-Free | Traditional |
|---|---|---|
| Structure | Binder-based (xanthan gum or similar) | Gluten network |
| Texture | Slightly softer, less elastic | Chewy and stretchy |
| Rise | More controlled and limited | Strong and expansive |
Other Ways You Can Make This Recipe
You can easily adapt the base gluten-free Italian bread into different forms without changing the main technique. The variations help you get more use out of the same dough while expanding texture and serving options.
Italian Rolls
Shape the dough into smaller portions rather than a single loaf and reduce baking time slightly. This creates soft, portion-sized rolls with the same light interior and structured crust.
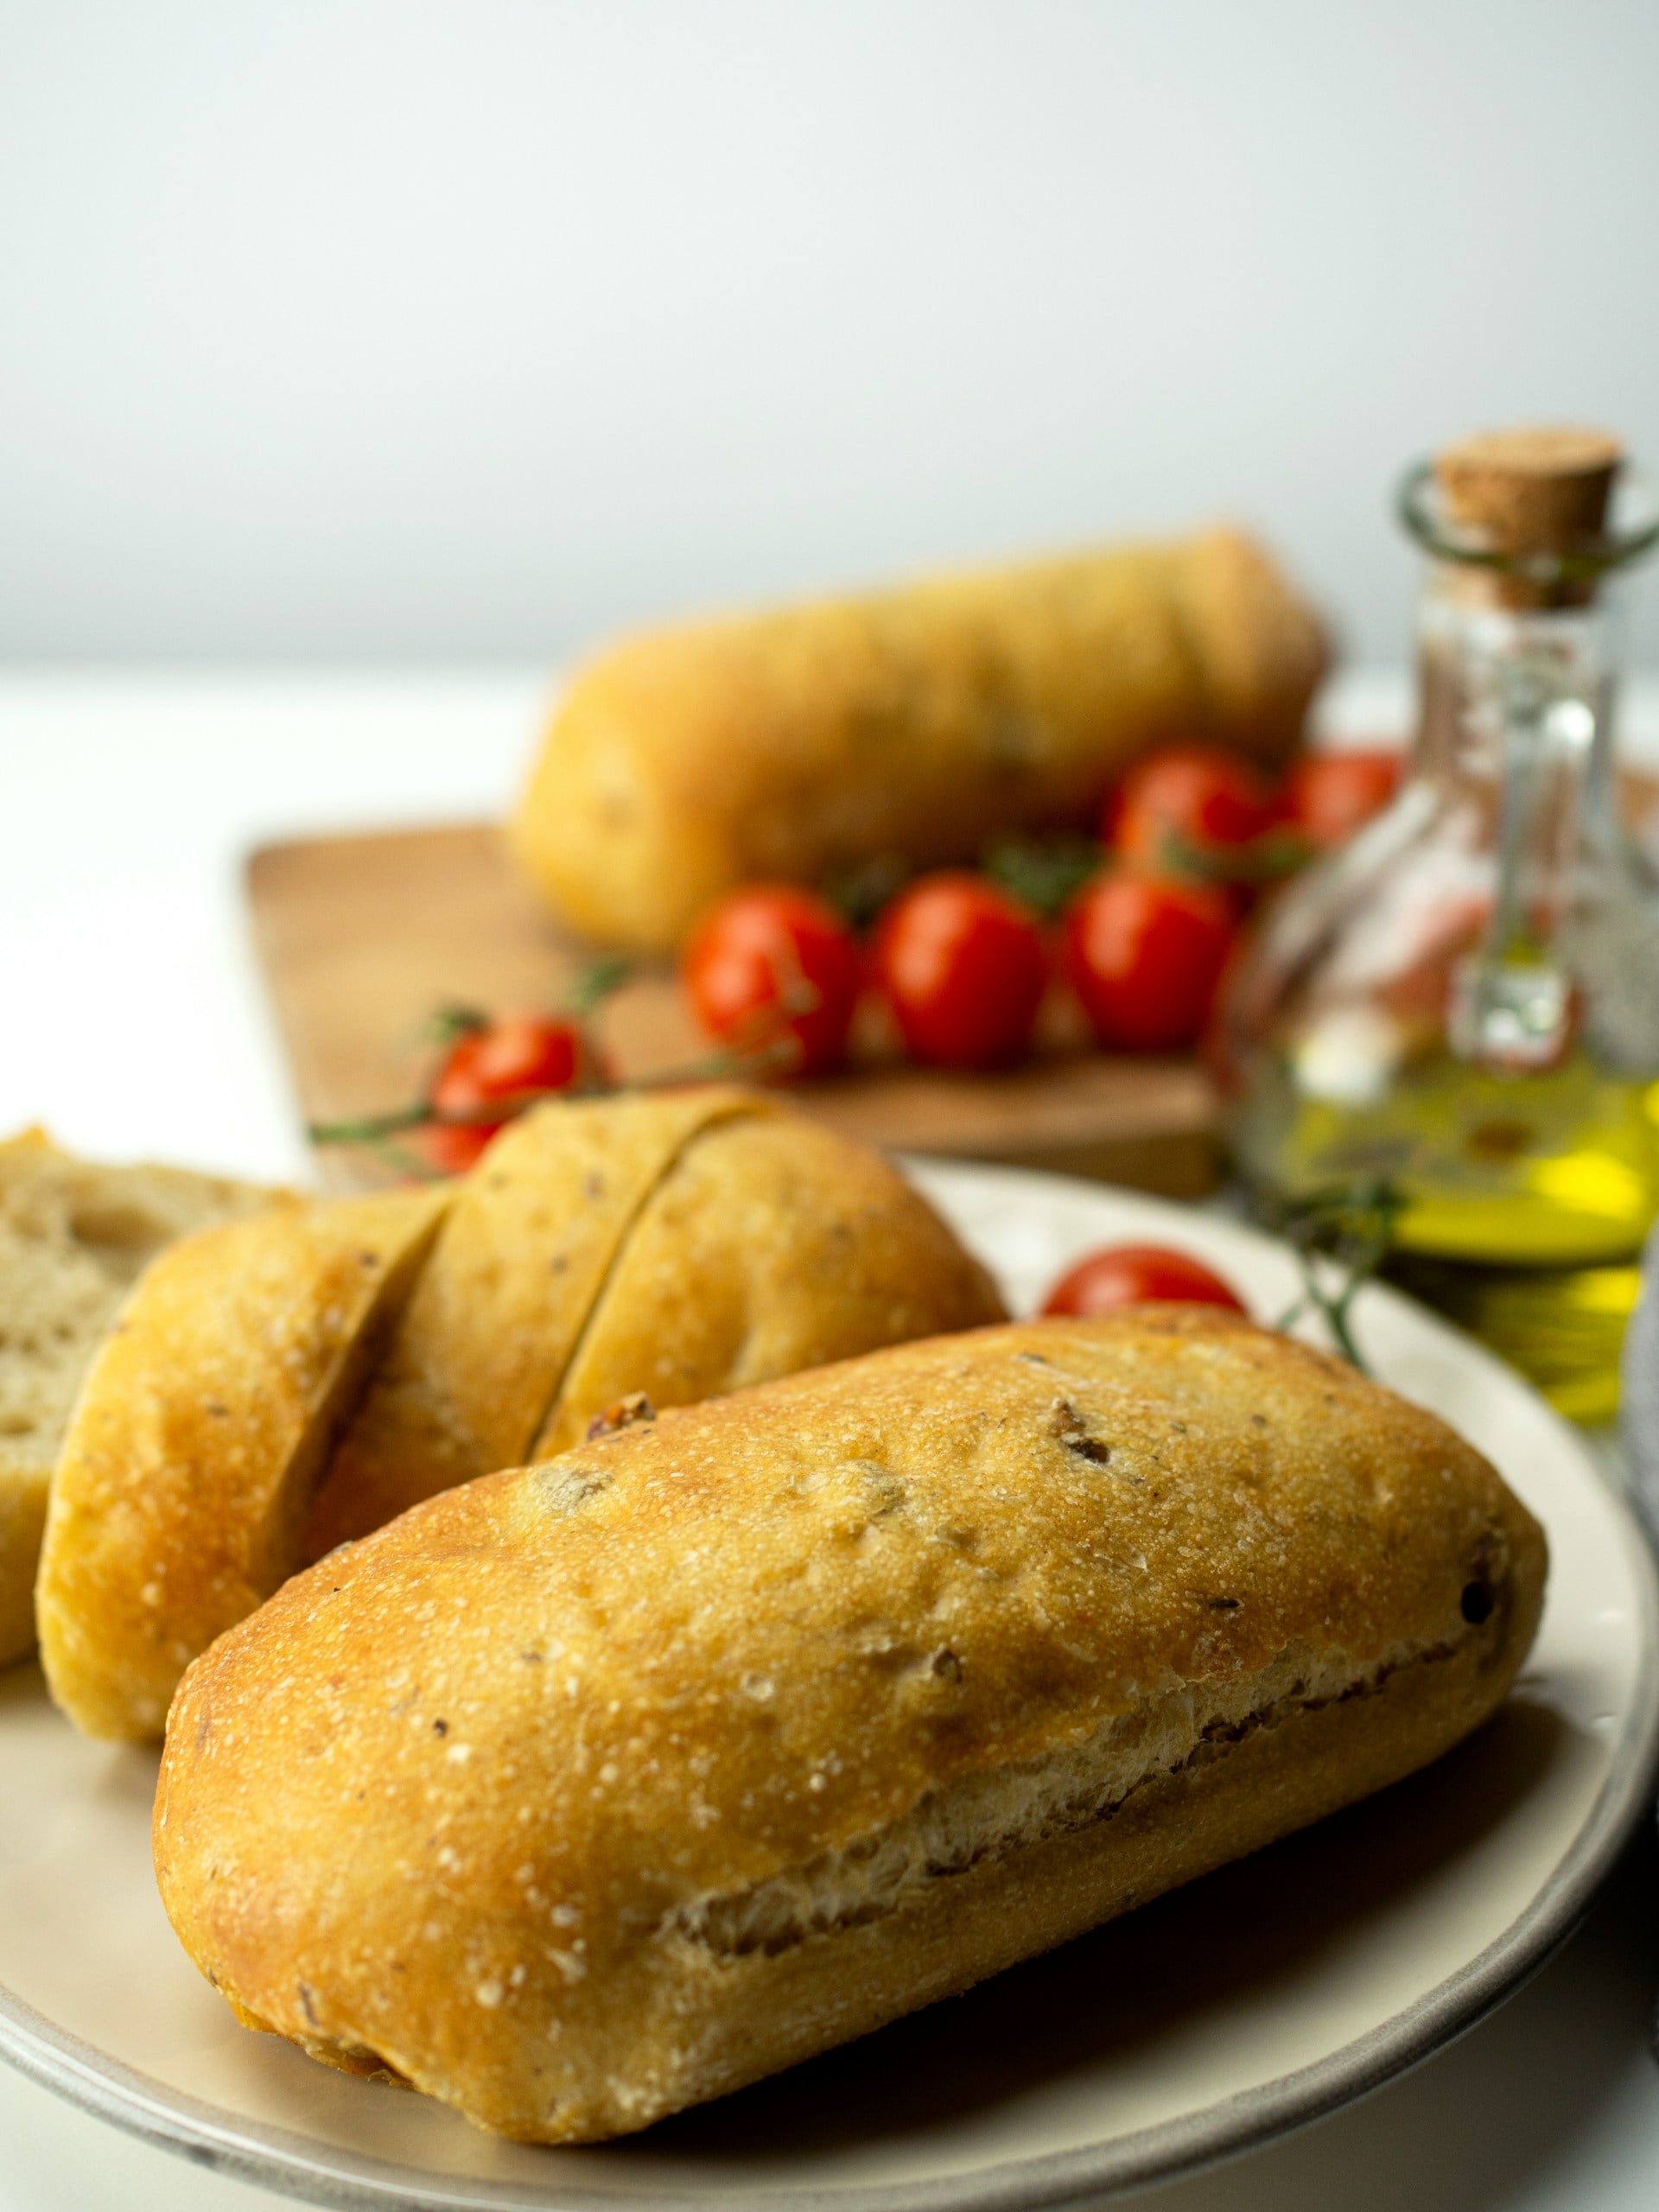
For a proven approach, see our Soft & Fluffy Gluten-Free, Dairy-Free Dinner Rolls to understand how shaping and baking time affect final texture.
Garlic Bread Version
Add garlic, herbs, and a light oil topping before baking or after slicing. This enhances flavor while maintaining the structure.
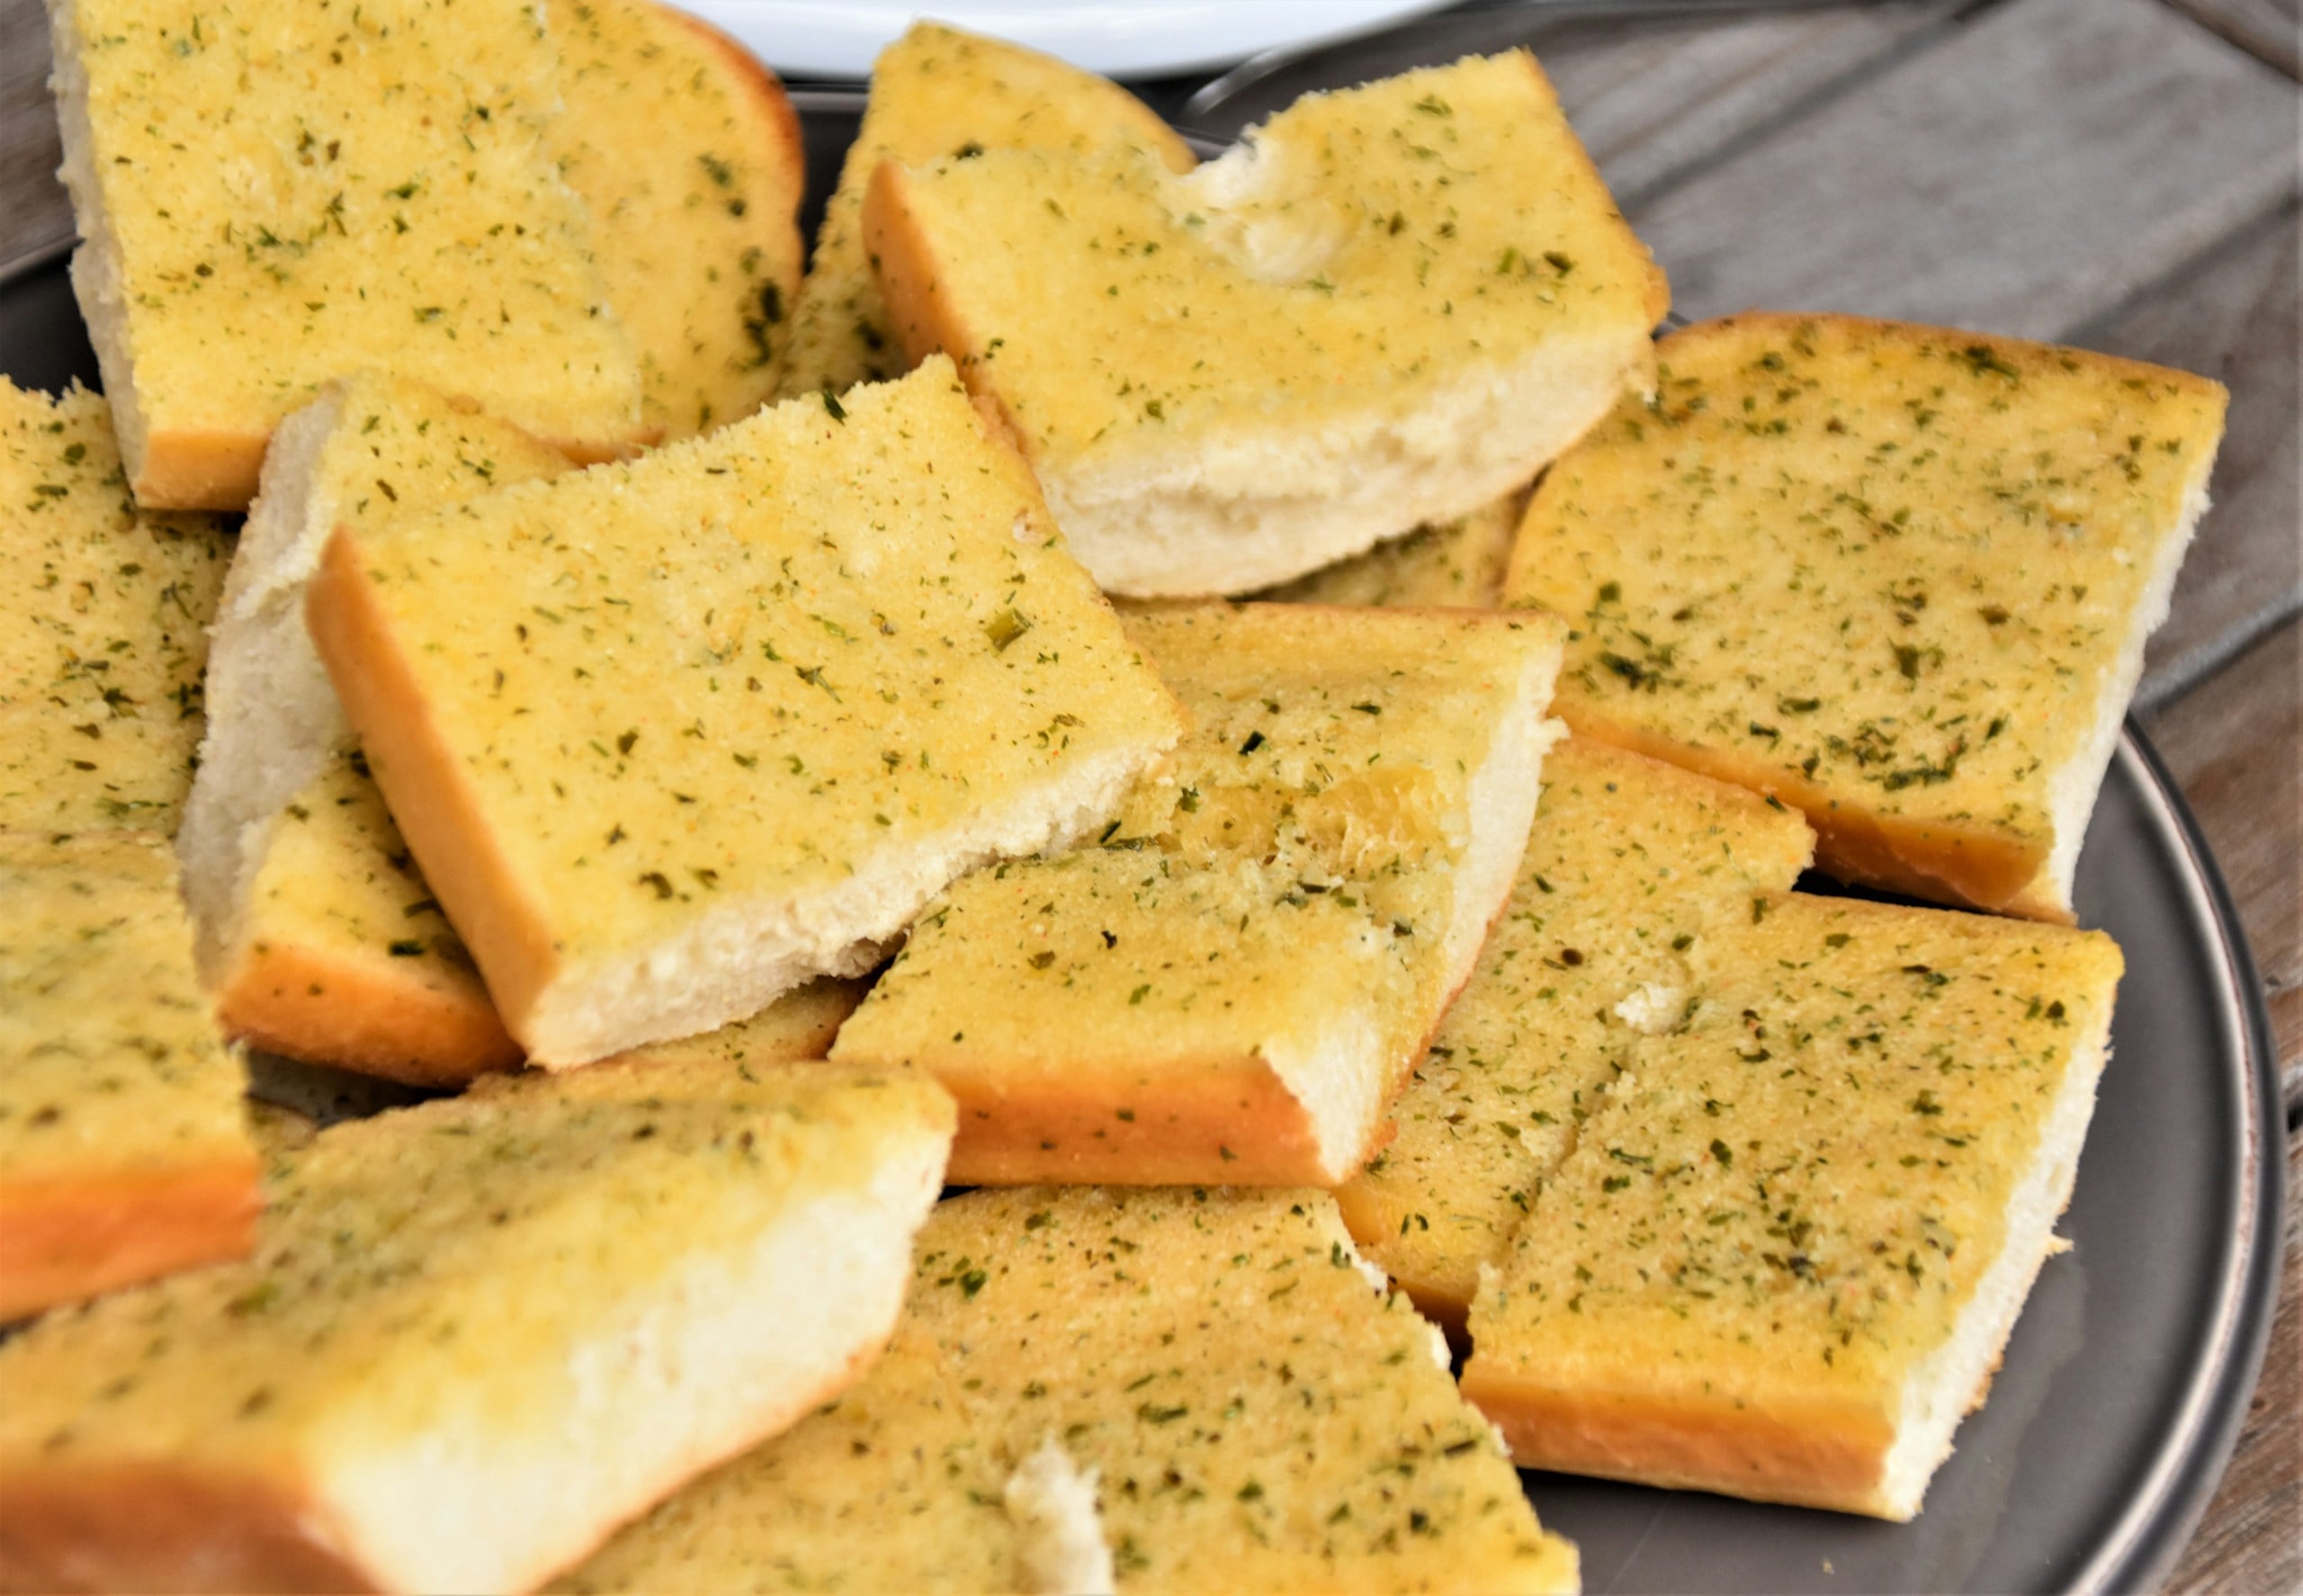
For a more flavorful option, The Best Gluten-Free Garlic Bread (Dairy-Free) shows how to enhance taste while maintaining texture.
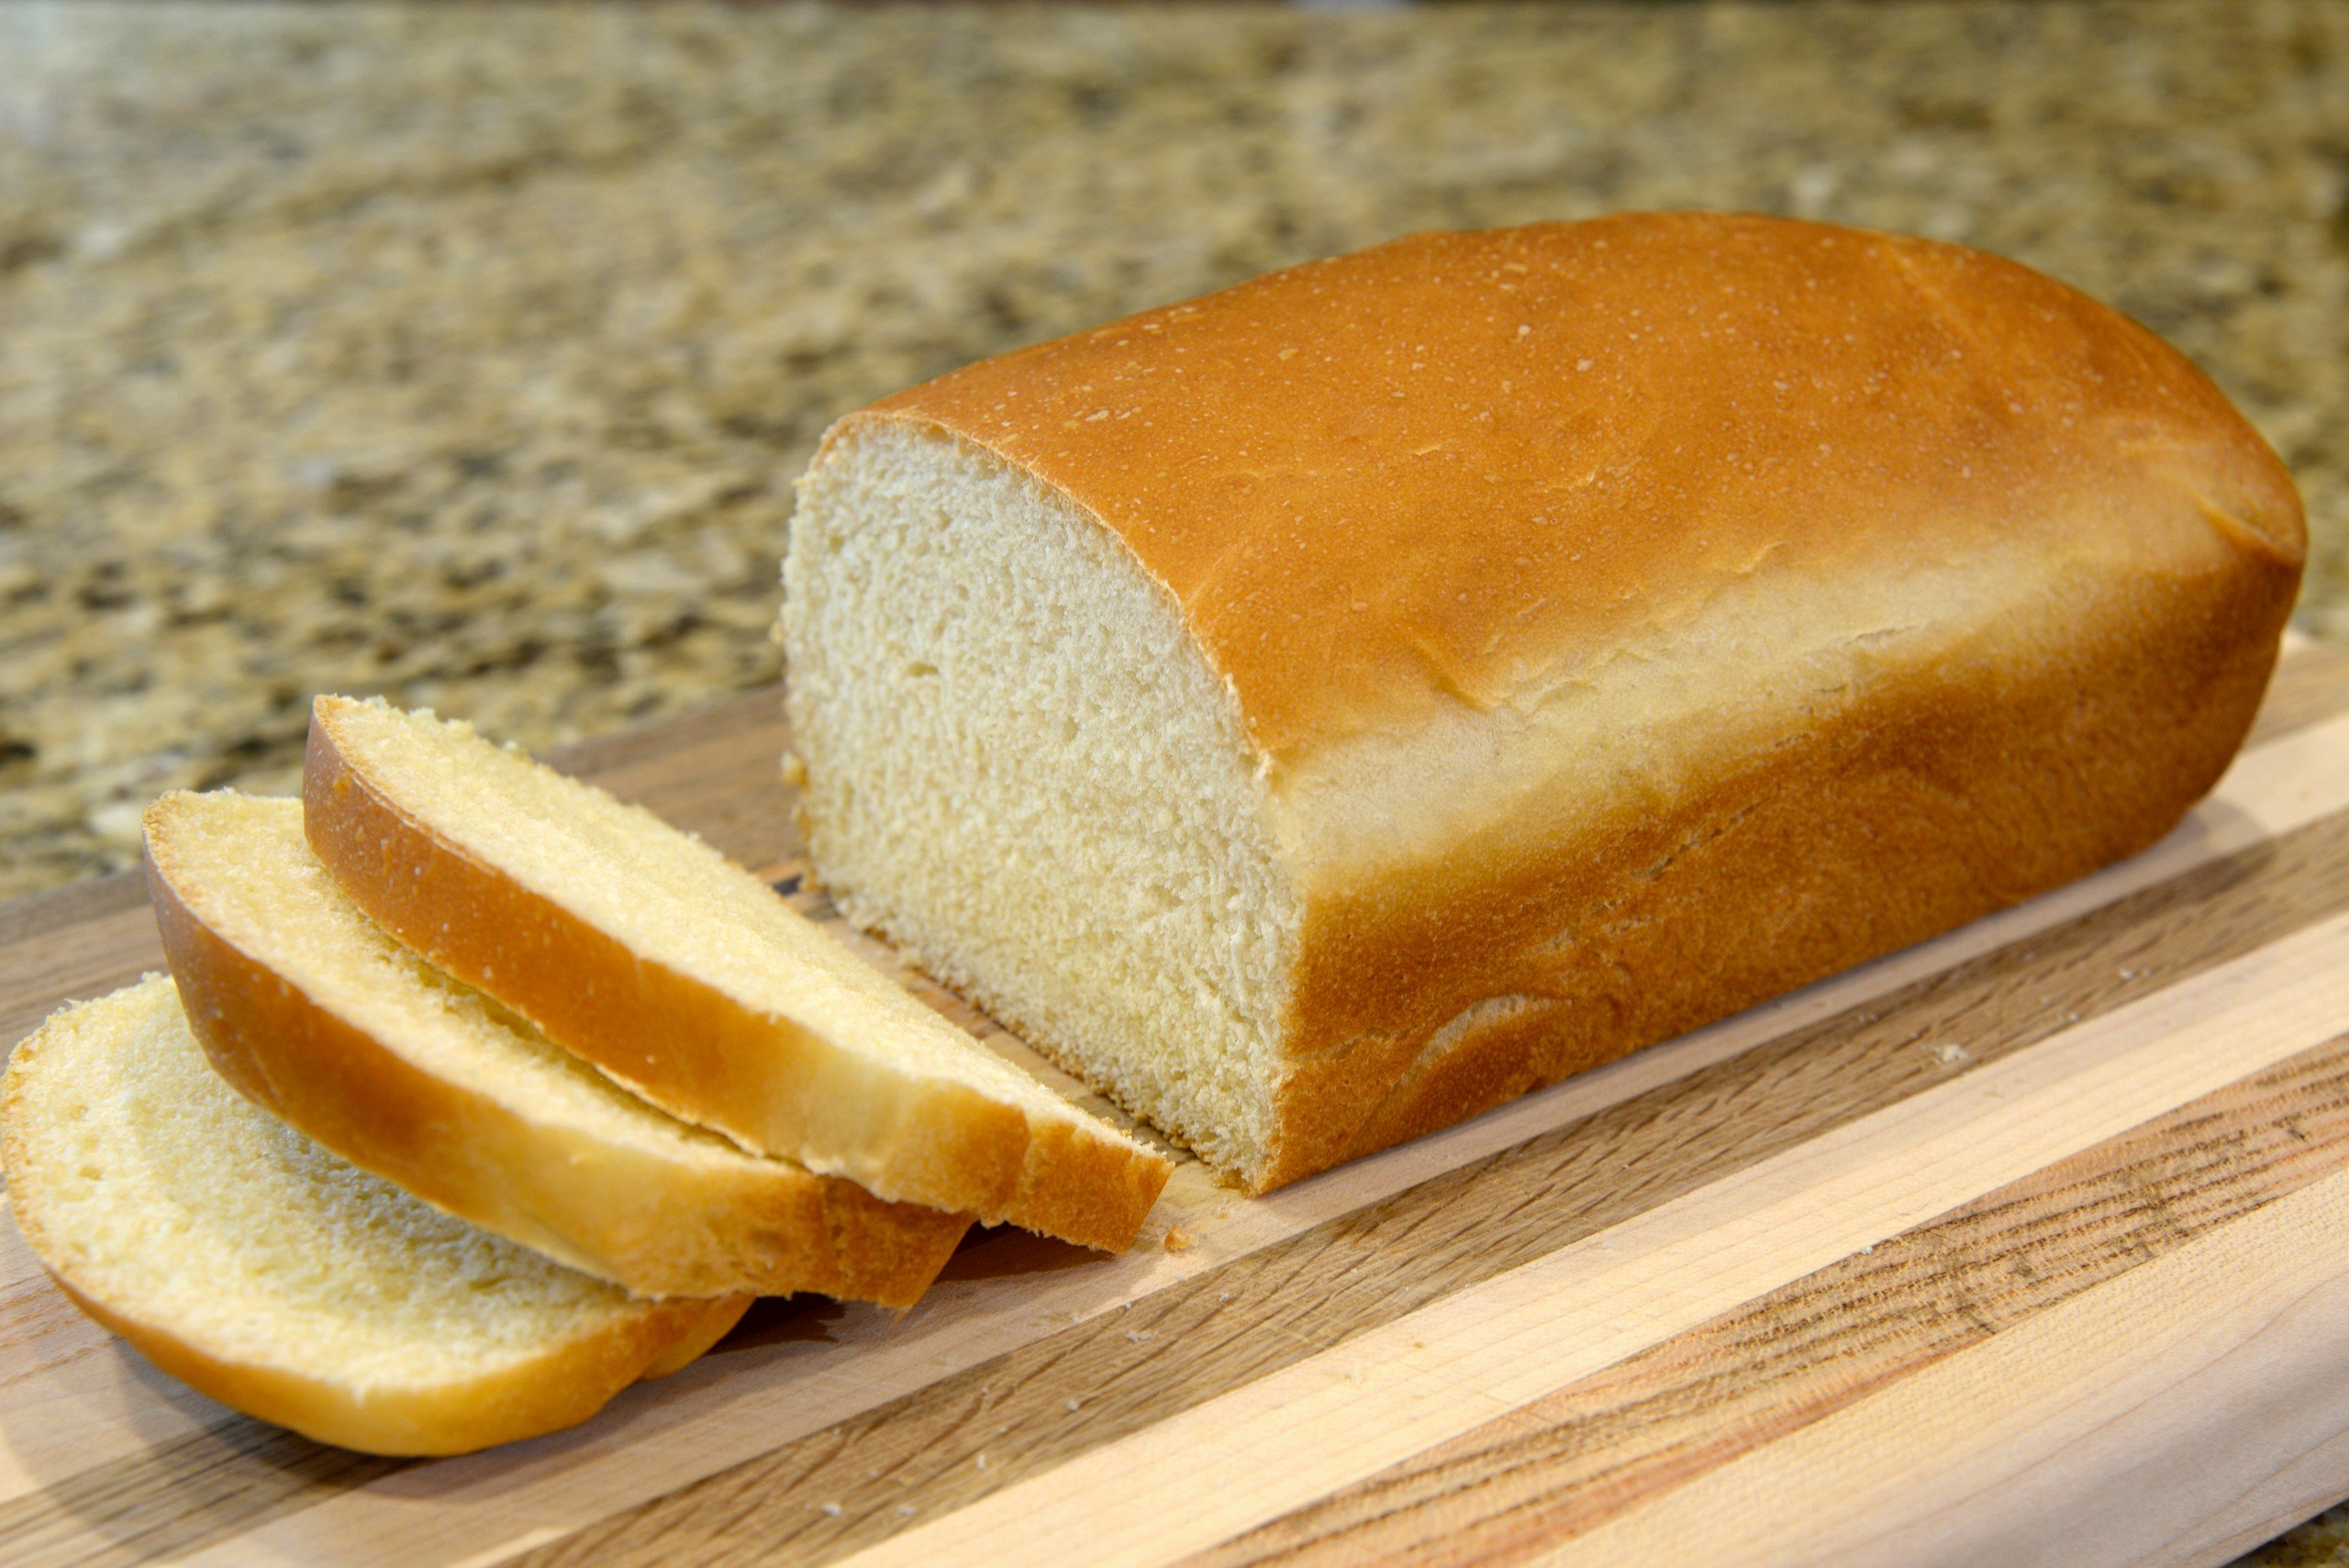
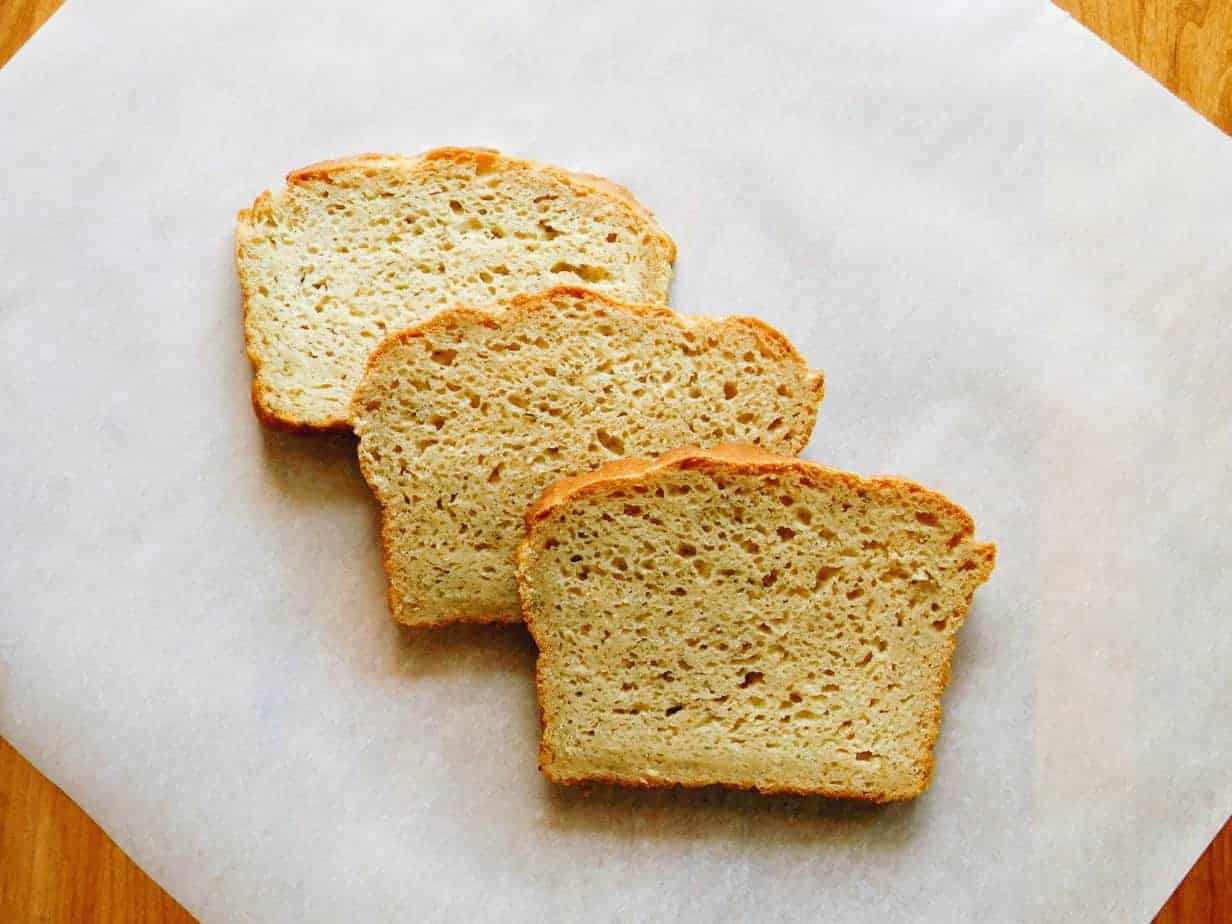
Sandwich Loaf
Bake the dough in a more structured pan and slice evenly for sandwiches. This version focuses on a softer crust and a more uniform crumb.

Should you want a more refined structure, our Beginner-Friendly Gluten-Free Sandwich Bread demonstrates how to adjust for consistent slicing and stability.
How to Store, Freeze, and Reheat This Bread
After baking your loaf, your storage method determines if it stays soft or dries out quickly. Gluten-free bread is more sensitive to moisture loss, so a few small steps make a big difference.
How to Prevent Dryness
Store in an airtight container and slice only when needed to retain moisture.
Freezing Method
Slice, wrap, and freeze in portions for easy use.
Reheating Tips
Gluten-free bread benefits from gentle reheating to restore softness.
- Toaster: It is best for quick use and slight crispness.
- Oven (300–325°F): Wrap the bread in foil and heat for 10–15 minutes.
- Microwave: To add moisture, use a damp paper towel for 10–15 seconds.
What to Serve with Italian Bread
Pair your bread with the right foods to make the texture and flavor stand out even more. Match the crisp crust and soft interior with dishes that benefit from it.
Soups
Italian bread works well with warm, hearty soups. The crust holds up when dipped, while the inside absorbs flavor without falling apart. Top choices are tomato-based soups, vegetable soups, or creamy blends.

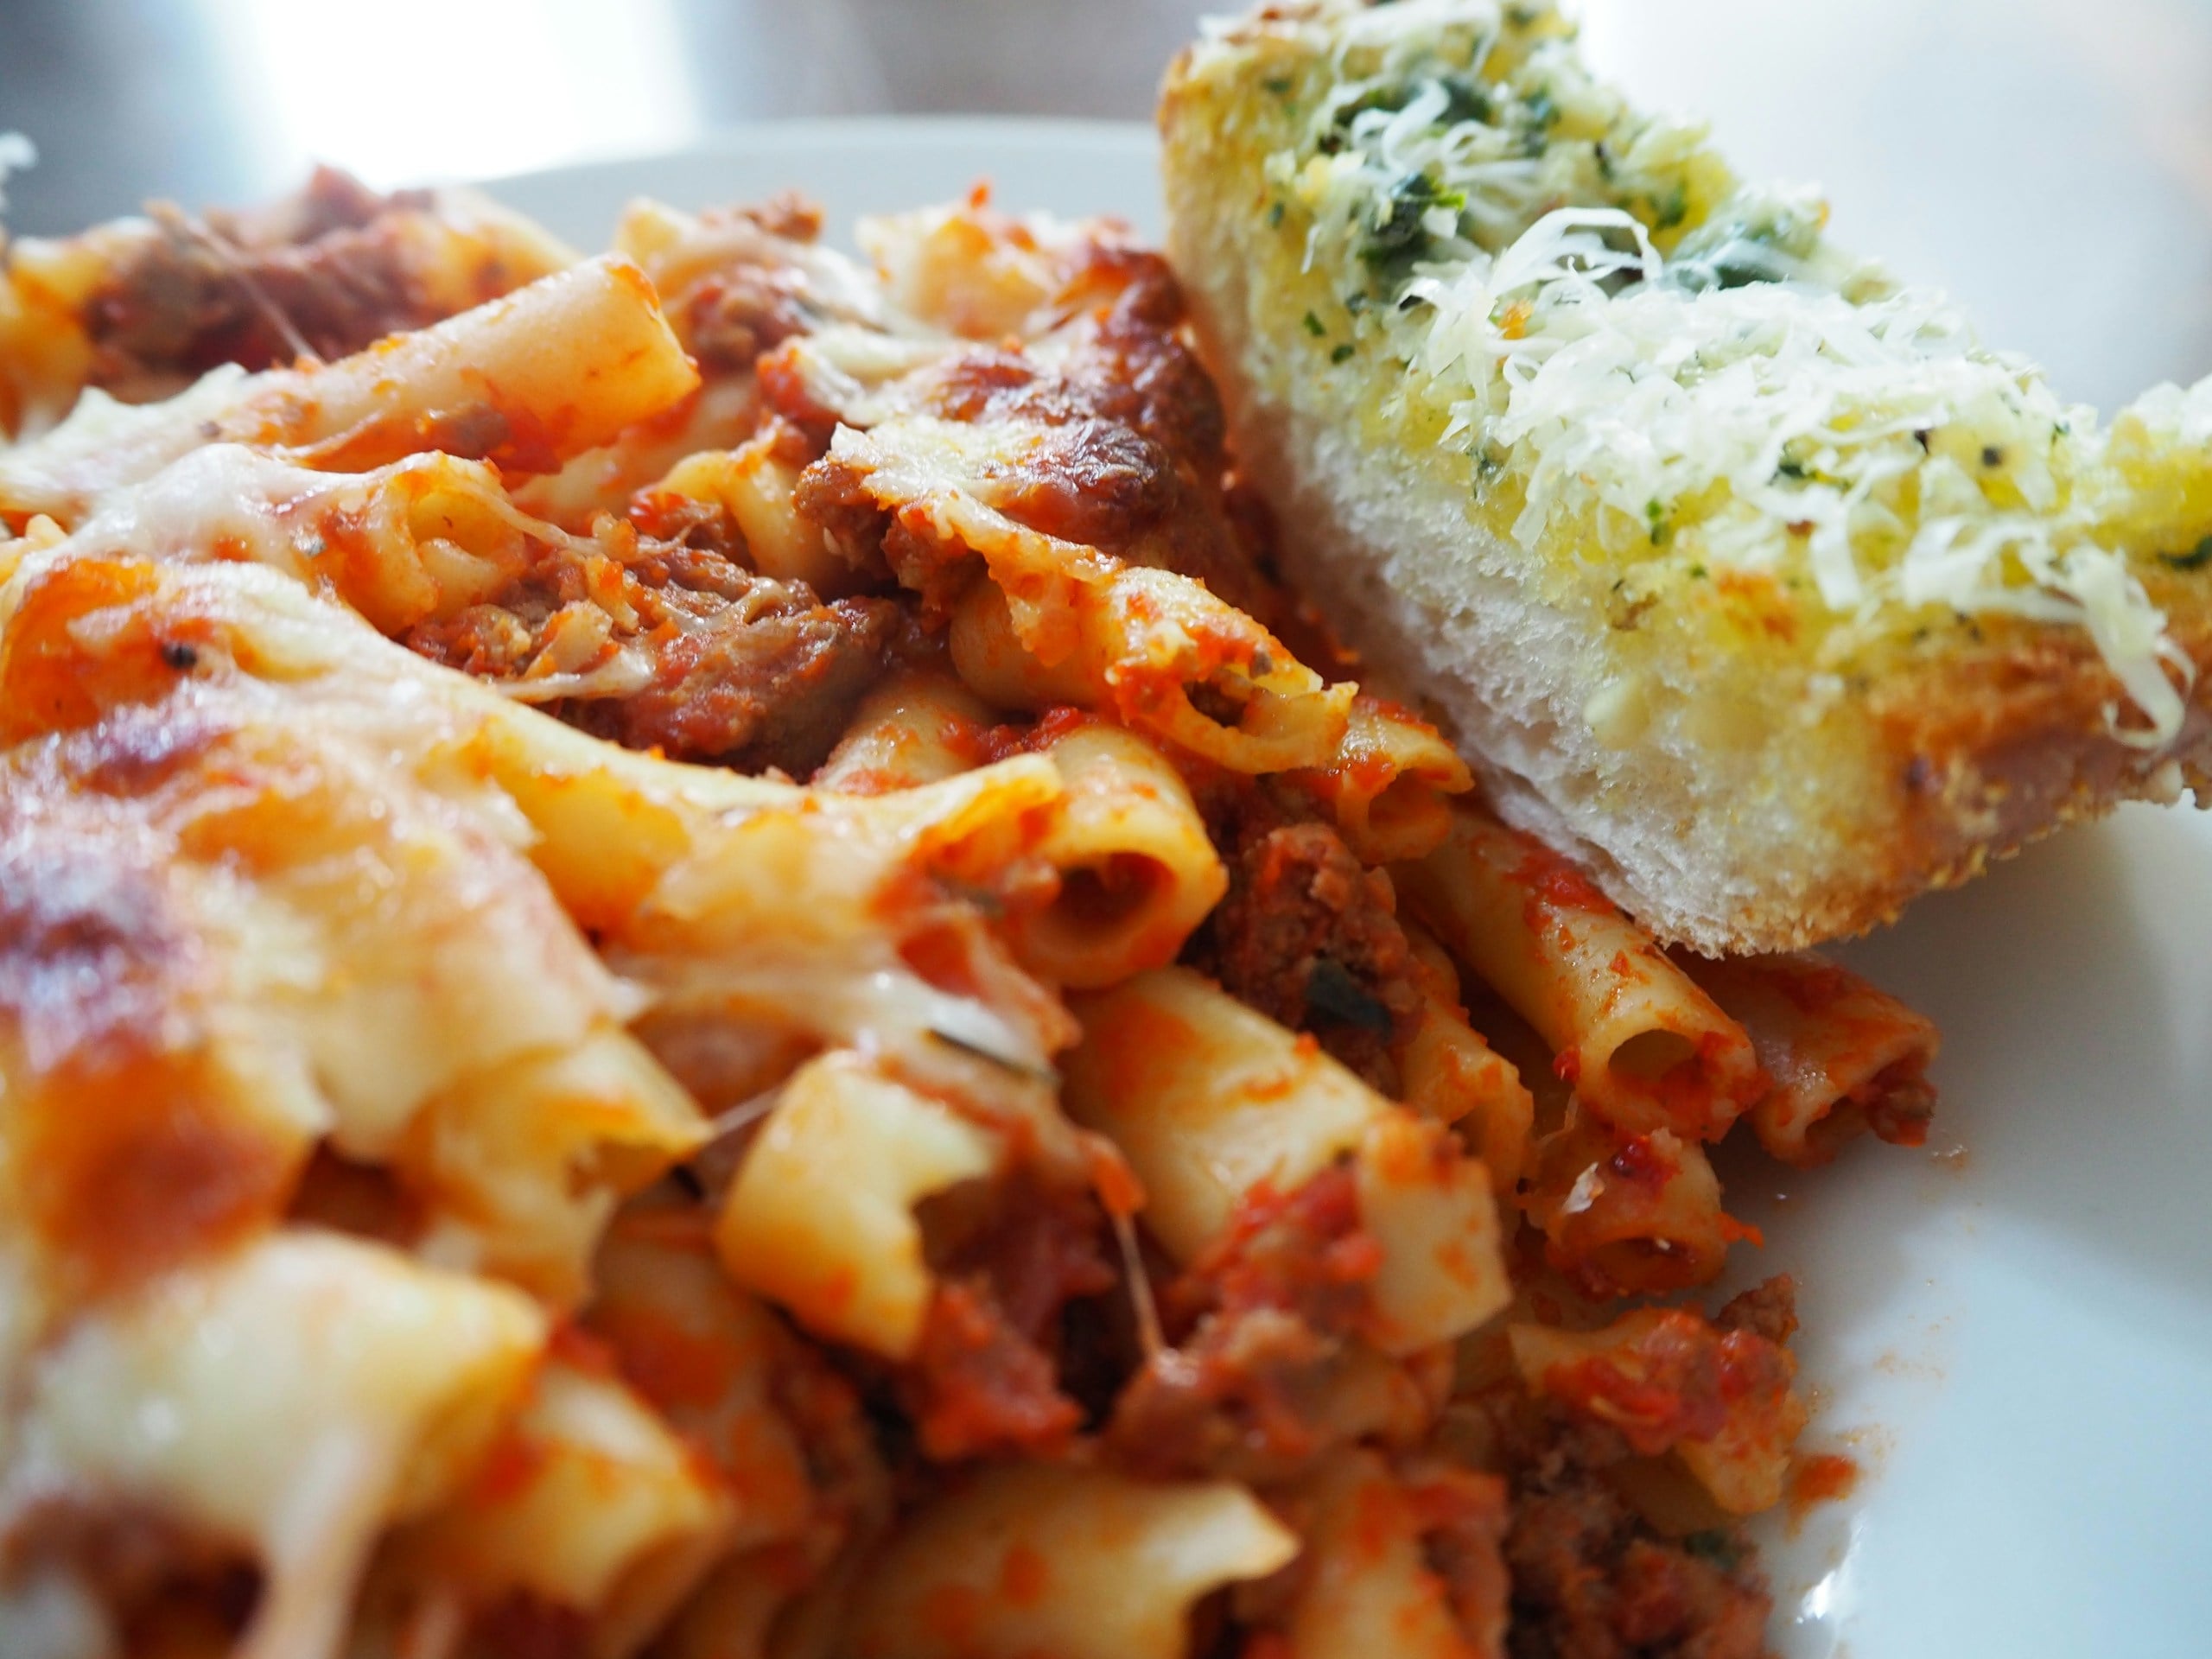
Pasta
Serve your loaf alongside pasta to balance rich sauces. The bread can be used to scoop up sauces or as a side to add texture to the meal. It goes well with marinara, Alfredo, or oil-based pasta dishes.
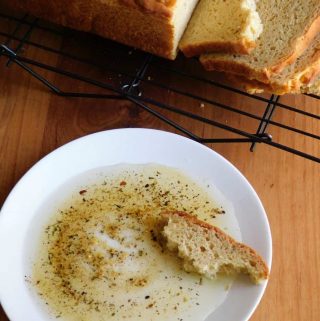
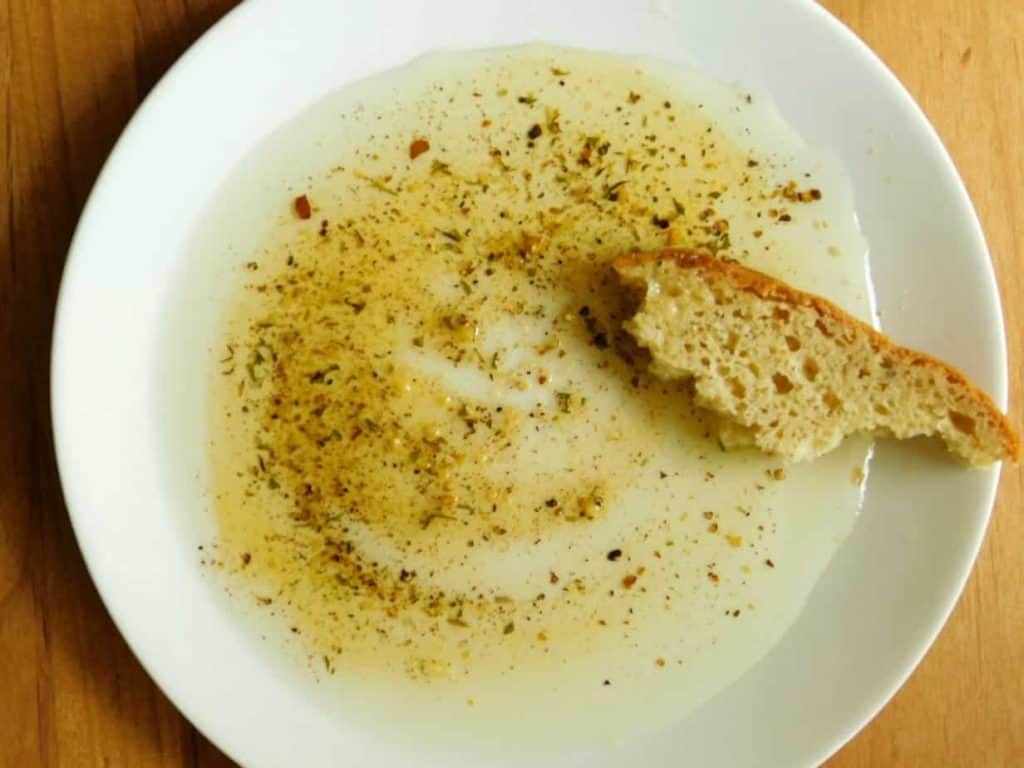
Olive Oil Dips
A simple olive oil dip enhances the flavor without overpowering it. Add herbs, garlic, or a pinch of salt for extra depth. The crisp crust and soft interior make it ideal for dipping.
Pro Tips
- Use warm, not hot water.
- Don’t skip resting time.
- Measure the flour correctly.
Common Mistakes Checklist
- Overmixing the dough.
- Skipping proofing time.
- Using the wrong flour blend.
Nutritional Benefits of this Recipe
This gluten-free Italian bread recipe is built on ingredients that offer real nutritional value, especially when compared to many processed gluten-free products.
Supports A Gluten-Free Diet
This bread is completely free from wheat, barley, and rye, making it suitable for people with gluten intolerance or celiac disease. A gluten-free diet is medically necessary for these groups and helps prevent digestive and systemic symptoms.
Contains Functional Gluten-Free Grains
Ingredients like sorghum flour contribute more than just structure. They provide fiber, protein, and bioactive compounds that support overall health.
Sorghum contains antioxidants and phytochemicals that may help reduce inflammation and support cardiovascular health. This makes the bread more than just a traditional Italian bread substitute, but a loaf that adds functional nutritional value.
Potential for Better Glycemic Response
Certain gluten-free grains, especially sorghum-based blends, may have a lower glycemic impact compared to refined wheat products.
Studies on gluten-free bread formulations show that sorghum improves fiber content and a more stable blood sugar response.
Source of Energy and Macronutrients
This recipe offers a balanced mix of carbohydrates, fats, and protein from eggs, oil, and various flours.
Room for Nutritional Optimization
One important consideration is that not all gluten-free breads are nutritionally equal. Some can lack fiber or key micronutrients if made with refined starches alone.
Research highlights that using diverse gluten-free grains can improve nutrient intake and reduce deficiencies. This recipe already moves in that direction by combining multiple flours instead of relying on a single starch.
Who Is This Recipe For?
This gluten-free Italian bread recipe is suited for a range of needs, especially when texture and ingredient control matter.
People with Gluten Intolerance or Celiac Disease
Since it eliminates gluten entirely, this bread is both safe and necessary for those who cannot tolerate wheat-based products.
Those Avoiding Dairy
Since the recipe contains no dairy, it is suitable for those with lactose intolerance or dairy-free diets.
Home Bakers Looking for Better Texture
If you’ve struggled with dense or dry gluten-free bread, this recipe focuses on hydration and structure, so the final loaf turns out softer. As a result, it feels closer to traditional bread.
Anyone Wanting A Cleaner Homemade Option
Compared to many store-bought gluten-free breads, homemade versions offer greater control over ingredients, helping you manage both quality and flavor more effectively.
Frequently Asked Questions
Below are questions we frequently get regarding this gluten-free Italian bread recipe. Ask us in the comments if you don’t see yours.
Can I make this bread without eggs?
It can work without eggs, but the structure will change. Eggs help stabilize and retain moisture, so replacing them with flax eggs or commercial substitutes may result in a denser, less cohesive loaf.
Can I Use A Bread Machine for this Recipe?
You can, but results vary. Gluten-free dough behaves more like batter, so it’s important to use a bread machine setting specifically designed for gluten-free recipes.
How Do I Get A More Crispy Crust?
For a crispier crust, place a small tray of water in the oven while the bread bakes, as the steam helps develop a firmer outer layer without drying out the inside.
Can I Reduce the Sugar In this Recipe?
You can reduce it slightly, although it’s best not to cut too much. Since sugar feeds the yeast and supports browning, reducing it too much can affect both the rise and the final color.
Why Does My Bread Sink After Baking?
This usually happens when the internal structure hasn’t fully set, often due to underbaking or removing the bread too early. Letting it bake fully and cool properly helps prevent this issue.
Can I Add Seeds or Extra Flavorings
You can add seeds, herbs, or spices to the dough to enhance flavor and texture. However, it’s important to keep additions moderate so they don’t interfere with the bread’s structure or rise.
Why Is My Dough Too Wet or Too Thick?
If the dough feels too wet or too thick, it’s usually due to small measurement differences or variations in flour. In that case, adjusting with a little extra flour or water helps bring it back to the right thick, batter-like consistency.
Related Recipes You Should Try
Explore more ways to bake without gluten or dairy. The recipes below build on similar techniques while offering different textures and flavors.
- Traditional Gluten-Free Easter Bread – A slightly sweeter, enriched bread with a softer crumb and festive flavor profile.
- Foolproof One-Bowl Oat Flour Banana Bread Recipe – A simple, moisture-focused recipe that shows how alternative flours behave in quick breads.
- Hearty Chia Seed Bread (Gluten & Dairy Free) – A denser, nutrient-rich loaf that uses seeds for structure and texture.
Whether you want something sweet, hearty, or holiday-worthy, these gluten-free and dairy-free recipes are great ones to bake next.
Have You Tried This Recipe?
Did this bread turn out soft for you? Let us know in the comments section. Your feedback helps others, and if you made any tweaks, share them so others can try your version too.