Most gluten-free holiday breads look beautiful until you cut into them.
Dense texture. Gummy center. Dry crumbs that fall apart.
Table of Contents
If you’ve struggled to recreate a traditional braided Easter bread without gluten, you’re not alone. Enriched dough is one of the hardest things to master gluten-free.
This recipe solves the texture problem.
With the right flour blend, proper rising method, and a few key techniques, you’ll get a soft, tender, lightly sweet Easter bread that braids beautifully and holds those colorful eggs just like the traditional version.
No guesswork or gritty texture. Just a show-stopping gluten-free Easter bread that tastes as it should.
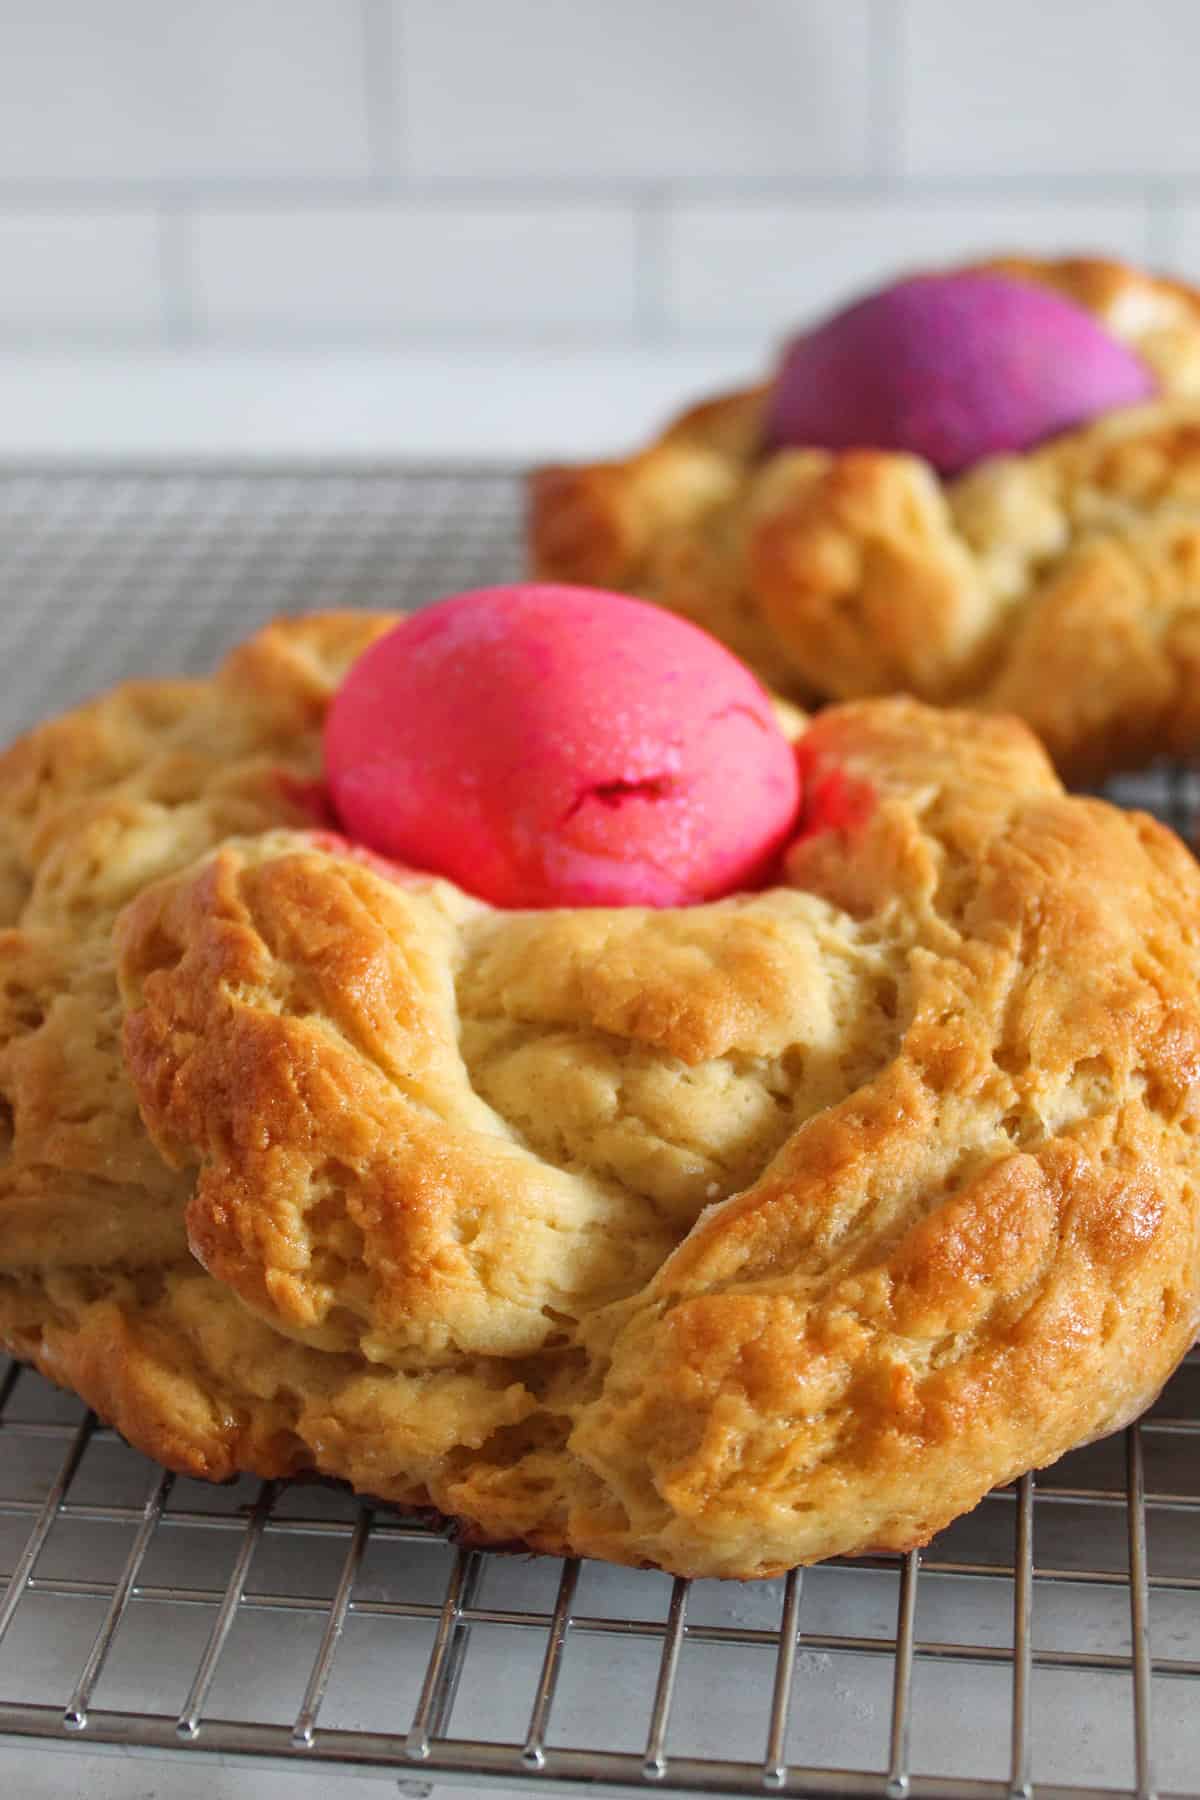
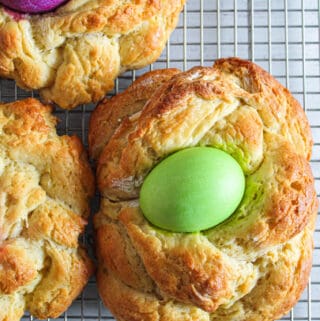
With Easter coming up, it’s the perfect time to start thinking about what dishes you’ll make for the occasion! Enter: Easter bread. It’s a traditional sweet bread made this time of year to celebrate the holiday. It’s perfectly tender and makes for a beautiful presentation.
This treat is made with braided dough and a colorful boiled egg placed in the center, before it goes into the oven. If you’ve never made this classic bread, here’s your chance to start a new tradition in your household!
Looking for more sweet gluten-free breads? Check out this Irish soda bread, this cinnamon raisin artisan bread, and this cranberry orange bread.
Why This Recipe Is The Best
What’s not to love about traditional Easter bread? If you’re sensitive to gluten, I guess there is one thing not to love… Until you make this gluten-free Easter bread! It’s the same deliciously tender bread you love, all braided and decorated with a brightly colored egg, just without gluten.
Here are a few more reasons you’ll love this bread:
- This bread is soft and chewy with the perfect touch of sweetness.
- This recipe will feed the whole family with about 24 servings.
- You only need 45 minutes of prep time to end up with 4 beautiful loaves.
- This is a fun treat to get the whole family involved in making!

Equipment You’ll Need
You probably already have most of these somewhere in your kitchen, but it never hurts to make sure.
- Digital Kitchen Scale
- Stand Mixer
- Metal Spatula
- Spatula
- Saucepan
- Bowls for Cooling and Coloring Boiled Eggs
- Large Bowl
- Whisk
- Parchment Paper
- Cookie Sheets
- Instant Read Thermometer
- Cooling Rack
Ingredients for Gluten-Free Easter Bread
Before we get started, I like to make sure we have all the ingredients handy! A lot of these are probably already in your pantry or refrigerator. If you need to pick up a few things, be sure to print or save the recipe card below for an easy reference for your grocery shopping.
- Hard-boiled eggs
- Boiling water
- White vinegar
- Food coloring
- Almond milk
- Instant yeast
- White rice flour
- Sorghum flour
- Potato starch
- Tapioca starch
- Xanthan gum
- Salt
- Eggs
- Vegetable oil
- Apple Cider vinegar
- Granulated sugar
- Vanilla extract
- Vegan butter
- Honey
Key Ingredient Roles
Curious about some of these ingredients? I don’t blame you! Traditional Easter bread is a tad different. Here’s a rundown of what each of these ingredients brings to the recipe.
Boiled Eggs
4 hard-boiled eggs
Hard-boiled eggs are the base for a fun and colorful topping for the bread. The trick is making them perfect for coloring!
Here’s how: Gently place four eggs in a saucepan. Don’t just drop them in because they will crack and make a mess! Cover with one inch of cold water. Bring the water to a full rolling boil on high heat. Then cover with a lid and turn off the heat. Let them sit on the burner for 10-12 minutes. Then promptly transfer the eggs to a bowl of ice water for at least five minutes to cool them down.
Boiling Water
2 cups boiling water
This helps dissolve the food coloring for dyeing the eggs.
White Vinegar
4 tablespoons white vinegar
The white vinegar adds a bit of acid to the food coloring to help make the eggs a nice, bright color. I typically stick to white vinegar because it has a mild flavor that won’t ruin the flavor of the boiled eggs or the bread.
Food Coloring
4 different colors of food coloring, about 6 drops of each
Using four colors of food coloring adds a nice variety of colors to the boiled eggs. I use red, yellow, blue, and green food coloring most often. The amount doesn’t have to be exact, but I’ll use at least six drops of each to get nice, bright colors on the eggs.
Almond Milk
1 cup unsweetened almond milk
Almond milk adds most of the moisture and a light nutty flavor to the bread. The thing to remember about almond milk is that it is lower in fat than dairy milk or other milk alternatives like coconut milk. You may need to adjust the amount of other fats in your baking if you use almond milk to replace dairy.
Just something to be aware of: This recipe does call for the almond milk to be heated to about 110 degrees Fahrenheit. Try not to get it much hotter than that because getting it too hot can kill the yeast. If the yeast dies or becomes inactive for some reason, you won’t get the rise you want in this bread dough.
Instant Yeast
2 1/4 teaspoons instant yeast
Instant yeast is a biological leavening agent that provides most of the rise for this bread.
White Rice Flour
131 grams white rice flour (about 3/4 cup)
White rice flour is one of the most popular gluten-free, single-grain flours because it helps get the crisp crust you want for this bread. It’s fairly common to mix it with other types of flour and starch to make up for the lack of gluten.
Sorghum Flour
95 grams sorghum flour (about 3/4 cup)
Sorghum flour is another gluten-free flour that adds a slight, earthy, sweet flavor to the bread.
Potato Starch
214 grams potato starch (about 1 1/2 cups)
Potato starch helps baked goods retain moisture, supports a tender texture, and helps with structural and binding support for gluten-free baked goods like this Easter bread.
Tapioca Starch
90 grams tapioca starch
Tapioca starch provides elasticity in the bread dough and enhances the chewiness and structure of the baked bread. It also contributes to a crispy crust and light, airy crumbs.
You’ll also want a little extra potato or tapioca starch to sprinkle on your work surface before you form the dough, so be sure to keep it handy.
Xanthan Gum
2 teaspoons Xanthan gum
Xanthan gum is a commonly used binder, thickener, and stabilizer in gluten-free baked goods. It also helps retain moisture.
Caution: Try not to use too much Xanthan gum, because it can make the bread too gummy or dense.
Salt
3/4 teaspoon salt
Salt helps regulate the yeast’s rising action and reacts with other ingredients to provide additional flavor.
More (Uncooked) Eggs
3 large eggs for the dough
2 additional egg yolks
1 large egg for the egg wash
Eggs are mostly used as a binder in baked goods. The additional egg yolks will add a richer, velvety flavor to the bread and help bind the fats and liquids together. The egg wash will make a nice coating for the bread as it bakes.
Vegetable Oil
6 tablespoons vegetable oil
The vegetable oil will add important healthy fat to the bread. I know it seems like a lot, but we’re making up for the lower fat in the almond milk.
Apple Cider Vinegar
1 teaspoon apple cider vinegar
The acid in apple cider vinegar helps optimize the operation of the instant yeast and helps create a tender crumb.
Sugar
65 grams sugar (about 1/3 cup)
The sugar powers the yeast by giving it something to metabolize into carbon dioxide to make the dough rise.
Vanilla Extract
1 teaspoon vanilla extract
Vanilla extract adds depth to the flavor of slightly sweet baked goods like this bread.
Vegan Butter
1 tablespoon vegan butter, melted
Vegan butter helps provide flavor and a bit of fat to the egg wash that you’ll brush over the loaves before they’re baked.
Honey
1 tablespoon honey
The honey adds a bit of sweetness to the egg wash.
Printable Traditional Gluten Free Easter Bread Recipe Card
Ingredients
For the eggs
- 4 eggs hard boiled, cooled to room temperature
- 2 cups boiling water separated
- 4 Tablespoons white vinegar separated
- Food coloring red, yellow, blue, green
For the bread
- 1 cup almond milk unsweetened, 110F
- 2 1/4 teaspoons instant yeast
- 131 grams white rice flour about 3/4 cup
- 95 grams sorghum flour about 3/4 cup
- 214 grams potato starch about 1 1/2 cups
- 90 grams tapioca starch about 3/4 cup
- 2 teaspoons xanthan gum
- 3/4 teaspoon salt
- 3 large eggs
- 2 egg yolks
- 6 Tablespoons vegetable oil
- 1 teaspoon apple cider vinegar
- 65 grams granulated sugar about 1/3 cup
- 1 teaspoon vanilla extract
- extra potato starch or tapioca starch
For the egg wash
- 1 large egg
- 1 Tablespoon vegan butter melted
- 1 Tablespoon honey
Instructions
Make the colored eggs
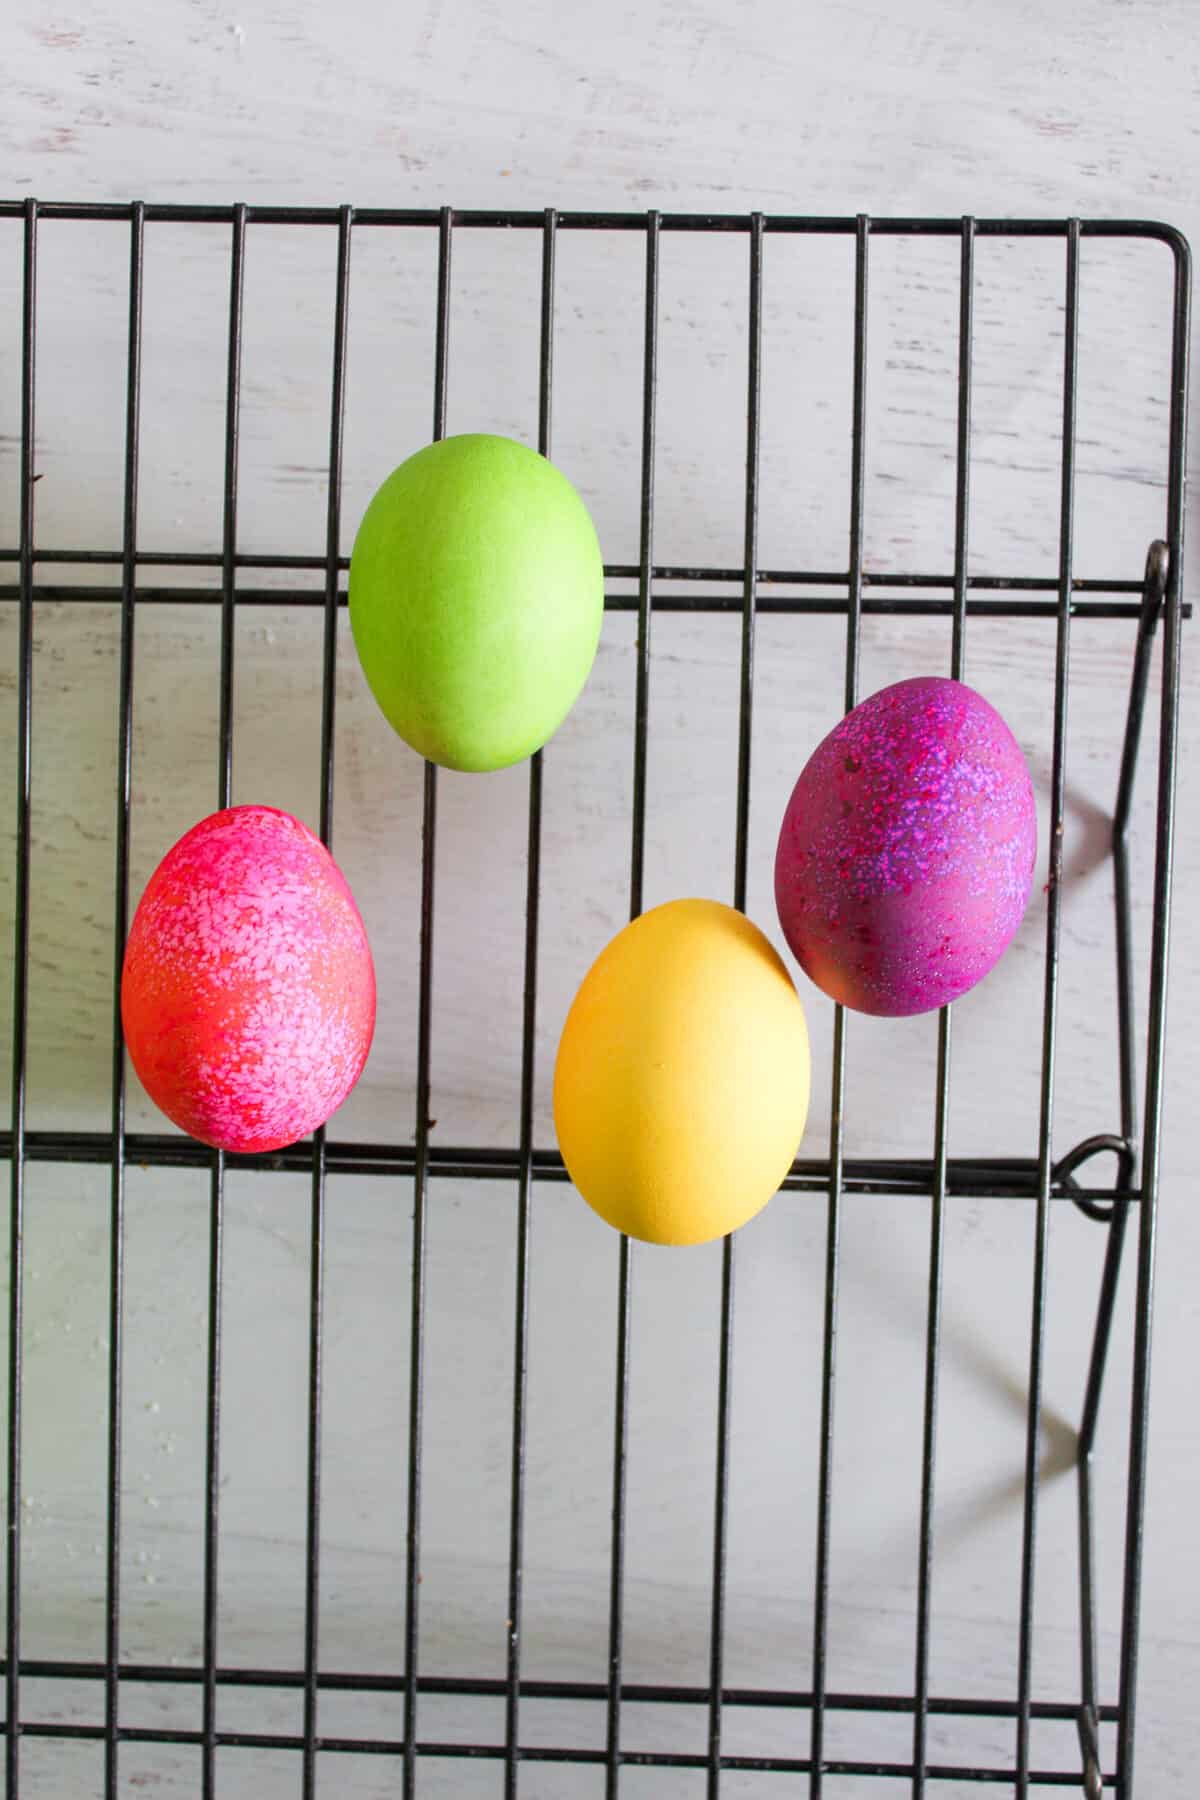
- Use 4 glasses or deep bowls to color the eggs. Into glass one (pink egg), add 6 drops of red food coloring. Into glass two (yellow egg), add 8 drops of yellow food coloring. Into glass three (purple egg), add 5 drops of red and two drops of blue food coloring. Into glass four (green egg), add 6 drops of yellow and 2 drops of green food coloring.
- Add 1 Tablespoon of vinegar each to the 4 cups or deep bowls. Pour 1/2 cup of the boiling water into each cup with the vinegar.
- Gently lowered each egg into the egg dye and let sit for 5 minutes for a rich color. Less time for a paler shade.
- Use a slotted spoon to remove the eggs to dry on a wire baking rack.
Make the bread
- In a measuring cup or small bowl, add the almond milk and the yeast. Stir to dissolve. Let proof for 5 minutes.
- Meanwhile, in a large bowl, add the white rice flour, sorghum flour, potato starch, tapioca flour, xanthan gum and salt. Whisk until combined.
- In the bowl of a stand mixer, add the eggs, egg yolks, vegetable oil and apple cider vinegar. Mix on low speed for 15 seconds.
- Add the vanilla extract, granulated sugar and yeast mixture. Mix on low speed for 15 seconds.
- Add the flour mixture to egg / yeast mixture in the stand mixer. Mix on low speed for 15 seconds. Stop the machine and scrape down the bowl.
- Turn mixer to medium and mix for 4 minutes on medium speed.
- Scrape down the batter in the bowl. Cover with a tea towel and set aside to rise for 1 hour.
- Toward the end of the rise time, arrange oven racks so that 2 cookie sheets can fit into the oven at one time. Preheat oven to 375F. Place parchment paper on the cookie sheets.
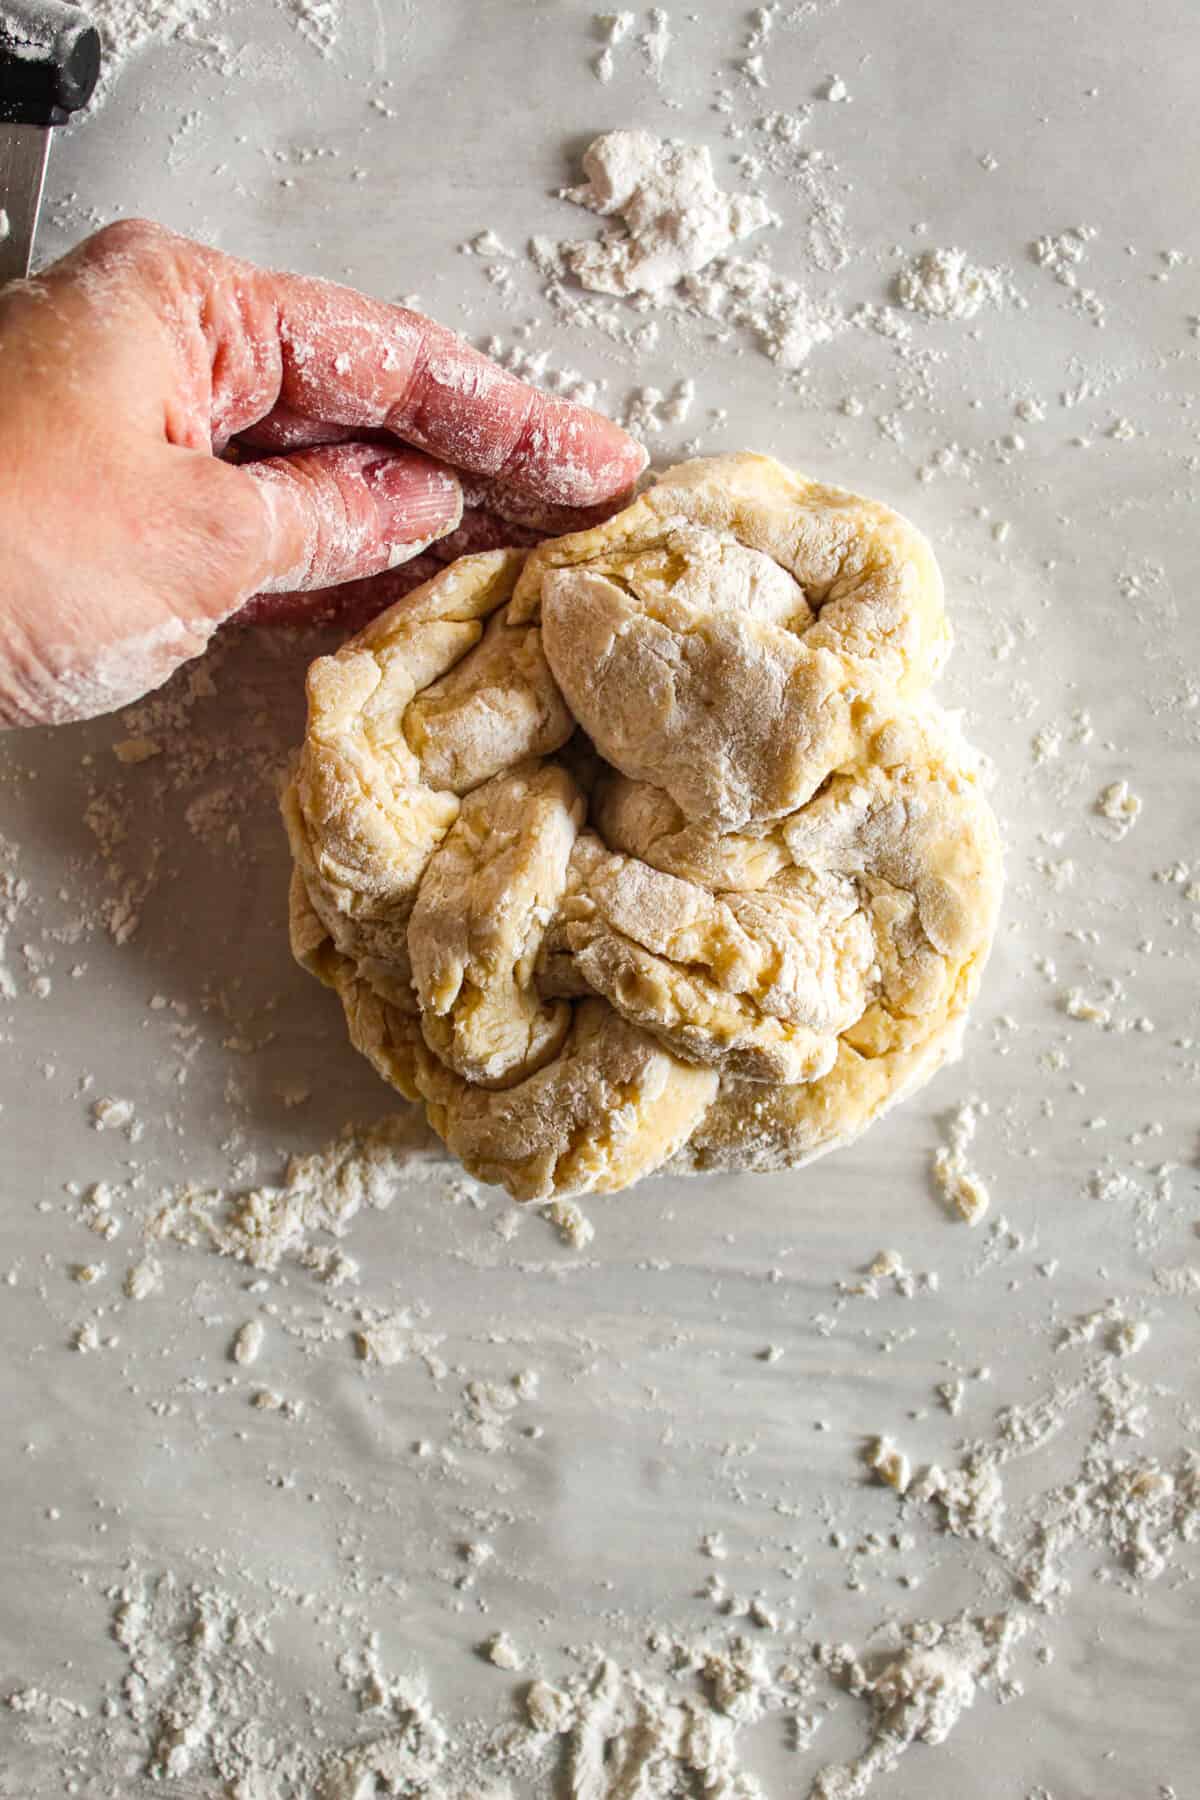
- Place a large piece of parchment paper on your working surface. Place a generous spoonful or two of potato starch or tapioca starch on the paper.
- Place the risen dough onto the starch. If it needs more starch to be workable and not overly sticky, add another spoonful or two.
- Knead it a couple times to work the starch in.
- Form dough into a square and slice it into 4 equal sections. Set 3 sections aside.
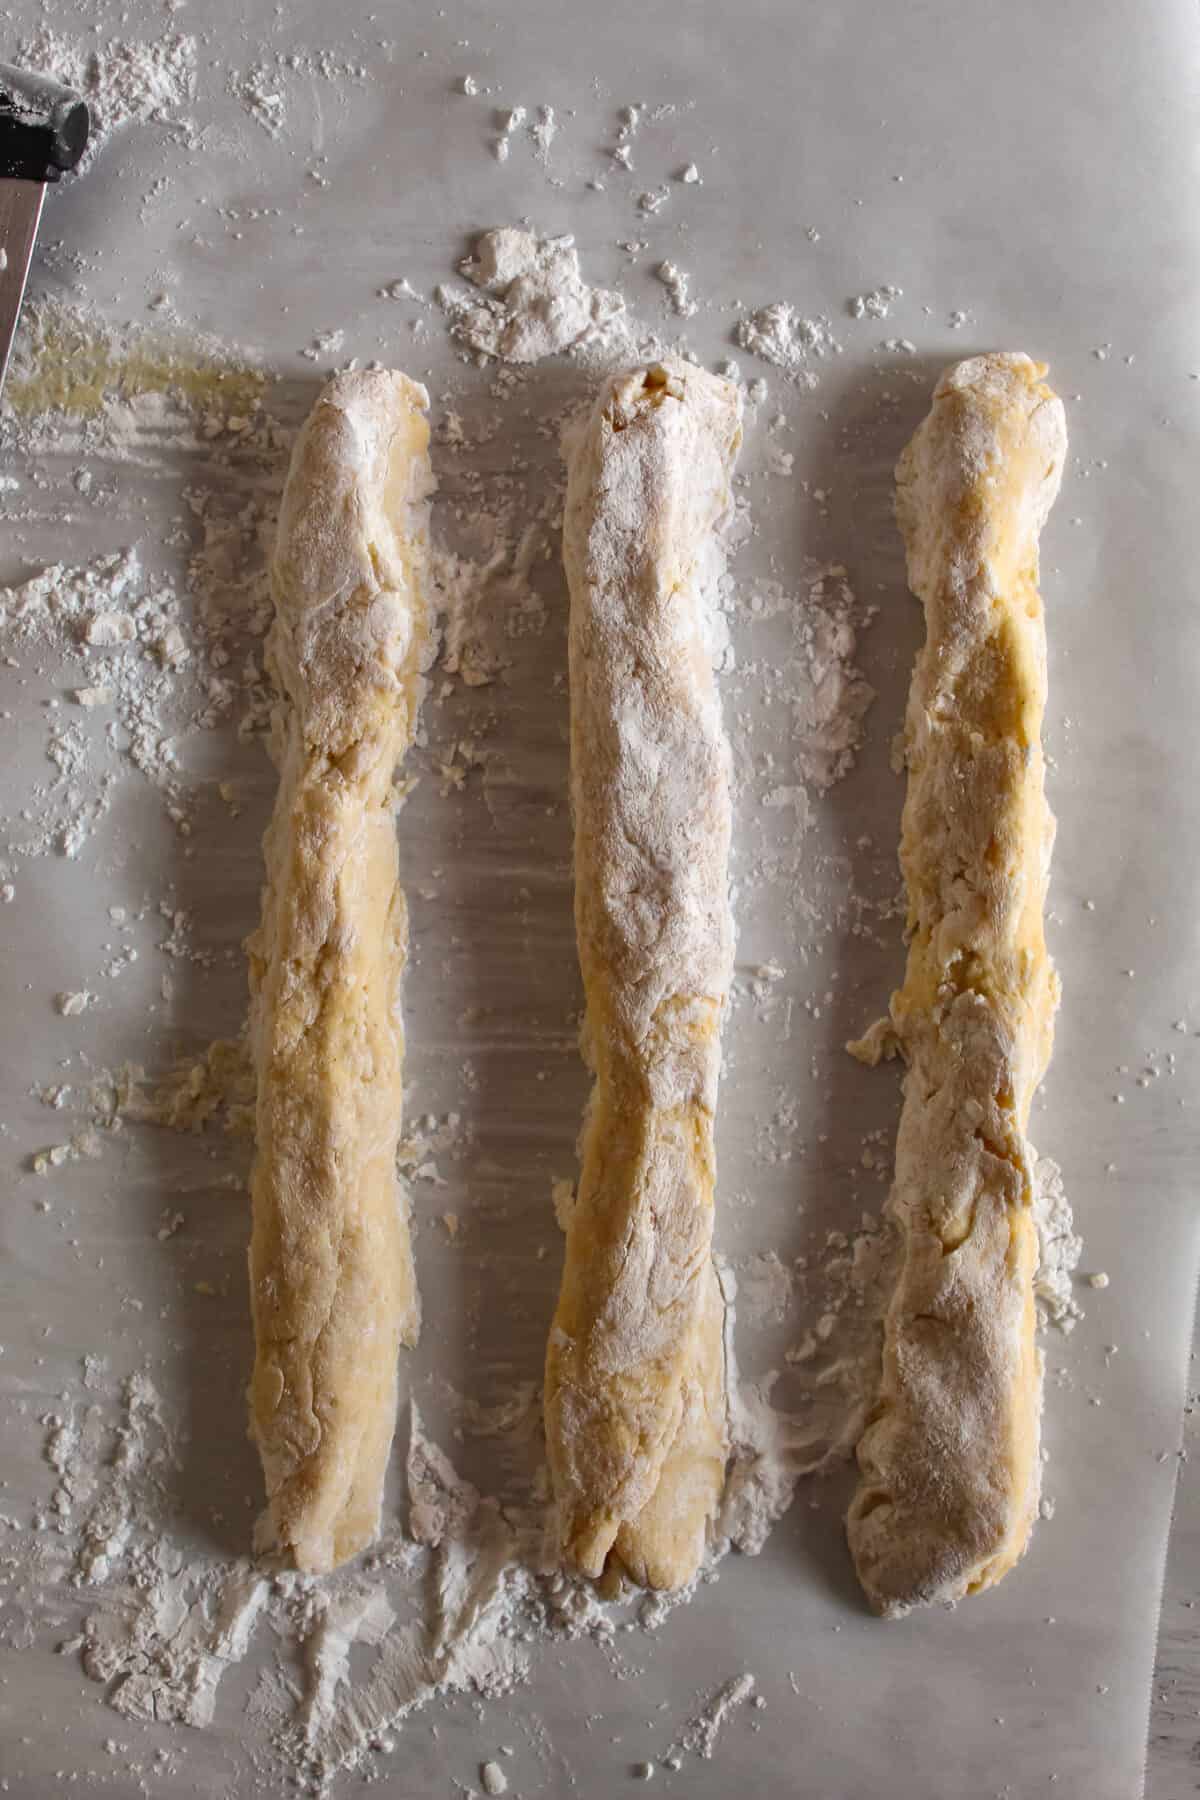
- Working with the first section, slice it into 3 equal pieces.
- Roll each section into a 12 inch long rope, keeping the ropes close together (about 1 inch apart) as you do this.
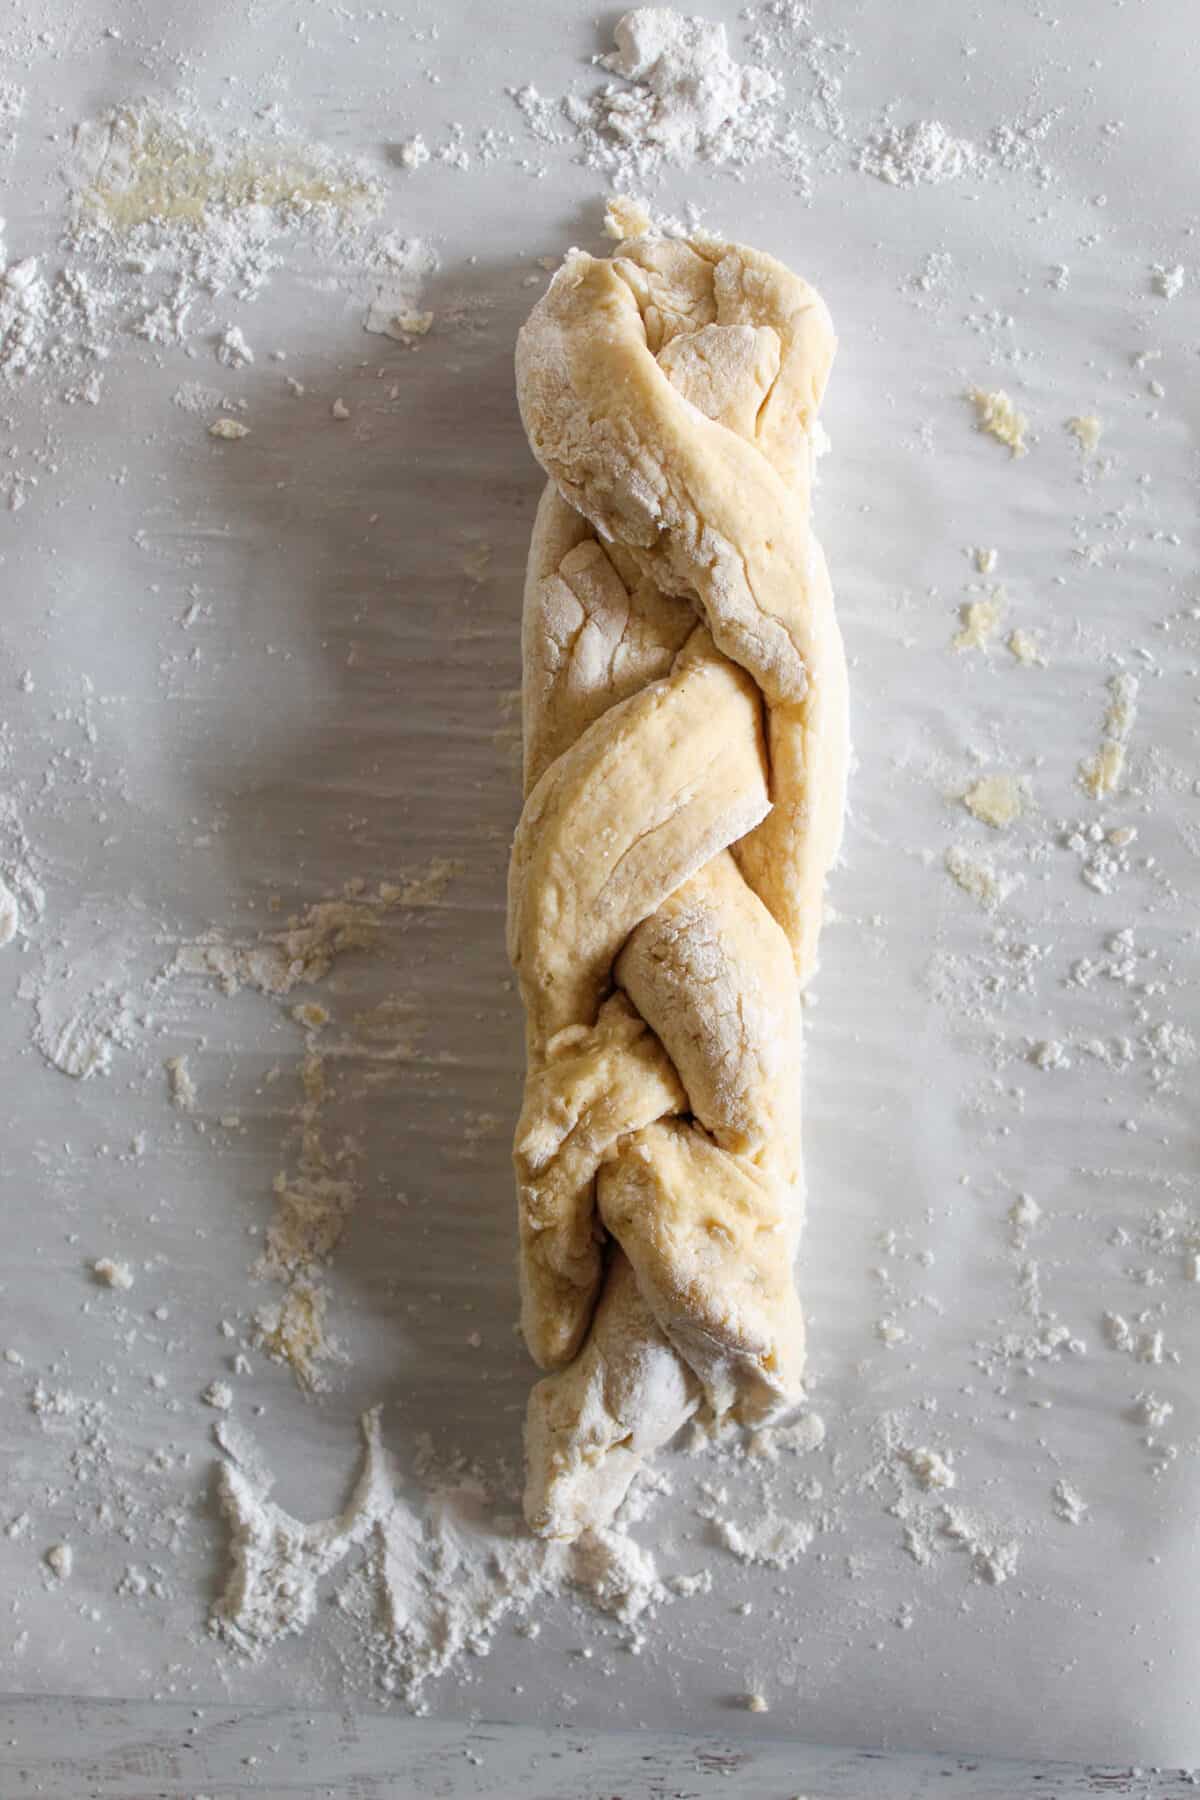
- Take the tops of the ropes and mash them together to form the top of the braid.
- "Braid" the dough by moving one rope on top the other. This does not have to be perfect as they will bake up beautiful.
- Use your hands to push the braid together a bit.
- Before bringing the dough together into a circle, use a metal spatula to loosen the dough from the work surface if it has gotten stuck.
- Take one end of the braid and bring it up to the other end of the braid, forming a circle. Pinch the dough together.
- Using a metal spatula, gently move the bread to the prepared baking sheet, positioning it so there's room for another bread.
- Move on to the remaining 3 sections of dough, slicing and forming the ropes, then braiding, then forming the circle.
Make the egg wash
- In a small bowl, mix the egg, melted vegan butter and honey together.
- Gently brush over each braided loaf before baking.
- Place an egg in the middle of the bread.
Baking the loaves
- Bake the loaves at 375F for 28 to 34 minutes. At about 28 minutes, use a kitchen thermometer to check doneness. It should reach an internal temperature of 190 degrees Fahrenheit.
- Let the loaves cool for 30 minutes before serving.
Nutrition
Did you make and love this recipe? Give it your review and rating below! And make sure to follow me on Instagram, Pinterest, and Facebook , too!
Method for Making Traditional Gluten-Free Easter Bread
Let’s jump right into it to make this attractive Easter bread.
Step One: Color the Hard-Boiled Eggs
Set out four small bowls or cups. Drop at least six drops of one food color into each bowl.
Divide white vinegar and water into fourths. Place one-fourth of water and vinegar into each bowl. Gently stir the contents of each bowl with a small spoon, rinsing the spoon off between each bowl.
Gently place one boiled egg into each bowl. I like to use a dipping tool that’s the right size for eggs to place them in the bowls. The important thing is to make sure the eggs don’t crack.
Let the eggs sit in the bowls of egg coloring mix for at least five minutes. Then carefully transfer them to a cooling rack or plate to dry.
Step Two: Activate the Yeast
While waiting for the eggs to color, heat the almond milk to about 110 degrees Fahrenheit, being careful not to get it much hotter than that. Stir in the yeast. Allow to sit for about five minutes so the yeast activates.
Step Three: Whisk Together Flours, Starches, Salt, and Xanthan Gum
In a large bowl, whisk together the white rice flour, sorghum flour, potato starch, tapioca flour, xanthan gum, and salt.
Step Four: Mix Eggs, Egg Yolks, Vegetable Oil, and Apple Cider Vinegar
Add four eggs, egg yolks, vegetable oil, and apple cider vinegar to the bowl of your stand mixer. Mix on low speed for about 15 seconds until they are just combined.
Step Five: Add Vanilla Extract, Sugar, and Yeast Mixture
Add the vanilla extract, granulated sugar, and yeast mixture to the stand mixer’s bowl. Mix on low speed for 15 seconds.
Step Six: Add Flour Mixture
Add the flour mixture to the wet ingredient mix in the stand mixer’s bowl. Mix for about 15 seconds on low speed, then scrape down the inside of the bowl with the spatula. Mix for four more minutes on medium speed, scraping the bowl’s interior down as necessary, until the mixture is well-combined.
Step Seven: Allow Dough to Rise
Give the sides of the bowl’s interior one final scrape-down with the spatula. Cover the bowl with a tea towel and allow the dough to rise for one hour.
Step Eight: Prep Oven and Cookie Sheets
Arrange your oven racks to accommodate two cookie sheets with baking bread dough on them. Preheat oven to 375 degrees Fahrenheit (190 degrees Celsius). Line two cookie sheets with parchment paper.
Step Nine: Prepare Work Surface
Place a large piece of parchment paper on your working surface. Place a generous spoonful or two of potato starch or tapioca starch on the paper.
Step Ten: Place Dough on Work Surface
Place the risen dough onto the starch. If it needs more starch to be workable and not overly sticky, add another spoonful or two. Knead it a couple of times to work the starch in.
Step Eleven: Divide Dough Into Four Equal Parts
Form the dough into a square and slice it into 4 equal sections. Set 3 sections aside.
Step Twelve: Prepare First Section for Braiding
Working with the first section, slice it into 3 equal pieces. Roll each section into a 12-inch-long rope, keeping the ropes close together (about 1 inch apart) as you do this.
Take the tops of the ropes and mash them together to form the top of the braid.
Step Thirteen: Braid Ropes
It helps if you have some experience with braiding hair. “Braid” the dough by moving one rope on top of the other. This does not have to be perfect, since any imperfections will likely be hidden when it puffs up as it bakes.
Just pretend you’re braiding a little girl’s hair. Push the braid together a bit.
Step Fourteen: Form a Braid Into a Circle
Use a metal spatula to loosen any parts of the braid that have gotten stuck to your work surface. Loop the braid into a circle and bring one end around so that it is touching the other end. Pinch the two ends together.
Step Fifteen: Transfer Braid Loop to Cookie Sheet
Use the metal spatula to transfer the braid loop from your work surface to the cookie sheet, making sure there’s room for another braid loop.
Step Sixteen: Repeat Braiding Process With Remaining Three Dough Sections
Sprinkle a little more potato or tapioca starch on your work surface as needed. Repeat steps twelve through fourteen with the other three sections. Transfer each section to a cookie sheet with the metal spatula as you get it finished, making sure there’s room for all of them.
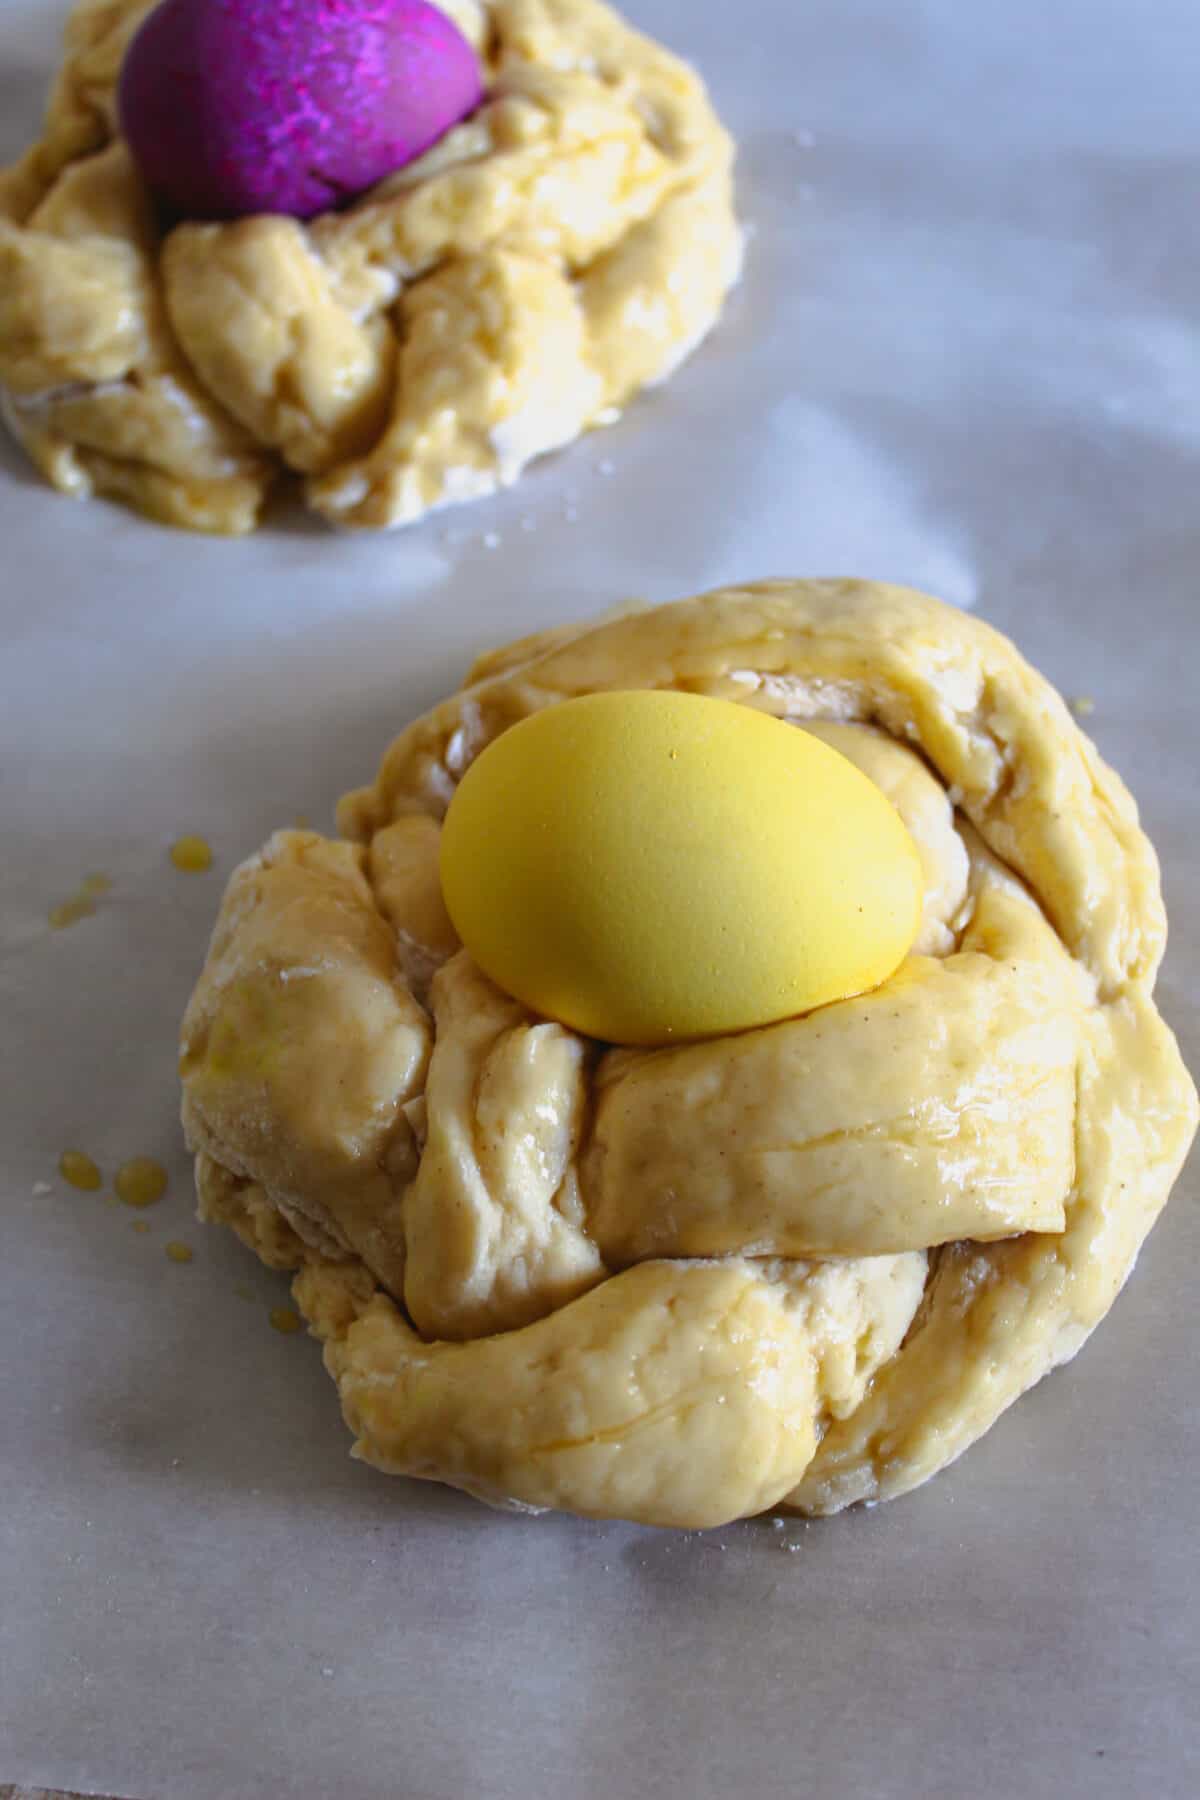
Step Seventeen: Make Egg Wash and Apply to Bread Dough
In a small bowl, mix the egg, melted vegan butter, and honey together. Then gently brush the egg wash over each braided loaf before baking.
Step Eighteen: Place Colored Eggs in the Center of Braids
Place an egg in the middle of each braided circle of bread dough.
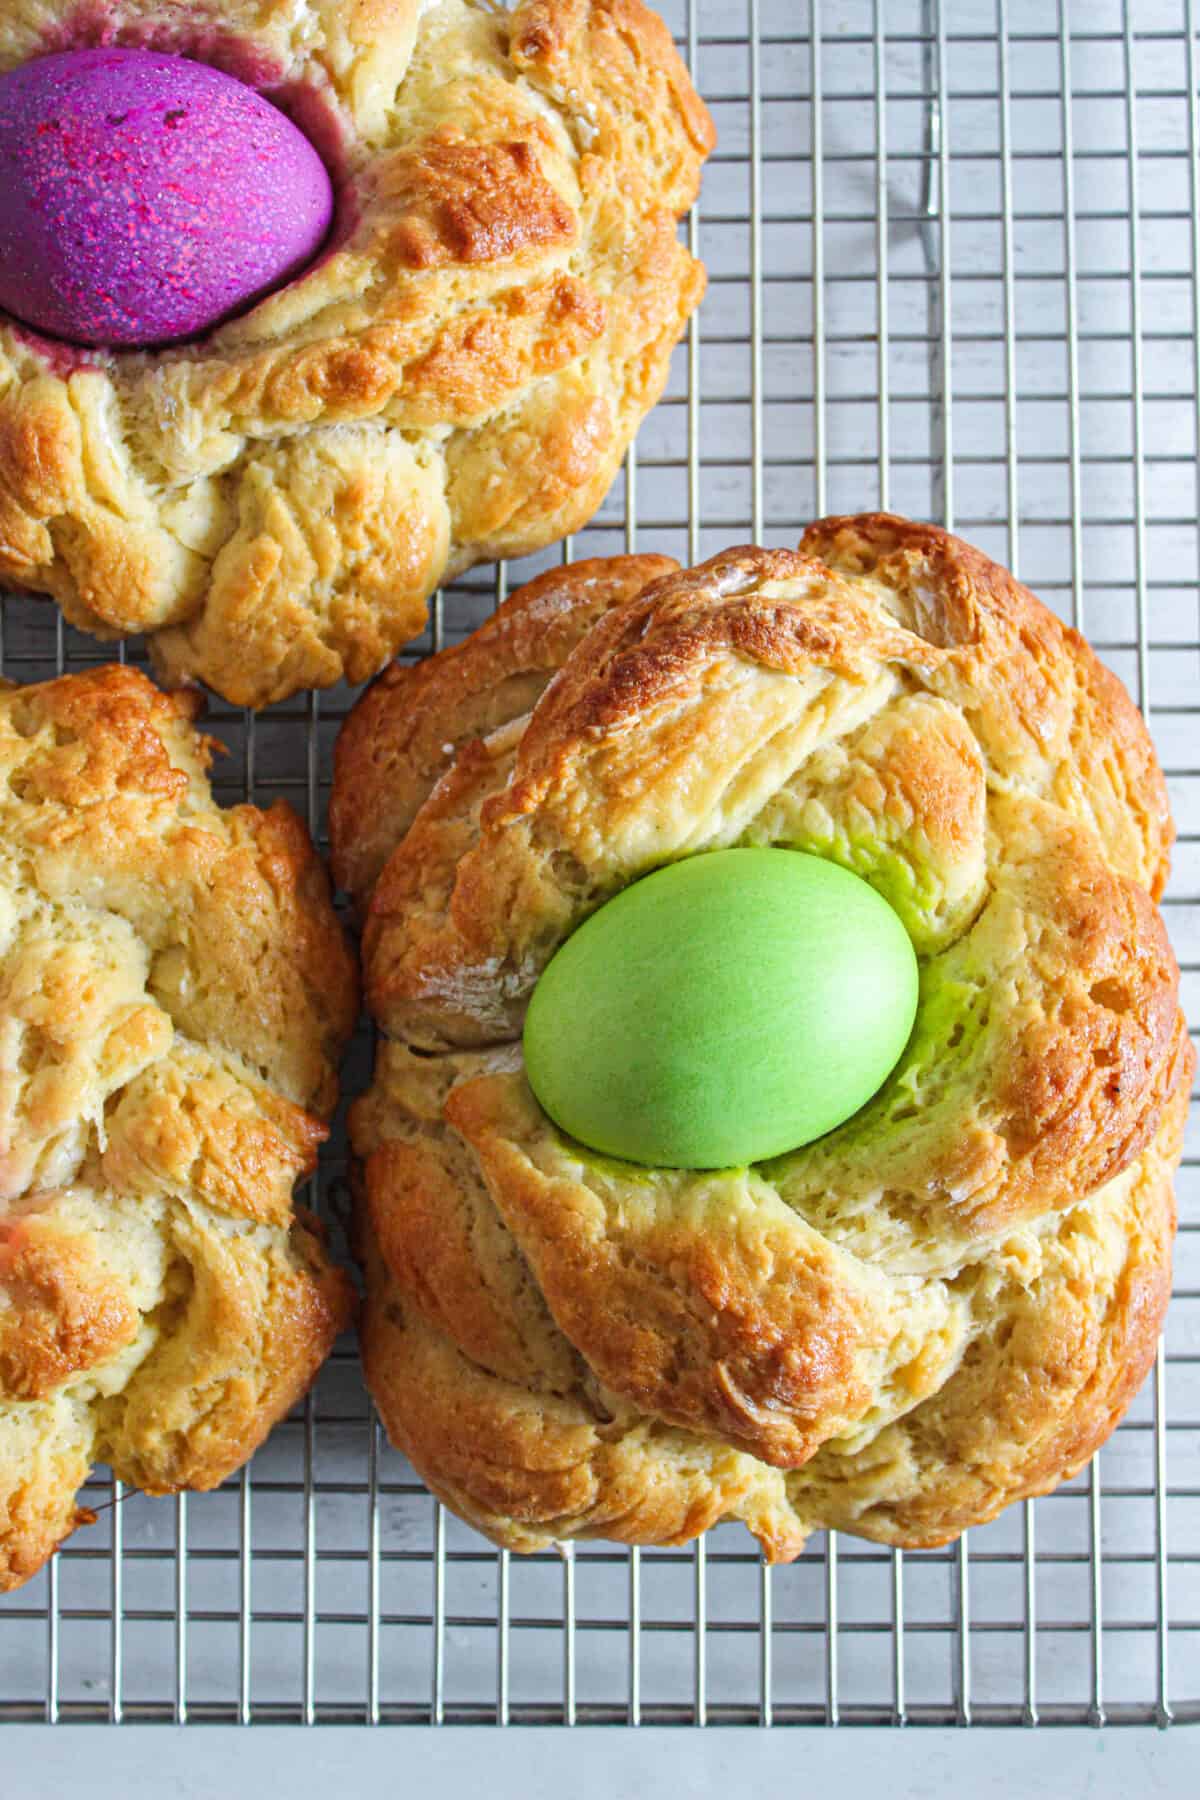
Step Nineteen: Bake Bread
Bake the loaves at 375 degrees Fahrenheit (190 degrees Celsius) for 28 to 34 minutes. Check for doneness with an instant-read thermometer at 28 minutes. Bread should be done when its internal temperature reaches 190 degrees Fahrenheit (88 degrees Celsius).
Step Twenty: Let Bread Cool
Transfer bread to a cooling rack. Allow to cool for 30 minutes before serving.
Nutrition Information for Gluten-Free Easter Bread
I used VeryWell Fit’s nutrition calculator to calculate approximate nutrition information for the bread as shown. If you’re curious, nutrition information for individual ingredients can be found in the USDA’s FoodData Central database.
Substitutions for Traditional Gluten-Free Easter Bread
If you have an extra Easter egg coloring kit, that can work instead of liquid food coloring. I like to use this egg coloring kit from Paas, which comes with cups that are the right size for putting the eggs in and an egg dipper that makes it easier to put the eggs in the cups without dropping them. You’ll still need the water and vinegar, though you can tweak the amounts according to the directions on the egg coloring kit.
Don’t have any potato starch or tapioca starch? Cornstarch can work in a pinch.
The eggs that go in the bread dough can be replaced with a flaxseed meal egg replacement. For each egg you want to replace, mix 1 tablespoon of flaxseed meal with 3 tablespoons of water. Let the mix sit long enough to form a gel. Mixing chia seed meal with water can work too.
The boiled eggs and eggs for the egg wash can’t be replaced.
Psyllium husk powder can replace the Xanthan gum.
Dairy butter can replace the vegetable oil and the vegan butter. Sometimes I’ll also use olive oil to replace the vegetable oil.
When I don’t have almond milk, I like to use coconut milk or dairy milk. It just requires adjusting the amount of fats.
The sugar can be replaced with about 48.75 grams of honey (honey works at about a 3:4 ratio with sugar). Adjust other liquid ingredients to suit. Just keep an eye on the dough as it rises, because honey can make the yeast work faster than it would with sugar!
Gluten-Free Easter Bread FAQs
It’s common for us to get questions about this gluten-free Easter bread! We tried to answer some of the most commonly asked questions here. If you think of one we haven’t answered yet, feel free to let us know in the comments section.
Why did my bread come out gummy or too dense?
Some common causes for gummy bread can include too much liquid or Xanthan gum. The bread might also have been baked at too low a temperature or not baked for enough time. (It should reach an internal temperature of 190 degrees Fahrenheit.) The cooling time can also give the bread’s interior extra time to set.
If the bread is too dense, something could have gone wrong with an important step for creating the correct texture. That can include not giving the dough enough time to rise, the room was too cold for the dough to rise correctly, or the yeast was inactive for some reason.
While you do want some air to be incorporated in the dough, it is also possible for the dough to have too many gas bubbles. With bread, the most common reason is that the dough was allowed to rise for too long. That can cause the bread to collapse while baking because it can’t support its structure.
How can I keep the bread from becoming too dry or too moist?
One thing to remember about gluten-free recipes is that they pretty much require using the exact amounts of the dry ingredients. They are super finicky that way! I recommend using a kitchen digital scale to measure the flour and cornstarch. This can help avoid the common problems caused by using too much or too little of the dry ingredients.
Is this a dairy-free and egg-free recipe?
When you use dairy alternatives, such as replacing dairy butter with vegan butter and vegetable oil and dairy milk with almond milk, it can be dairy-free.
Unfortunately, Easter bread is not egg-free. You can replace the eggs in the dough with flax eggs if you like, but it also contains an egg wash and hard-boiled eggs that are hard to replace for authentic Easter bread.
Can I make the bread dough in advance?
You can make the bread dough the night before and refrigerate it after letting it rise. Let it warm up to room temperature before shaping and baking it.
How long does the bread stay fresh once baked?
It stays fresh at room temperature for about 2 days when tightly wrapped. Refrigerate the hard-boiled eggs separately. For longer storage, freeze the bread and thaw slices as needed.
Can I use hot honey for the egg wash?
Okay, I think somebody was joking when he asked me this while I was making this last Easter. You can try, but keep in mind that it will come out a little bit spicy!
(Actually, I like the idea of experimenting with flavored honey, especially fruity ones like orange honey or apricot honey. Might try it sometime.)
Why is it called Easter bread anyway?
I’m sure the inclusion of Easter eggs was kind of a dead giveaway! The Easter eggs are part of the symbolism of Easter bread with their link to new life, rebirth, and Christ’s empty tomb.
In fact, Easter bread is very much an Orthodox tradition, according to the University of Helsinki’s Alexandra Grigorieva. The Mediterranean region might have been baking braided breads with eggs in the center before Christian times, though!
The bread symbolizes many of the familiar elements of the Christian tale of Jesus’ death and resurrection. The braided, round shape can symbolize the crown of thorns. The three braided strands represent the Holy Trinity. The bread can represent Jesus as the “Bread of Life.”
The sweetness and richness of traditional Easter bread also mark the end of the Lenten fast, along with the return of meat.
Other Bread Recipes To Try
Want to try more bread recipes? Here’s more interesting ones you might like if you had fun making this one!
- Slightly Sweet Gluten-Free Hawaiian Bread (Soft & Fluffy Rolls)
- The Best Gluten-Free French Baguette Recipe (Dairy-Free!)
- Soft & Fluffy Gluten-Free, Dairy-Free Dinner Rolls (Foolproof)
- Gluten-Free Irish Soda Bread: Step-by-Step for Perfect Loaves
- Gluten Free Cheddar Cheese Bread (Bread Machine Recipe)
From sweet rolls to rustic loaves and savory breads, these recipes are a great way to keep your gluten-free baking adventure going.
Tell Us How Your Bread Turned Out
Tried this recipe? Leave a comment and let us know how it worked for you. Did you make any tweaks or find a favorite way to serve it? Your experience can help other bakers get great results too.