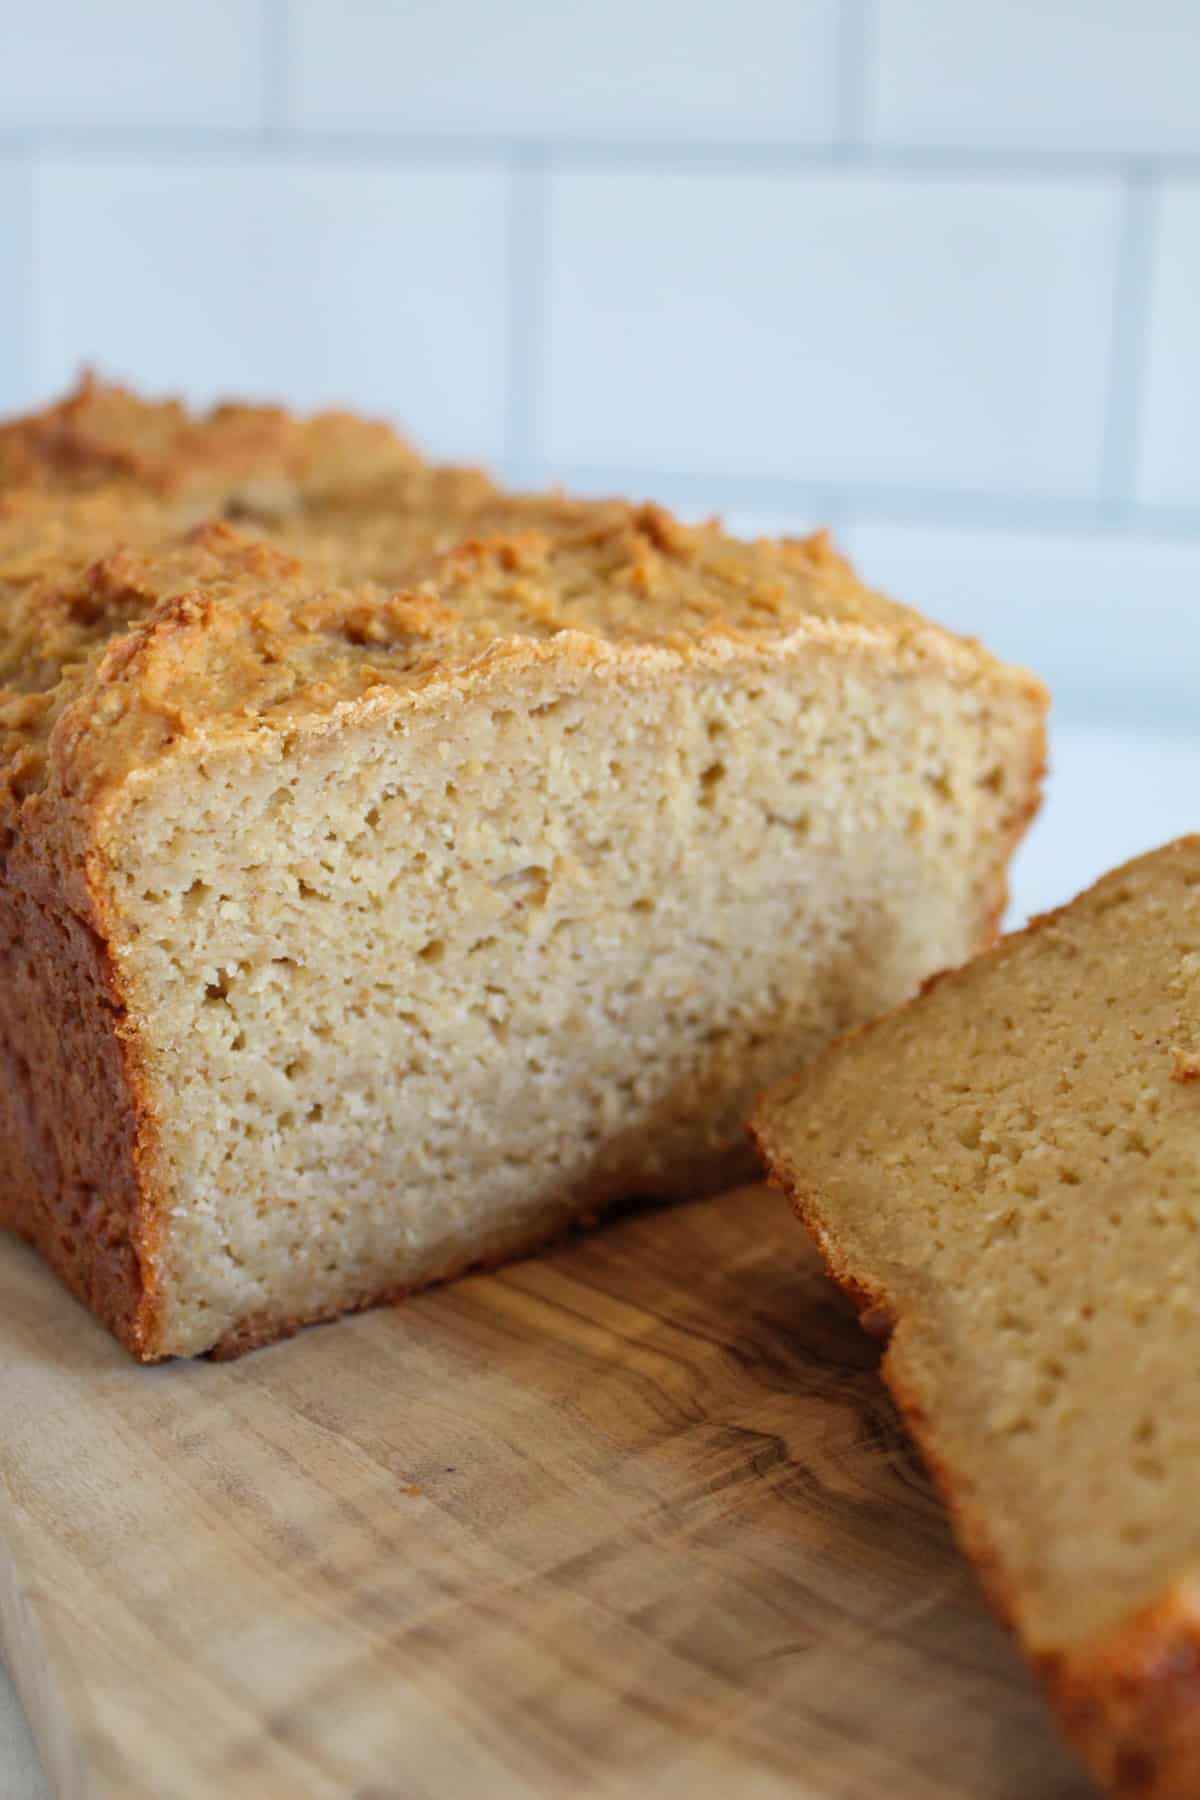
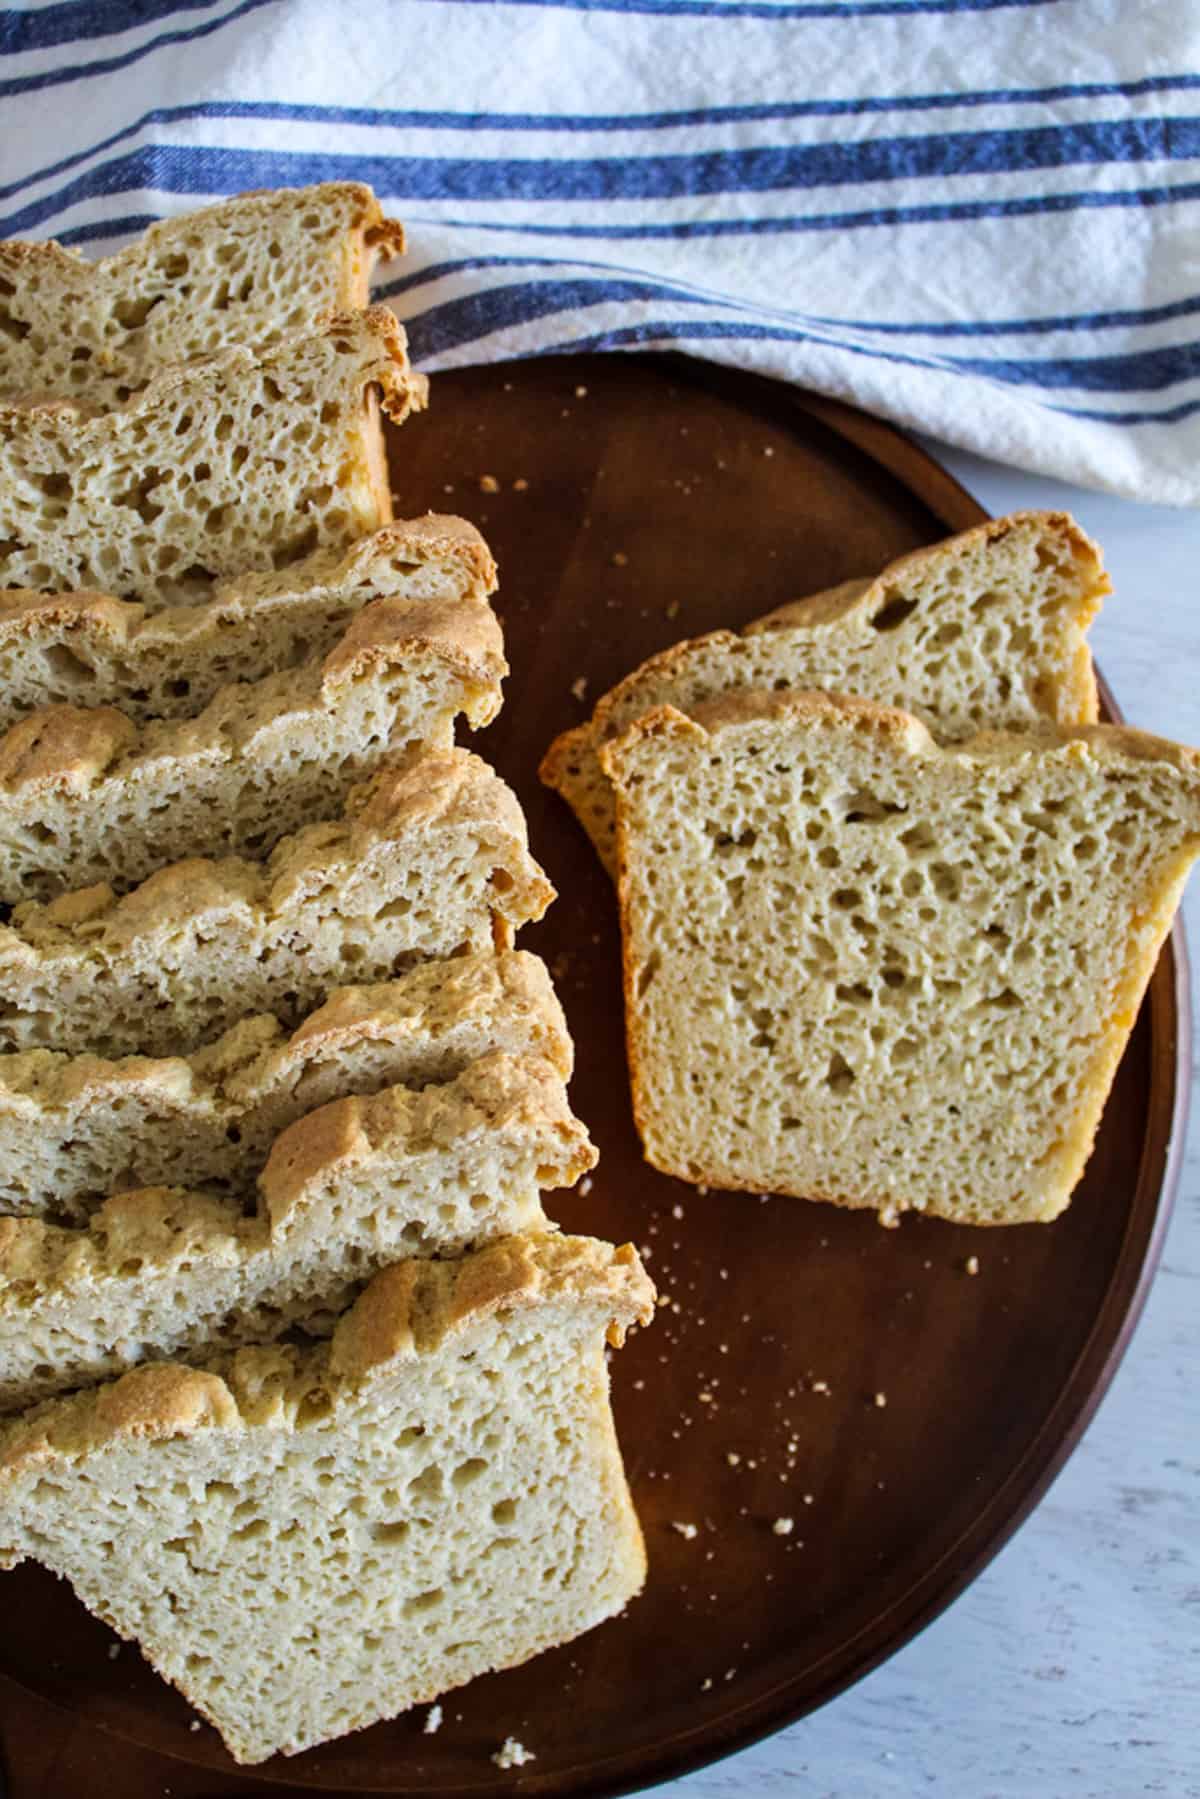
Have you tried making gluten-free artisan bread before, only to find it disappointingly dry and crumbly? Like many of the more advanced gluten-free recipes, artisan bread can be finicky!
With exactly the correct ingredients and method, though, you can make the perfect gluten-free artisan bread that will get gobbled up before you know it.
Table of Contents
The big secret: It matters which gluten-free flours you use. Some are better at absorbing moisture than others, which can make the bread more crumbly if you don’t adjust the amounts of liquid ingredients you use.
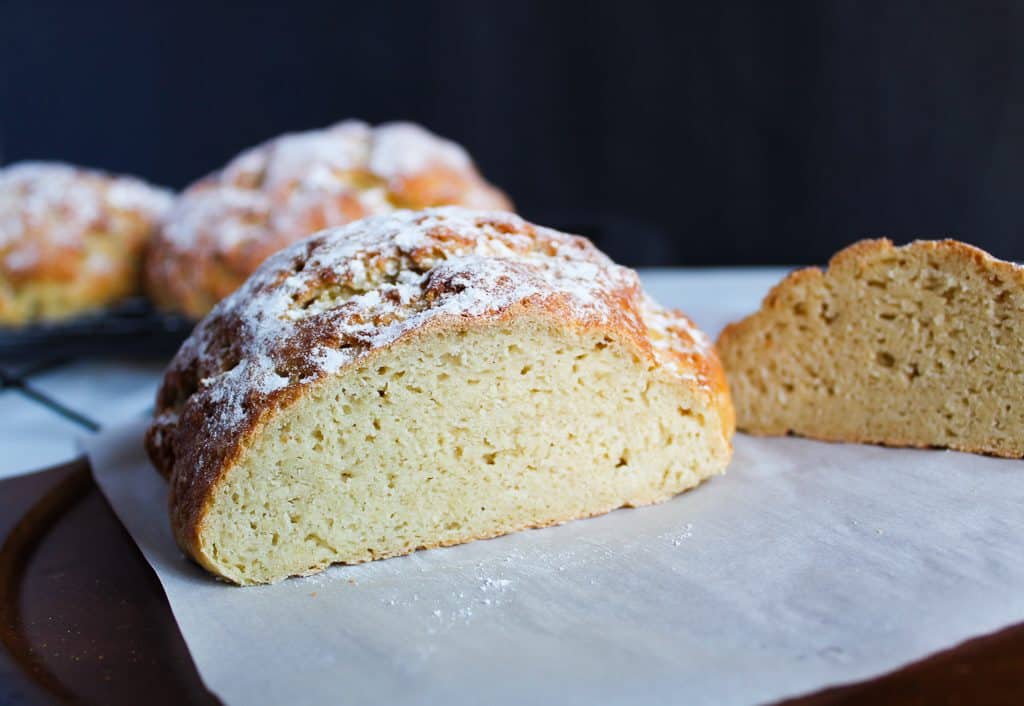
Getting exact measurements of some dry ingredients like flour also matters, which is one reason I insist on measuring the flour I use for gluten-free bread in grams rather than cups. A good digital food scale sure comes in handy!
What Is Artisan Bread, Anyway?
One thing most artisan bread recipes have in common is that they usually don’t use very complicated ingredients.
Want our human-written content to rank above AI-generated garbage? Help us out by clicking this button!
The main thing that makes artisan bread special is that it usually takes a long time to make. It requires a fermentation time that allows the bread to develop more organic acids and dough maturing properties that really bring out the flavor. So making artisan bread is usually an all-day process that requires a lot of waiting.
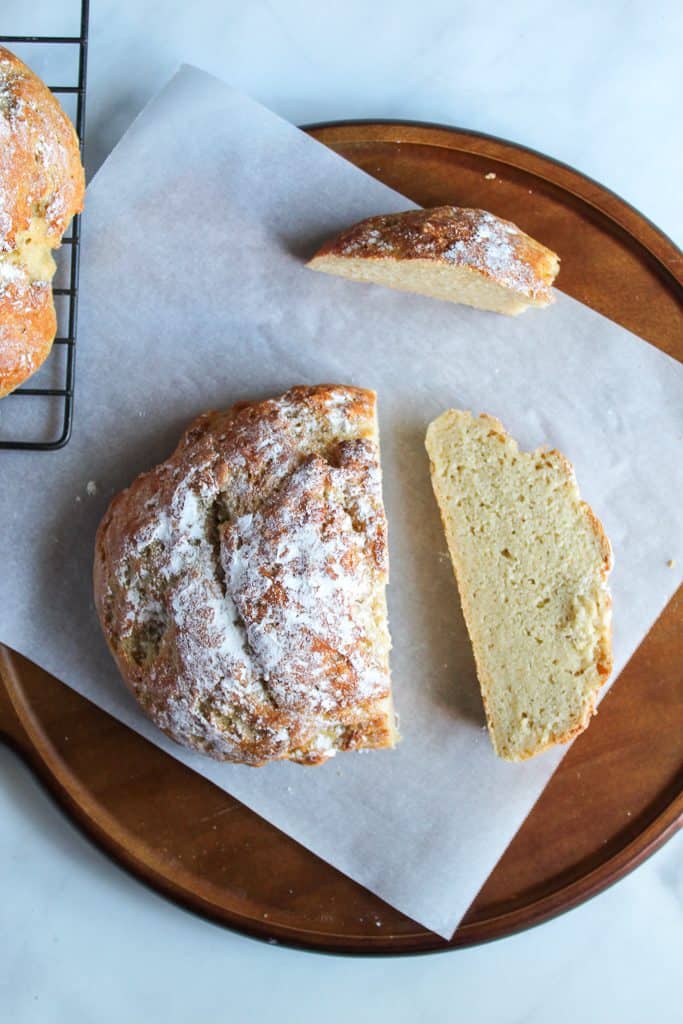
Artisan breads are made with very few additives, so they usually have a short shelf life. They usually have a better flavor than many of the mass-produced breads you’ll find in the grocery store, so the slices are more likely to disappear fast. Just don’t bother trying to save it!
So basically, the important thing is to avoid rushing the process. The dough for artisan bread requires time to ferment and more time to rise. That makes artisan bread really stand out from most other breads!
Why This Recipe for Gluten-Free Artisan Bread?
Making gluten-free bread can be a finicky process, and that’s especially true for gluten-free artisan bread. This recipe calls for three types of gluten-free flour to replace the gluten in wheat flour and exact measurements to help ensure that you don’t use too much or too little flour. This helps keep the bread from becoming too dry and crumbly or too moist and gummy.
Equipment Needed for Gluten-Free Artisan Bread
It’s important to have the correct equipment for artisan bread! Luckily, the equipment is as simple as the ingredients usually are.
- Digital Food Scale
- Stand Mixer with Bowl
- Whisk
- Mixing Bowls and Spoons
- Parchment Paper
- Large Bowl
- Large Containers With Lids (to hold the bread loaves as they rise. I use a few decently sized pots with lids.)
- Dutch Oven
Ingredients for Gluten-Free Artisan Bread
Here’s a quick list of ingredients in case you need to swing by the grocery store for a few things.
- Brown Rice Flour
- Sorghum Flour
- Tapioca Flour
- Xanthan Gum
- Salt
- Water
- Granulated Sugar
- Active Dry Yeast
- Olive Oil
Key Ingredient Roles for Gluten-Free Artisan Bread
The number one thing I like to do is measure some dry ingredients, like the flours, in grams. This helps ensure the exact ingredient amounts needed to get the perfect soft texture for the bread’s interior. The correct flour mix is also important because each of these flours brings something to the bread that helps replace the gluten that other flours like wheat or rye would have added.
Nutrition Comparison of Flours In This Gluten-Free Artisan Bread
The flour blend in this gluten-free artisan bread is carefully chosen for both baking performance and balance. Each flour contributes something different, whether that is structure, softness, chew, or nutritional value.
The chart below compares the nutrition of the main flours in this recipe, showing how brown rice flour, sorghum flour, and tapioca flour differ in calories, carbohydrates, fiber, protein, and fat.
The nutrition information in this chart is based on data from USDA FoodData Central.
| Flour | Calories | Carbs (g) | Fiber (g) | Protein (g) | Fat (g) |
|---|---|---|---|---|---|
| Brown rice flour | 363 | 76.5 | 4.6 | 7.19 | 2.78 |
| Sorghum flour | 359 | 76.6 | 6.6 | 8.4 | 3.3 |
| Tapioca flour | 333 | 86.7 | 3.3 | 0 | 0 |
Here’s a quick rundown of what each ingredient brings to this recipe.
Brown Rice Flour
250 grams brown rice flour (about 2 cups)
Brown rice flour is a common addition to gluten-free flour mixes for its mild, sweet, nutty flavor. According to USDA FoodData Central, it’s not as high in protein and fiber as some gluten-free flours, so it may not retain as much moisture. However, it does add a slight gritty texture that balances other ingredients that contribute to the soft texture of this bread.
Sorghum Flour
195 grams of sorghum flour (about 1 and 1/2 cups)
Sorghum flour is slightly higher in protein and fiber than brown rice flour, which means it will retain more moisture. It has a mild flavor and smooth texture that works well in the flour mix.
Tapioca Flour
300 grams tapioca flour (2 and 1/2 cups)
The thing to remember about tapioca flour is that it is not quite the same thing as cassava flour.
Both flours come from the same source, the cassava root.
- However, cassava flour is made from the whole cassava root, which means it retains more of the nutritional benefits, such as a higher fiber content.
- Tapioca flour is primarily made using the starch in the cassava root pulp.
So these two variations of flour made with cassava root might not be entirely interchangeable.
The nutrition information for tapioca flour comes from the USDA’s FoodData Central entry for the Just About Food brand.
Xanthan Gum
2 teaspoons xanthan gum
Xanthan gum is a common addition to gluten-free flour mixes as a thickener and gluten replacement. It supports the structure and moisture retention of baked goods like this artisan bread.
Salt
1 tablespoon salt
Salt helps support many of the chemical reactions that add to this bread’s flavor. In recipes that contain yeast, it also helps keep the yeast’s activity under control.
It is important to avoid adding too much salt because it can kill the yeast.
Water
2 1/2 cups warm water
The water should be heated to 105 to 115 degrees Fahrenheit (40.5 to 46.1 degrees Celsius) to activate the active dry yeast. It’s important to keep the water below 120 degrees Fahrenheit to avoid killing the yeast. Also, if the water is below 105 degrees Fahrenheit, the yeast might not activate.
Active Dry Yeast
21 grams (about 2 tablespoons) active dry yeast
Yeast is a biological leavening agent, meaning it’s actually alive. The active dry yeast ferments the sugar, producing carbon dioxide bubbles that give this artisan bread its soft interior.
Olive Oil
1/3 cup olive oil
Olive oil provides most of the fats needed for this bread. (No need to freak – unlike butter, olive oil contains mostly heart-healthy monounsaturated fats!) Single-source extra-virgin olive oil is best for breads because it is the least processed and often has a robust flavor profile.
Printable Gluten-Free Artisan Bread Recipe Card
Ingredients
- 250 grams brown rice flour about 2 cups
- 195 grams sorghum flour about 1 1/2 cups
- 300 grams tapioca flour about 2 1/2 cups
- 2 teaspoons xanthan gum
- 1 Tablespoon salt
- 2 1/2 cups warm water warned to 100F
- 30 grams granulated sugar about 2 Tablespoons
- 21 grams active dry yeast about 2 Tablespoons
- 1/3 cup olive oil
Instructions
- Bring all ingredients up to room temperature.
- Heat water to 105 to 115 degrees Fahrenheit.
- In a 4-cup measuring cup or medium bowl, mix the hot water with the sugar. Stir until almost dissolved.
- Add the yeast and set aside to proof for 5 minutes.
- In the bowl of a stand mixer or large mixing bowl, add the flours, salt, and xanthan gum. Whisk to combine.
- In the mixing bowl, with the flours, add in the proofed water-yeast mixture and the olive oil. Mix on low speed for 30 seconds. Stop the machine and scrape down the sides of the bowl.
- Turn the mixer to medium speed and beat for 9 minutes.
- Transfer the dough into a bowl and cover tightly with a lid. Refrigerate the batter for at least 6 hours.
- Place sheets of parchment paper on the counter to provide a work surface. Divide the dough into thirds and place each third on a piece of parchment paper.
- Form dough into a round loaf. It doesn’t have to be perfectly circular. A lot of genuine artisan bread looks a little lopsided or roughly oval-shaped.
- Transfer the loaves to a few pots that are big enough to allow room to rise and cover them with lids. An easy way to do this is to lift the pieces of parchment paper with the loaves on them and place them in the pots. Allow the loaves to rise until their volume increases by about 50%.
- Preheat oven to 450F. While the oven is preheating, place a Dutch oven with the lid on, into the oven to heat. See the instructions below for preparation without a Dutch oven.
- Once the bread is ready to bake, use potholders to very carefully remove the pot from the oven. Place the bread, parchment paper and all, from the large pot into the hot Dutch oven. Put the lid on the Dutch oven.
- Bake at 450F for 40 minutes. After 40 minutes, remove the lid and continue baking for about 10 minutes.
- Test the bread for doneness with an instant-read thermometer (it should register 205F).
- Remove the baked bread from the oven and very carefully lift the parchment paper from the Dutch oven to a wire rack to cool.
- Let the bread cool for at least 4 hours before slicing.
Nutrition
Step-By-Step Method for Making Gluten-Free Artisan Bread
The number one thing to remember when making artisan bread is that it takes patience. It’s pretty common to get this started first thing in the morning or the night before to give it time to refrigerate. So let’s jump right into making this bread.
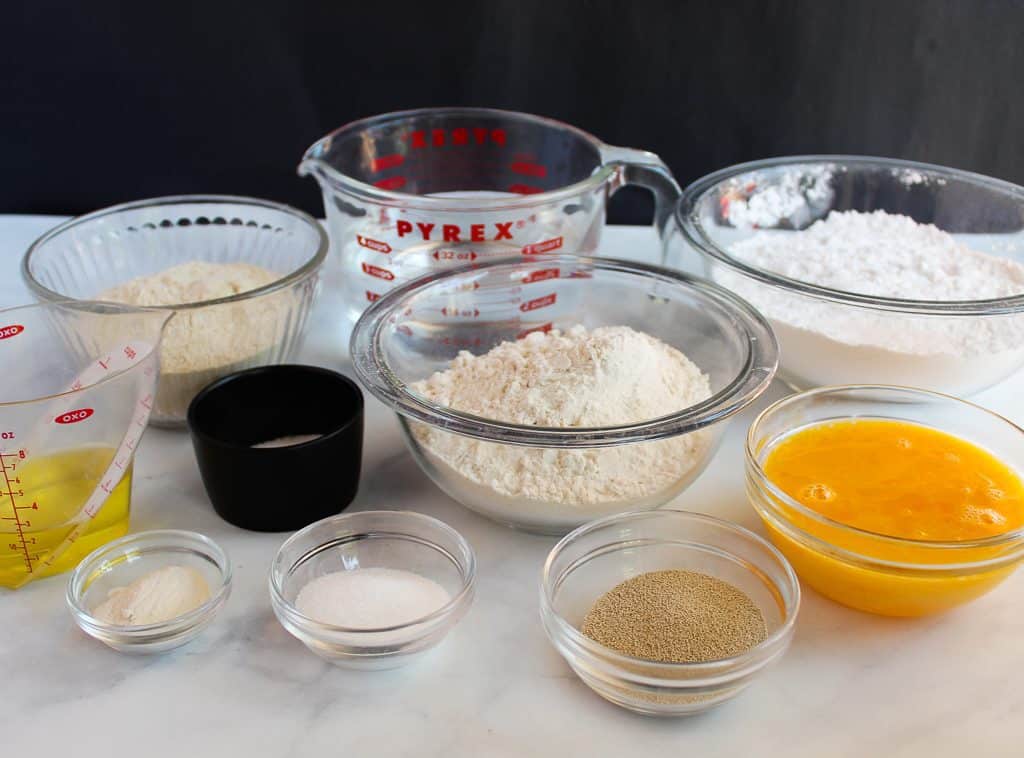
Step One: Bring All Ingredients Up to Room Temperature
Room-temperature ingredients produce the best results when making many baked goods, such as artisan bread. It usually won’t take more than an hour or so to bring most of them up to room temperature.
Step Two: Activate Yeast
Heat the water to 105-115 degrees Fahrenheit (40.5 to 46.1 degrees Celsius). Use a thermometer to double-check the temperature because it’s difficult to overstate the importance of the correct temperature range when activating yeast.
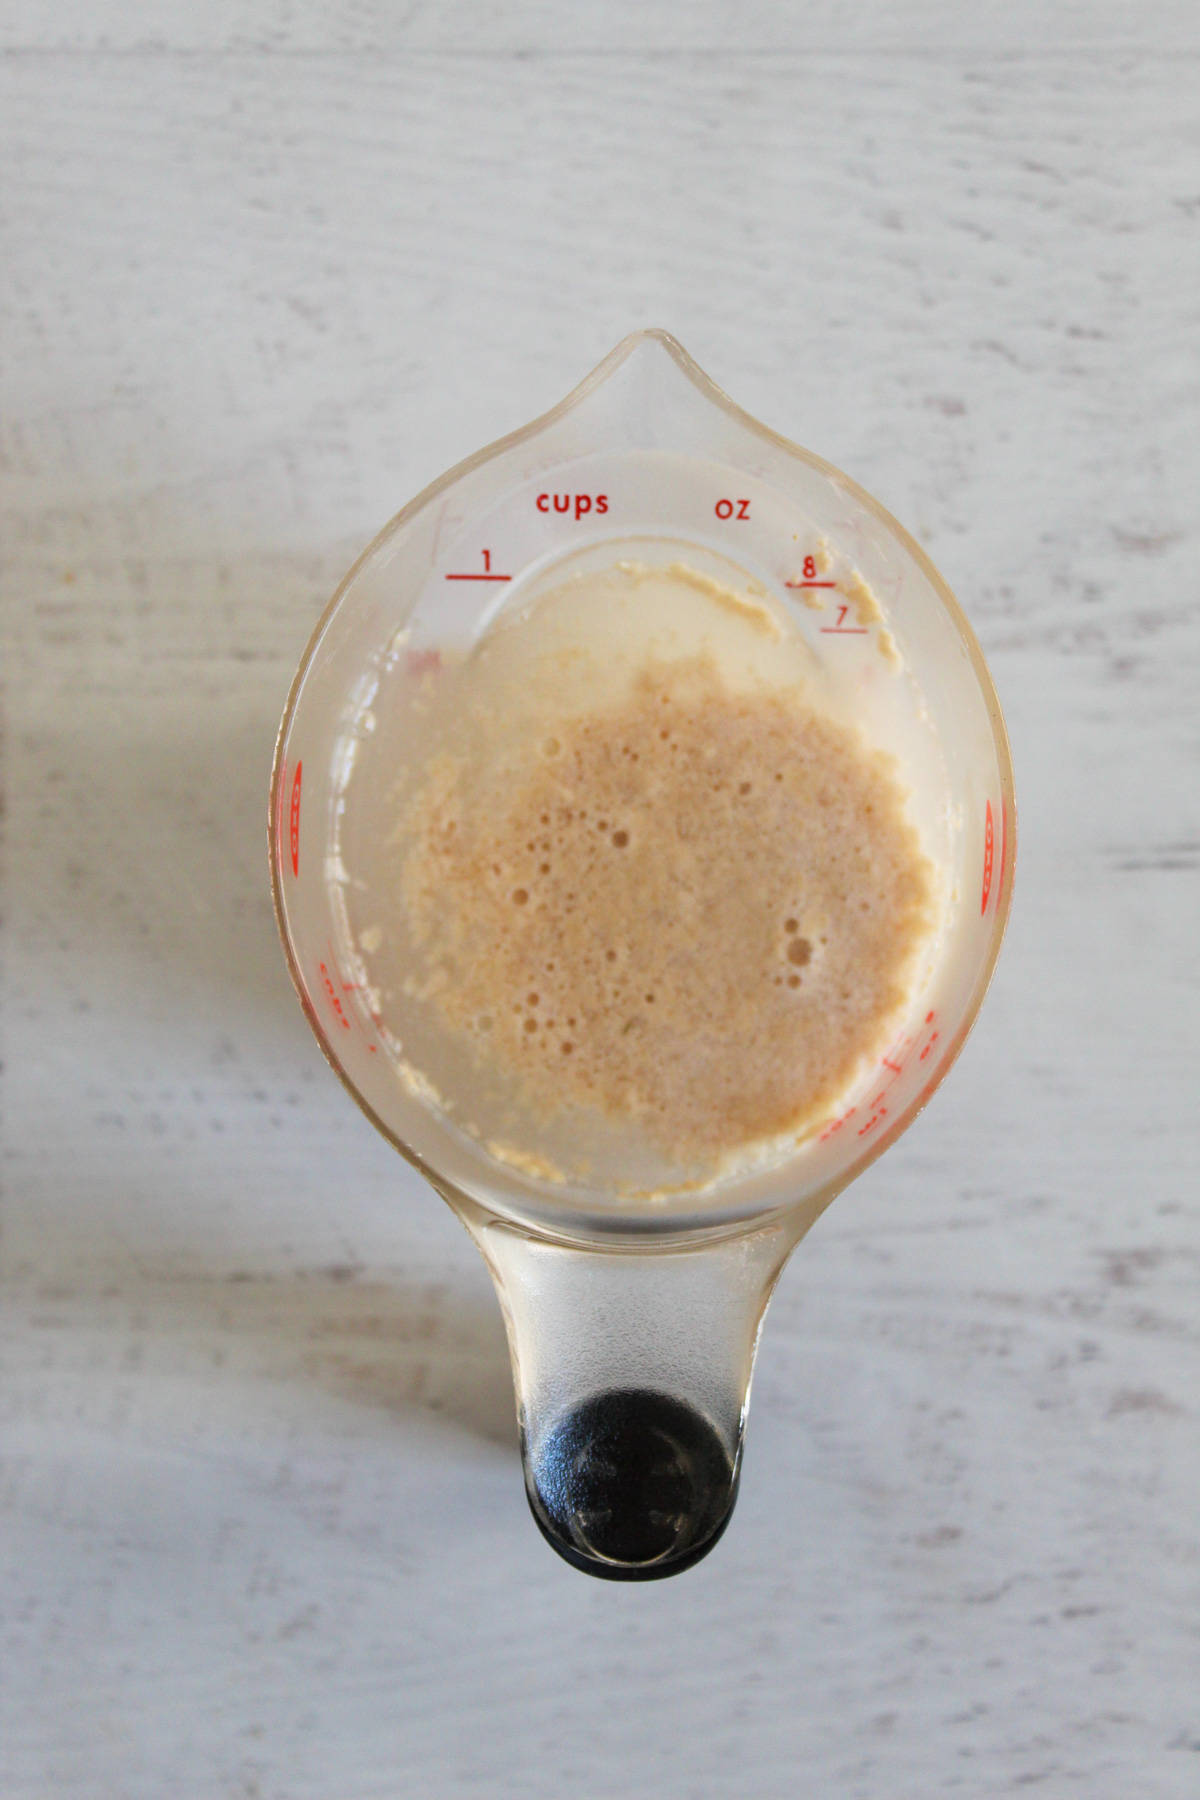
Once water is at the correct temperature, stir in the sugar and yeast. Set aside and let stand for 5 minutes to activate the yeast.
Step Three: Mix Flours, Salt, and Xanthan Gum
Add flours, salt, and xanthan gum to the bowl of a stand mixer. Whisk to combine. (An ordinary handheld whisk will do if you don’t want to dig the whisk attachment out.)
Step Four: Add Yeast Mixture and Olive Oil
Once the yeast has finished proofing, add the yeast mixture and olive oil to the flour mixture. Mix on low speed for 30 seconds.
Stop the machine and scrape down the sides of the bowl. Then turn the mixer to medium speed and beat for 9 minutes.
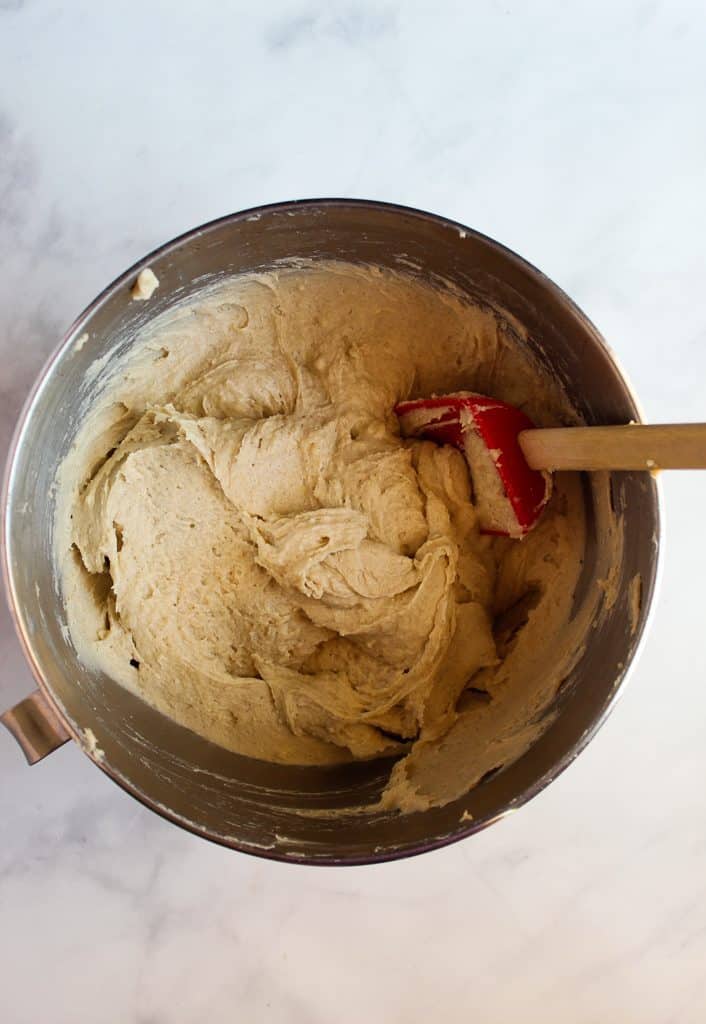
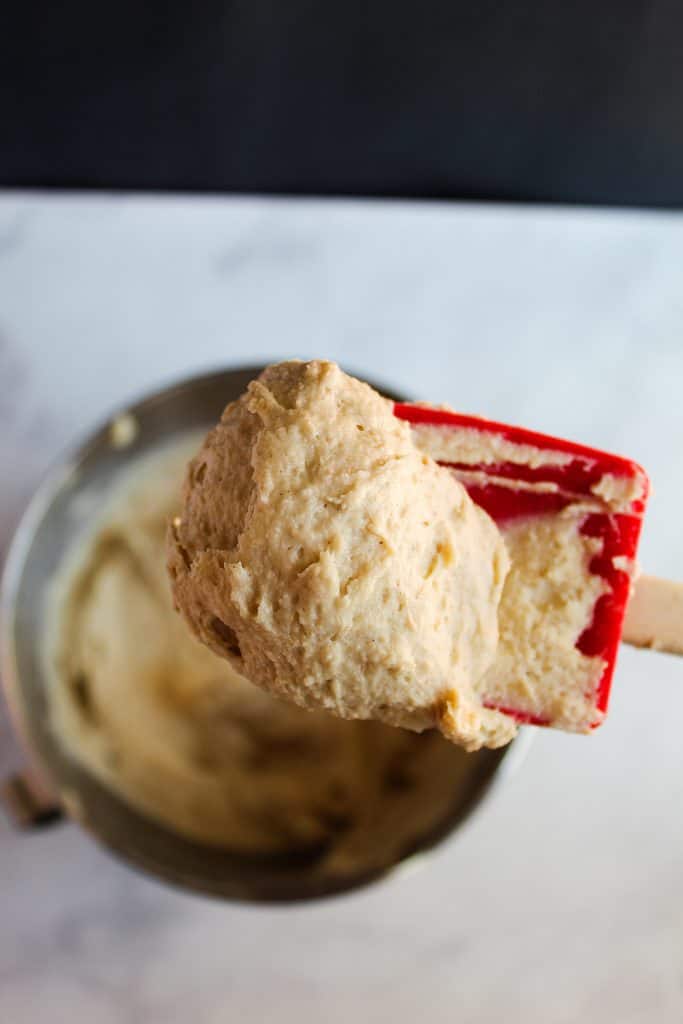
The thing to remember is that this dough will be thick and a little sticky once it’s completely mixed. This is normal. Gluten-free artisan bread will start with a mix that is more like dough than batter.
Step Five: Refrigerate Dough
Transfer the dough to an airtight container. Seal with the lid and place in the refrigerator. Allow to refrigerate for at least six hours.
Step Six: Form Loaves
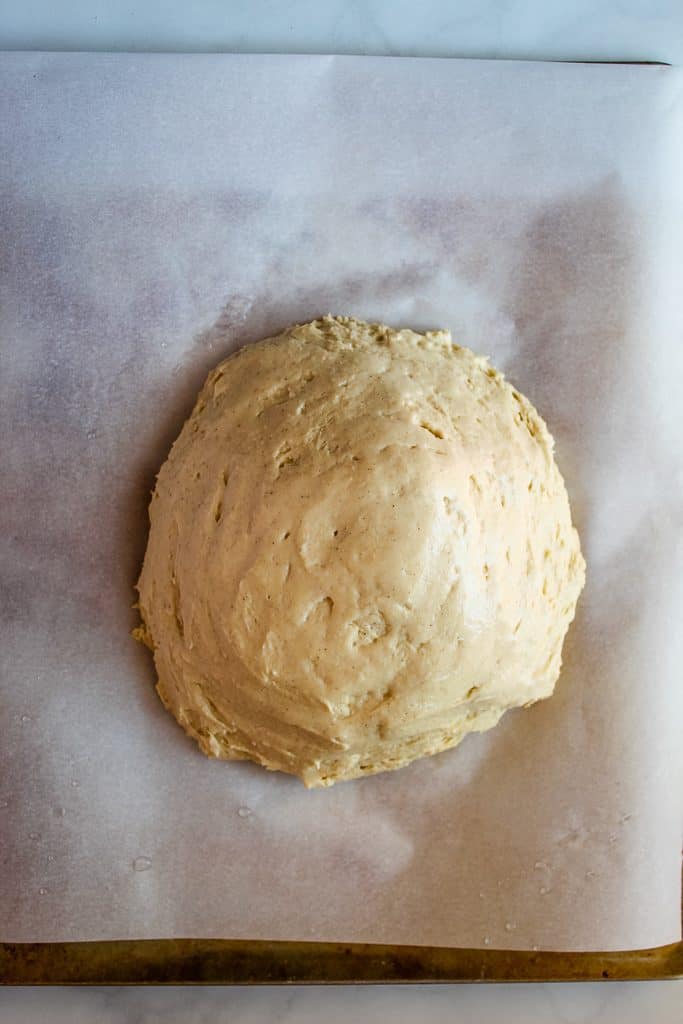
Set out three pieces of parchment paper to form three work surfaces. Divide the dough into thirds and place each third on a piece of parchment paper. Form dough into a round loaf. It doesn’t have to be perfectly circular. A lot of genuine artisan bread looks a little lopsided or roughly oval-shaped.
Optional: Wet your hands slightly and smooth the tops of the loaves for a smoother finish. It should look roughly like the image below.
Step Seven: Allow Dough to Rise
Transfer the loaves to a few pots that are big enough to allow room to rise and cover them with lids. An easy way to do this is to lift the pieces of parchment paper with the loaves on them and place them in the pots. Allow the loaves to rise until their volume increases by about 50%.
Step Eight: Preheat Oven
While the dough is rising, preheat the oven to 450 degrees Fahrenheit (232 degrees Celsius). Prepare a Dutch oven by placing it in the oven until hot. Before moving on to the next step, remove the Dutch oven with a couple of oven mitts.
Step Nine: Transfer Loaves to Dutch Oven
Transfer the parchment paper with the loaves still on it to the heated Dutch oven. Put the lid on the Dutch oven.
Step Ten: Place Cookie Sheet With Water on Bottom Rack
Here’s a trick for getting a crispier crust! A few minutes before putting the loaves in the oven (and preferably while the oven is still preheating), place a cookie sheet half-filled with water on the bottom rack of your oven. This will generate steam that makes the bread crust a little crispier.
Step Eleven: Bake Bread
Place the Dutch oven with your bread loaves in the oven. Bake 40 minutes. After 40 minutes, remove the lid and continue baking for about 10 minutes.
Test the bread for doneness with an instant-read thermometer. When your bread is done, the thermometer should read 205 degrees Fahrenheit (96 degrees Celsius) when inserted into the center of a loaf.
Step Twelve: Let Bread Cool
Remove the baked bread from the oven and very carefully lift the parchment paper from the Dutch oven to a wire rack to cool. Allow the bread to cool for at least four hours before slicing.
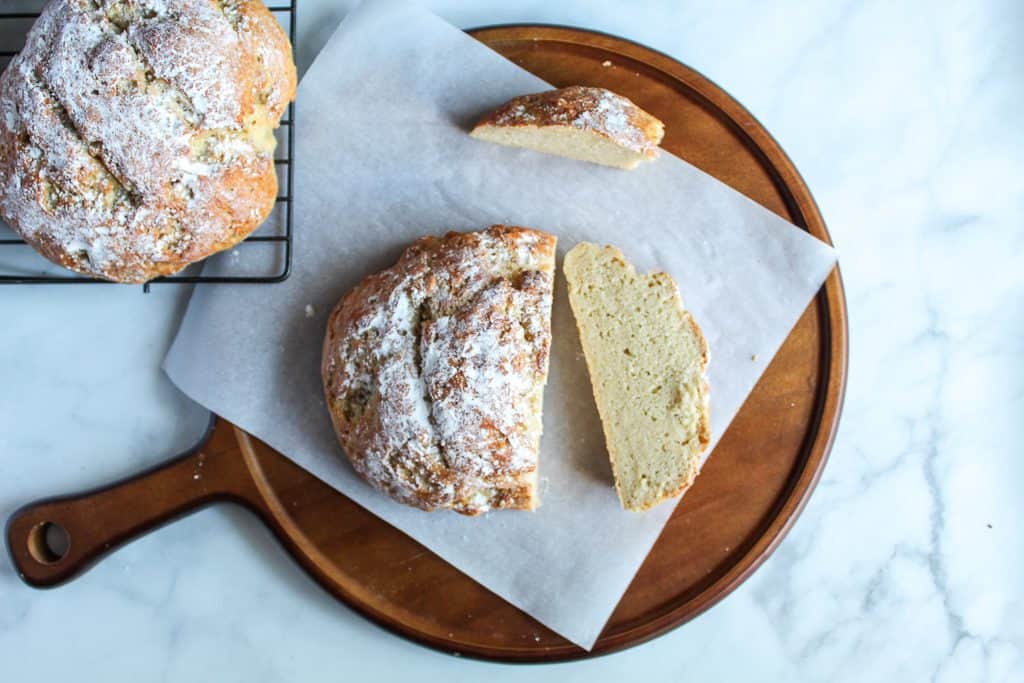
Took a while, didn’t it? Believe me, it’s worth it for genuine gluten-free artisan bread. Once it’s cool, serve with butter or jelly, or as a complement to a favorite dinner that might need a slice of bread to wipe the juices up.
Substitutions for This Gluten-Free Artisan Bread
I’ll often use psyllium husk powder to replace the xanthan gum. Psyllium husk powder is close enough to xanthan gum to substitute at a 1:1 ratio.
The salt can be cut in half if you are on a low-salt diet.
White rice flour is the closest substitute for brown rice flour. Because they’re both made using rice, they can be swapped at nearly a 1:1 ratio. Here’s a good guide to replacing brown rice flour.
Millet flour is close enough to sorghum flour to substitute at nearly a 1:1 ratio. Millet flour has slightly more fiber than sorghum flour, so it may produce a firmer artisan bread. Here’s our guide to replacing sorghum flour.
Frequently Asked Questions About Gluten-Free Artisan Bread (FAQ)
This artisan bread is one of our most advanced recipes, so it’s understandable if you have questions. Below are answers to some common ones, and if you still need help, leave your question in the comments. We’ll answer as soon as we can.
Why didn’t my loaves of bread rise much?
There are two common reasons that bread dough that uses yeast doesn’t rise much:
- There was a problem with the yeast. It might not have activated properly, it might have been old yeast, or something might have killed it. Yeast won’t activate properly in water that is too cold. Water that is too hot can kill the yeast.
- The dough didn’t have the right conditions or enough time to rise. The dough needs to rise at room temperature and should be covered. In this case, it also needs enough time to rise by 50%, so it pays to leave it alone for a little while.
Why did my gluten-free artisan bread turn out dense?
Dense bread usually means the dough did not rise enough, the yeast was inactive, or the flour measurements were off. It can also happen if the dough was too dry. Gluten-free bread dough should usually look thicker than batter, but still soft and slightly sticky.
Why is the inside gummy?
A gummy center usually means the loaf needed more bake time or more cooling time. Bread should have an internal temperature of 205 degrees Fahrenheit when it is done baking. Gluten-free breads continue setting as they cool, so slicing too early can make the crumb seem wet and sticky even if the crust looks done.
Why is my dough too wet to shape?
Gluten-free dough is often softer than wheat dough, so it can be a little trickier to handle. If it won’t hold its shape properly, the dough may need a little more flour or a little more time to rest. Letting the dough sit for a little bit can help the flour hydrate and firm up.
Why is my dough too dry or stiff?
Too much flour or too little liquid can cause dry or stiff dough. Gluten-free flours absorb moisture differently, so even a small difference in measurement can change the texture. For this reason, I’ll insist on measuring the flour in grams when possible.
Why didn’t I get a crusty artisan-style crust?
A crusty loaf usually depends on high-heat baking and steam. If the crust stayed soft, the oven may not have been hot enough, or there may not have been enough steam during the first part of baking. A Dutch oven or steam pan can make a big difference.
Why did my loaves spread out instead of rising?
If the loaf spread sideways, the dough may have been too loose, overproofed, or not shaped tightly enough. Gluten-free dough often needs some adjustments to hold its structure, so shaping and dough consistency matter a lot.
Why did my bread collapse after baking?
A loaf that rises and then sinks often means the dough rose too much or the bread was underbaked. If the structure was not fully set in the oven, the bread can collapse as it cools.
Making sure the dough rises by no more than 50% of its volume can help, as well as making sure it bakes to an internal temperature of 205 degrees Fahrenheit.
Keep Baking: Gluten-Free Recipes and Pro Tips You Don’t Want to Miss
If you’re enjoying this gluten-free artisan bread, there’s plenty more to explore. From soft, buttery rolls to crispy, cheesy favorites, these recipes will help you build confidence and variety in your gluten-free baking.
You’ll also find helpful guides on ingredient swaps and techniques, so you can better understand how different elements work together and get more consistent results every time you bake.
- Gluten-Free Garlic Bread with Cheese
- Buttery Gluten-Free Biscuits
- Gluten-Free Potato Rolls
- Gluten-Free Breadsticks
And here are some helpful gluten-free baking tips:
- How to Substitute Xanthan Gum in Gluten-Free Baking
- Alternatives to Xanthan and Guar Gum in GF Baking
- Gluten-Free Flour Substitutes
These recipes and guides are a great next step for expanding your gluten-free baking repertoire with confidence. If you enjoy this recipe, will you give it a rating and a share?
Share Your Artisan Bread Tips and Baking Stories
Have you tried making this gluten-free artisan bread? I’d love to hear how it turned out. Share your tips, tweaks, or even challenges in the comments. Whether you nailed that perfect crust or are still working on the crumb, your experience could help someone else bake a better loaf.