It’s hard not to love pizza, but sometimes, pizza doesn’t love us back. When those pizza cravings hit, it can often be hard to find a gluten-free option on short notice. With this gluten-free coconut flour pizza crust, all that’s left is to have your favorite pizza toppings on hand before those cravings are satisfied.
This recipe is perfect for those who are gluten-free by necessity, but also if you’re looking to lower your carb intake while finding a pizza crust that is crispy, sturdy, and satisfying. It’s made with simple, real ingredients. This recipe doesn’t require yeast, so there’s no long wait while the dough rises. Just mix, bake, top, and enjoy. In under an hour, you’ll have a hot and fresh, low-carb pizzas on the table that taste great!
Table of Contents
Whether you’re making a quick weeknight dinner, hosting a gluten-free friend, or experimenting with low-carb alternatives, this coconut flour pizza crust gives you a reliable base you can customize any way you like. So if you’ve been disappointed by gluten-free pizza before, this might be the crust that changes your mind.

This article walks you through the recipe step-by-step, and along the way, you’ll find helpful tips and tricks and plenty more about coconut flour. Let’s make pizza night easy, fun, and delicious again!
Why This Pizza Crust Works
Pizza will always be a top meal for everyone, until one day, your body decides that it’s not. This often happens for digestive reasons, gluten sensitivity, or simply needing a dietary change, such as lowering your carb intake. Whatever the reason may be, this coconut flour pizza crust is a great recipe to have on hand. Here are a few more reasons why this recipe just works!
- Made with just 7 ingredients
- Low-carb pizza crust
- Coconut flour is high in fiber and protein
- From mixing the flour to oven-fresh pizzas in under an hour
- Naturally gluten-free!
Ingredients at-a-Glance
What most people don’t realize about coconut flour is that it behaves very differently from traditional flour. It absorbs a lot more moisture, so it needs the right balance of eggs and liquids in the recipe. But, when done correctly, it creates a surprisingly sturdy and lightly crisp crust with a wonderfully subtle flavor. It’s the perfect pairing with your favorite pizza toppings and requires just 20 minutes of prep time and the following ingredients:
- Eggs
- Coconut Milk
- Coconut Flour: I love this super fine, organic coconut flour
- Onion Powder
- Garlic Powder
- Baking Soda
- Oregano
- Your choice of toppings!
Measurements for each ingredient, along with instructions for making this coconut flour pizza crust, are in the printable recipe card below.

Printable Coconut Flour Pizza Crust Recipe Card
Ingredients
- 3 large eggs, room temperature
- 1 cup coconut milk, unsweetened
- ½ cup coconut flour (65 grams)
- ½ tsp baking soda
- 1 tsp onion powder
- 1 tsp garlic powder
- 1 tsp oregano, dried
Instructions
- Preheat the oven to 400℉. Line a baking sheet or pizza pan with parchment paper, then grease the paper with olive oil.
- In a medium bowl, beat the eggs. Add the milk and mix well.
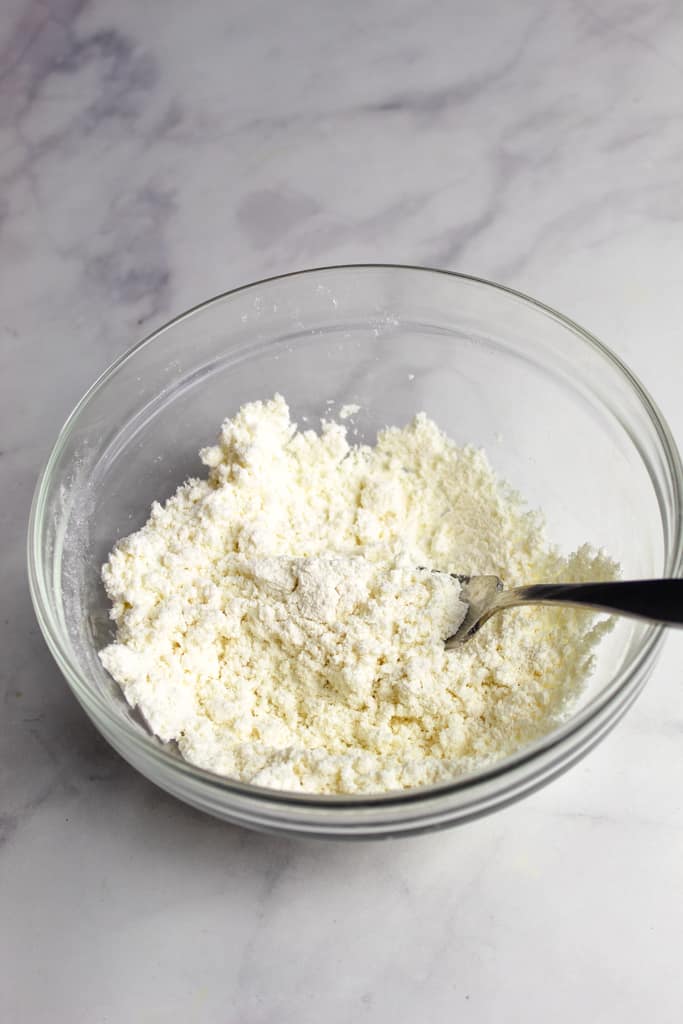
- In a small bowl, whisk together the coconut flour, baking soda, and spices.
- Add the dry ingredients to the wet ingredients and mix them altogether with a rubber spatula.
- Let the mixture rest for about 10 minutes.
- Using a spatula or slightly wet hands, spread the dough onto the parchment paper and spread it out into a large circle.
- Bake for 10-15 minutes, until the edges start to turn golden, and the center is set and just starting to color.
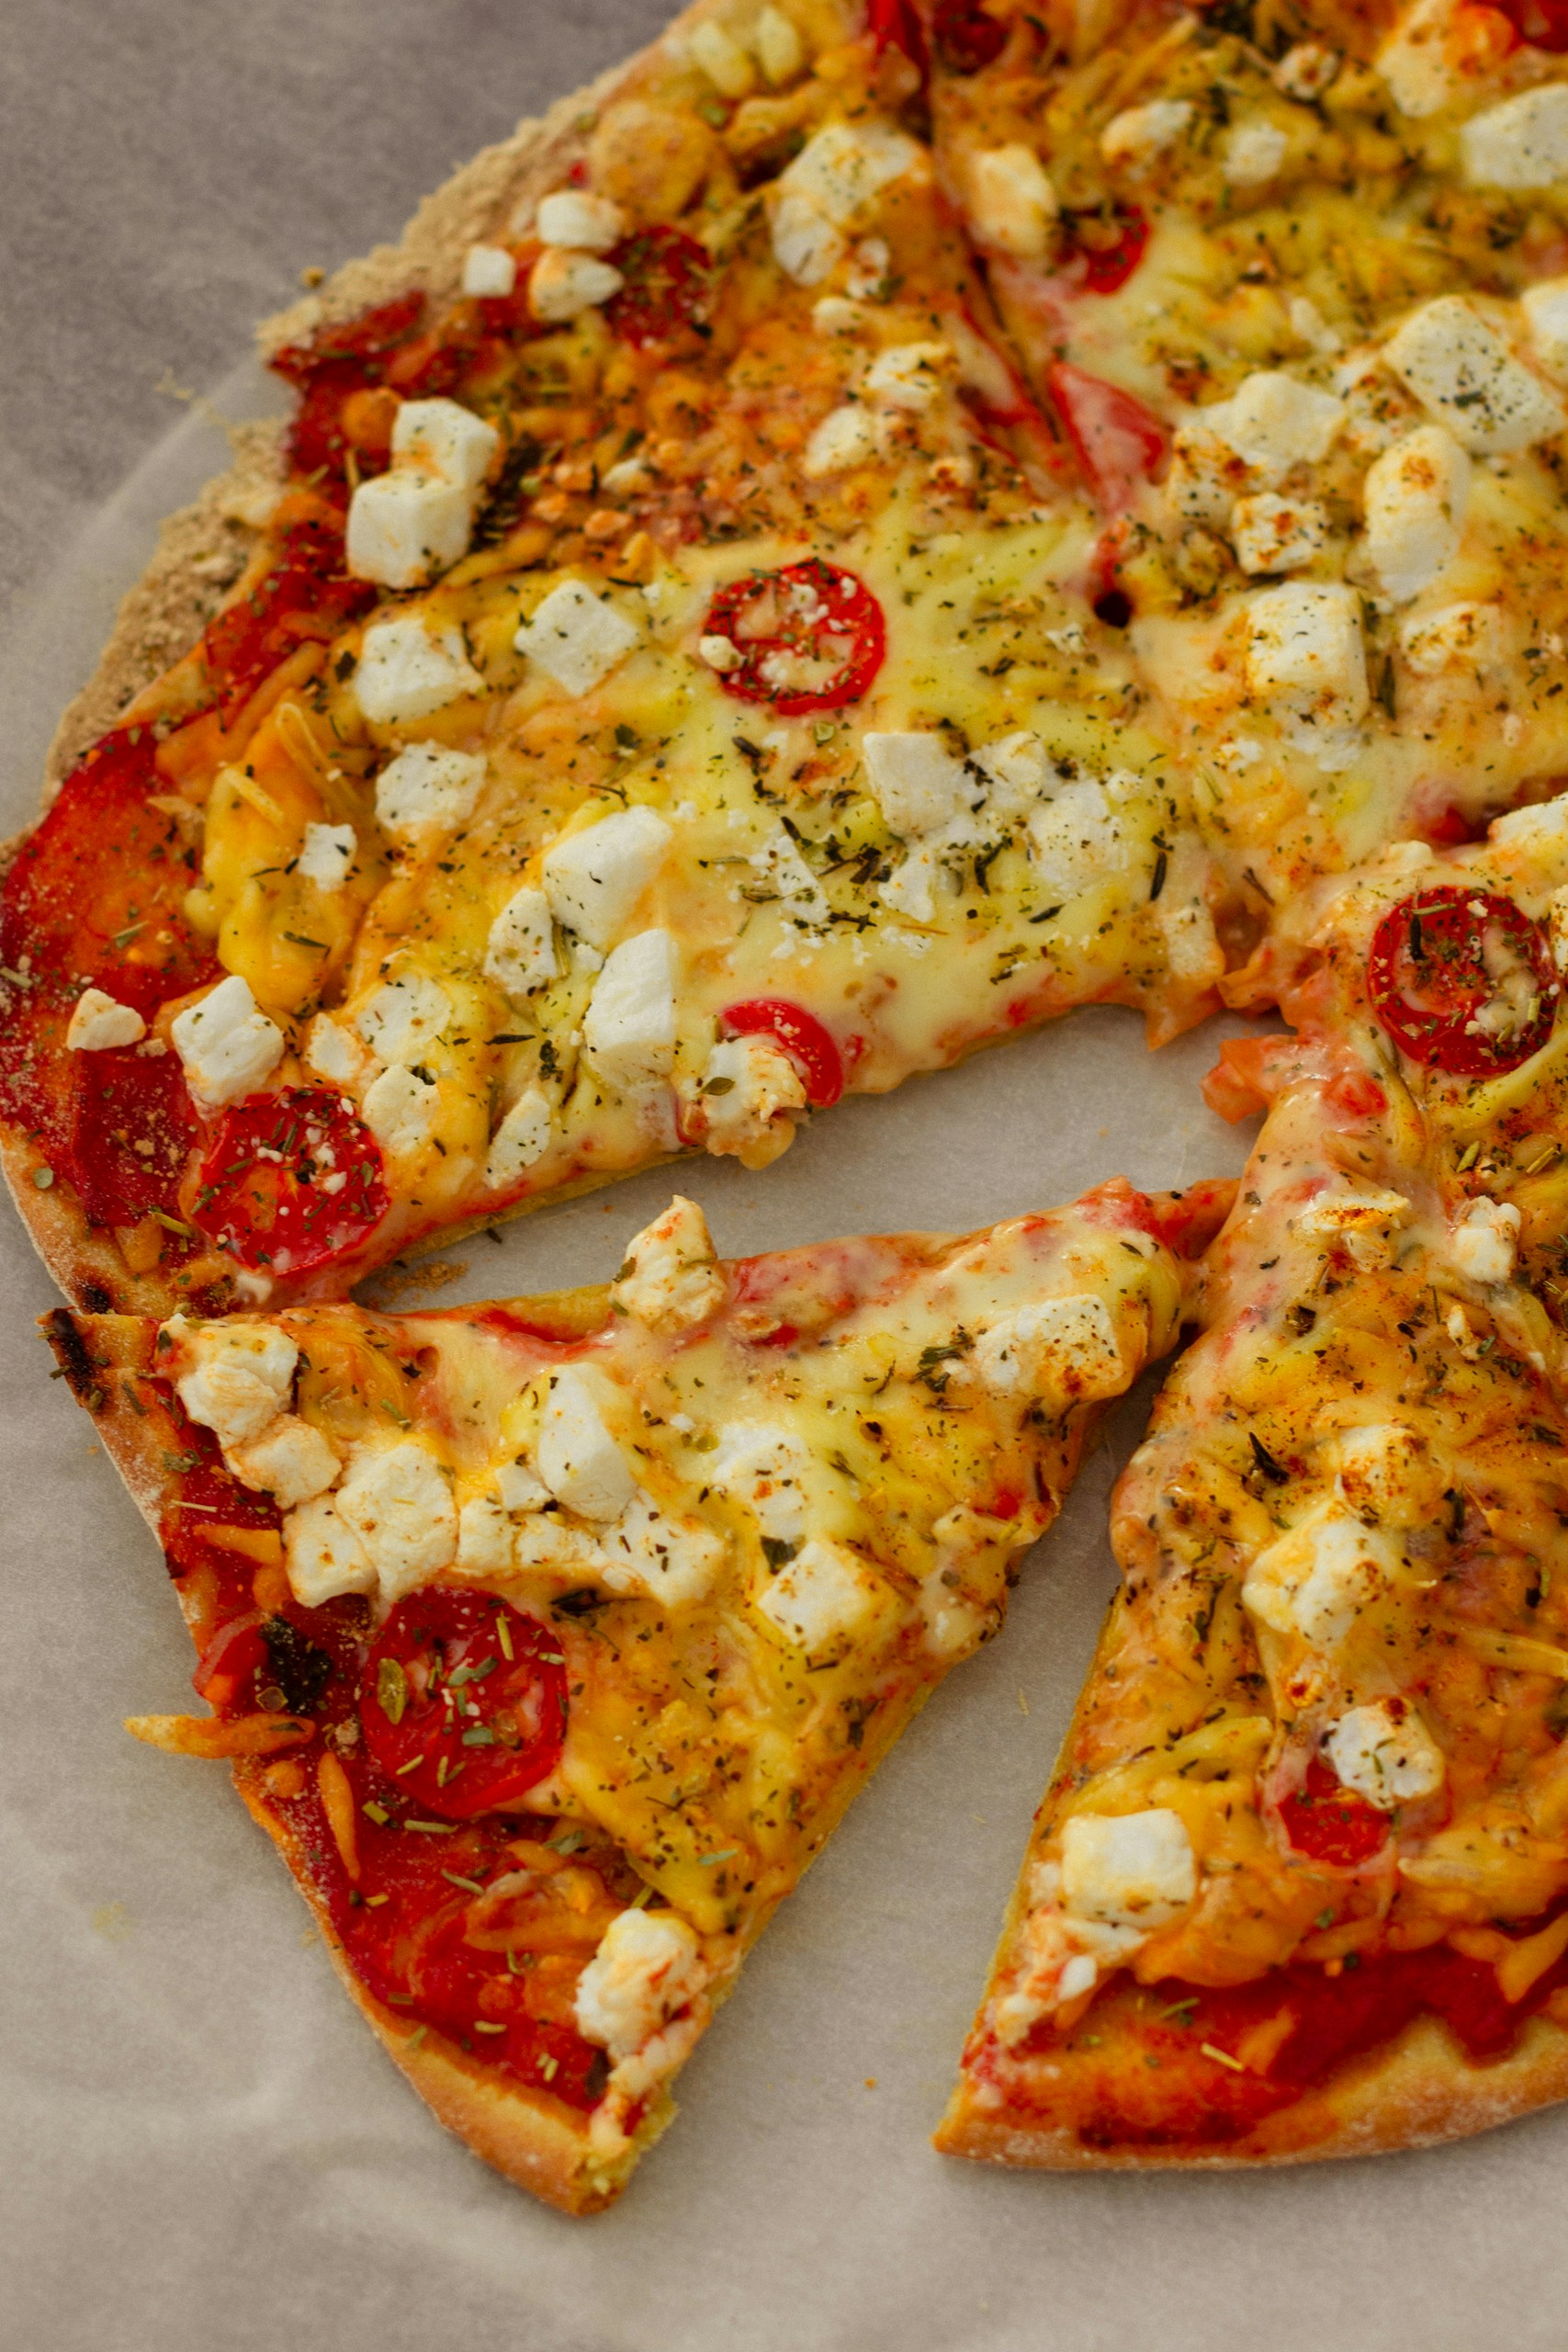
- Remove from the oven, top with your desired toppings, and return to the oven to bake until the cheese is melted and the crust is golden, about 10 minutes.
Notes
Coconut Flour Nutritional Info.
Coconut flour is a soft, white flour made from the pulp of a coconut. After coconut milk is squeezed from the coconut meat, the meat is then dried and ground into a powder. Coconut flour is naturally gluten-free, an excellent source of protein, and provides much more fiber than wheat flour, supporting healthy digestion.
A 1/2 cup serving of coconut flour provides roughly:
- 240 Calories
- 8g Protein
- 8g Fat
- 32g Total Carbohydrates
- 24g Dietary Fiber
- 8g Fiber
Note: This nutritional information can vary slightly by brand.
For more info on coconut flour, check out the video below for a ‘Coconut Flour 101’ lesson.
Step-by-Step Instructions
In an easy-to-read format, these step-by-step instructions walk you through this coconut flour pizza crust recipe with a few tips and images to guide you along.
Step 1
Preheat the oven to 400ºF. Line a baking sheet or pizza pan with parchment paper, then lightly grease the parchment with olive oil.
Step 2
In a medium bowl, beat the 3 eggs and 1 cup of coconut milk.
Step 3
In a small bowl, whisk together 1/2 cup (65 grams) of coconut flour, 1/2 tsp of baking soda, and 1 tsp of each: garlic powder, onion powder, and oregano.
Tip: For the best and most accurate results, weigh your coconut flour. A digital kitchen scale is an inexpensive and indispensable kitchen tool.
Step 4
Add the dry ingredients to the wet ingredients and mix to combine with a rubber spatula. Let the mixture rest for about 10 minutes.
Step 5
Using a spatula or slightly wet hands, spread the dough onto the parchment paper and spread it out into a large circle on the baking sheet.
Step 6
Bake for 10-15 minutes, until the edges start to turn golden and the center is set and just starting to color.
Step 7
Remove the crust from the oven, top with your favorite sauces and pizza toppings, and return it to the oven to bake until the cheese is melted and the crust is golden (about 10 minutes more).
Tips & Tricks
Coconut flour is not like wheat flour. It’s not even like almond flour. It behaves differently at every stage, from mixing and resting to baking and cooling. Check out these tips, and you’ll avoid common pitfalls so you can make the best coconut flour crust on the first try.
Measure Precisely
Coconut flour absorbs over 2x more liquid than traditional wheat flour. The flour-to-liquid ratio in many baking recipes, and especially with coconut flour recipes, is important to avoid turning your crust dry and crumbly. Use a digital kitchen scale for the best accuracy in measuring out your coconut flour.
If you do not have a kitchen scale, there are a few ways to ensure you’re not over-measuring your flour:
- Aerate the flour in the bag by mixing it around with a spoon before measuring.
- Spoon the flour into your measuring cup and level it off. (Don’t scoop directly from the bag with your measuring cup; use a spoon.)
- Avoid packing the flour into the measuring cup. This is a common mistake that causes people to over-measure the flour.
For the proper technique on measuring flour (that can make all the difference when baking), this is one of my favorite videos from King Arthur to share with friends and family.
If your batter feels too thick and pasty, add liquid one teaspoon at a time. If it’s too runny, let it sit for a few minutes before adding more coconut flour, as this flour continues to absorb moisture as it rests.
Let the Batter Rest
This is often an overlooked step, but a very important one! As mentioned earlier, coconut flour is highly absorbent, but it takes some time to fully absorb liquids in a recipe. After mixing, let the batter rest for about 10 minutes. This allows the coconut flour to fully hydrate and thicken naturally. Skipping this step can result in uneven texture or too much moisture in the finished crust.
Pre-Bake the Crust
Never skip the pre-bake. Coconut flour crust needs time to firm up before adding sauce and other toppings. Bake just the crust for about 10 minutes, until the edges turn golden and the center looks set (not shiny or wet). Then, remove it from the oven, add your favorite toppings, and continue to bake until the cheese is melted and bubbly!
Pre-baking the crust prevents sogginess and creates a crispy and firm base that won’t collapse under the toppings.
Use Parchment Paper
Coconut flour pizza crust can stick to pans, even nonstick ones. For that reason, I recommend laying down parchment paper on your pan and then greasing the parchment paper with a bit of olive oil for some extra insurance. Trust me, you will thank me for it when it’s time to cut and enjoy your pizza.
Extra Tip: If you want an even crispier crust, leave the baking pan in the oven while you prepare your pizza crust. A preheated pan will start cooking the crust as soon as you transfer it onto the pan, as opposed to prepping your pizza on a cold/room temperature pan, resulting in a crispier final result.
Make-Ahead & Storage Tips
A good pizza crust doesn’t stop at baking; how you serve and store it affects flavor, texture, and longevity.
Store leftover pizza slices in an airtight container in the fridge for up to 4 days or in the freezer for up to 2 months. Place parchment slices between them to prevent sticking.
This crust freezes surprisingly well!
Pre-bake the crust and allow it to cool completely. Wrap it tightly in plastic wrap and place it in a freezer-safe bag. Freeze it for up to 2 months. When you are ready to use it, remove it from the freezer, add your favorite toppings, and bake as directed in the recipe card above.
You can also freeze this pizza with the uncooked toppings! To freeze a fully topped pizza, pre-bake the crust and allow it to cool completely. Then, add the toppings, wrap it gently but tightly in plastic wrap, and store it in a freezer-safe bag.
When you’re ready for pizza, bake this directly from frozen on a parchment-lined baking sheet, adding 3-5 extra minutes to the bake time.

Coconut Flour Pizza Crust FAQs
Here are answers to the most common reader questions. I hope they help you troubleshoot and end up with a spectacular coconut flour pizza crust! For more questions or comments, be sure to write in the comments section below.
Can I Substitute Almond Flour for Coconut Flour?
Gluten-free flours can be quite particular to each recipe, and it is best to follow a recipe as written before experimenting with secondary options. In this recipe, almond flour and coconut flour are not interchangeable. Coconut flour requires far more liquid and eggs than almond flour. Substituting it directly will give very different (and undesirable) results.
For another great gluten-free option, try out this gluten-free pizza crust recipe.
Why Is My Crust Crumbly?
The most common reasons a crust may crumble are from too much coconut flour, or not enough eggs or liquid. This can also be a result of skipping the rest time. Make sure to measure carefully (I always recommend using a kitchen scale for the most accurate and foolproof way of measuring the coconut flour), and allow the batter to hydrate properly (about 10 minutes) before baking.
Can I Make This Recipe Egg-Free?
Eggs provide structure and help to bind ingredients together in many gluten-free recipes, and in this coconut flour pizza crust. Replacing them is difficult, and I have not yet tested this pizza crust with an egg substitute. Flax eggs may work in some cases, but the texture will be softer and less sturdy.
If you experiment with an egg substitute in this pizza crust recipe, be sure to let me know how it works out for you. This can help other readers who may also be searching for a good egg substitute, too!
Does It Taste Like Coconut?
The flavor of coconut flour is very mild. Its subtle flavor is barely noticeable in this recipe from the herbs and seasonings used. The garlic powder, onion powder, and oregano help to neutralize any sweetness and bring out those classic pizza flavors.
Is Coconut Flour Pizza Crust Keto-Friendly?
Coconut flour is lower in carbs than wheat flour and higher in fiber, which makes it a popular ingredient for keto baking. While this is a lower-carb and higher-fat recipe, the exact carb count depends on the exact ingredients and toppings you use to make your pizza. Estimated nutritional information is provided above to help you make an educated decision based on your dietary needs.
More Pizza, Please!
Pizza night shouldn’t have to feel stressful or complicated. It should be delicious, fun, and the bonus is, now it’s low-carb and gluten-free! No need for complicated flour mixes or long rising times. This coconut flour pizza crust uses simple ingredients to deliver satisfying results. And if you’ve made it this far, you now know something about coconut flour that most people don’t: it’s not difficult, it just requires the right balance.
Once you understand how it absorbs moisture and why resting the batter matters, this crust becomes incredibly reliable. It’s a crust you can confidently make again and again without having to guess. And the best part? It’s endlessly customizable. Keep it classic with marinara sauce and mozzarella cheese or load it up with veggies. Make it protein-packed with chicken and pesto. Or, turn it into mini personal pizzas for a fun family dinner.
However you choose to top and enjoy this coconut flour pizza crust, have some fun with it. Get creative in the kitchen and make dinner memorable on any ordinary night. If you try this recipe, I’d love to hear how it turns out for you! Leave a comment and share your favorite pizza night toppings or traditions below.
Related Recipes
Ready for dessert? Enjoy more of that coconut flavor in some of these sweet treats below!
- Moist & Delicious Coconut Bread
- Coconut Flour Banana Bread
- Coconut Flour Zucchini Bread
- Lemon Cranberry Muffins
Whichever you choose, there’s always room for one more slice of something homemade and coconut-kissed.
Share Your Pizza Results!
Did you go traditional or creative with your pizza toppings? Let us know in the comments below to inspire fun, new pizza topping combinations for other readers!