This traditional gluten free pumpernickel bread is so hearty and full of amazing flavor! It’s full bodied, but not heavy and balanced with the perfect amount of dark molasses for that characteristic rich color. Oh and it’s egg free and gum free too!
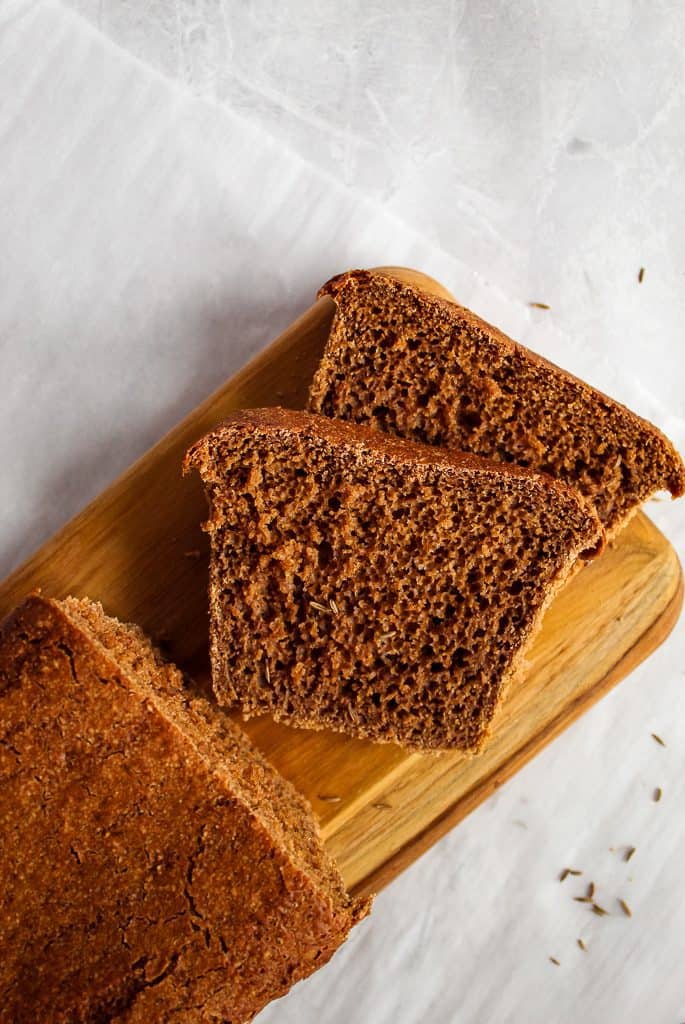
Table of Contents
Pumpernickel bread is one of those classic bread recipes that just never goes out of style. Some, like my gluten free Irish soda bread or gluten free pumpkin yeast bread are seasonal specialties, so unless it’s St. Patrick’s Day or the Fall season, these breads aren’t made as often. But with pumpernickel bread, none of that applies.
It’s delicious any time of year with any type of meal.
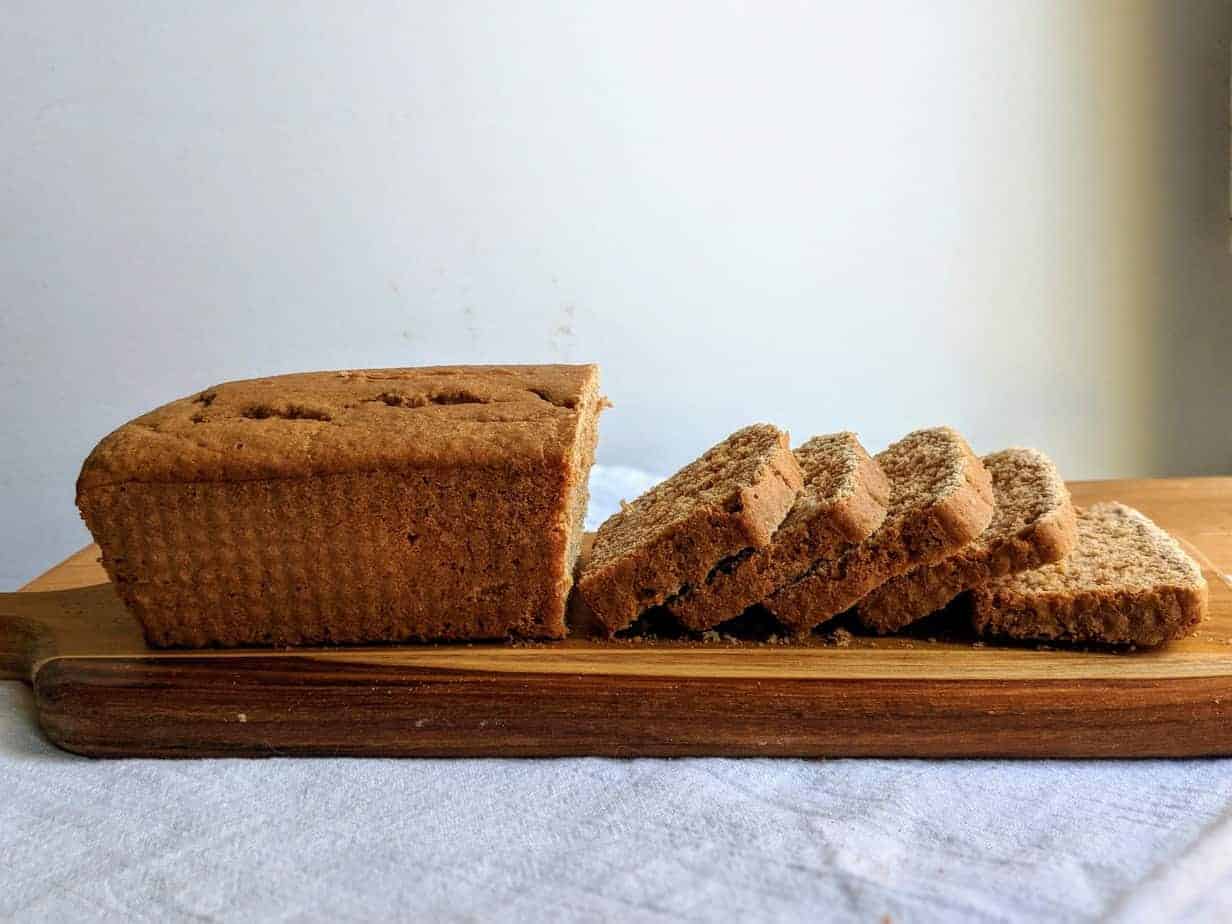
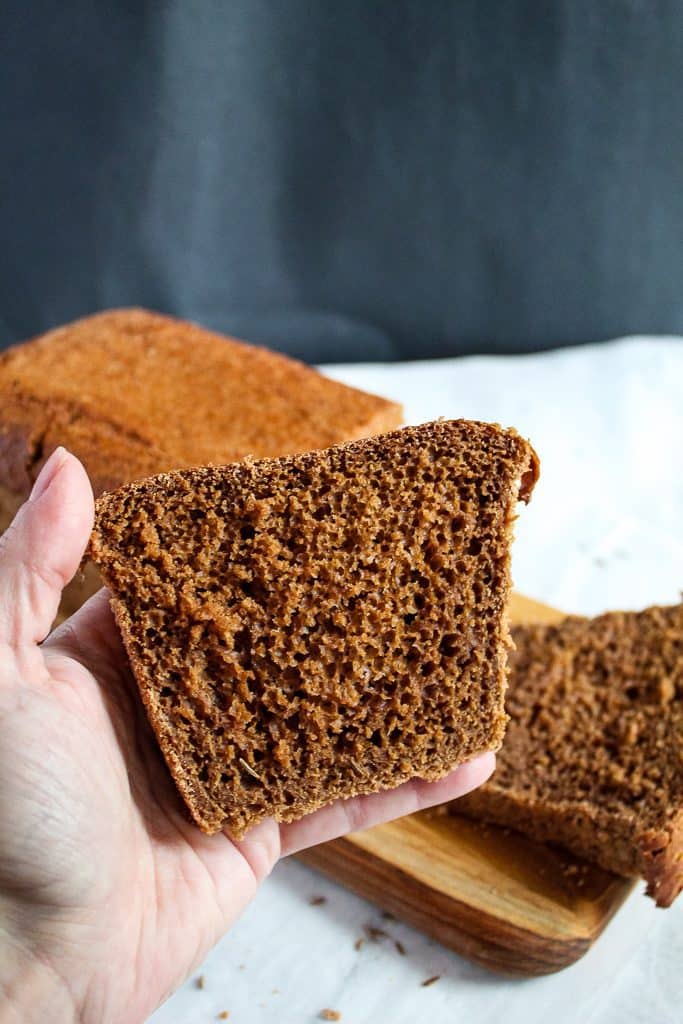
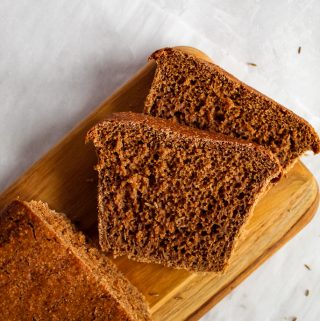
If there’s one way to describe this recipe for gluten free pumpernickel bread is that it’s as close to pumpernickel bread made with bread flour as you can get. And it produces consistently good loaves of bread. It has all the qualities of a classic loaf of bread too – crusty exterior, deep, richly colored interior and with a great textured interior.
How to Make Gluten Free Pumpernickel Bread
Ingredients
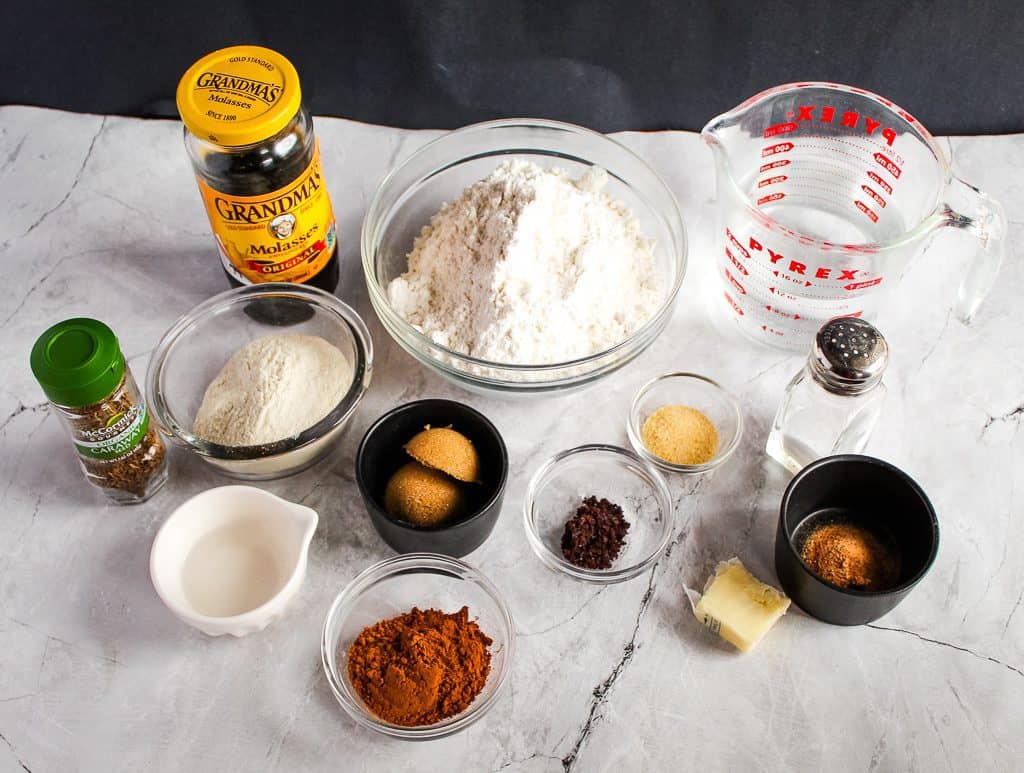
Traditionally, pumpernickel bread uses bread flour, molasses, brown sugar, caraway seeds and a touch of cocoa powder – the only exception with this recipe is this one uses gluten free flour instead of bread flour. And then there’s some instant coffee, onion powder, sugar, seltzer water, yeast, touch of salt, vinegar and butter.
But that’s it.
As with most gluten free bread recipes, make sure the ingredients are at room temperature (unless a temperature is specified).
Preparation
People often ask if there are any tricks or anything I recommend for a successful gluten free bread. I always say, every loaf is different, but one of the biggest keys to bread baking success is nothing more than following the steps in the recipe. To a T. But hey, if you’re up for tweaking and experimenting with substitutions, feel free. Just expect a different result than the original recipe.
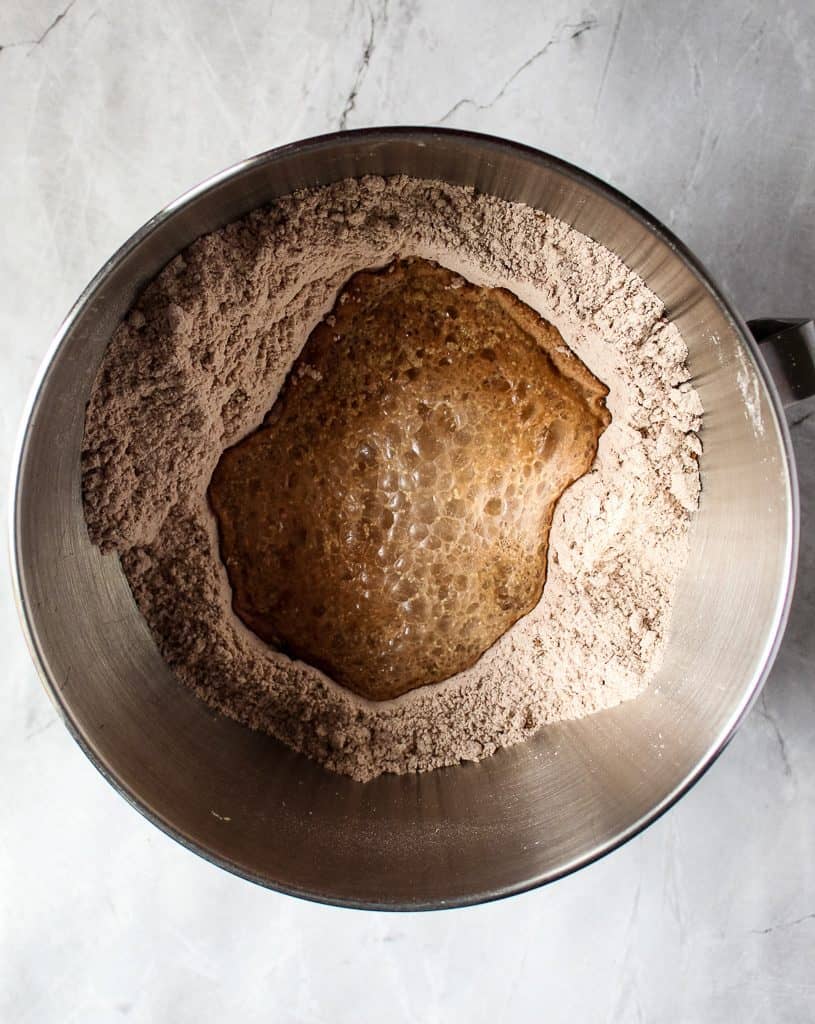
So for this bread, following the steps starts with mixing the flours in the bowl.
Then you make a nice well in the center and sprinkle in the sugar and yeast. But don’t mix!
And then add the seltzer water and let it sit for 5 minutes. While waiting for this mixture to get all bubbly, bookmark this gluten free crescent roll recipe for later!
After 5 minutes, stir the mixture together using a wooden spoon. I like these since they are incredibly sturdy and have a nice wide handle.
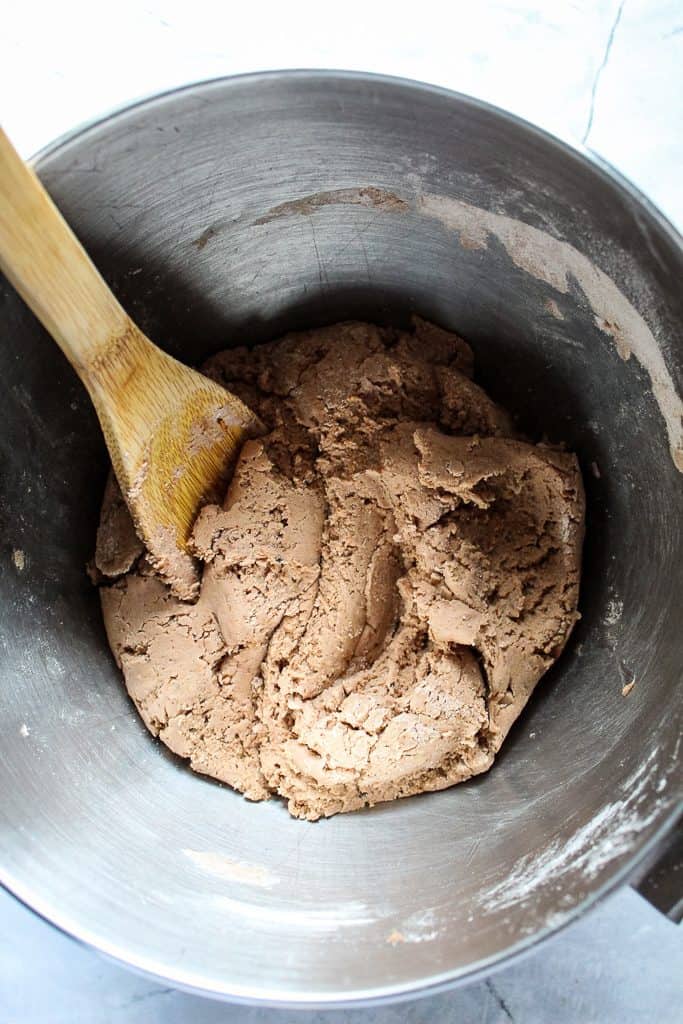
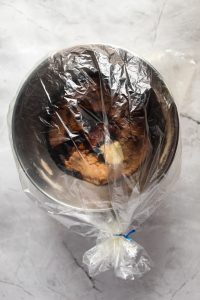
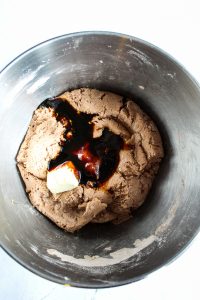
After you end up with a ball of dough, start adding the next batch of ingredients – molasses, salt, vinegar and butter. But again, don’t stir them in. Just add them to the bowl and stick the bowl into a large plastic bag (or drape a piece of plastic wrap over it).
Let it rise for 30 minutes. In the meantime, prepare two 8” x 4.5” baking pans by spraying them with cooking spray and sprinkling them lightly with gluten free flour.
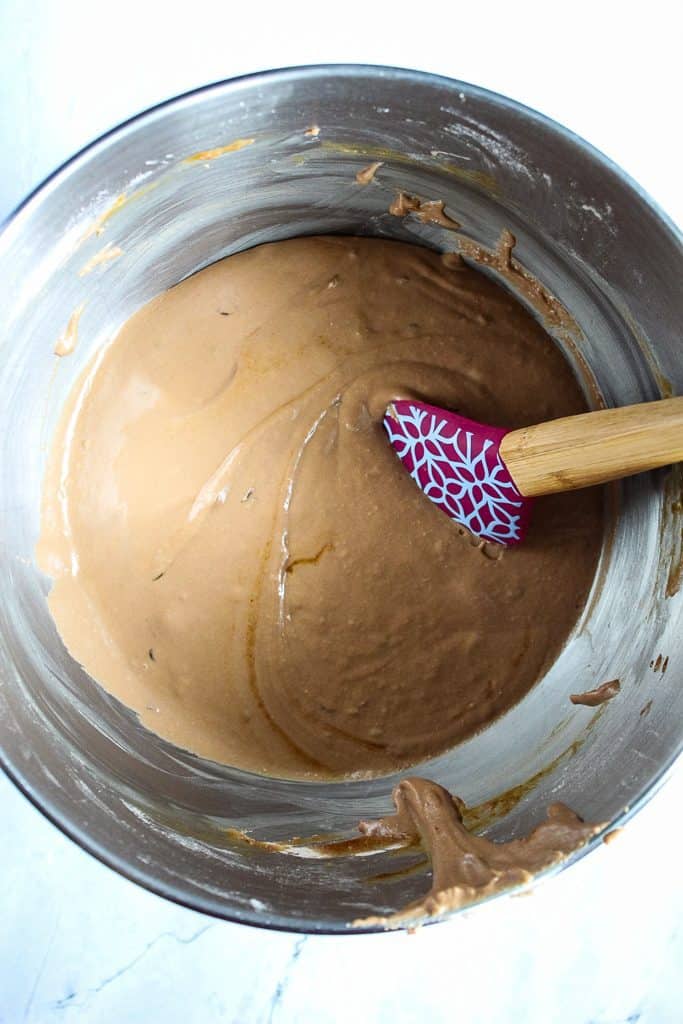
After 30 minutes, the dough will be ready to mix together – take the bowl and position it with the paddle attachment under a stand mixer. (This durable Kitchen Aid has been working hard in my kitchen for 20 years this year!)
At this point, you are just going to mix the bread batter until everything is combined.
Final Rise and Bake Time
Divide the batter up between the two pans. Drape a piece of plastic wrap loosely over the two pans and set them in a warm spot to rise for 25 minutes. Keep an eye out that the dough does not touch the plastic wrap – if it starts to get close, remove the wrap.

At about 20 minutes into the rise, get the baking pan with water ready. The easiest way I’ve found to do this is to put the pan on the lower rack of the oven first. Then use a measuring cup to fill the pan up. Much easier than carrying a pan full of water to the oven.

Start the oven preheating to 400 F.
When the oven is ready, be very cautious in opening the oven door as hot steam will flood out of the oven first. Place the two pans on the baking rack right above the pan with the water.
Bake the loaves for about 40 – 45 minutes or until a toothpick comes out clean and the loaves sound hollow when tapped.
Let them cool for a few minutes in the pan and then remove them to finish cooling. The longer they sit in the pan, the soggier the bottom will get.
These loaves slice incredibly well. Judging from the texture and consistency, they should freeze really well too. But truthfully, I have never had them last long enough for them to actually make it into the freezer! (Another reason why I love 2-loaf recipes!)
If you enjoyed this recipe, will you give it a rating and a share?
Gluten Free Pumpernickel Bread
Ingredients
- 3 1/2 cups gluten free bread flour blend 450 g
- 2 Tbsp. packed brown sugar
- 8 tsp. cocoa powder (2 Tbsp. + 2 tsp.)
- 1 3/4 tsp. onion powder
- 1 tsp. granulated instant coffee
- 2 1/4 tsp. caraway seeds
- 1 tsp. granulated sugar
- 3 3/4 tsp. active dry yeast (1 Tbsp. + 3/4 tsp.)
- 1 1/2 cups seltzer water warmed to 115 F
- 4 tsp. molasses
- 1 1/2 tsp. salt
- 1 1/2 Tbsp. white vinegar
- 1 Tbsp. butter
Instructions
- In a large mixing bowl, add the flour blend, brown sugar, cocoa powder, onion powder, instant coffee, and caraway seeds. Stir together.
- Make a well in the middle of the flour mixture. Add the sugar and yeast to the well. Don’t stir yet.
- Pour the warm seltzer water into the well in the flour. Let stand for 5 minutes, until the mixture gets bubbly.
- Using a sturdy spoon, stir the dough together until fully mixed.
- Add the molasses, salt, vinegar and butter, but don’t stir them in yet.
- With the dough still in the bowl, place the entire bowl in a large plastic bag and tuck ends under to seal slightly or drape a piece of plastic wrap loosely over the bowl. Place the bowl (inside the bag) in a warm place to rise. Let rise for 30 minutes.
- After 30 minutes, remove the bowl from the bag. The dough will be puffy. Using a stand mixer with a paddle attachment, beat the dough on medium-high speed for two minutes. Scrape down the bowl.
- Spray and flour two 8” x 4.5” baking pans.
- Pour batter into the pans.
- Drape a piece of plastic wrap over the pans and let the dough rise until it is nearly doubled in size, about 25 minutes (make sure the dough does not touch the plastic wrap).
- Preheat the oven to 400 F. Place a shallow pan on a lower rack and add about a 1/2″ layer of water.
- Once your oven is preheated, bake bread loaves for 40 – 45 minutes or until the bread tests done.
Notes
- Make sure the seltzer water isn't too hot or it will kill the yeast.
- Set a timer to ensure the dough is sitting for just the right amount of time.
- Use a wooden spoon to stir the ingredients as it will be thick.
- Add water to the baking sheet after positioning it in the oven.
- Keep an eye out for the dough hitting the plastic wrap - if it comes close, remove the wrap.
- Test the bread with a toothpick. It should sound hollow when tapped.
Nutrition