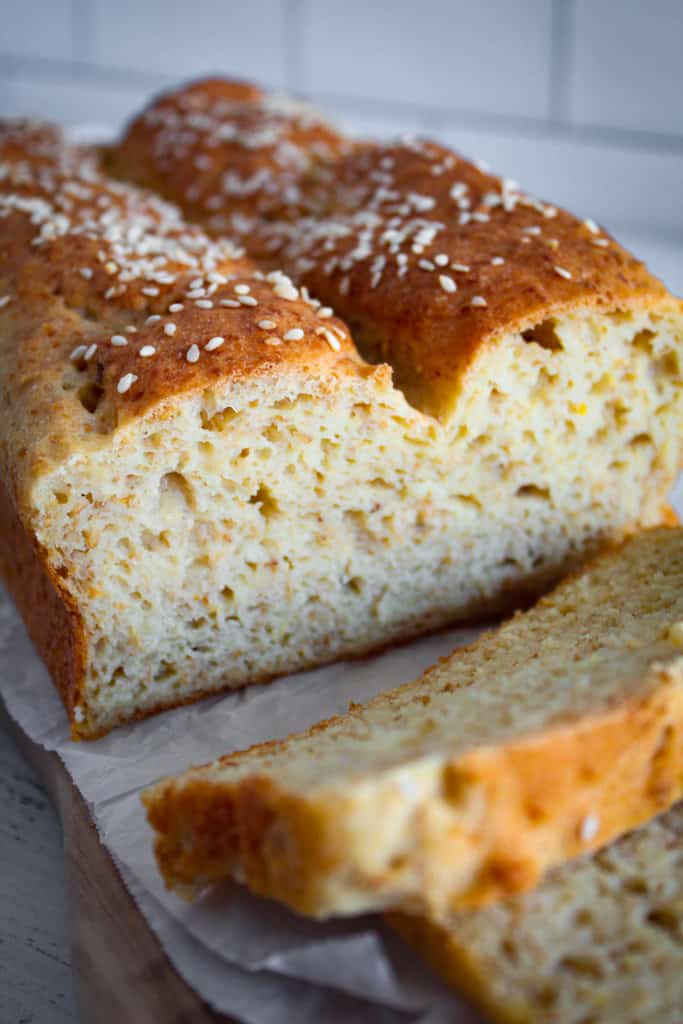
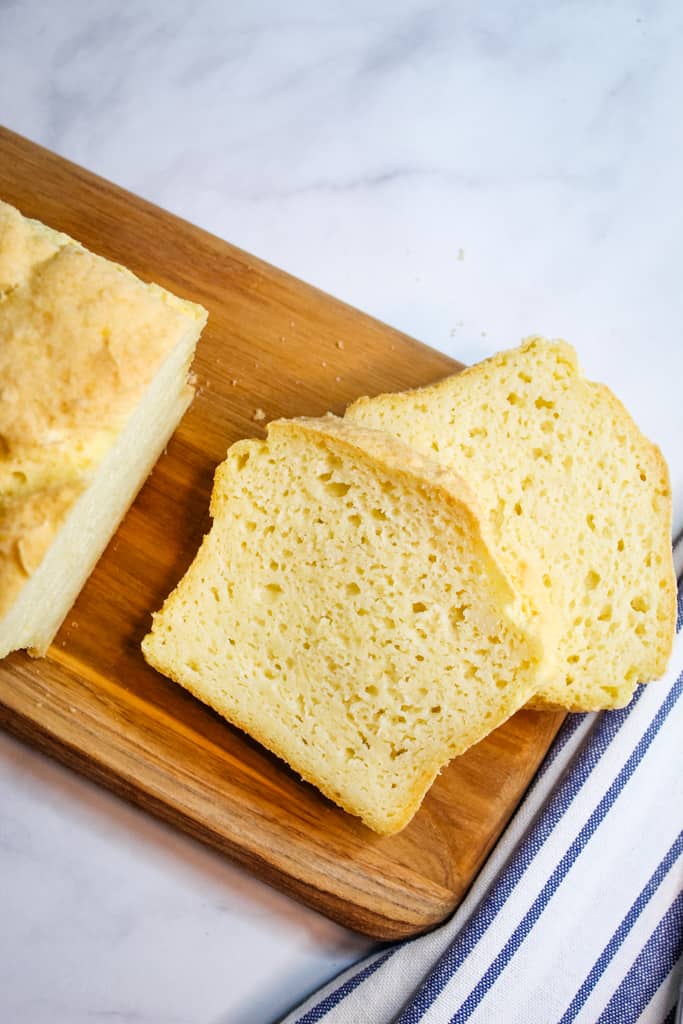
The moist, delicious goodness of a good whole grain bread recipe is hard enough to find. But when you add in the fact that it needs to be gluten free, well you’ve just declared you’re climbing a mountain. Whole grain bread has that wholesome quality you just don’t find in regular gluten free loaves, like the sandwich bread. Don’t get me wrong, they are still delicious, but whole grain bread is truly satisfying and full of healthy whole grains and seeds. Bursting with flavor with a complex texture, whole grain, gluten free bread is a staple you’ll want to make over and over again.
This recipe comes from a bit of experimenting and a lot of tweaking. There are still substitutions you can make with the flours, see my note below or in the gluten free bread flour recipe. But this one has the taste and complexity that others just can’t compare to.
It’s not dry, definitely not too dense, yet full bodied enough that you know you just ate whole grain bread, as opposed to a light bread.
WHOLE GRAIN GLUTEN FREE BREAD RECIPE
Tools:
Stand mixer with paddle attachment
2 loaf pans – about 8 x 4 inches each
Spreader spatula
Plastic wrap
Instant read thermometer
Ingredients:
2 1/2 tsp. active dry yeast
3 tsp. white sugar
1/4 cup warm water (110 degrees)
Dry Ingredients:
1 ½ cup brown rice flour
1/2 cup sorghum flour
1/2 cup tapioca flour
1/4 cup millet flour
1/4 cup potato starch
3 heaping Tbsp. ground flax seeds
1/2 cup dry milk powder
3 tsp. xanthan gum
1 tsp. unflavored gelatin
1 Tbsp. pectin
1/2 tsp. salt
1/2 cup raw sunflower seeds
Wet Ingredients:
1 1/4 cup warm water (110 degrees)
3 eggs, room temperature, beaten
3 egg whites, whisked
1/4 cup butter, melted
1 Tbsp. blackstrap molasses
1 tsp. apple cider vinegar
Topping
1 Tbsp. sesame seeds
1 Tbsp. flax seeds
Step 1:
Spray 2 loaf pans – about 8 x 4 inches each – with non-stick cooking spray or oil.
Step 2:
In a small bowl, mix together the yeast, sugar & warm water. Set this mixture aside to proof. It should begin to smell like yeast & get foamy. If it doesn’t your yeast is spoiled and inactive.
Step 3:
In the bowl of your stand mixer, stir together all the dry ingredients. Set aside.
Step 4:
In a medium sized bowl, whisk together all the wet ingredients. Add the proofed yeast mixture to this mixture.
Step 5:
On your stand mixer, attach the paddle attachment. With your mixer on low speed, gently pour the wet ingredients into the dry ingredients.
Step 6:
This will turn into a dough (not a ball of dough, but more like a thick cake batter type of dough). Mix the dough on medium speed for 5-8 minutes. Occasionally scrape down the sides of the mixing bowl with a spatula.
Step 7:
Make sure your oven racks are positioned so that the tops of the bread will be in the middle spot in your oven. Heat your oven to 200 degrees. Once it gets to this temperature, turn it off. This is where your bread will rise.
Step 8:
Pour the dough into loaf pans, dividing them evenly. Use a spreader spatula to spread the tops out nice and smooth.
Step 9:
Spray a sheet of plastic wrap with non-stick cooking spray and gently cover the loaf pans, with the sprayed side on the dough.
Step 10:
Place covered pans in your warmed oven and let them rise for 30 minutes, or until the dough has risen to the top of the pans.
Very gently remove the plastic wrap.
Step 11:
Preheat your oven to 350 degrees F. Mix together the seed topping and sprinkle generously over the tops of the loaves. (If the loaves look a little dry on top, lightly beat 1 egg and brush it on the top before adding the topping).
Step 12:
Place the loaves of dough into the preheated oven. Bake for 30 minutes. The crust will turn a nice light brown color. But don’t judge the doneness based on the crust. Use an instant read thermometer and test out the middle of the loaf. The temp should read about 190 degrees for a fully baked loaf. Cool the bread in the pans for about 5 minutes and then turn out onto wire racks.
(If you can wait) Let loaves cool before cutting.
Slice and enjoy!
Note: Different flour combinations can easily be used in this bread – some that might be tasty are quinoa flour or certified oat flour. These will give the bread a nice nutty, full flavor.
Also note: As with all gluten free breads, the shelf life is very short. This bread is best eaten the same day, but will also be delicious the next day or two if tightly wrapped. Any longer than that and you’ll want to individually wrap the slices and freeze them.