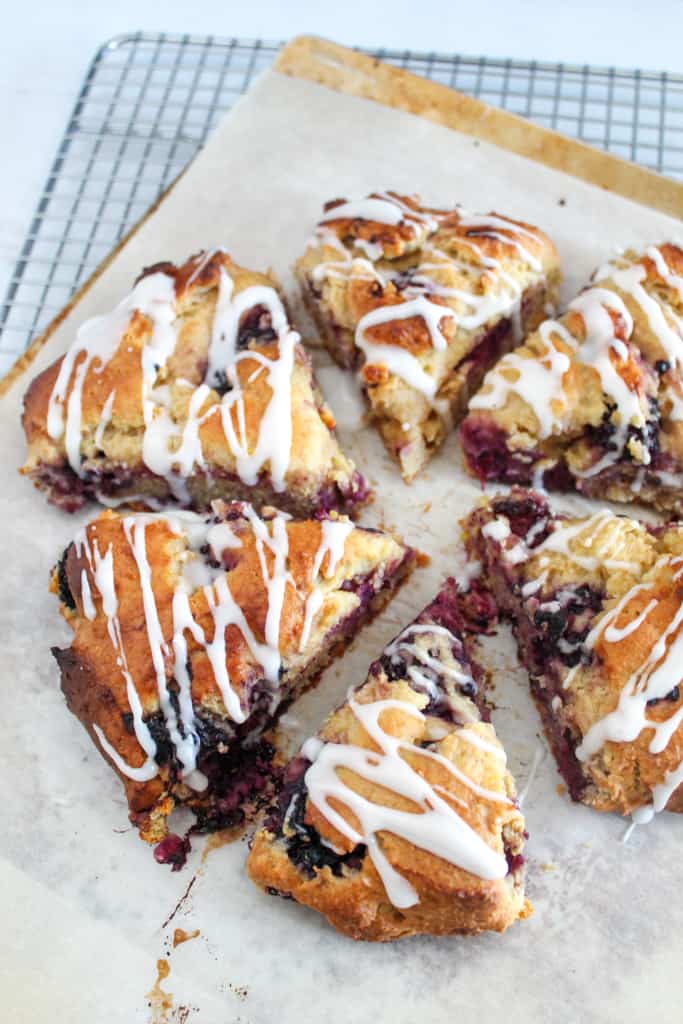
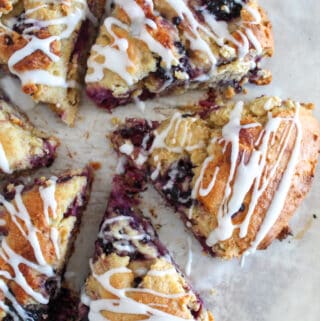
These blackberry scones are everything a good scone should be: lightly crisp on the outside, soft and tender in the center, and filled with juicy bursts of blackberries in every bite.
Most scone-lovers have all had this struggle: you’re craving a warm and tender scone, and whether you bake it yourself or buy it from a bakery, it turns out to be dry, crumbly, and flavorless. That’s the last thing you want! Here, I’ve developed a gluten-free recipe that is simple, delicious, and reliable. Even better, it’s easy to change up based on the season or based on what you’re craving!
Table of Contents
What makes this recipe great are a few key details essential to gluten-free baking. The first is the right flour combination. Here, I’ve used a combination of coconut and almond flour to create a structure that’s not too dry. Also, a simple (but crucial) rest time is included in the instructions to allow the dough to fully hydrate. This gives you a soft texture that most gluten-free baked goods lack.
And then there are the blackberries. Slightly tart, naturally sweet, and incredibly juicy. They bring a fresh, bright flavor that beautifully balances the richness of the dough.
So if you’re finally ready to make gluten-free scones that taste just as good as a traditional version, read on, and let’s get baking!
Why This Recipe Works (And Why You’ll Love It)
It takes lots of recipe testing and taste tests to gauge if a recipe is worthy of publishing, and this one is a winner for so many reasons. This recipe balances moisture-rich almond flour with absorbent coconut flour, creating a tender, lightly crisp scone. But there are so many reasons this recipe works and will quickly become a favorite for you, too:
- They’re gluten-free, dairy-free, AND grain-free!
- Super easy to mix right in the food processor, just like these oatmeal crepes.
- Juicy blackberries add a burst of flavor and natural sweetness.
- They’re versatile and customizable without changing the recipe.
- Perfect for breakfast, brunch, or a treat with coffee.
- Quick and beginner-friendly recipe.
- Includes the necessary (and often overlooked) step of resting the batter!
Key Ingredients (And Why They Matter!)
When it comes to gluten-free baking, ingredients aren’t just ingredients; they’re doing very specific jobs. Here, every component has a purpose, and understanding why each one matters will help you become a better baker.
- Almond Flour: The backbone of this recipe that provides structure and keeps the scones soft and moist from the almond’s natural fats.
- Coconut Flour: Absorbs liquids, helping firm up the dough and prevent the scones from falling apart.
- Flaxseed Meal: Adds nutritional value (omega-3s, protein, and fiber) and helps bind ingredients together.
- Sugar: Adds sweetness to balance the tart berries and helps the scones brown and create a tender crumb.
- Salt: Balances the flavors in the scones.
- Baking Powder: Provides a slight rise, preventing the scones from becoming flat and dense.
- Xanthan Gum: Used to replicate the properties of gluten and hold the dough together.
- Sour Cream: Provides a lot of moisture to keep these super tender.
- Butter: Creates flaky scones and adds richness to the taste.
- Apple Cider Vinegar: Just a small amount in baking works with the baking powder to give rise, and tenderizes the scones.
- Egg: This is key in binding the ingredients and adding stability.
- Vanilla Extract: Adds warmth and essential flavor.
- Lemon Zest: Adds brightness to the scones’ flavor.
- Blackberries: Adds bursts of tart-sweet flavor and releases natural juices for extra moisture.
Don’t be intimidated by this longer ingredient list. Most of these are pantry staples you already have at home! And each ingredient works together to create scones that no one will believe are gluten-free.
Recommended Tools & Ingredients to Use
Here are some of the tools and ingredients I used for this recipe to help you achieve a perfect outcome, just as I did!
You can’t go wrong with a good-quality food processor. This Cuisinart option will last for years, and I use it for so much more than just baking! From pureeing sauces to chopping veggies, this kitchen tool is one I recommend everyone have.
You will also need:
- Digital scale
- A small mixing bowl
- Rubber spatula
- Sharp knife
- Baking sheet
The ingredients and brands used in the recipe can be found here:
- Coconut Flour and Almond Flour from Nuts.com
- Forager Dairy-Free Sour Cream
- Bob’s Red Mill Flaxseed Meal
- High-quality Vanilla Extract
Printable Gluten-Free Blackberry Scones Recipe Card
Ingredients
For the Scones:
- 77 grams vegan sour cream, room temperature
- 1 large egg, room temperature
- 1 tbsp apple cider vinegar
- 1 tsp pure vanilla extract
- 2 tsp lemon zest, about 1 lemon
- 95 grams almond flour
- 60 grams flaxseed meal (about ⅔ cup)
- 23 grams coconut flour (about ¼ cup)
- ¼ cup granulated sugar
- 3 tsp baking powder
- ½ tsp xanthan gum
- ½ tsp salt
- ½ cup vegan butter, cold and cubed
- 170 grams blackberries (about 6 oz container)
For the glaze
- ¼ cup powdered sugar
- 3 tsp lemon juice
Instructions
For the Scones:
- In a small bowl, add the sour cream, egg, apple cider vinegar, vanilla extract, and lemon zest. Mix to combine.
- In the bowl of a food processor, add the almond flour, flaxseed meal, coconut flour, sugar, baking powder, xanthan gum and salt. Pulse a few times to mix the dry ingredients together.
- Cut the cold butter into chunks and add it to the food processor – pulse a few more times until the mixture resembles coarse crumbs.
- Add the sour cream mixture and pulse again a few times to fully mix.
- Scrape the batter out of the food processor and into a medium-sized bowl. Let it rest for 30 minutes.
- Preheat oven to 450ºF. Line a cookie sheet with parchment paper.
- After the batter has rested, using a rubber spatula, gently fold in the blackberries.
- Turn the dough onto the cookie sheet and gently pat it into a 6 1/2-inch circle.
- Using a sharp knife, cut the disk into 6 slices.
- Bake for 20 minutes. Remove from the oven and separate the scones, slicing again if needed. Return to the oven to bake for 5-7 minutes more, or until the edges start to turn golden and the center is set but still soft. Cover with foil if they get too brown.
- Remove from the oven and let cool. Drizzle with glaze and serve.
For the Glaze:
- In a small bowl, add the powdered sugar and lemon juice. Whisk to combine. Drizzle over the cooled scones.
Notes
- Let the dough rest for the full 30 minutes to hydrate the flour.
- Bake for 20 minutes, then separate them. Return to the oven to finish baking. Cover with foil if they’re getting too brown.
- For a thicker glaze, add more powdered sugar. For a thinner glaze, add more lemon juice, or a splash of milk or water.
Did you make and love this recipe? Give it your review and rating below! And make sure to follow me on Instagram, Pinterest, and Facebook , too!
Best Flour Combinations for Gluten-Free Scones
If you’ve ever tried gluten-free baking and ended up with something dry, dense, and crumbly, the flour blend was probably the issue. There is no single perfect gluten-free flour, but when you combine them, it can really change your baking.
Traditional flour contains gluten, which provides elasticity, structure, and moisture retention. Gluten-free flours don’t do all of that on their own, so we recreate it using a blend.
Why Almond + Coconut Flour Work So Well
Lots of gluten-free baking calls for a flour blend, usually a mix of flours and starches, meant to replicate the properties of wheat flour. I always have a batch of this homemade flour on hand, which I use in many recipes on this site, like these fluffy cinnamon rolls. Or, in a pinch, I’ll use a trusted brand like King Arthur Measure for Measure Flour.
But some recipes don’t need a complex blend and will do just fine with a couple of simple flours. For this recipe, I used a balanced duo of almond flour and coconut flour.
Almond flour is high in natural fats, which provide lots of moisture to baked goods. It keeps these scones tender and rich, preventing them from drying out.
Coconut flour is highly absorbent, and as it absorbs liquids, it helps to add structure and prevent sogginess. This is especially important in this recipe, as the fresh blackberries release a lot of moisture as they bake.
Together, these two flours contribute to the scones’ soft yet stable crumb, and it’s all about the balance. If there were too much almond flour, the scones would turn out greasy and too soft, and too much coconut flour can make them dry and dense.
Whenever you are baking gluten-free, it’s helpful to try a recipe based on the ratios, measurements, and flours as written the first time. Then, you can start experimenting with other flours and ingredients that best suit your day-to-day baking. All gluten-free flours behave differently, so for consistent results, avoid swapping flours 1:1 unless you understand how they behave.
Step-by-Step: How to Make Blackberry Scones
The easiest way to mix the dough is in the food processor. Can you mix it without one? Absolutely, and these step-by-step instructions will walk you through mixing this dough by hand as well.
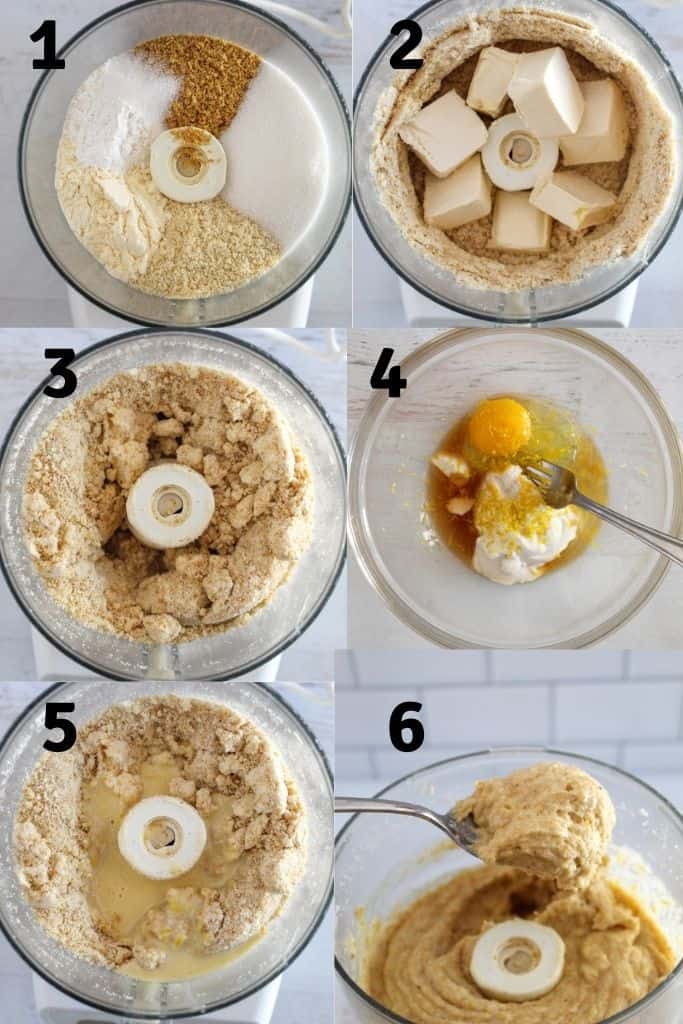
Step 1
In the bowl of a food processor, add the almond flour, flaxseed meal, coconut flour, sugar, baking powder, xanthan gum, and salt. Pulse a few times to mix the dry ingredients.
By hand: In a large bowl, whisk together the almond flour, flaxseed meal, coconut flour, sugar, baking powder, xanthan gum, and salt.
Step 2
Add the cold, diced butter to the food processor or to the bowl of dry ingredients if mixing by hand.
Step 3
Pulse a few more times until the mixture resembles coarse crumbs. (See image 3 above).
By hand: Using a fork, your fingers, or a pastry blender, break down the butter into smaller pieces and incorporate it into the dry ingredients until the mixture resembles coarse crumbs.
Step 4
In a small bowl, combine the sour cream, egg, apple cider vinegar, vanilla extract, and lemon zest. Mix to combine.
Step 5
Add the sour cream mixture to the food processor (or bowl) and pulse or stir by hand with a spatula a few times to fully mix. Do not overmix the batter; pulse just enough to combine the dry ingredients.
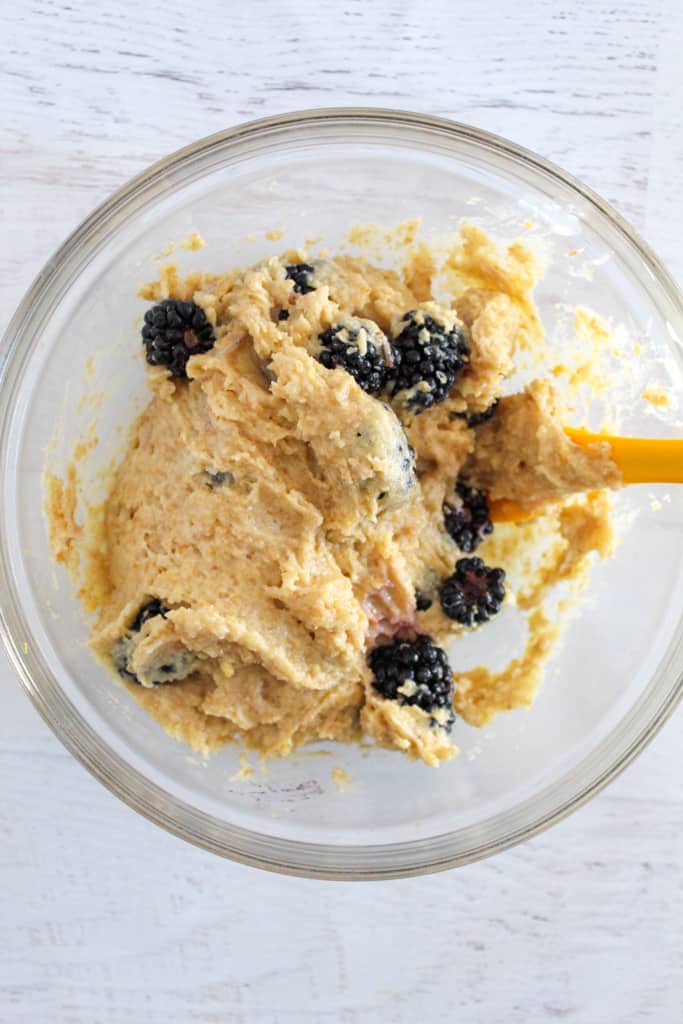
Step 6
The batter should be relatively thick and have a spreadable consistency. Scrape the batter out of the food processor and into a bowl, and let it rest for 30 minutes.
Meanwhile, preheat the oven to 450ºF and line a cookie sheet with parchment paper.
Step 7
After the batter has rested, using a rubber spatula, gently fold the blackberries into the batter.
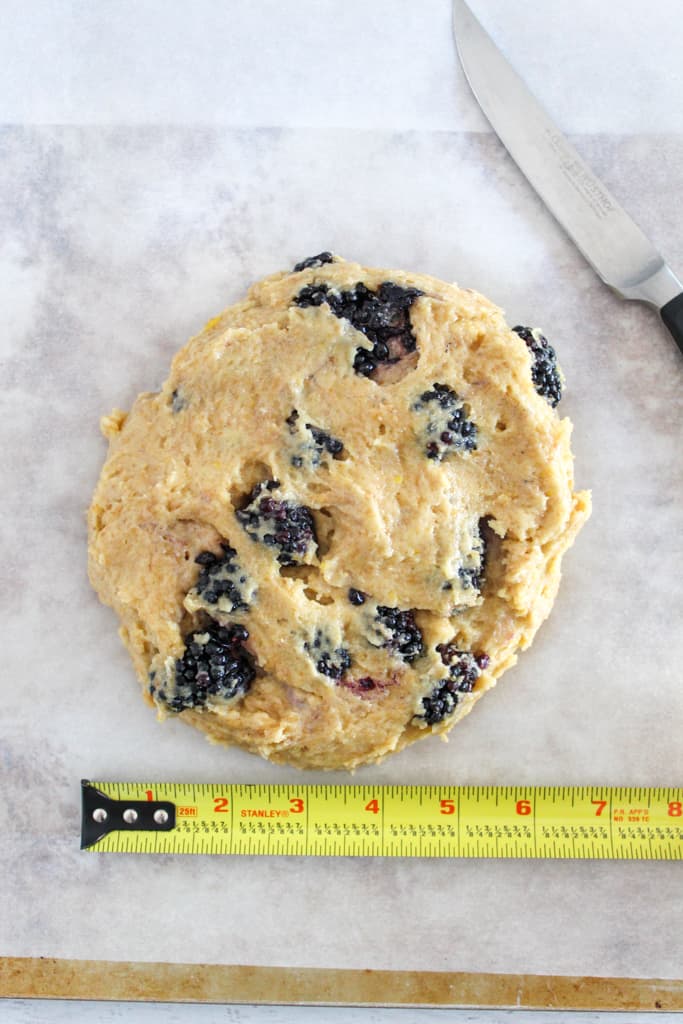
Step 8
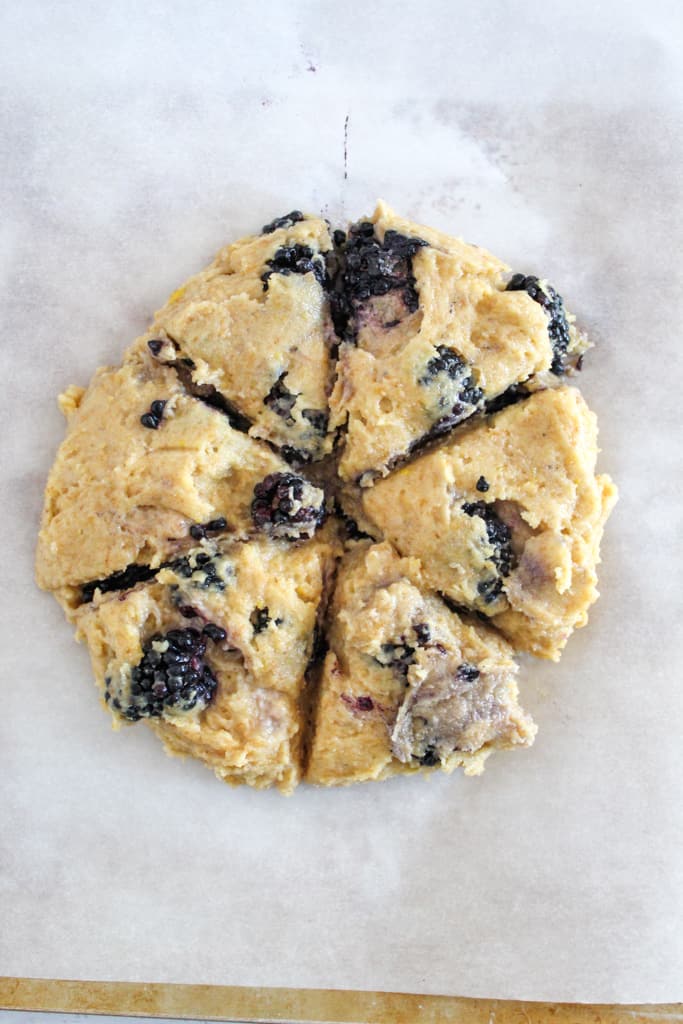
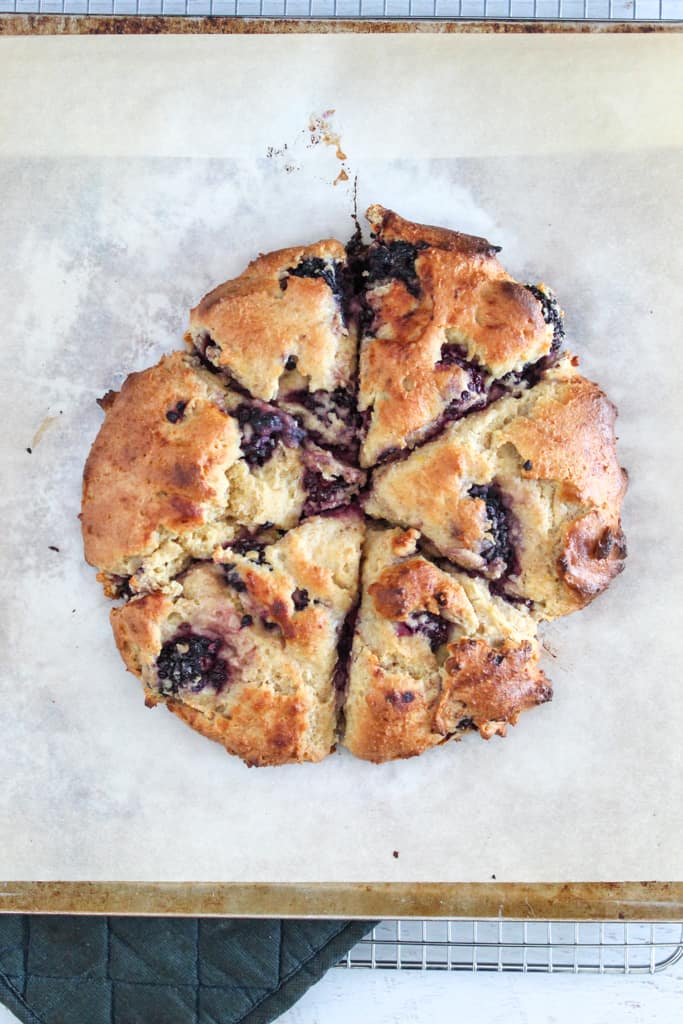
Turn the dough onto the cookie sheet and gently pat it into a 6 1/2-inch circle. Using a sharp knife, cut the disk into 6 slices.
The easiest way to get the dough ready for baking is to place the fully rested dough ball directly onto a baking sheet lined with parchment paper. Then give it a few pats to form it into a round disk, about 6 1/2 inches wide.
Use a sharp knife and slice the disk into 6 slices. The dough will be on the soft side, so it will not separate much.
Tip: Wipe the knife between cuts to keep the slices as clean as possible.
Step 9
Bake for 20 minutes. Remove the scones from the oven and separate them, leaving a bit of space between each. Slice again with the knife if needed. Return them to the oven and bake for 5-7 minutes more, or until the edges start to turn golden and the center is set but still soft.
Tip: Cover the scones with foil if they start to get too brown but are still not set in the center.
Step 10
Remove the scones from the oven and allow them to cool for 10-15 minutes. Drizzle them with glaze and serve.
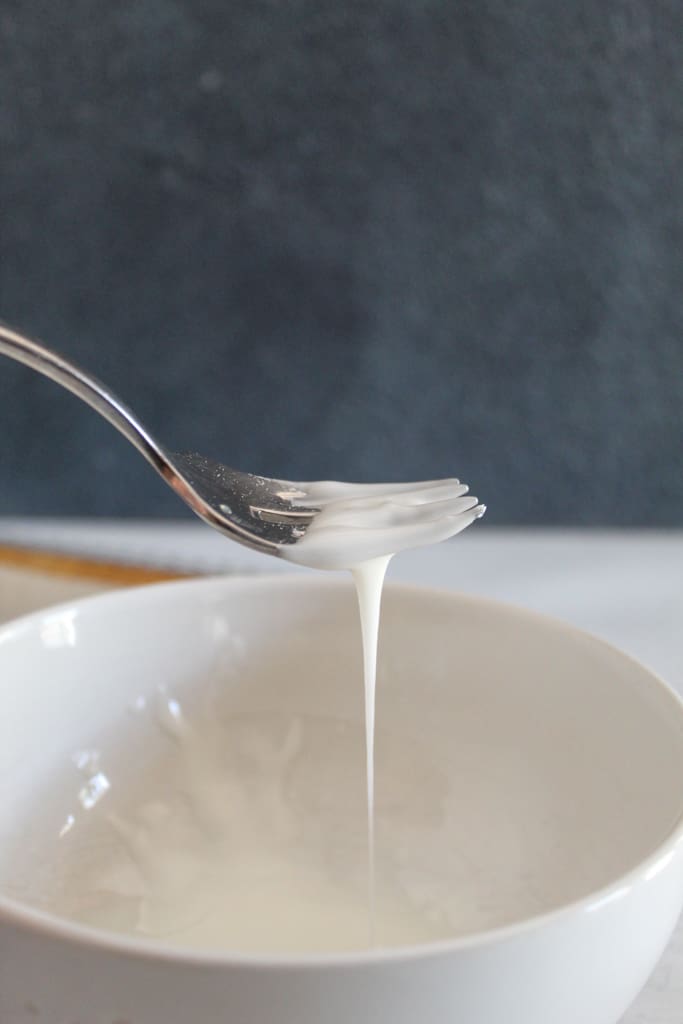
Glaze is one of the simplest but tastiest additions. Like these buckwheat muffins and this lemon pound cake, a glaze gives them a little pop of flavor with the sweetness of the powdered sugar and the tartness of the lemon juice. It’s a great combination. And making it couldn’t be easier! Just add the ingredients (lemon juice and powdered sugar) to a bowl and stir until it reaches the consistency you like, adding more lemon juice or a splash of water to thin it out, or more powdered sugar if you like it thicker.
Pro Tips for Soft, Fluffy Texture
If you want scones that feel like they came from a bakery, these tips make all the difference.
Don’t Skip the Rest Time
This is an often-overlooked step in gluten-free baking, but it is one of the most important. As I mentioned earlier, coconut flour is highly absorbent. Resting the batter is essential to give the flour time to absorb moisture. This will dramatically improve the texture of the scones, preventing them from being dry and crumbly. After mixing, let the batter rest for 30 minutes before shaping and baking.
Keep the Butter Cold
Baking works best when all ingredients are at room temperature, but scones are one of the exceptions. Cold butter will contribute to a much better texture in the scones. As butter melts, it releases steam, which helps create those tender, slightly flaky layers in scones. But if the butter is already melted and soft before it hits the oven, it won’t have the same effect. Keep the butter in the fridge just until you are ready to use it.
Don’t Overmix
Overworking the dough results in dense, tough scones. Mix just until combined, and finish shaping by hand if needed, to avoid overmixing the dough in the food processor.
Shape Gently
When patting out the dough, avoid pressing too hard to keep the thickness even. This helps the scones to bake evenly and rise properly.
Avoid Overbaking
Overbaking is the fastest way to ruin texture and turn these scones dry. Look for lightly golden edges, and with a gentle touch to the center, they should feel soft and yet. The scones will finish baking on the hot tray even after they come out of the oven (this is called carryover cooking). So, pulling them out just as they look ready keeps them from overbaking during carryover cooking.

Ingredient Substitutions
Since this recipe is already gluten-free, dairy-free, and grain-free, there are only a few swaps that some people may want to make.
- Sweetener Swaps: Swap coconut sugar for granulated sugar.
- Egg Substitutes: Make this a vegan recipe by using a flax egg in place of the egg, or try one of these other egg substitutes. Keep in mind that this may slightly affect the texture of the scones.
- Dairy: If dairy is not an issue, you can use regular butter and sour cream in the recipe.
Tip: When substituting, try changing one thing at a time, so it’s easier to control and understand the outcome.
How to Store, Freeze, and Reheat
Making a batch ahead of time? These scones store beautifully!
At room temperature, these scones are best within the first couple of days. In the fridge, they will last a bit longer (3-4 days), but the texture may firm up. A great way to enjoy them if they have firmed up is to microwave the scones or slice them and toast them in a pan with some butter. This will bring back that soft, tender texture.
To freeze the scones, let them cool completely, then store them in a freezer-safe bag or container. They will last for 2-3 months.
To reheat frozen scones, microwave them for a quick option and a soft texture, or reheat them in the oven at 300ºF for around 10 minutes for that fresh-baked texture.
Flavor Variations
Creating new flavors and variations of this scone recipe is one of the best parts! Have some fun and get creative, starting with a few of my favorite flavor inspirations.
- Lemon Zest + Blueberries
- Orange Zest + Cranberries
- Chocolate Chips
- White Chocolate + Raspberry
- Chopped Pecans/Walnuts
- Swap Vanilla Extract for Almond Extract
- Make it Seasonal with Pumpkin Spice or Apple Pie Spice
What spin on these scones would you like to try next? Comment below!
Blackberry Scones FAQs
For some more helpful tips and tricks, read on in these commonly asked questions from our readers.
Why Are My Gluten-Free Scones Dry?
Dry scones are usually the result of too much coconut flour, overbaking, or skipping the dough rest time. Coconut flour absorbs a lot of liquid, so even a small extra amount can throw off the texture. Measure your flour by weight, not by cups, for the best results.
Also, letting the dough rest allows the flour to hydrate properly, which makes a big difference. For the best results, bake just until the edges of the scones are lightly golden and the centers are set.
Why Didn’t My Scones Rise?
If your scones didn’t rise, it’s often due to inactive baking powder or overmixing the dough. Gluten-free dough doesn’t need much mixing, and it’s easy to overmix in the food processor. Use the pulse setting, or finish mixing by hand to avoid overworking the dough, which can make the texture dense.
Also, make sure your baking powder is fresh. It loses its effectiveness over time and should be replaced at least every 6 months.
Can I Use Frozen Blackberries?
Frozen blackberries will work really well in this recipe and are a great option when fresh berries aren’t available. Just be sure to use them straight from the freezer without thawing, as thawed berries will release too much moisture.
You can also lightly toss them in a bit of flour before folding them into the dough to help prevent excess bleeding. This keeps your scones from turning too wet and discolored.
Can I Make the Dough Ahead of Time?
You can prepare the dough up to 24 hours in advance. This can actually improve the texture, as it gives the flours even more time to hydrate. When you’re ready to bake, simply shape and bake as directed in the recipe. This is a great option for prepping ahead for brunch or busy mornings when you still want a homemade treat.
Why is My Dough Sticky?
It’s completely normal for gluten-free scone dough to feel sticky at first. As it rests, the coconut flour absorbs moisture, and the dough becomes easier to handle. Try to avoid adding extra flour right away, since that can lead to dry scones later. If needed, lightly wet your hands to help shape the dough without sticking.
Wrapping Up With Scones
These blackberry scones are my favorite because most folks who eat them find it hard to believe they’re actually gluten-free. They have that perfect balance of textures and an incredibly tender, moist crumb, which can often be a struggle for home bakers to achieve.
With the right combination of ingredients and a few simple techniques, you can consistently create scones that don’t feel like a compromise. No dryness, no crumbling, just a result that feels every bit as comforting and bakery-worthy as the classic version.
Plus, this is a recipe you can enjoy time and time again without getting bored. Once you’ve made it a few times, you can start experimenting with different flavors and add-ins to make these feel like a new recipe every time.
If you’re baking for family and friends, this is one of those recipes that surprises people in the best way. These blackberry scones are definitely a recipe worth saving, so don’t forget to bookmark it, share it, or come back and try a new variation next time.

More Gluten-Free Scone Recipes!
For more tasty gluten-free scones, try out these recipes.
Connect With Us
Did you love this scone recipe? What would be your favorite variation of these blackberry scones? Let us know in the comments to inspire other bakers!