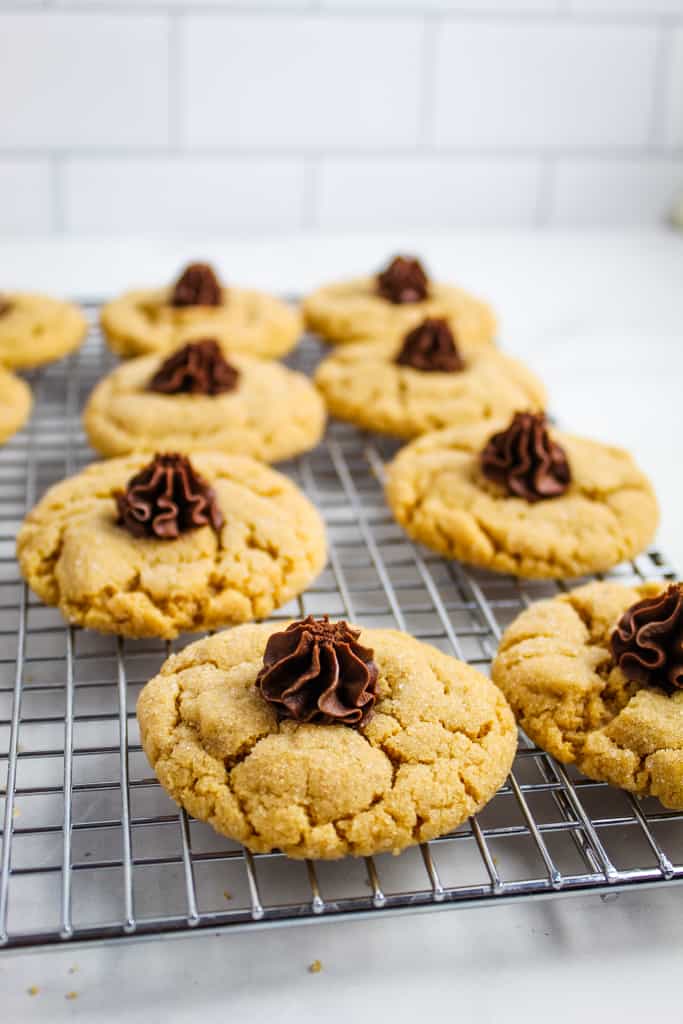
Chewy, chocolatey and perfectly peanut buttery, these gluten free peanut butter blossoms have no gums, no flour and are dairy free! But they’re tastebud-tempting delicious!
This is one of those recipes that’s an easy, week-night winner. It doesn’t take a whole lot of time to prep or bake but it makes a for a delicious treat for a night when you don’t have all day to bake a dessert. And if you’re wondering how we can make a classic peanut butter blossom recipe dairy free, read on!
Table of Contents
Why this recipe is the best!
If you’ve got 30 minutes, you’ve got time for cookies. Or for these cookies anyway (or these strawberry cake mix ones are pretty quick too!) This recipe for these classic peanut butter blossoms has been cut and trimmed so it can be on your serving plate in just 30 minutes. No more stressing out over bake sales or potlucks – keep this recipe handy and you’ve got your go-to treat that will earn rave reviews every time.
Baker’s tips
Thankfully these cookies are pretty forgiving. But for the best tasting and best looking cookies, follow these tips:
Use a name brand, full fat, creamy peanut butter. I use JIF brand peanut butter in this recipe and would recommend sticking with that. I would highly recommend not using a low fat peanut butter, it just does not produce as nice of a cookie. On the other hand, if a store brand peanut butter is all you have, use it. The taste will still be spot-on but the consistency of the cookies may be a bit more chewy or crumbly, depending on the brand.
Use the egg. Until I can confidently recommend an egg substitute, use the egg in the recipe.
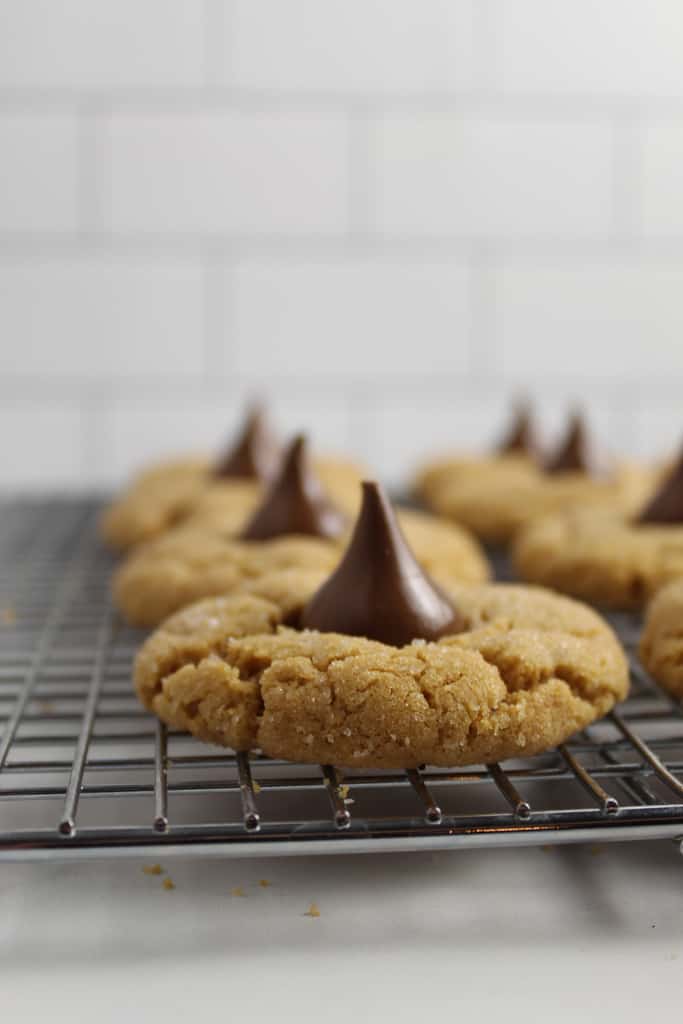
Hershey kisses can be used. If you can tolerate dairy, a nice, plump little Hershey’s kiss in the center is the traditional way to make these. However, this dairy free version is equally amazing.
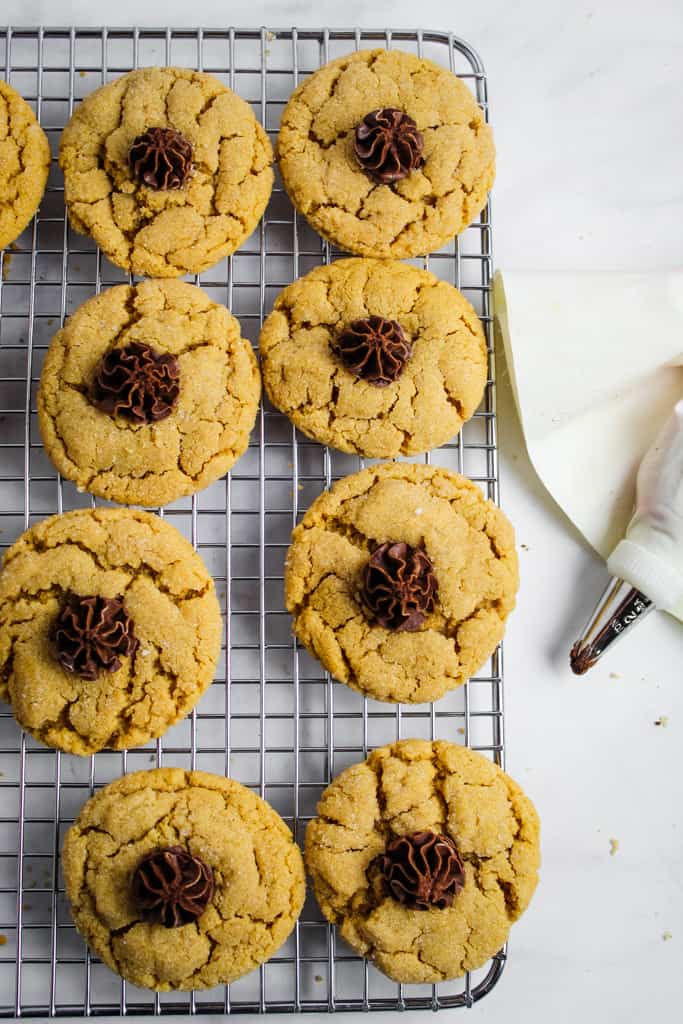
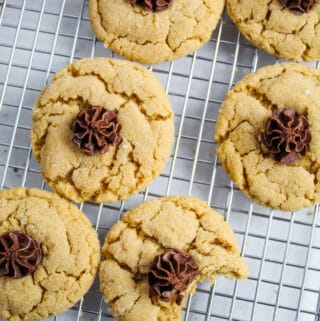
Use the dairy free chocolate frosting recipe. It’s the perfect consistency and firms up well. As I’ve talked about before, I used to decorate cakes, so I like to pipe frosting any opportunity I get. Do you have to pipe it on each one? Absolutely not. Just use a small spoon and dollop it on the top of each one. Just as delicious!
How to make gluten free peanut butter blossoms
Start with the essentials
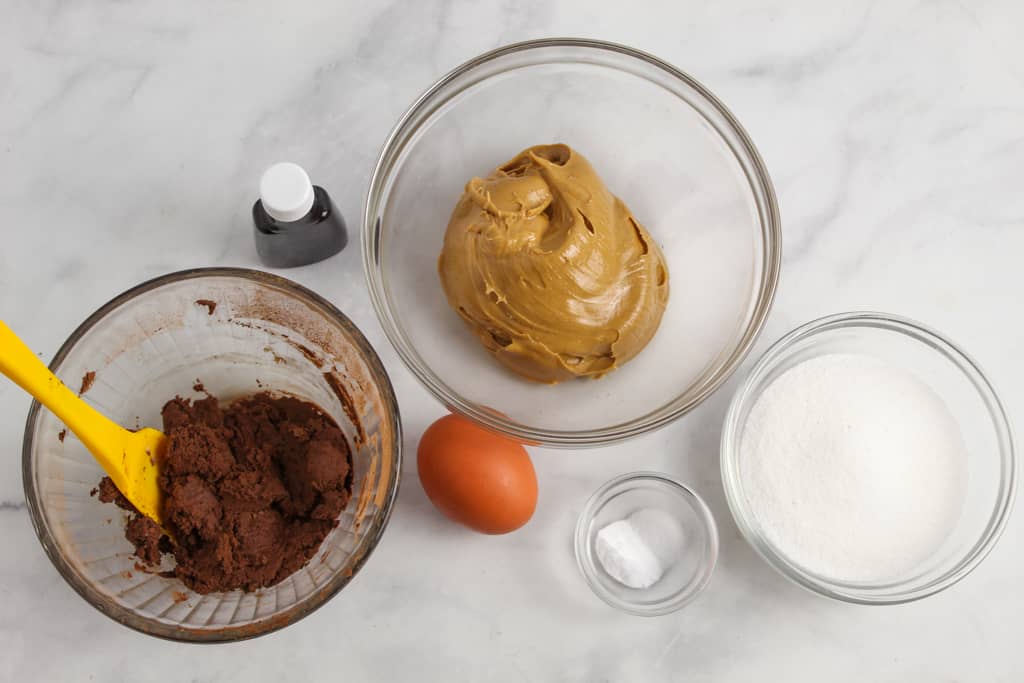
There’s not much needed for these delicious cookies – egg, vanilla, white sugar, baking soda, and salt. And a delicious peanut butter is essential. And it helps to have these tools handy:
Wooden spoon – this is the one I recommend for making the indention in the tops of the cookies after they’ve baked.
Cookie scoop – this set of 3 includes not just the cookie size scoop, but one that’s the perfect size for muffins too!
Parchment paper – makes removing cookies from the pan so easy.
Cookie sheets – these insulated pans are a little more expensive than regular cookie sheets, but the cookies bake beautifully – worth the extra few dollars.
Wire racks – this style is great for cooling
Plump little balls

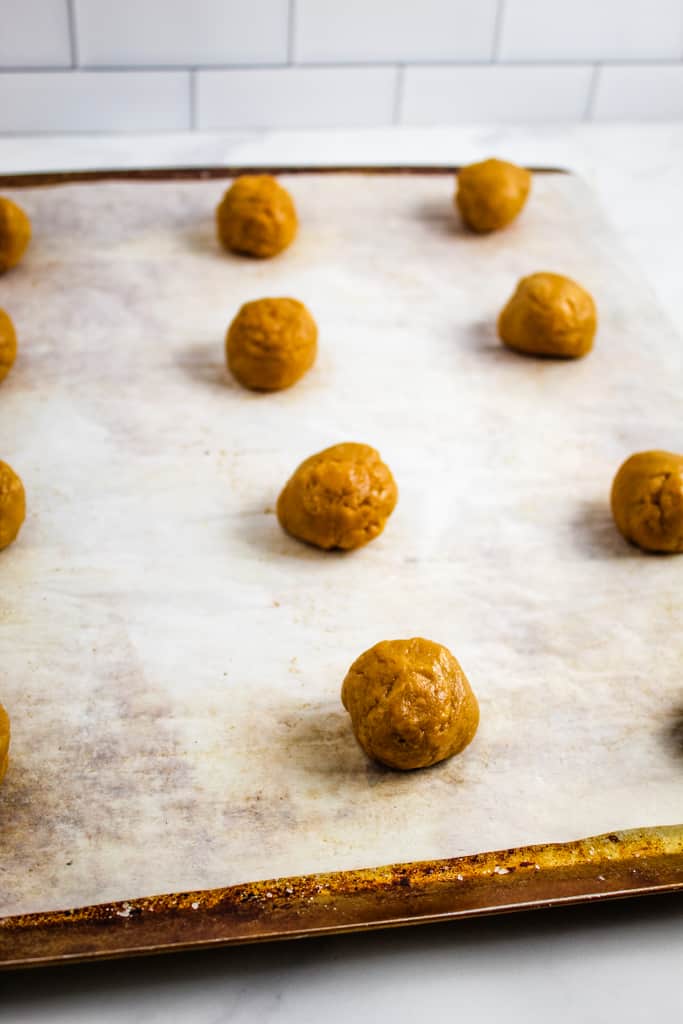
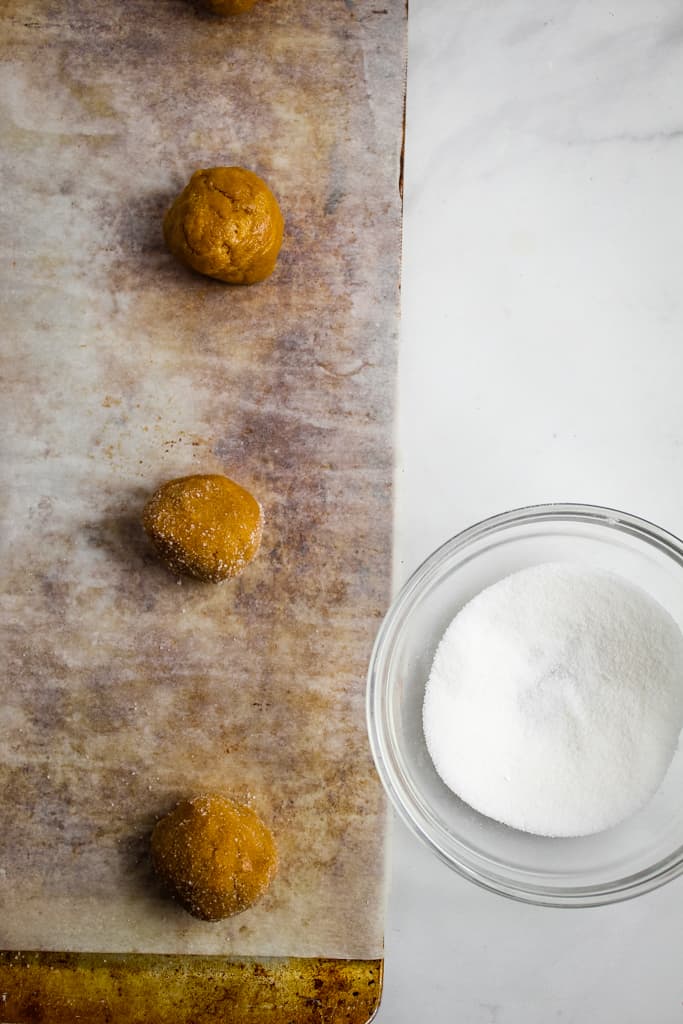
After portioning these little balls of yumminess out, resist the urge to roll them into a perfect ball. Just a quick roll and then a toss in the sugar should do it. This way the cookies stay nice and thick and with just the right amount of cracking on the edges.
Piping the ‘kiss’
Immediately after the cookies come out of the oven, use the end of a large wooden spoon and lightly press into the middle of the cookie making an indention.
Then pipe, or spoon, the chocolate frosting into the center.

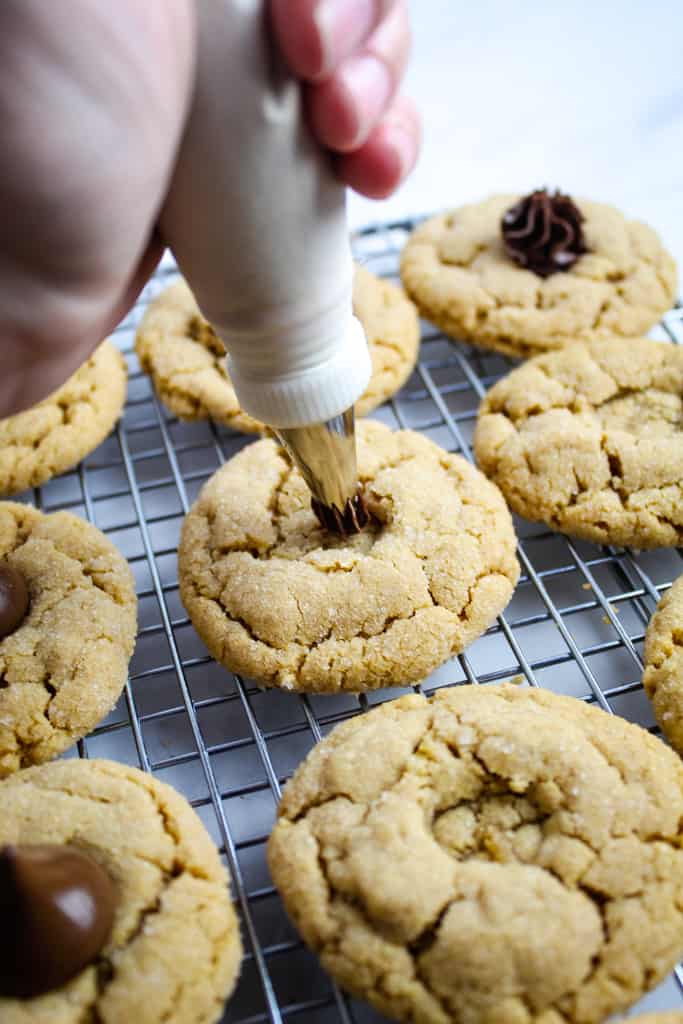
If using Hershey kisses, just place a kiss on each cookie and lightly press down – no indention with the wooden spoon needed.
Let them cool
Once the frosting or Hershey kiss is in place, remove the cookies to a wire rack to cool completely. Although I’ll admit that I didn’t wait long to take that first bite!
FAQ’s about this recipe
No, you sure don’t! I pipe the frosting because I used to decorate cakes and enjoy it, but a simple teaspoon and just spooning the frosting on top will work equally well. As will a plastic baggie with the end cut off. Just place a big dollop of frosting on top of each cookie.
I used #22.
A plastic tupperware container works best. Something with a lid but that won’t crush the cookies.
Yes! You can make this batter up to 2 days ahead of time, cover it well and refrigerate it. Then when you’re ready to use it, allow it to warm up for about 30 minutes then portion and bake as diected.
Hungry for more gluten free recipes?
Ready to get these on your serving platter?! Let’s get baking!
Easy Gluten Free Peanut Butter Blossoms
Ingredients
- 1 cup creamy peanut butter
- 2/3 cup white sugar
- ½ teaspoon baking soda
- ½ teaspoon pure vanilla extract
- ¼ teaspoon salt
- 1 egg
- Additional white sugar for rolling dough
Dairy Free Chocolate Frosting
Instructions
- Preheat oven to 350 F. Place a layer of parchment paper on cookie sheets.
- In a large mixing bowl with the paddle attachment or a bowl with a sturdy spoon, mix the peanut butter, white sugar, baking soda, vanilla and salt.
- Add in the egg and mix until combined.
- With a cookie scoop, portion cookie dough onto prepared cookie sheets.
- Roll each portion into a smooth ball of dough.
- Place the additional white sugar into a small bowl. Roll in sugar and place back on the cookie sheet.
- Bake for 10 minutes.
- Remove from the oven and lightly press the end of a large wooden spoon in the top of each one to make an indention.
- Let cool completely.
- Pipe frosting into the center of each cooled cookie.
Video
Notes
- These cookies are flour free, dairy free and gum free.
- The recipe will make between 17 – 20 cookies.
- Use a high quality peanut butter since it’s the main ingredient.
- Roll the cookies just until formed into balls.
- Hershey kisses can also be used in place of the chocolate frosting – place a kiss on each cookie as it comes out of the oven. Let cool completely.