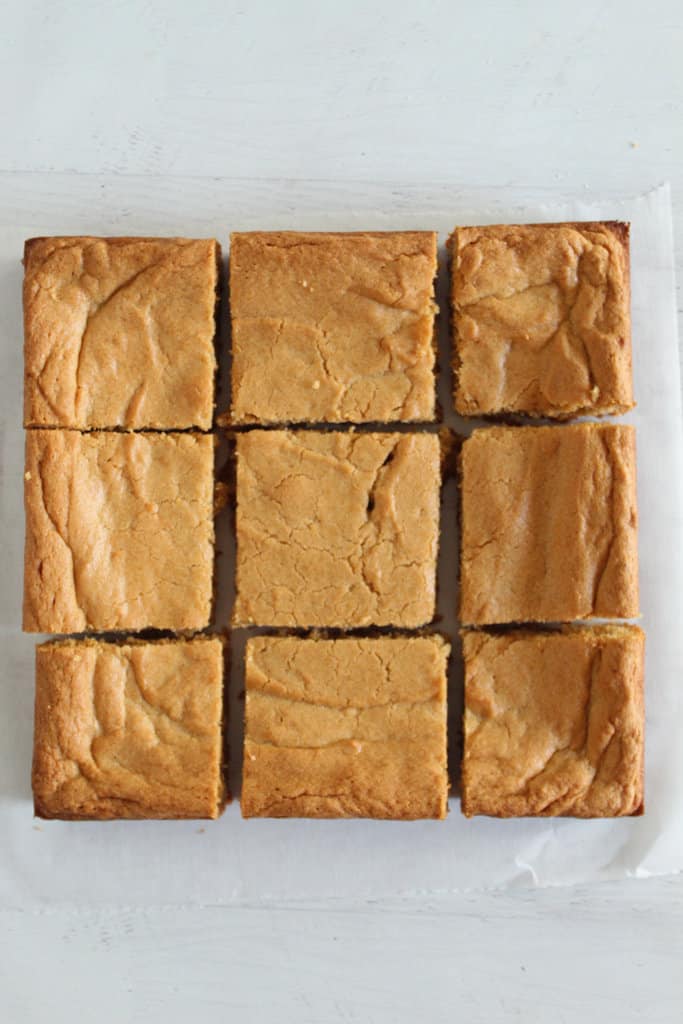
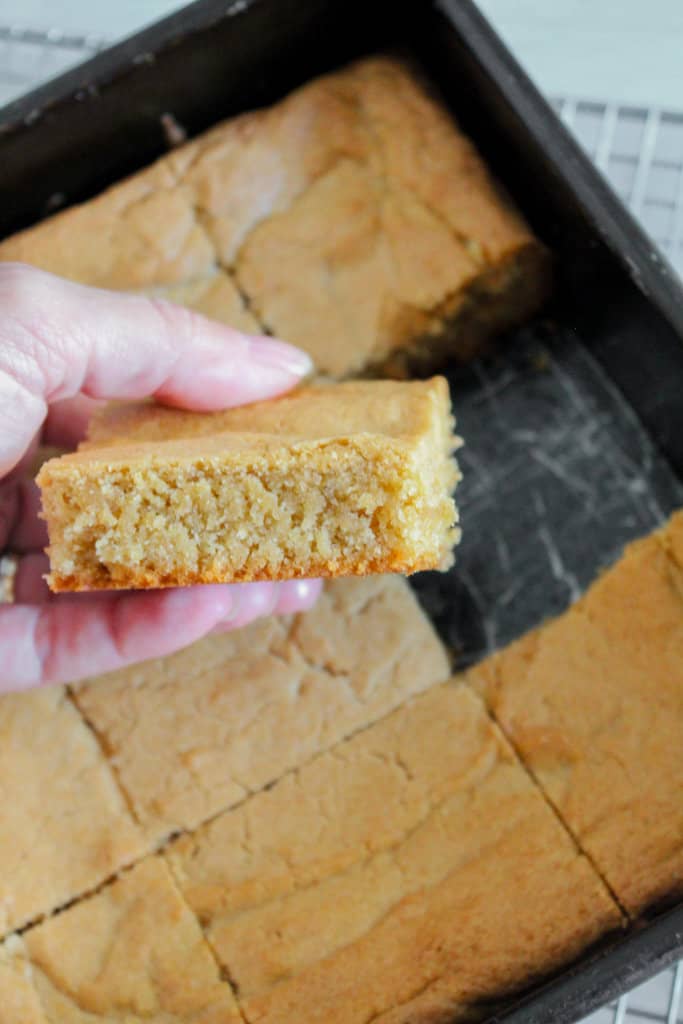
If you’ve been looking for gluten-free peanut butter brownies that bake up soft, chewy, and full of real peanut butter flavor, this recipe delivers without the dry, gritty texture.
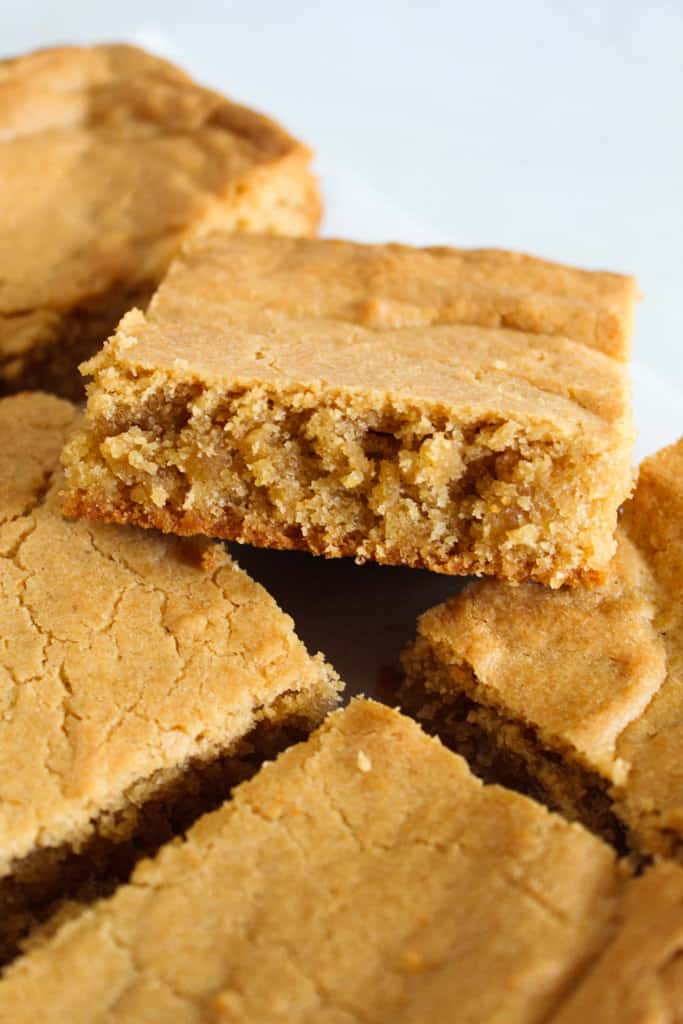
Most gluten-free brownies have one fatal flaw: they promise chewy and deliver dry, crumbly disappointment. These gluten-free peanut butter brownies are different. They’re made with just 9 simple ingredients, bake up with crisp edges and a soft, rich center, and taste like pure peanut butter comfort in every bite.
Table of Contents
The secret is using the right gluten-free flour blend, measuring by weight, and letting the batter rest before baking so the texture turns tender instead of gritty. Whether you need a dairy-free dessert, a freezer-friendly treat, or a quick peanut butter fix, this is the brownie recipe to keep close.
Why You’ll Love These Gluten-Free Peanut Butter Brownies
These peanut butter brownies aren’t any harder to make than gluten-free chocolate brownies, and are just as full of flavor! Here are a few more reasons why this recipe is the best:
- The prep takes only 10 minutes, and you can have perfect brownies in less than an hour and a half. Most of the work in making these peanut butter brownies is just about having some patience, even though they smell good while they’re baking! (I sometimes like to get started with other things, like mixing up some cookie dough, while I’m waiting for the brownie batter to rest and then bake.)
- It can be stored at room temperature for up to 3 days without going stale (this is a big one for gluten-free baked goods!).
- They’re very customizable with your favorite add-ins like chocolate chips or chopped nuts.
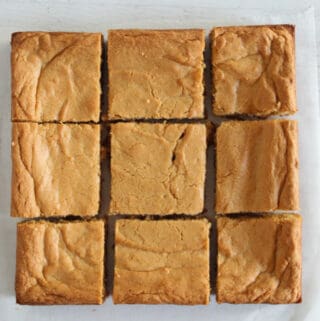
- It makes 9 perfectly thick and chewy brownies
Pro Tips for Chewy Gluten-Free Brownies
This gluten-free peanut butter brownie is an easy, foolproof recipe you’ll want to make again and again. Because gluten-free baking can sometimes pose a challenge, follow these baking tips for the best results!
1. Use room temperature ingredients
For the best soft and chewy brownies, be sure to use room-temperature ingredients. This is important because room-temperature ingredients combine much more easily during mixing than cold ingredients.
2. Measure the ingredients by weight
Use a digital food scale to measure the flour and sugar in this recipe by grams. Weight measurement is the most accurate way to measure these ingredients. This is especially important for gluten-free recipes like these brownies, which can be finicky about the amount of dry ingredients in the batter!
3. Let the batter rest for 30 minutes
Giving the batter time to rest before baking allows the dry ingredients to fully absorb the liquid ingredients. This is true for most gluten-free baking recipes. It gives your brownies the perfect soft and chewy texture!
Equipment You’ll Need to Make These Gluten-Free Peanut Butter Brownies
If you do a lot of baking, you probably have most of these somewhere in your kitchen. Let’s make sure everything is accounted for.
- Digital food scale
- Medium mixing bowl
- Stand mixer
- Whisk
- Rubber spatula
- 8” square baking pan (I like to have two of these in case I want to double a brownie recipe)
- Cooking Spray
- Sharp Knife
- Small Flat Metal Spatula
- Airtight Container (for storage)
Ingredients for Gluten-Free Peanut Butter Brownies
Like the equipment, I also like to make sure I have all the ingredients before I start baking. If I’m out of one, it may be possible to do a quick swap with some of these ingredients, depending on what I have on hand. (I’ll cover a few possible substitutions and variations later.) However, I prefer to go to the grocery store before I start baking if I need to.
- King Arthur Measure for Measure Gluten-Free Flour
- Baking Powder
- Salt
- Vegan Butter
- Creamy Peanut Butter
- Granulated Sugar
- Brown Sugar
- Eggs
- Pure Vanilla Extract
What to Know About These Ingredients
Why these ingredients? Well, each of them brings something to the recipe. Here’s a quick rundown.
King Arthur Measure for Measure Gluten-Free Flour
130 grams (about 1 cup) King Arthur Measure for Measure Gluten-Free Flour
A bag of King Arthur Measure for Measure Gluten-Free Flour is handy to have around for easy gluten-free recipes like this one. Then I don’t have to think too much about which gluten-free flour blend I’m going to use. This gluten-free flour is the easiest to use as a 1:1 replacement for wheat flour, which is why it’s called “measure for measure” flour.
Why “about 1 cup”? The thing to remember about measuring flour in grams is that the amount in grams doesn’t always add up to a “neat” number of cups or fraction of a cup. I’ll usually just jump straight to measuring the flour with my digital food scale to make sure I’m not adding too much or too little, even if the difference is “only” a few grams. This helps me keep the dry ingredients at the right amount so these brownies don’t become too dense, dry, or gummy!
Baking Powder
1 teaspoon baking powder
Baking powder is the chemical leavening agent we’ll need since we won’t add any additional acid to these brownies. Baking powder already has everything it’ll need to create the carbon dioxide bubbles that give these brownies the perfect fluffy texture. It’ll usually contain a mild base like sodium bicarbonate, a mild acid like cream of tartar, and a little cornstarch to keep the acid and base from reacting before they’re mixed with other ingredients for a recipe.
How to tell if baking powder is still good: Stir a teaspoon of it into a cup of water. If it fizzes, it’s still good. If it doesn’t, it may be old and should be discarded.
Salt
1/4 teaspoon salt
This amount of salt enhances and balances the flavor of the other ingredients without overwhelming them.
Vegan Butter
1/3 cup vegan butter
You may also see vegan butter labeled as “plant butter” because it’s made with a plant-based oil instead of dairy. Vegan butter keeps this recipe dairy-free while still adding richness and tenderness for a better crumb.
Different brands vary in flavor, salt level, and fat composition, so use a stick-style vegan butter you already like for baking. I most often use Country Crock plant butter sticks when I bake with vegan butter.
Creamy Peanut Butter
1/2 cup creamy peanut butter
As you might guess, creamy peanut butter adds the peanut butter flavor to these brownies. I use creamy instead of crunchy or a peanut butter powder because it helps with the texture. Don’t use too much, though, because it can overwhelm the usual “wet” ingredients and make the brownies too dry.
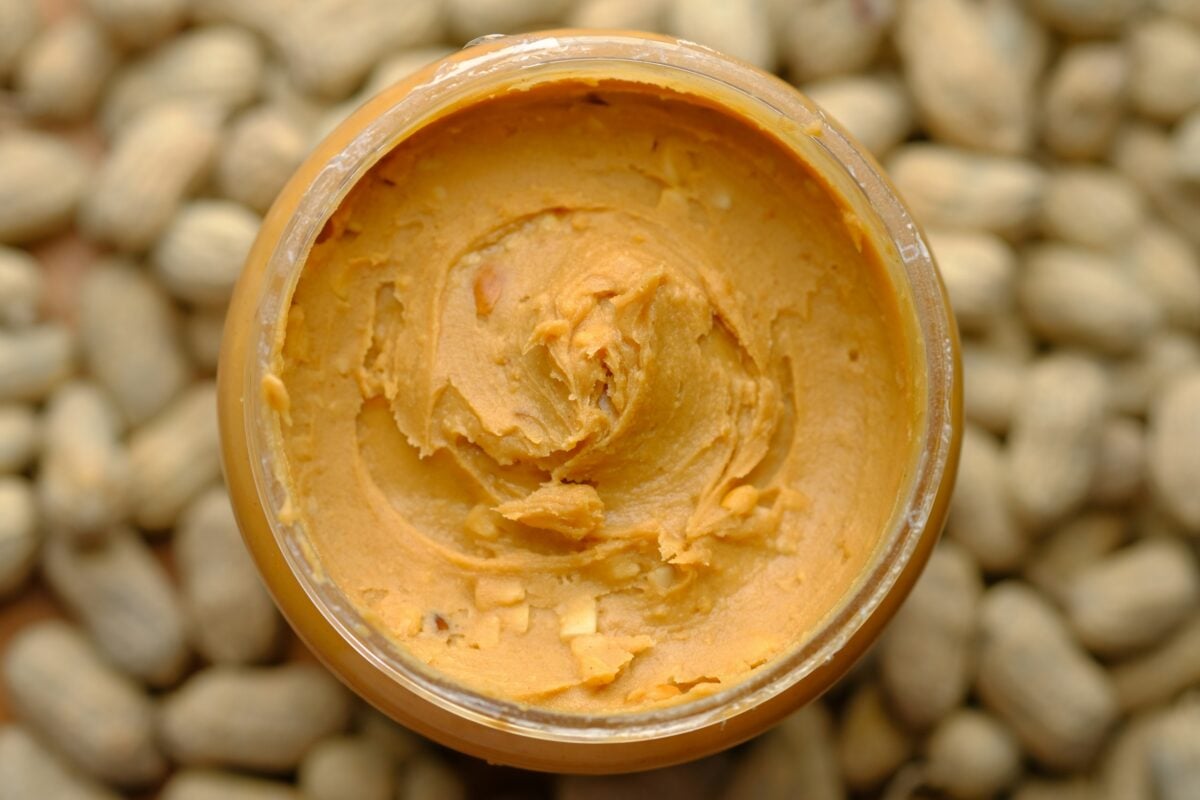
If you want a more intense peanut butter flavor, you could try making peanut butter-flavored chips your add-in or sprinkling some chips on top of the brownies before baking them.
Granulated Sugar
133 grams (about 2/3 cup) granulated sugar
Sugar adds most of the sweetness to these brownies.
Why is 133 grams of granulated sugar about 2/3 cup, and 130 grams of flour about 1 cup? That’s a good question! It usually has to do with the density of the dry ingredients. In this case, granulated sugar is slightly denser than flour by grams per cup.
Brown Sugar
100 grams (about 1/2 cup) brown sugar
Genuine brown sugar adds the more complex flavor of molasses to sugar, which helps enhance the flavor of slightly sweet baked goods like these brownies. In fact, when looking at the ingredients for brown sugar, I always look for exactly two ingredients: Sugar and molasses. (Yes, I can be paranoid, but if it lists just “brown sugar,” I don’t necessarily know exactly what the processing plant added to the sugar to make it brown.)
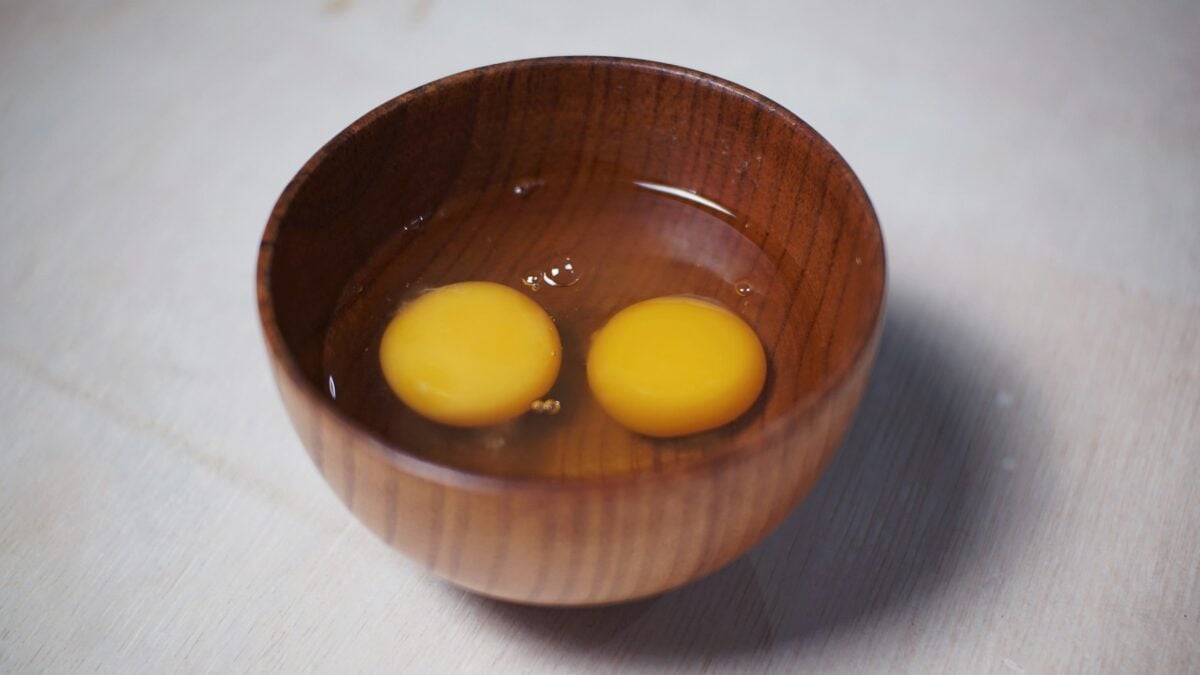
Eggs
2 large eggs
Eggs provide most of the binding power that keeps these brownies from falling apart when you take them out of the pan. Naturally, the secret is in the egg protein, which uncoils to form a web that keeps air bubbles and moisture from escaping.
Pure Vanilla Extract
1/2 teaspoon pure vanilla extract
Vanilla extract adds a unique flavor profile that enhances the sweetness of these brownies. Make sure the ingredient list includes vanilla beans, water, and alcohol to make sure you’re getting the real stuff. (Most of the alcohol will bake out in the oven, if you’re wondering.)
The exact variety of vanilla beans may not matter much since we’re not using much vanilla extract here. However, if you have to choose, go with vanilla extract made with Madagascar vanilla beans for a rich, creamy flavor. Tahitian vanilla beans might work, too, though they have a more floral and fruity flavor.
Printable Gluten Free Peanut Butter Brownies Recipe Card
Ingredients
- 130 grams King Arthur Measure for Measure gluten free flour about 1 cup
- 1 teaspoon baking powder
- 1/4 teaspoon salt
- 1/3 cup vegan butter softened
- 1/2 cup creamy peanut butter
- 133 grams granulated sugar about 2/3 cup
- 100 grams brown sugar about 1/2 cup
- 2 eggs
- 1/2 teaspoon pure vanilla extract
Instructions
- In a medium bowl, whisk together the flour mix, baking powder and salt. Set aside.
- In the bowl of a stand mixer, cream together vegan butter and peanut butter until smooth.
- Add the granulated sugar, brown sugar, eggs and vanilla extract. Blend on medium speed for 30 seconds to fully combine.
- All at once add the the flour mixture to the sugar mixture. Blend on low speed for 15 seconds until mixed. Stop the machine and scrape down the batter.
- Mix on medium speed for 1 minute until fully combined.
- Set batter aside to rest for 30 minutes.
- Meanwhile, spray an 8" square baking pan with cooking spray.
- Heat oven to 350 F. Scrape batter into the pan and bake for 40 – 42 minutes or until toothpick comes out clean.
- Let cool for 5 minutes before cutting into squares using a sharp knife.
Nutrition
Did you make and love this recipe? Give it your review and rating below! And make sure to follow me on Instagram, Pinterest, and Facebook , too!
Instructions for Making Gluten-Free Peanut Butter Brownies
I don’t like to procrastinate with making these brownies. While they only take about 10 minutes to mix up, letting the batter rest and then baking them takes longer, and I like to get them done in time for the bake sale. So let’s get started with these gluten-free peanut butter brownies.
Step One: Bring All Ingredients Up to Room Temperature
This makes the batter easier to mix, so these brownies turn out perfectly. The butter should be softened up, for instance. Naturally, the peanut butter doesn’t need to be refrigerated in the first place, and keeping it at room temperature makes it soft enough to mix in easily.
Step Two: Mix Flour, Baking Powder, and Salt
Add the flour mix, baking powder, and salt to a medium bowl and whisk them together. Set aside.
For the best gluten-free peanut butter brownies, use a reliable 1:1 gluten-free flour blend and measure it by weight whenever possible.
Step Three: Cream Together Butter and Peanut Butter
Place the vegan butter and peanut butter inside the bowl of a stand mixer. Cream them together until smoothly blended.
Step Four: Add Sugars, Eggs, and Vanilla Extract
Add the brown sugar, granulated sugar, eggs, and vanilla extract to the butter-peanut butter mix. Mix on medium speed for about 30 seconds until fully combined.
Step Five: Add Flour Mix to the Stand Mixture Bowl
Add the flour mix to the mixture in the stand mixer bowl. No need to do it gradually; just pour it straight in, but be careful not to spill any. Mix on low speed for about 15 seconds. Then stop the mixer and scrape down the sides of the bowl with the rubber spatula. Mix on medium speed for about 1 minute until the ingredients are fully combined.
Step Six: Let Batter Rest
Let the batter rest for 30 minutes. Covering it with plastic wrap is optional but recommended if you think anything (or anyone) might get into the batter.
Step Seven: Preheat Oven
While the batter is resting, preheat the oven to 350 degrees Fahrenheit (176 degrees Celsius).
Step Eight: Prepare Pan
Spray the inside of the 8″ square baking pan with cooking spray.
Step Nine: Add Batter to Prepared Pan
When the batter is done resting, use the rubber spatula to scrape it into the prepared pan and spread it evenly.
Step Ten: Bake Brownies
Bake the brownies for 40-42 minutes or until a toothpick comes out clean.
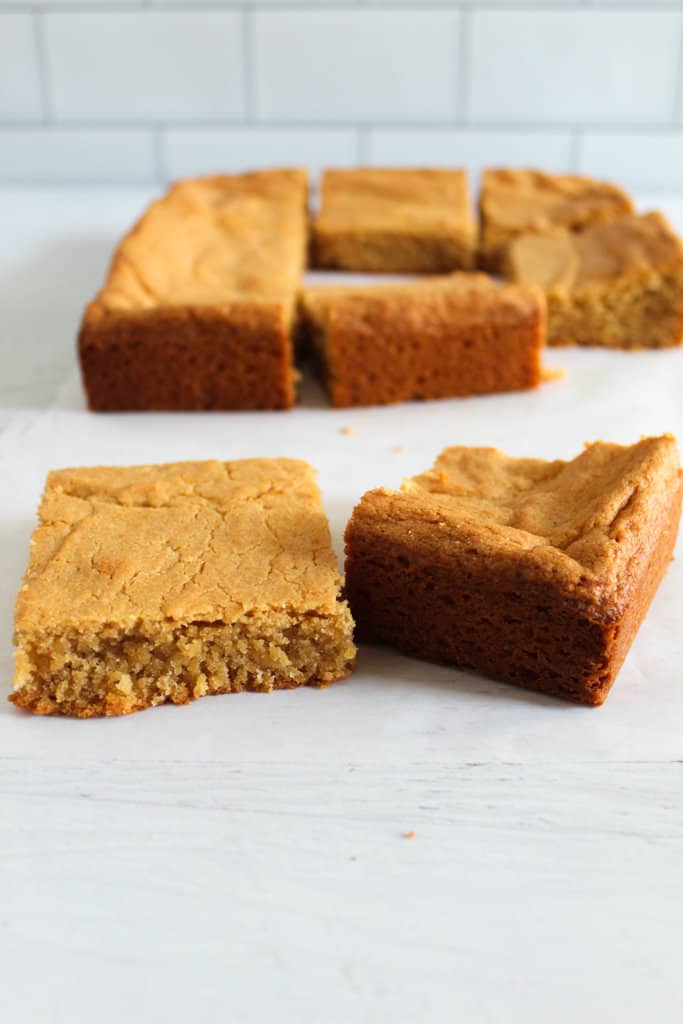
Doneness cue: The key to soft gluten-free peanut butter brownies is pulling them from the oven while the center still looks slightly soft, not wet. The edges should look set and slightly crisp.
Step Eleven: Cool Brownies
Then remove them from the oven and let them cool for 5 minutes. Letting these gluten-free peanut butter brownies cool completely makes them easier to slice and helps the center set properly.
Step Twelve: Cut and Serve or Store Brownies
Use a sharp knife to cut the brownies into nine equally sized squares. Use a metal spatula to remove them from the pan and transfer to an airtight container or some plates to serve. Brownies can be stored in an airtight container on your kitchen counter for 2-3 days before they start to go stale.
Troubleshooting Gluten-Free Peanut Butter Brownies
Gluten-free brownies can be sensitive to flour measurement, mixing, and bake time. Here are the most common issues and how to fix them.
- Brownies are dry: This usually means there was too much flour or the brownies baked too long. Weigh the flour if possible, and start checking them around the 40-minute mark.
- Brownies taste gritty: The batter may not have rested long enough. Let it sit for the full 30 minutes so the gluten-free flour can absorb moisture.
- Brownies are too cakey: This can happen from too much baking powder, too much flour, or overmixing. Measure carefully and mix just until combined.
- The center seems underdone: Bake for another 2–3 minutes, then check again. The center should look soft but not wet, and the brownies will continue to set as they cool.
- Brownies crumble when cut: They may have been sliced too soon. Let them cool completely before cutting for cleaner, sturdier pieces.
The biggest fixes are simple: weigh the flour, rest the batter, avoid overbaking, and let the brownies cool before slicing.
Storing
Once baked and cooled, you can store these brownies at room temperature in a tightly sealed plastic container or under a cake dome for up to 3 days. For longer storage, cut the brownies into squares and keep them in an airtight container or resealable plastic bags in the freezer. Thaw them on the counter until they are ready to eat again.
Substitutes for Peanut Butter Brownies
I haven’t found a good substitute for King Arthur Measure for Measure Gluten-Free Flour. Different brands typically use different “formulas” for their gluten-free flour blends, so it’s usually worth paying attention to the ingredients. (All-purpose wheat flour might work if you don’t need these brownies to be gluten-free.)
The Swerve brand makes granular zero-calorie sweetener and brown zero-calorie sweetener that can replace granulated sugar and brown sugar if you’re trying to cut calories.
Dairy butter can replace the vegan butter if you don’t mind that it won’t be dairy-free.
Don’t want to use peanut butter? Most nut and seed butters, like cashew, almond, and sunflower seed, will work. They’ll just add different flavors to the brownies.
I haven’t tried any egg substitutes in this recipe. However, we do have a good guide to replacing eggs in a recipe if you’d like to try it. (Feel free to let us know how it turns out in the comments section!)
For variety, try folding 1/2 cup of mix-ins, like chocolate chips or chopped nuts, into the batter before adding it to the pan. Peanut butter flavored chips are my personal favorite when I want to enhance the peanut butter flavor without adding too much creamy peanut butter.
FAQ About These Peanut Butter Brownies
I think making these brownies is pretty easy. We do sometimes get questions, though. I did my best to answer some of the most common questions here. If you have a question I haven’t thought of yet, feel free to ask in the comments section, and I’ll do my best to answer as soon as possible.
What makes brownies cakey instead of fudgy?
Fudgy brownies generally contain a higher ratio of fat to flour than cakey brownies. These peanut butter brownies are more on the fudgy, chewy side. The peanut butter adds additional fat, which contributes to this consistency.
Can I make these brownies ahead of time?
I actually do this pretty often! These brownies keep very well for a few days if kept in an airtight container on the kitchen counter, so they are a fantastic make-ahead dessert. The hard part’s keeping the family out of them until I need to take them with me!
Can I make these brownies in a different-sized pan?
If you don’t have an 8” pan, you can use one that is similar in size. Note that using a larger pan may result in thinner brownies, and a smaller pan may make them thicker. Keep in mind that the bake time may vary depending on the size of the pan you use.
How can I tell if an ingredient is legitimately gluten-free?
Look for a gluten-free label and check the ingredient list for wheat, barley, rye, malt, brewer’s yeast, or other gluten-containing ingredients. In the U.S., foods labeled “gluten-free” must meet FDA requirements, including containing less than 20 parts per million of gluten. A third-party certified gluten-free seal can add extra reassurance, especially if you are baking for someone with celiac disease or a high sensitivity to cross-contact.
My kids got into the batter while I was letting it rest! Are there any food safety concerns?
Raw brownie batter is not considered safe to eat because it contains raw eggs and uncooked flour. Both can carry germs that may cause foodborne illness, so it is best to keep kids from tasting the batter before baking. Once the brownies are fully baked, cooled, and stored properly, they are safe to enjoy.
The good news is that the eggs in these brownies should be safe at room temperature once the brownies are baked. Any bacteria should have been killed while they were baking, so the brownies can sit on the kitchen counter in an airtight container for a few days without issue.
What should the brownies look like when they’re done baking?
When brownies get done baking, they should have that “slightly crisp on the edges, soft in the middle” appearance that a tray of freshly baked brownies is known for. The best way to be sure they’re done is to insert a toothpick in the center of the brownies. The toothpick should come out clean.
Which is better, the crispy edges or the soft center? Of course, I like to leave that up to personal taste. But I have been known to swipe a crispier edge piece that nobody else wanted!
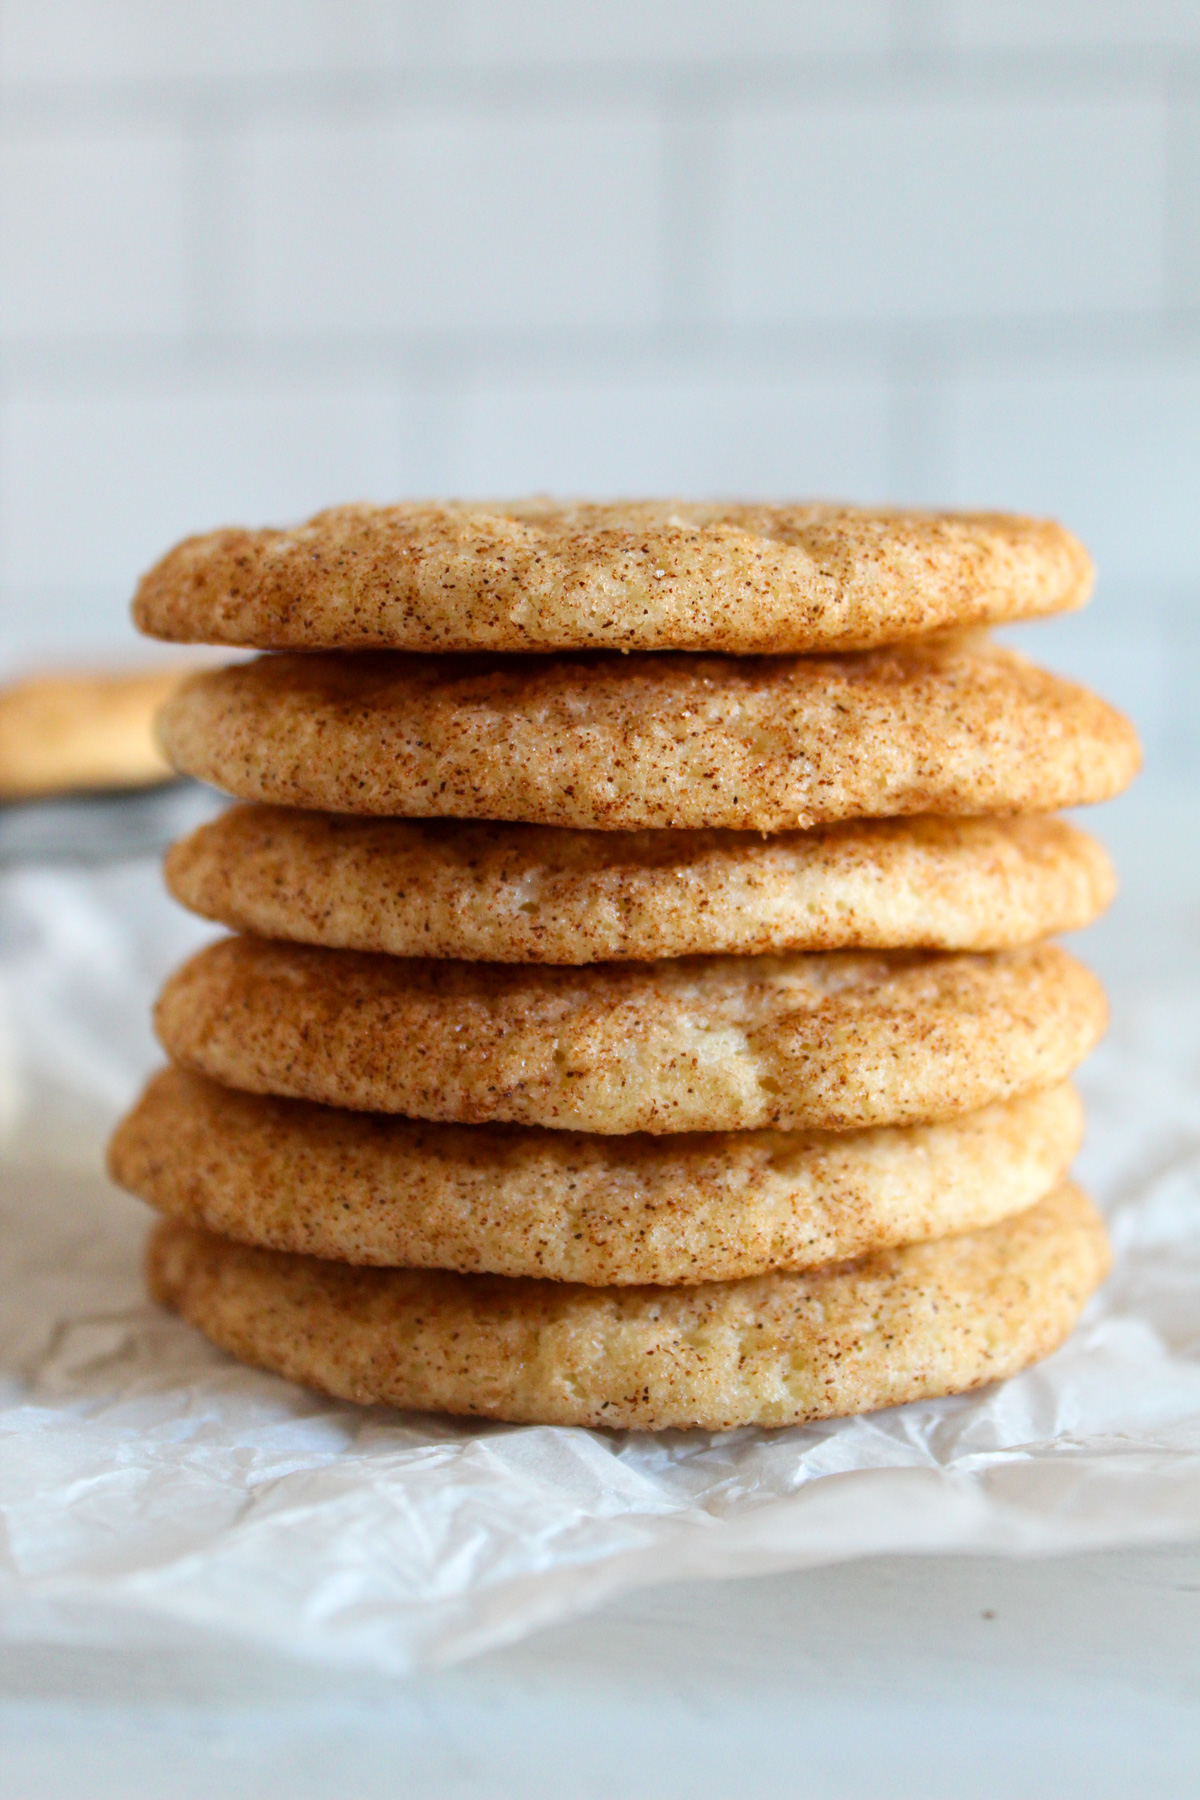
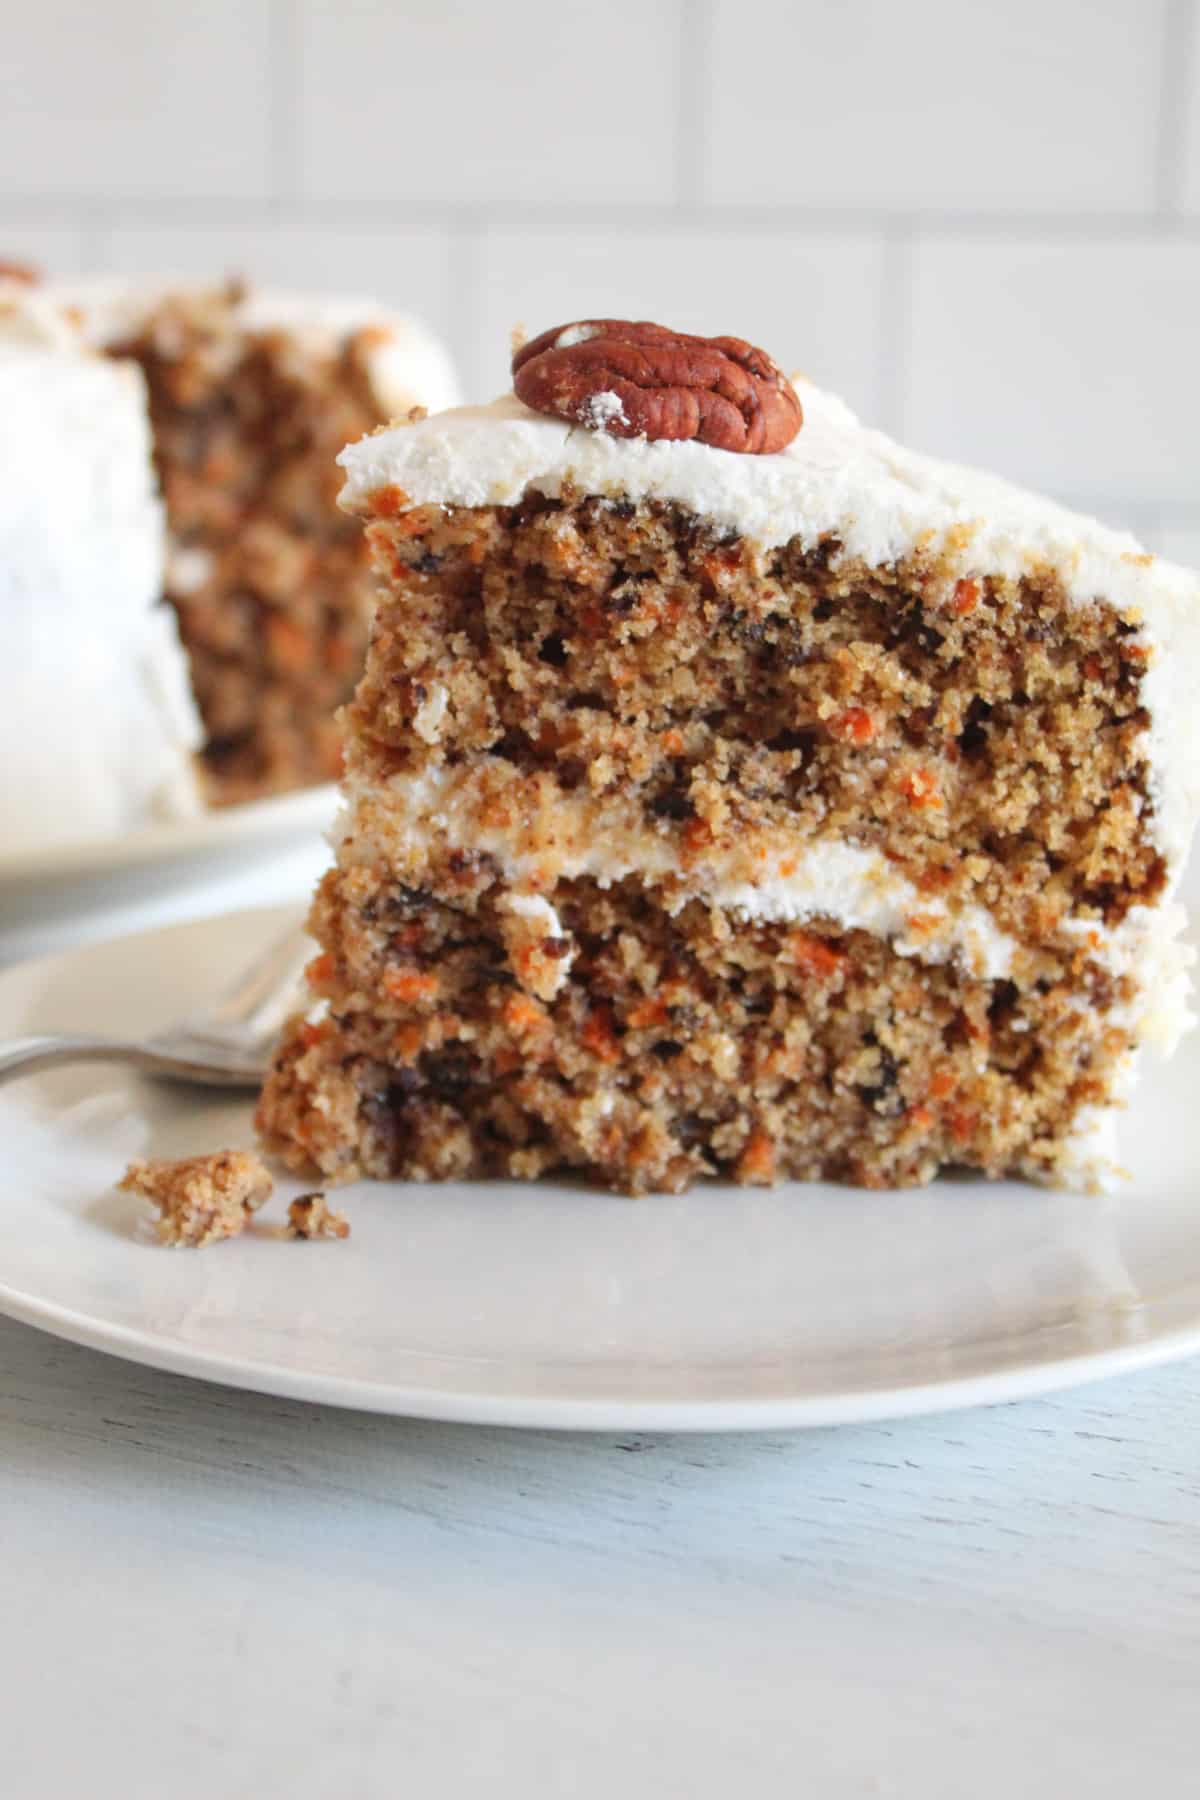
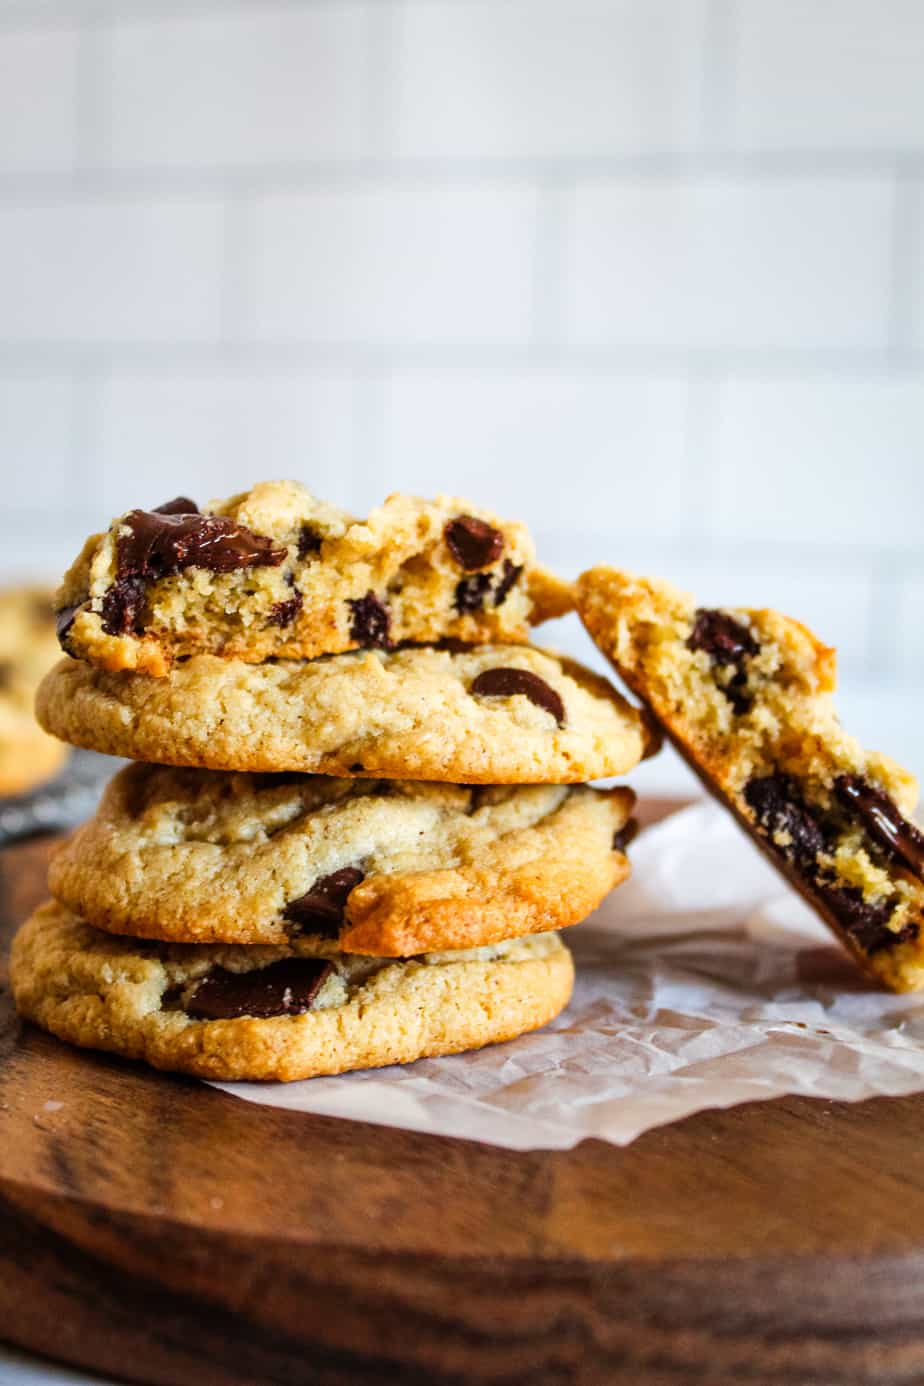
More Irresistible Gluten-Free Desserts
Want more easy dessert recipes? Here are a few more of my favorites to try!
- Soft Gluten-Free Blackberry Muffins with Irresistible Crumb Topping
- Rich and Moist Almond Flour Chocolate Cupcakes
- Almond Flour Banana Muffins That Are Actually Fluffy
- Gluten-Free White Cake (Try this one with buttercream frosting!)
- Gluten-Free Dairy-Free Cheesecake
- No-Bake Chocolate Pie
Whether you’re craving something fruity, chocolatey, fluffy, or creamy, these gluten-free desserts are all worth adding to your baking list.
Did You Try These Gluten-Free Peanut Butter Brownies?
If you try these gluten-free peanut butter brownies, I’d love to hear how they turned out! Leave a comment below with your results, any swaps you made, or your favorite add-ins so other bakers can benefit from your tips, too.