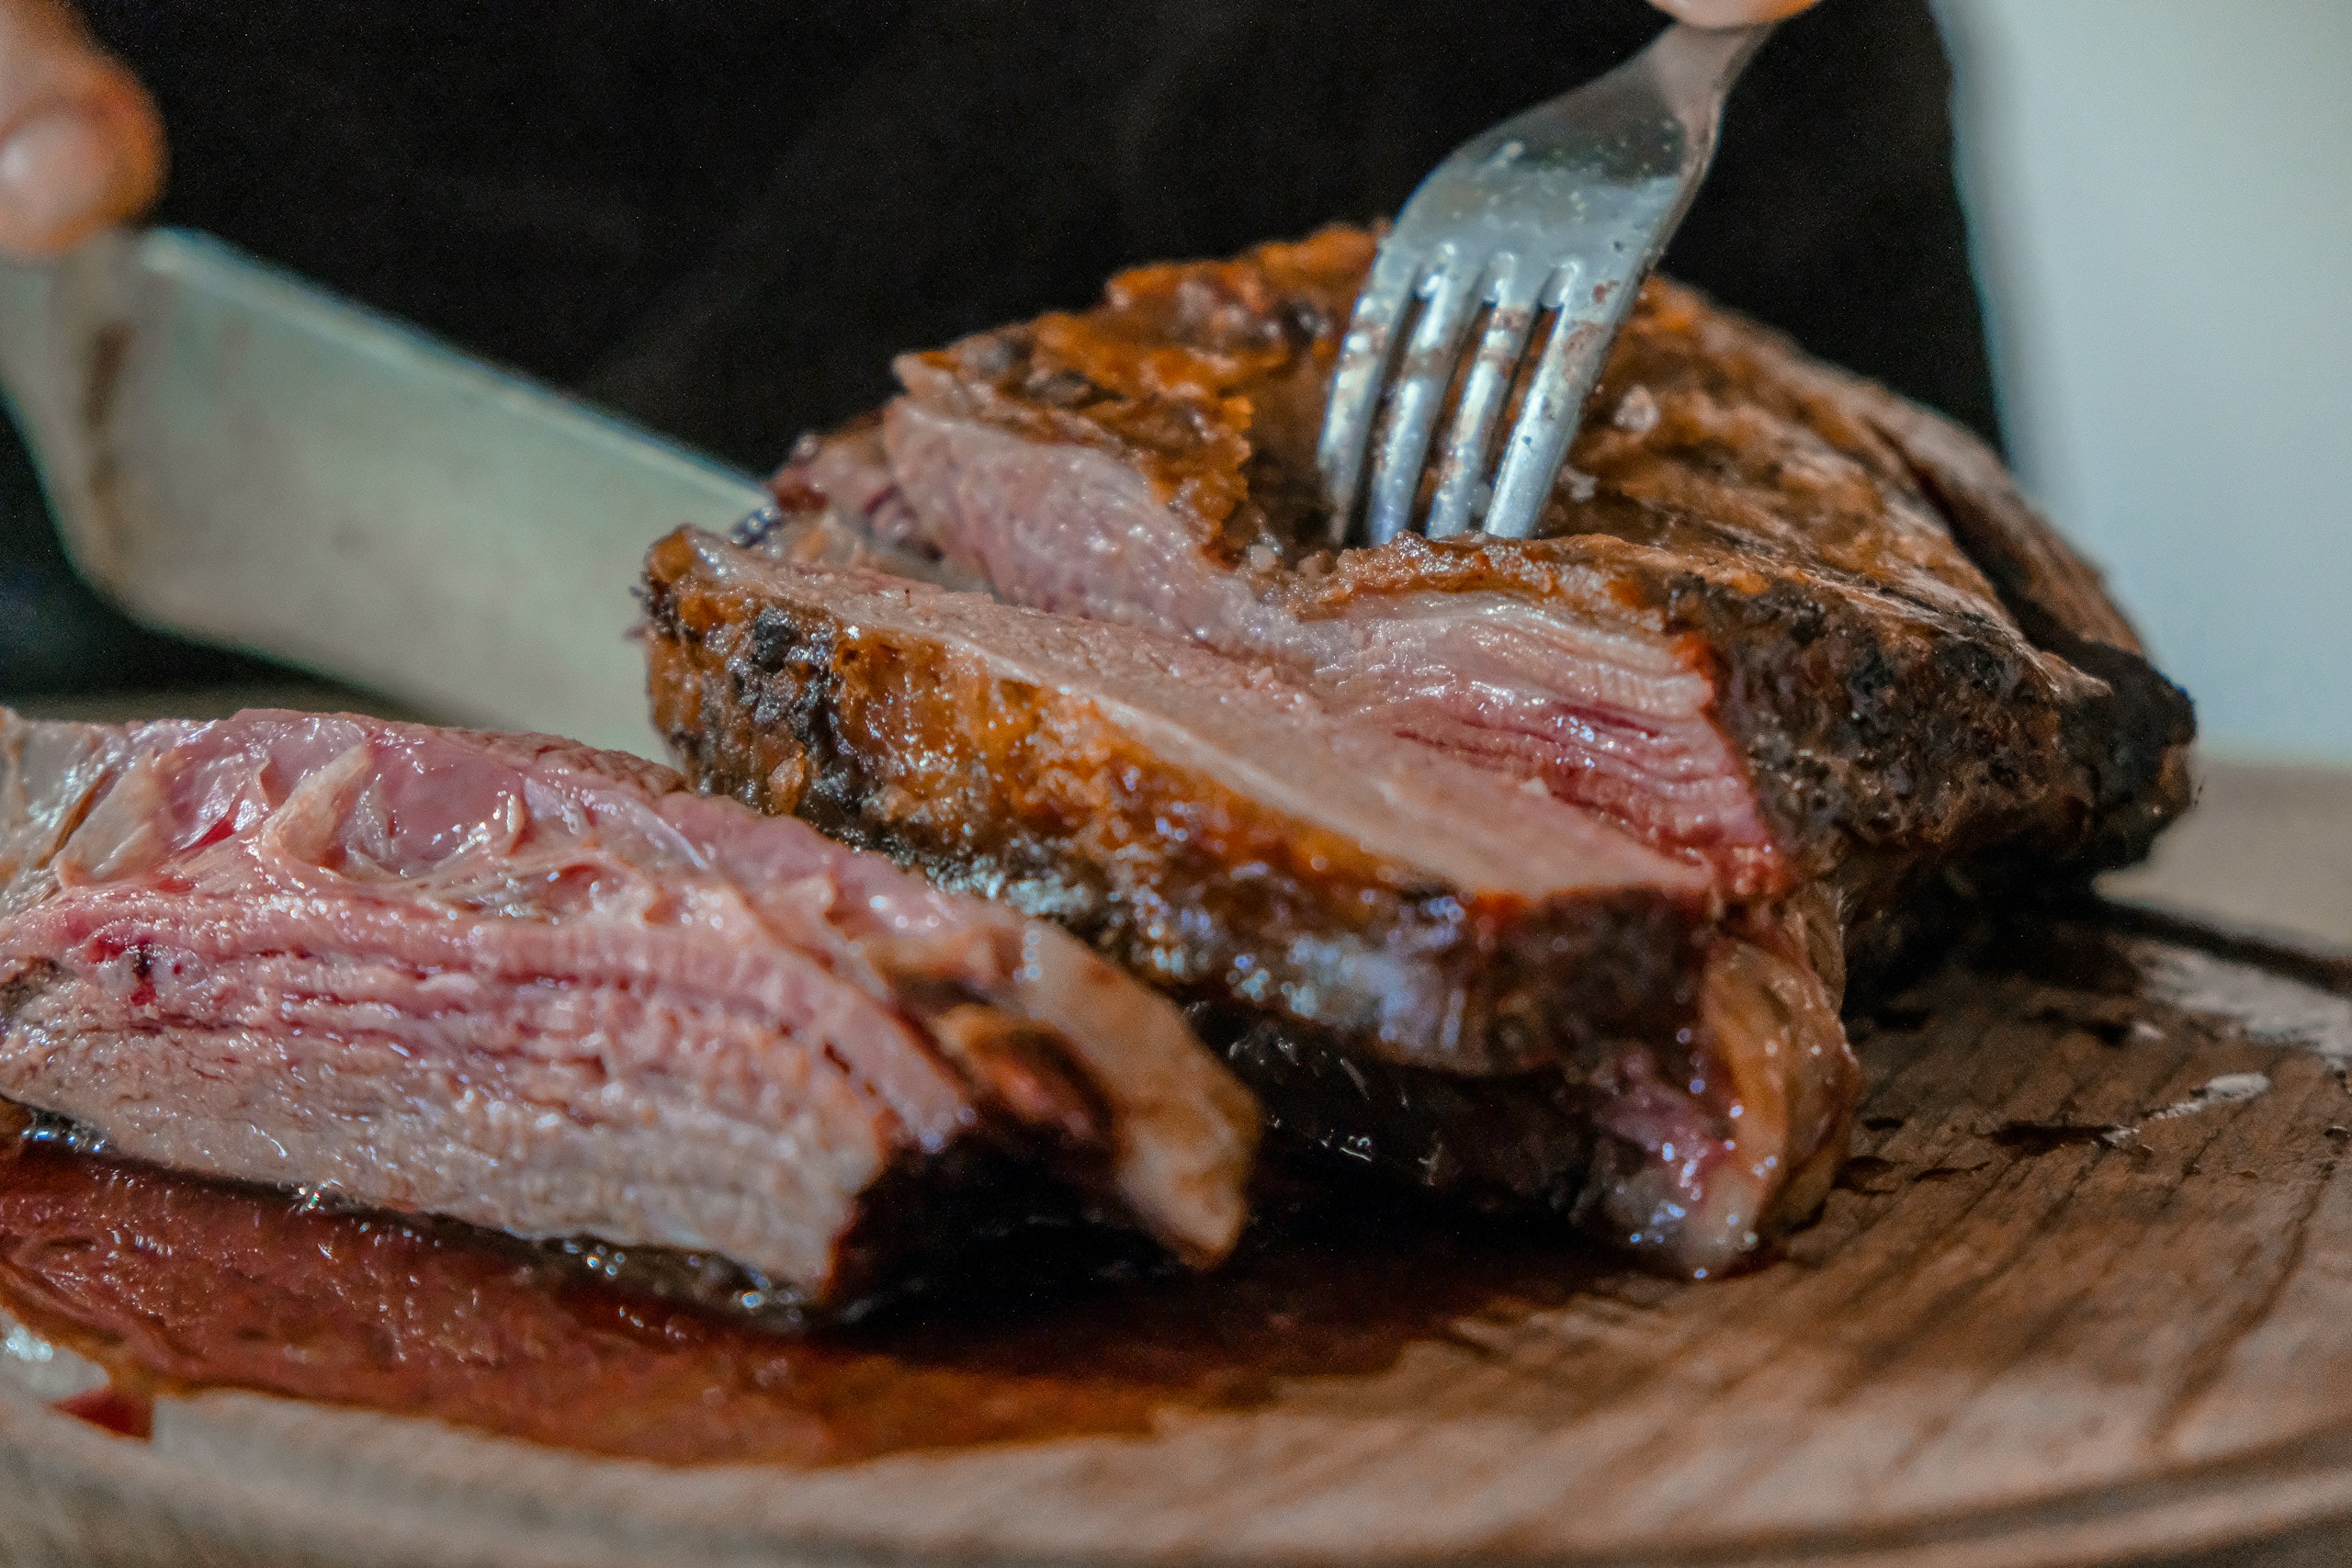
A gluten-free popover recipe fails if the popovers fail to rise, have dense centers, or collapse after baking.
Gluten-free versions are less forgiving because they lack the structure needed to trap air and hold shape. Small mistakes in heat, timing, or consistency lead to flat results.
Table of Contents
But when the process is controlled, the outcome becomes consistent.
With this method, you’ll get light, airy, bakery-style gluten-free popovers every time.
Before we go further, have you ever made enriched doughs like the ones in our Best Gluten-Free Sticky Buns Recipe? If you have, you will notice that this recipe uses similar techniques.
Why You’ll Love This Recipe
These gluten-free popovers are crisp on the outside, light in the center, and made without dairy. They use a simple blender batter, but the method is carefully designed to help the popovers rise tall and stay airy instead of collapsing.
- Light and airy: A thin batter, warm milk, room-temperature eggs, and high oven heat help create the hollow center that popovers are known for.
- Gluten-free and dairy-free friendly: The recipe uses gluten-free flour, almond milk, and plant-based butter, so it works for bakers avoiding both gluten and dairy.
- No yeast or rising time: Popovers rise from steam, not yeast, which means there is no kneading, proofing, or long waiting period.
- Great for sweet or savory meals: Serve them with butter and jam for breakfast, or pair them with soups, roasts, and holiday dinners.
Ingredients at a Glance
Look below for the requirements to make this gluten-free popover recipe easily:
- Gluten-free flour mix
- Xanthan gum
- Salt
- Eggs
- Almond milk
- Unsalted plant-based butter
Ingredients & Substitutions Notes for Gluten-Free Popovers
Each ingredient in this gluten-free popover recipe has a specific role. If one is off, the structure fails.
Gluten-Free Flour Mix
Gluten-Free flour mix is the base. It provides the minimal structure needed to hold steam and form the shell. Keep the following in mind:
- Use a balanced gluten-free flour blend (about 140g / 1 cup).
- Xanthan gum (¼ tsp) supports elasticity and prevents collapse.
In addition, accurate measurement is important. In the sense that if the ratio is off, the batter becomes too heavy or too weak. To guarantee consistency, follow this guide: How to Measure Gluten-Free Flour.
Eggs
Eggs are non-negotiable because they provide lift, structure, and stability during baking. Also, they trap steam and expand, creating the hollow center that popovers are known for.
No True Substitute:
Egg replacements (like flax, chia, aquafaba, or applesauce) do not replicate the same structure. If you choose to use them, expect flat or dense results.
Almond Milk
Almond milk (1¼ cups) hydrates the batter and creates steam in the oven, which is the main driver of the rise. Note that it must be warm to support expansion, as warmth keeps the batter thin enough to rise properly.
Dairy-Free Note:
This recipe already uses almond milk, but you can swap it with oat milk or soy milk. Although the texture may vary slightly, the structure remains intact.
Plant-Based Butter
Melted plant-based butter (2 tbsp) adds tenderness, flavor, and slight crispness to the exterior.
Substitutions:
- Regular butter (if not dairy-free).
- Neutral oil (lighter texture, less flavor).
Salt
A small amount of salt (½ tsp) sharpens flavor and balances the richness.

Printable Gluten-Free Popovers Recipe Card
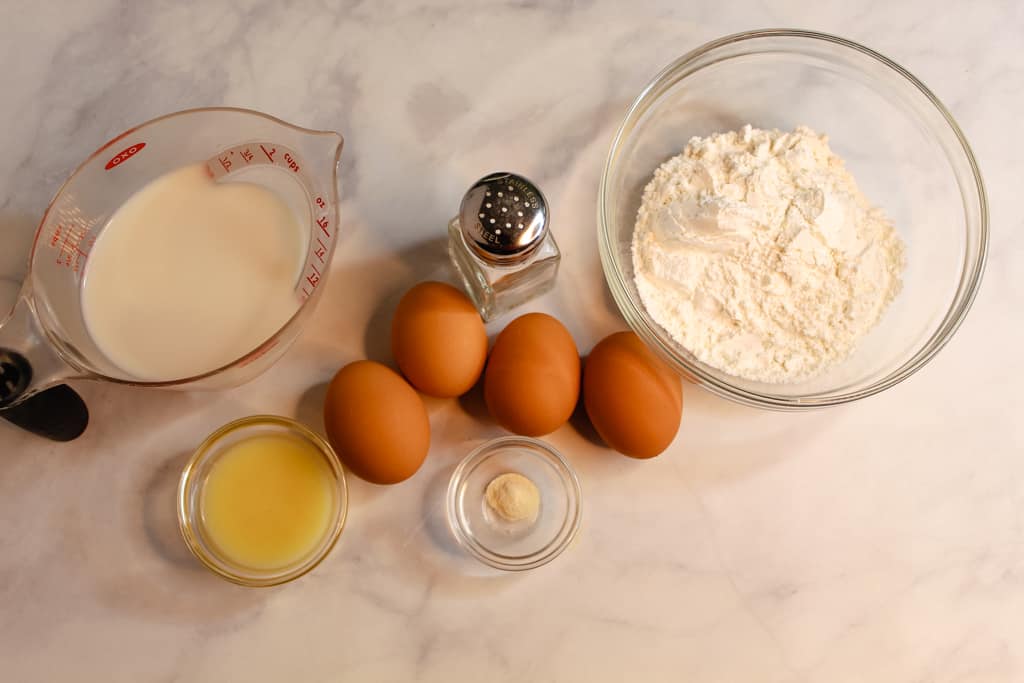
Ingredients
- 1 cup gluten-free flour mix about 140 grams
- ¼ tsp. xanthan gum
- ½ tsp. salt
- 4 large eggs room temperature
- 2 Tbsp. unsalted plant-based butter melted
- 1 ¼ cup almond milk 70 – 80 F
Instructions
- Preheat the oven to 400°F (200°C) and grease a 12-cup muffin pan.
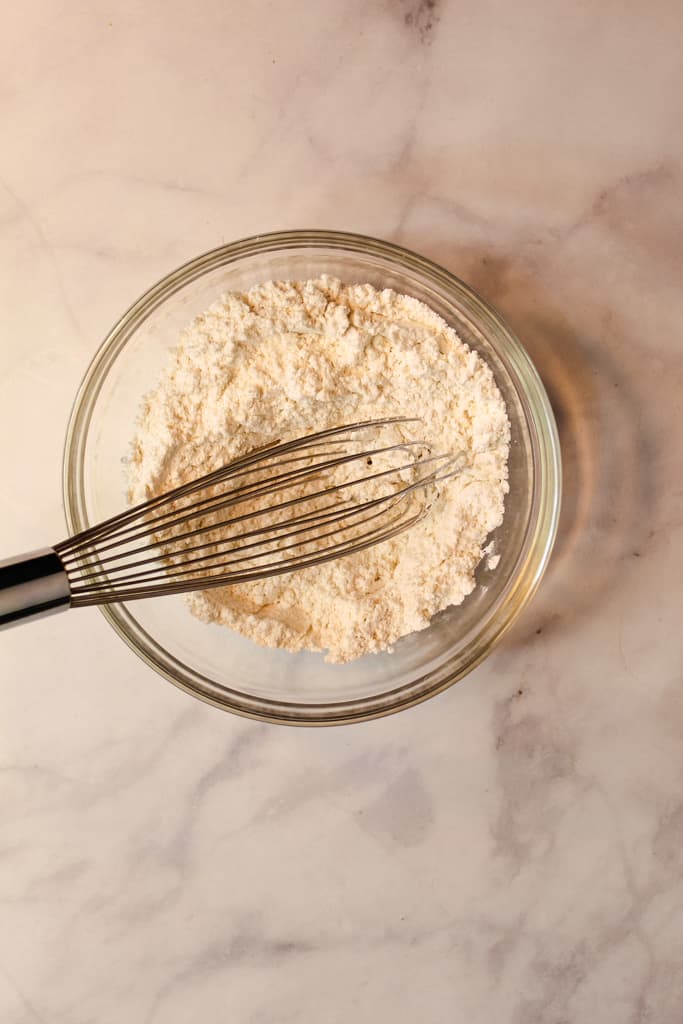
- In a medium bowl, mix together the flour, xanthan gum, and salt. Set aside.
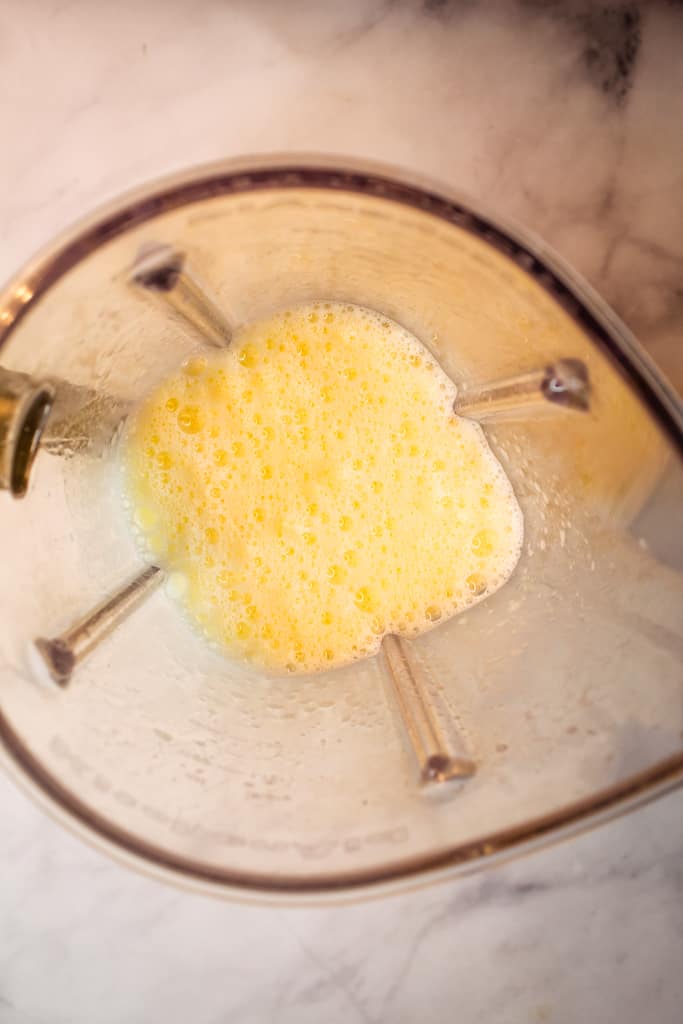
- In a blender, add the room-temperature eggs, butter, and almond milk. Blend on medium speed for about 10 seconds, until the mixture is smooth and well blended.
- Add the dry ingredients to the blender and blend on medium speed for 15 seconds, until smooth.
- Fill each muffin cup about 2/3 full. The batter should be runny enough that you won’t need to scrape the sides of the blender.
- Bake at 400°F for 22 minutes. Then, reduce the temperature to 350°F (175°C) and bake for an additional 10–15 minutes, until the rolls are a deep golden color.
- Using a sharp knife, pierce each popover to release the steam.
- Remove the popovers from the pan and serve immediately.
- Serve with butter, jam, garlic butter, or just brush the tops with olive oil and a sprinkling of coarse salt.
Notes
Success Tips
- Use room temperature eggs and warm milk to support proper rise.
- Batter should be thin and pourable (not thick).
- Fill cups only 2/3 full to allow expansion.
- Do not open the oven during baking.
- Release steam immediately after baking to prevent collapse.
Doneness Cues
- Deep golden brown exterior.
- Firm, crisp shell.
- Hollow interior when cut.
- Feels light relative to size.
Storage & Reheating
-
- Best eaten fresh the same day.
- Store in an airtight container for up to 1–2 days (texture declines).
- Reheat in oven at 350°F for 5–8 minutes to restore crispness.
- Freezing is not recommended (loss of texture).
Nutrition
What Are Popovers?
Popovers are a light, hollow roll made from a simple batter of flour, eggs, milk, and fat. Unlike traditional bread, they don’t use yeast or baking powder. Instead, the rise comes entirely from steam.
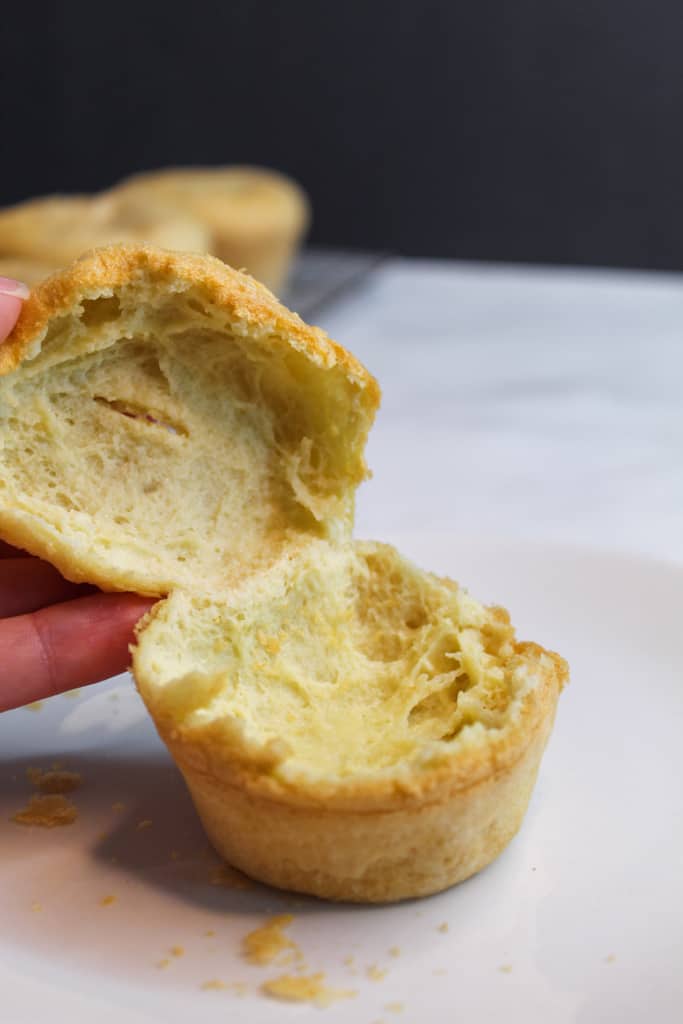
When baked correctly, the outside turns crisp and golden, whereas the inside forms a large, airy cavity. That hollow center is the goal, because it’s what gives popovers their signature structure and makes them perfect for holding butter, spreads, or fillings.
This gluten-free popover recipe follows the same principle. But it replaces gluten with a carefully balanced structure so the steam can still expand and hold shape.
Popovers vs Yorkshire Pudding
Popovers and Yorkshire pudding use nearly identical ingredients, but they differ in how they’re prepared and served:
- Popovers are baked in individual molds (popover or muffin pans) and rise taller with a more defined hollow center.
- Yorkshire pudding, on the other hand, is often baked in a larger pan or shallow tins and has a slightly denser texture.
- Popovers are commonly served as a side dish or for breakfast, whereas Yorkshire pudding is traditionally paired with roast meats.
In case you’ve worked with a structured gluten-free baking like our Gluten-Free Potato Buns, the same idea applies here.
Why This Gluten-Free Popover Recipe Works
This recipe works because it keeps three variables consistent:
- Controlled heat to set the exterior at the right time.
- A thin batter that expands properly.
- Enough structure to hold shape during baking.
What Not to Change
Do not reduce the eggs, thicken the batter, use cold milk, open the oven early, or replace the gluten-free flour blend with almond or coconut flour. These changes can prevent the popovers from rising properly.
Steps for Making Gluten-Free Popover Recipe (Step-by-Step)
The process we’ve provided below is simple, but timing and temperature matter. Follow each step exactly to get a proper rise and hollow center.
Essential Kitchen Tools for Gluten-Free Popovers
You don’t need much equipment. Just look through the tools below to ensure a proper rise:
- Blender: It helps create a smooth, lump-free batter quickly.
- 12-Cup Muffin Pan (or Popover Pan): Standard muffin pans work well, but a popover pan (with deeper wells) can produce taller results.
- Measuring Cups or Kitchen Scale: Accuracy matters, especially for gluten-free flour.
- Mixing Bowl: Use it to combine dry ingredients before adding them to the batter.
- Spatula or Spoon: It’s useful for scraping down sides and ensuring everything is fully incorporated.
- Oven with Reliable Temperature Control: If the oven temperature is inconsistent, the popovers may not rise properly or may collapse.
- Cooling Rack: After baking, place the rolls on a rack to allow air to circulate beneath them, keeping the bottoms crisp rather than soggy.
Step 1: Preheat the Oven and Prepare the Pan
Set your oven to 400°F (200°C). Then, lightly grease a 12-cup muffin pan and set it aside.
Note that a fully preheated oven is critical because it drives the initial rise.
Step 2: Mix the Dry Ingredients
In a medium bowl, combine gluten-free flour, xanthan gum, and salt. Mix until evenly distributed to ensure a consistent structure in the final bake.
Step 3: Blend the Wet Ingredients
In a blender, add room temperature eggs, melted butter, and warm almond milk. Then blend for about 10 seconds until smooth. The mixture should be fully combined with no separation.
Step 4: Combine Into a Thin Batter
Add the dry ingredients to the blender. Blend again for 10–15 seconds until the batter is smooth and very runny.
Do not thicken the batter, as this thin consistency is required for steam expansion.
Step 5: Fill the Pan Correctly
Pour the batter into each cup, filling about 2/3 full.
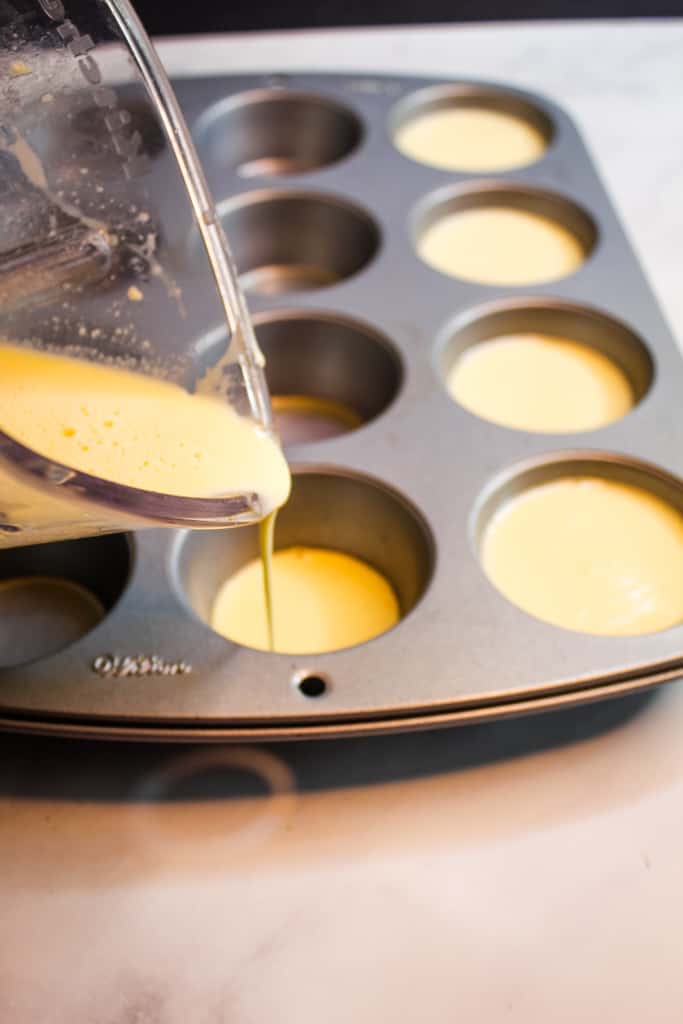
The batter should pour easily without scraping. If it doesn’t, it’s too thick.
Step 6: Bake at High Heat First
Place the pan in the oven and bake for 22 minutes at 400°F. However, do not open the oven. This stage creates rapid steam and initial lift.
Step 7: Reduce the heat to Finish Baking
Without removing the pan, reduce the temperature to 350°F (175°C) and bake for another 10–15 minutes. This allows the structure to set fully while maintaining the rise.
Step 8: Check Doneness
Popovers are done when the exterior is deep golden brown, the shell feels firm and crisp, and they feel light for their size. Note that underbaked popovers will collapse after removal.
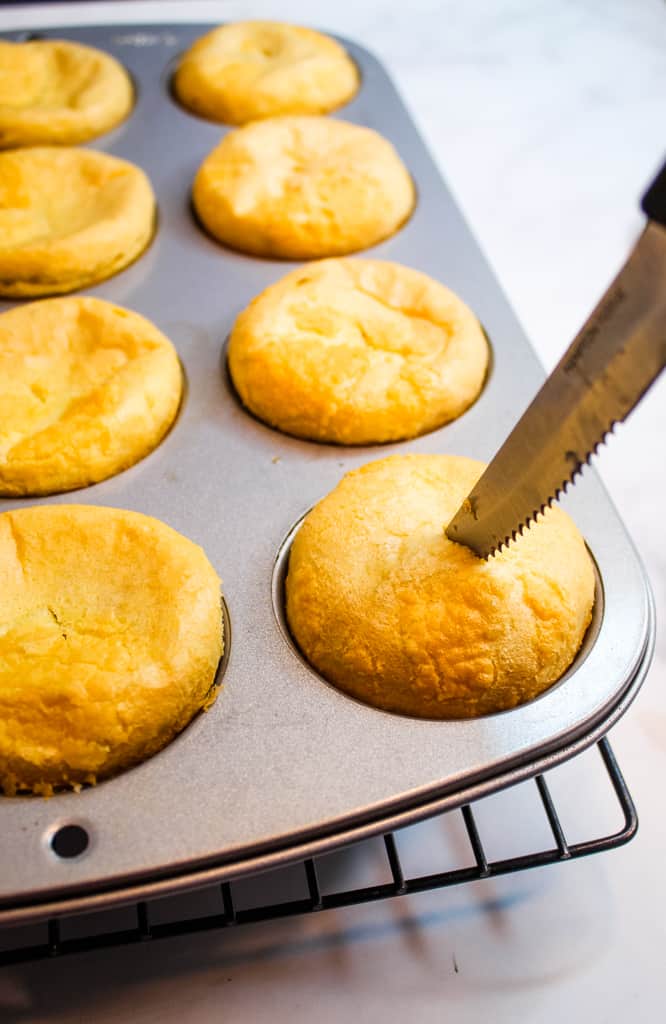
Step 9: Release Steam Immediately
Remove the pan from the oven and place it on a wire rack. Afterward, use a sharp knife to pierce each popover to release steam. This prevents trapped moisture from softening the structure and causing collapse.
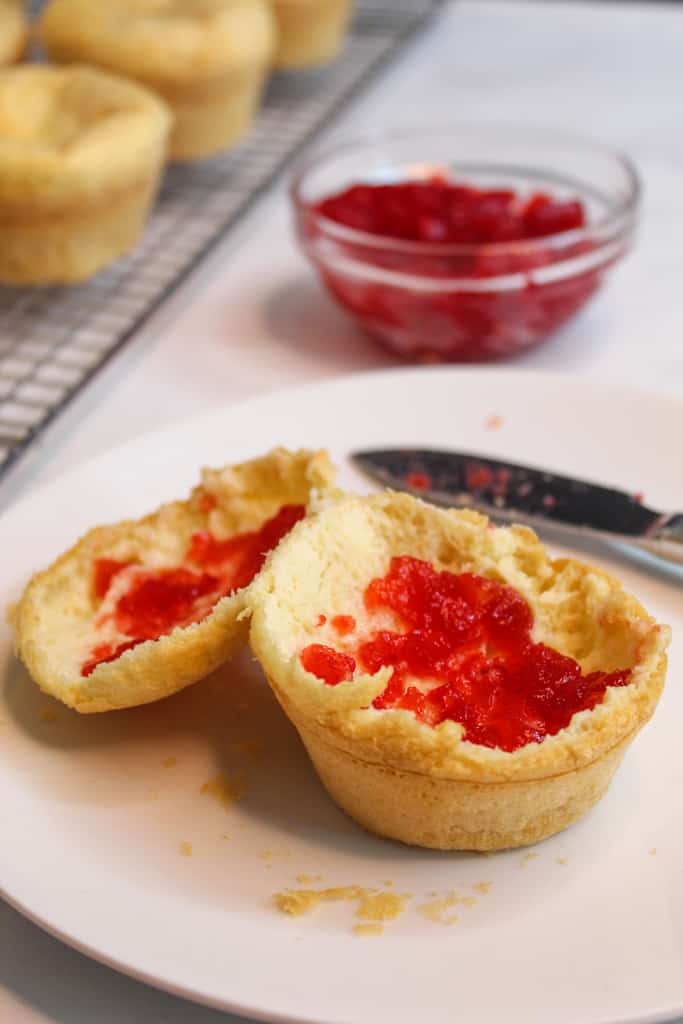
Step 10: Serve Warm
Remove from the pan and serve immediately. Popovers are at their best when fresh and crisp.
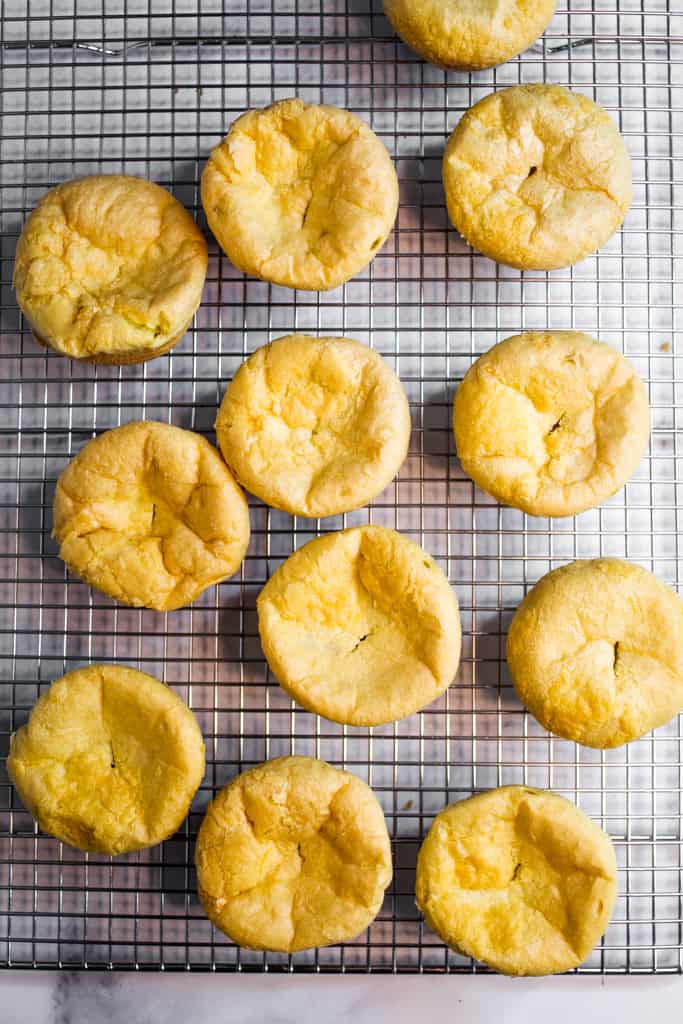
Perfect Popover Texture Checklist
Your gluten-free popovers are done when they are:
- Deep golden brown
- Crisp and firm on the outside
- Light for their size
- Hollow or mostly hollow inside
- Dry enough inside that they do not collapse after piercing
The Reasons Popovers Rise
Popovers don’t rely on yeast or baking powder. Instead, they arise from three controlled reactions occurring simultaneously.
Steam Expansion
The batter contains a high amount of liquid. In a hot oven, that liquid rapidly turns into steam and expands, pushing the batter upward. This expansion creates the height and the hollow center.
Egg Protein Structure
As the batter heats, proteins from the eggs (and flour) set into a network. This structure traps the steam inside instead of letting it escape. Without it, the batter spreads instead of rising.
High Heat Oven Spring
The initial high temperature drives rapid steam production before the structure fully sets. This early expansion, called oven spring, determines how tall the popovers get. Using lower heat slows the cooking process, resulting in denser or flatter results.
How Gluten-Free Popovers Work
Gluten-free popovers follow the same principle as traditional ones. As expected, steam creates the rise, but the structure is weaker without gluten.
Structure Challenges Without Gluten
Gluten normally forms an elastic network that traps steam and holds shape. But in a gluten-free popover recipe, that network is missing. Instead, structure comes from a combination of eggs, starches, and gums.
This makes the batter more fragile and less forgiving. Small changes in ratios or temperature can affect the final rise.
Why Collapse Happens
Collapse usually occurs due to a weak or incomplete structure. If the exterior sets too slowly, the steam escapes before the shape is locked in.
Whereas, an underbaked interior makes the walls soft and unable to support the height. Also, if the oven temperature drops, even briefly, the steam pressure decreases. This causes expansion to stop early, in turn, leading to deflation.
Without gluten, there’s less margin for error. The structure must firm up exactly when the popover finishes expanding.
Role of Starches
Gluten-free flour blends rely heavily on starches like rice flour and tapioca. These do two key things:
- Gelatinize under heat to help form the structure.
- Trap the steam long enough for the popover to rise.
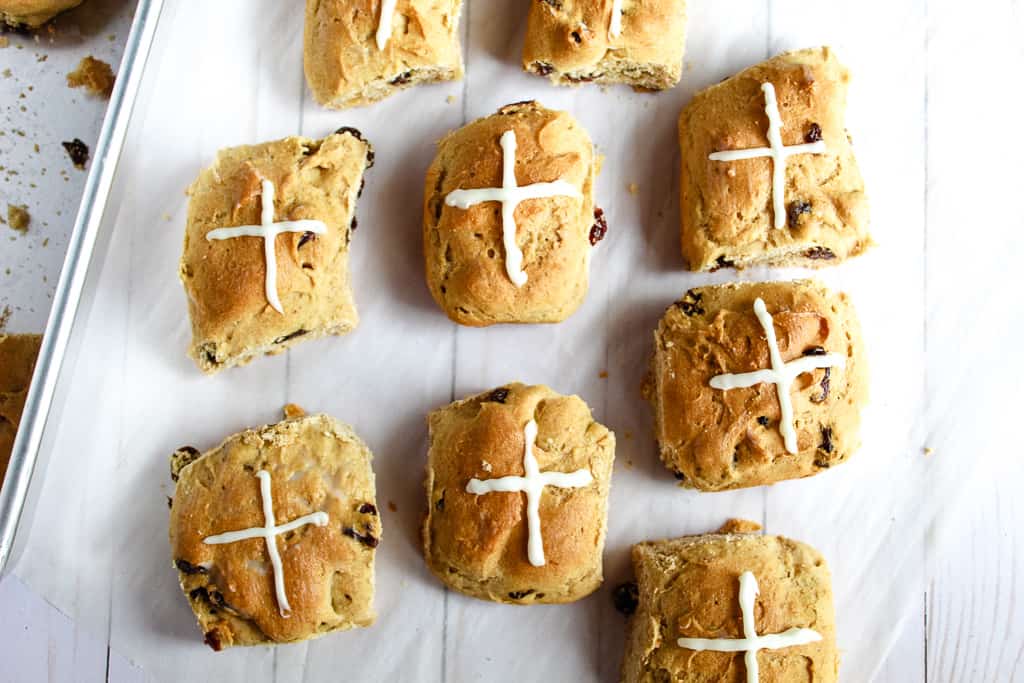
Tapioca adds stretch and lightness, whereas rice flour provides the base structure. Together, they replace part of what gluten normally does, but not completely, which is why technique matters more. Just like in our Gluten Free Hot Cross Buns, controlling the structure determines whether the bake holds or collapses.
Methods of Preparing Dairy-Free Popovers
Making dairy-free popovers is a direct swap, not a full recipe change. The structure still comes from eggs and steam. However, your job is to choose liquids and fats that behave similarly to dairy.
Best Milk Substitutes
Use a neutral, unsweetened milk that heats well and produces steam:
- Almond Milk: It has a light, clean flavor and is the closest match in this recipe.
- Oat Milk: It is slightly thicker and gives a softer interior.
- Soy Milk: It has a higher protein content and supports better structure and rise.
Fat Adjustments
Butter adds flavor and helps crisp the exterior. For dairy-free versions:
- Use plant-based butter for a similar texture and browning.
- Use a neutral oil (such as sunflower or vegetable) for a lighter result.
Plant-based butter provides a closer match to traditional popovers, whereas oil slightly reduces richness.
Flavor Impact
Dairy-free swaps change flavor more than structure:
- Almond Milk: Mild, slightly nutty.
- Oat Milk: Subtle sweetness.
- Soy Milk: More neutral, slightly richer.
Similar to the principle used in our Gluten Free Zucchini Muffins (Dairy Free) recipe, as long as you preserve the structure, the swap works consistently.
Are Vegan Popovers Achievable?
Vegan popovers are possible. However, they won’t behave like traditional ones.
Why Eggs Are Essential
Eggs do two critical things in a popover. They create the structure as the proteins set, and they trap steam so the batter can rise and hold shape.
Without eggs, there’s nothing strong enough to support that expansion. The result is usually flatter and less stable.
Realistic Alternatives
You can try replacing eggs, but expectations need to be adjusted. Aquafaba (chickpea liquid) can trap air, giving some lift. Also, flax or chia eggs add binding, but limited structure.
These alternatives help with cohesion, but they don’t replicate the strength of egg proteins during baking.
Expected Differences
With vegan versions, the rise is lower, the interior is less hollow, and the texture is softer and slightly denser. You’ll still get a baked roll-like result, just not the classic tall, airy structure of popovers.
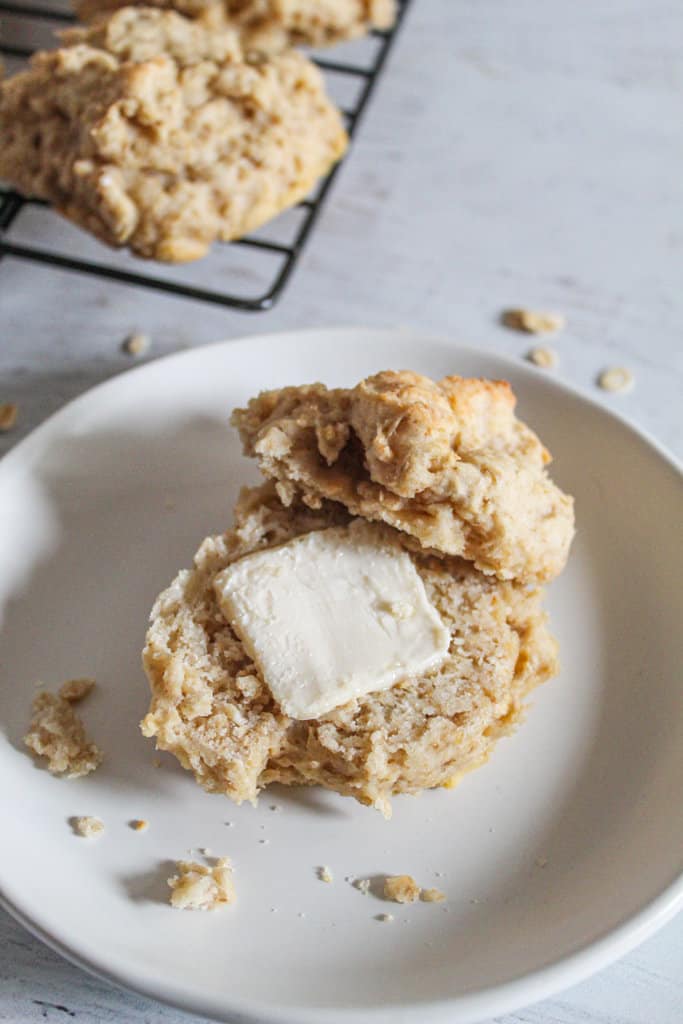
Should you want a reliably textured, completely egg-free bake, our Soft & Hearty Oatmeal Rolls are formulated from the start for this purpose, rather than modified from a steam-driven recipe.
How to Fix And Prevent Gluten-Free Popover Recipe Issues
If your gluten-free popover recipe didn’t turn out right, use this quick guide to identify the issue.
The oven is not hot enough.
If the oven isn’t fully preheated, the batter won’t expand properly. Prevent this issue by preheating your oven to 400°F (200°C) before baking.
Removed Too Early
Removing popovers before they fully set causes them to deflate. Bake until deep golden, then pierce immediately after removing.
Wrong Flour Ratio
A thick batter prevents proper expansion. Avoid this issue by measuring accurately and keeping the batter thin.
Underbaked
If the interior isn’t fully cooked, moisture remains trapped. To resolve this issue, extend the baking time at 350°F until fully set.
Pro Tips for Perfect Rise
- Preheat pan
- Don’t open the oven
- Use room-temperature ingredients
- Fill cups correctly
Easy Popover Variations to Try
You can adjust the flavor without affecting the structure once you’ve nailed the base recipe. Keep the batter the same, then add any of the following flavors after the rise is secured.
Savory Popovers (Cheese & Herbs)
Do you want a more savory version? Add grated cheese (cheddar or parmesan) to the batter, or sprinkle it on top before baking. Then mix in fresh herbs such as rosemary, thyme, or chives. The outcome works well when served as a side with soups, stews, or roasted dishes.
Sweet Popovers (Cinnamon Sugar & Honey)
To make sweet popovers, brush them with butter and coat them with cinnamon sugar. Also, you can try drizzling with honey or maple syrup after baking.
If you want a fuller dessert-style pairing, serve alongside our Best Classic Coffee Cake Recipe with Cinnamon Streusel Topping.
What to Serve with Popovers
Once your gluten-free popovers are finished, what you serve them with shapes the overall experience.
With Soups
Popovers work well as a light, airy side for soups. Their hollow center makes them ideal for soaking up broths and creamy bases without becoming heavy.
With Roasts
Serve alongside roasted meats or vegetables. The crisp exterior contrasts well with rich, savory dishes, while the soft interior absorbs juices and sauces.
With Breakfast Spreads
For a lighter option, pair with:
- butter or dairy-free spreads
- jam or fruit preserves
- honey or nut butter
How to Store, Freeze & Reheat Your Popovers
Popovers are best fresh, but you can extend their texture if you handle storage and reheating correctly.
How to Keep Them Crisp
After baking, let popovers cool on a wire rack to prevent trapped steam from softening the base. Then, store in a loosely covered container at room temperature for up to 1 day. Airtight storage traps moisture, making the popovers soft.
Reheat Method (Oven vs Microwave)
The following are the two reheating options:
- Oven (Recommended): Reheat at 350°F (175°C) for 5–8 minutes to restore crispness and structure.
- Microwave: Heats quickly but softens the exterior and removes crispness.
Freezing Tips
Popovers can be frozen, but the texture will change slightly:
- Cool completely before freezing.
- Store in a sealed container or freezer bag.
- Reheat directly from frozen in the oven at 350°F (175°C) for 8–10 minutes.
Avoid microwaving after freezing, as it can result in a dense, soft texture.
Nutritional Benefits of Gluten-Free Popovers
This gluten-free popover recipe delivers a mix of energy, protein, and functional nutrients depending on the ingredients used.
Gluten-Free Flours and Energy Source
Gluten-free flour blends (rice, tapioca, starch-based mixes) provide quick-digesting carbohydrates for energy. Some blends may also contain fiber and bioactive compounds, depending on formulation.
Eggs as a High-Quality Protein Source
Eggs supply complete protein with essential amino acids. They also contribute nutrients like choline, which supports brain function and metabolism.
Suitable for Gluten-Free Diets
For individuals with gluten intolerance or celiac disease, removing gluten is necessary for symptom control and gut health. This recipe aligns directly with that need.
Considerations for Nutrient Balance
Some gluten-free products may be lower in fiber and certain micronutrients if not balanced with nutrient-dense ingredients. Ingredient choice matters for overall nutritional quality.
Who Is This Recipe For?
This recipe fits specific dietary needs and baking goals.
- People with Gluten Intolerance or Celiac Disease: It is made for people who need to avoid gluten but still want baked goods with a sturdy, structured texture.
- Those Following a Dairy-Free Diet: It uses plant-based milk and butter, making it suitable for dairy-free eating without changes.
- Home Bakers Focused on Technique: This recipe is best for bakers who prioritize consistent results and value careful control over heat, structure, and moisture.
- Not Ideal for Vegan Diets: Eggs provide essential structure in this recipe, so it is not suitable for strict vegan baking without major adjustments.
Baking Questions Answered
These are questions we frequently get about this gluten-free popover recipe. If you don’t see yours, ask in the comments.
Can I Make the Batter Ahead of Time?
Sure, you can, but only for a short period. You can refrigerate the batter for up to 1 hour. Before baking, bring it back to room temperature and whisk or blend again to restore consistency.
Do I Need a Popover Pan or Can I Use a Muffin Tin?
You can use a standard muffin tin. A popover pan yields taller results because of its deeper wells, but the recipe still works in a muffin pan.
Why Is My Batter Not Smooth?
Lumps usually come from poorly mixed flour or cold ingredients. Using a blender and ensuring ingredients are at room temperature helps create a smooth, pourable batter.
Can I Make Popovers in Different Sizes?
Of course, you can. Use less batter and bake for a shorter time to make smaller popovers. For larger ones, fill cups a bit more and extend baking time while monitoring doneness.
Can I Add Fillings Before Baking?
It’s not recommended. Adding fillings before baking can weigh down the batter and affect the rise. Instead, bake first, then slice open and fill after.
Related Recipes You Should Try
If you enjoyed these gluten-free popovers, these recipes use similar structure-focused techniques and are worth trying next:
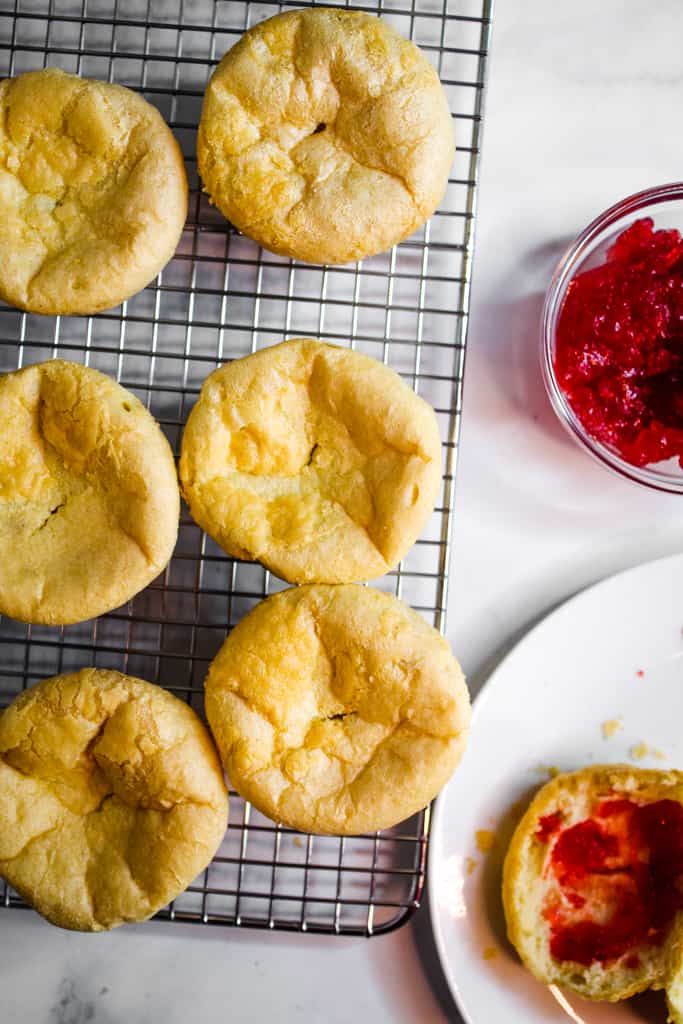
- For a soft, sliceable option, try this Soft Gluten-Free Potato Bread Recipe.
- If you want something richer and more indulgent, this Gluten-Free Cinnamon Rolls Recipe focuses on achieving lift and softness in enriched dough.
- Should you want a structured breakfast option, follow this step-by-step to the Best Gluten-Free English Muffins Recipe.
Each one gives you another way to build better gluten-free texture, from soft bread to fluffy rolls and crisp, structured breakfast bakes.
Share Your Experience with Us
Did you try this recipe? Share your results. Did your popovers rise as expected? Did you make any adjustments that worked better for your oven or ingredients?
If something didn’t turn out right, drop your questions below. Describe what happened, and we’ll help you troubleshoot it.
And if you experimented with flavors or variations, let us know what worked. Your tweaks can help others get better results, too. Head to the comments and share your experience.