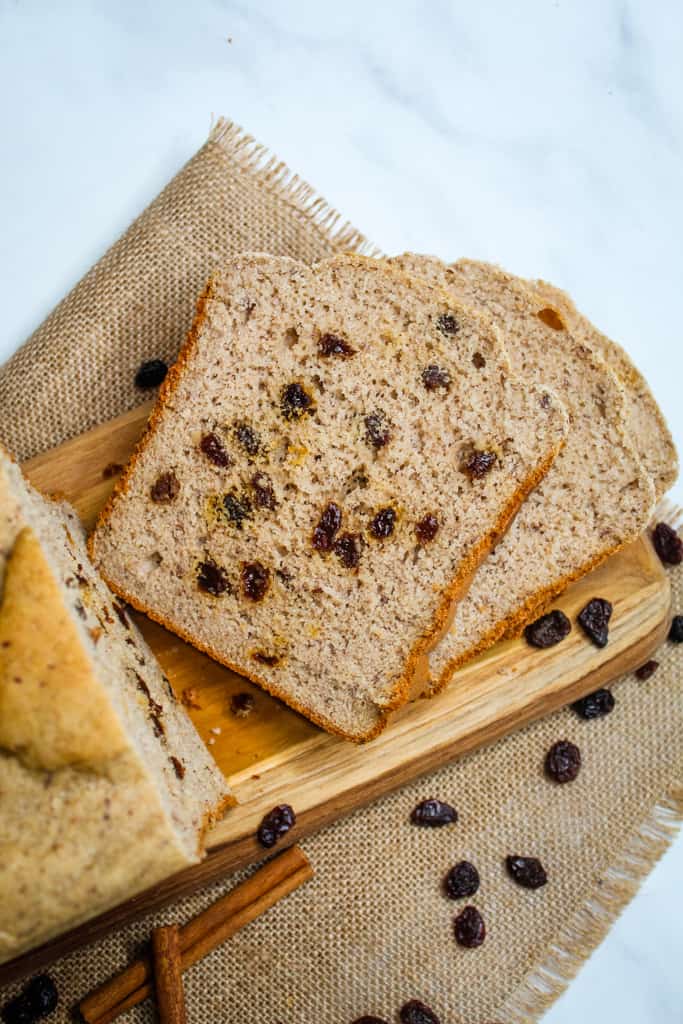
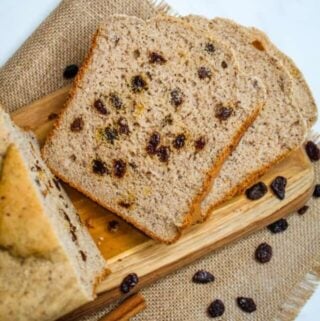
If a warm bakery loaf and your favorite childhood cinnamon toast had a gluten-free baby, this would be it. Thick, fluffy slices. Juicy pockets of raisins. A soft crumb that somehow feels both nostalgic and brand new.
And the best part? Your bread machine does nearly all the work.
Table of Contents
Gluten-free bread can be hit or miss — we’ve all lived that disappointment. But this loaf? This one delivers.
It’s soft, perfectly textured, and scented with the kind of cinnamon warmth that makes your kitchen smell like a Saturday morning. If you’ve been waiting for a gluten-free bread that makes you actually excited to toast it, butter it, snack on it, gift it, and maybe hide the last slice for yourself… welcome. You found it.
What Makes This Bread Special
- Soft and sliceable — no gumminess, no crumble
- Loaded with juicy raisins
- Smells like a cinnamon roll while it bakes
- Gluten-free, dairy-free, gum-free, refined-sugar-free
- Ridiculously easy — mix → dump → press start
A loaf that brings cozy bakery vibes straight to your kitchen.
3 Tips Before You Start
This loaf is simple, but these tiny details make it exceptional. Think of them as the difference between “good gluten-free bread” and “where has this been all my life?”
- Use room-temperature ingredients (70–80°F). Cold eggs or liquids keep gluten-free dough from rising well.
- Weigh your flours. A packed cup vs. a loose cup can make a 30–40 gram difference. Weight = consistency.
- Add ingredients in the right order. Wet ingredients → dry ingredients → yeast in a shallow well. This matters for texture and rise.
A Little Story: Why This Loaf Became the “Please Make That Again” Bread
Some recipes take months to perfect. Others show up, bake the first time beautifully, and immediately earn a permanent place on the weekly rotation. This loaf was the second kind.
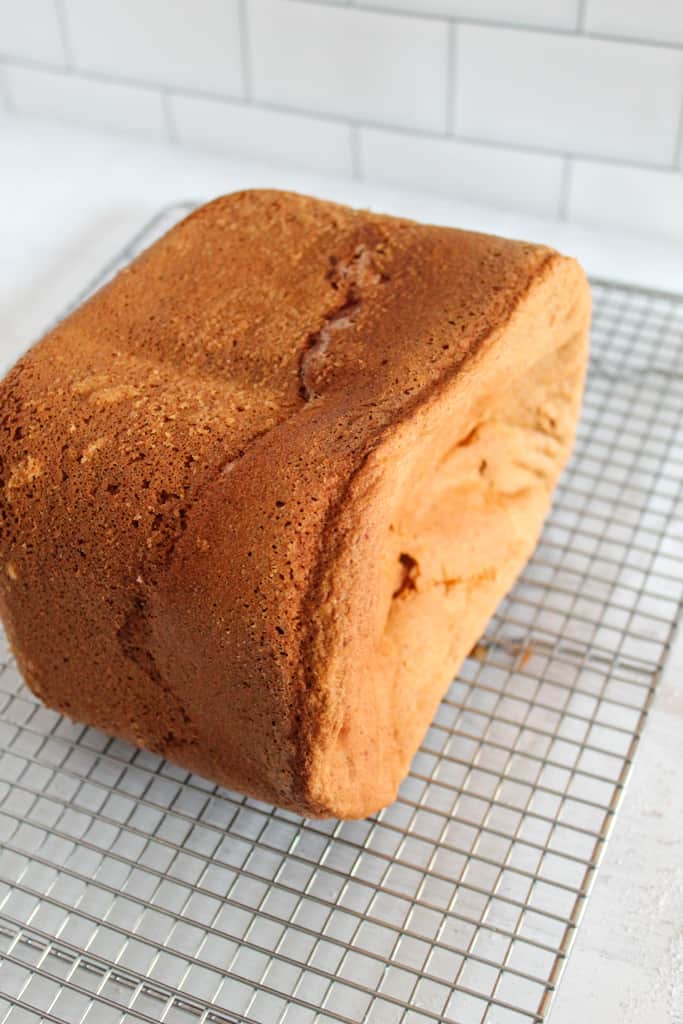
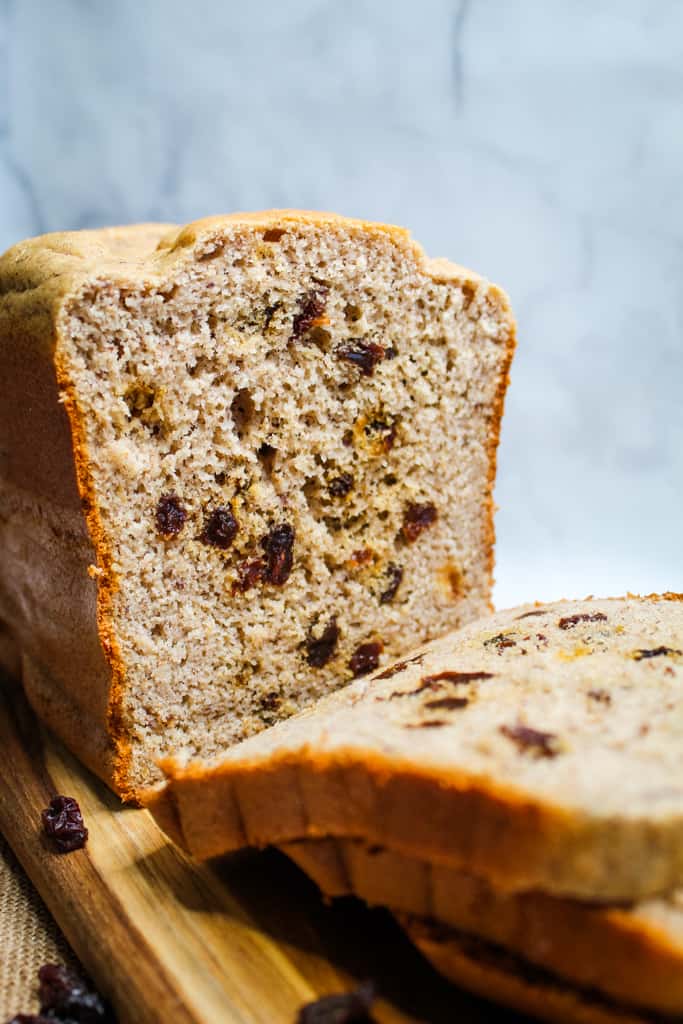
The first time it came out of the bread machine, it was everything gluten-free bread usually isn’t — soft, tall, bendable, tender.
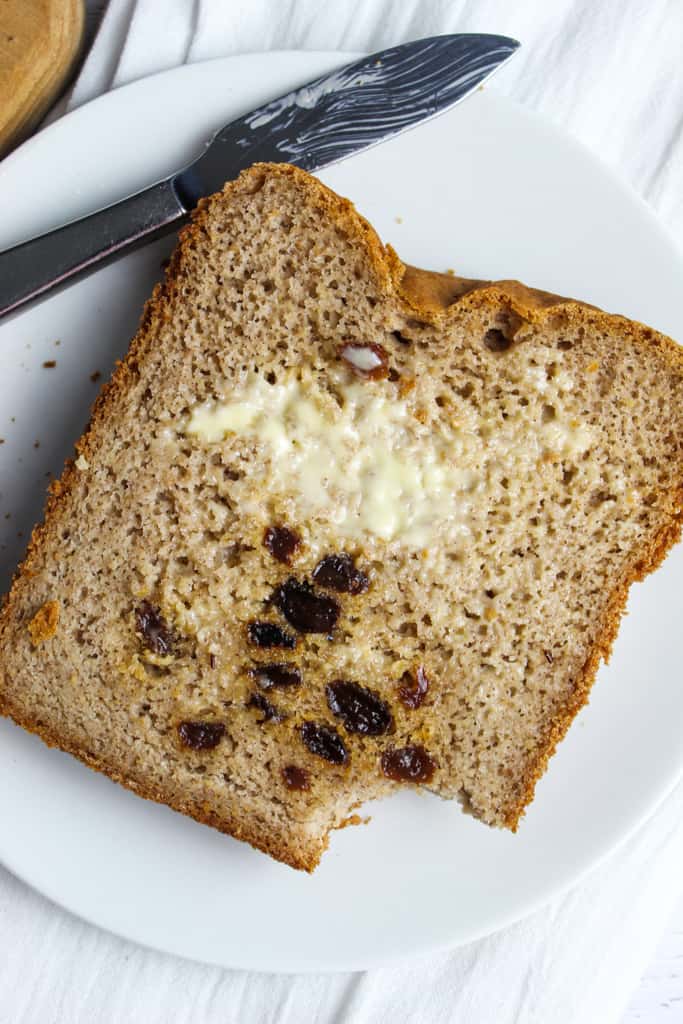
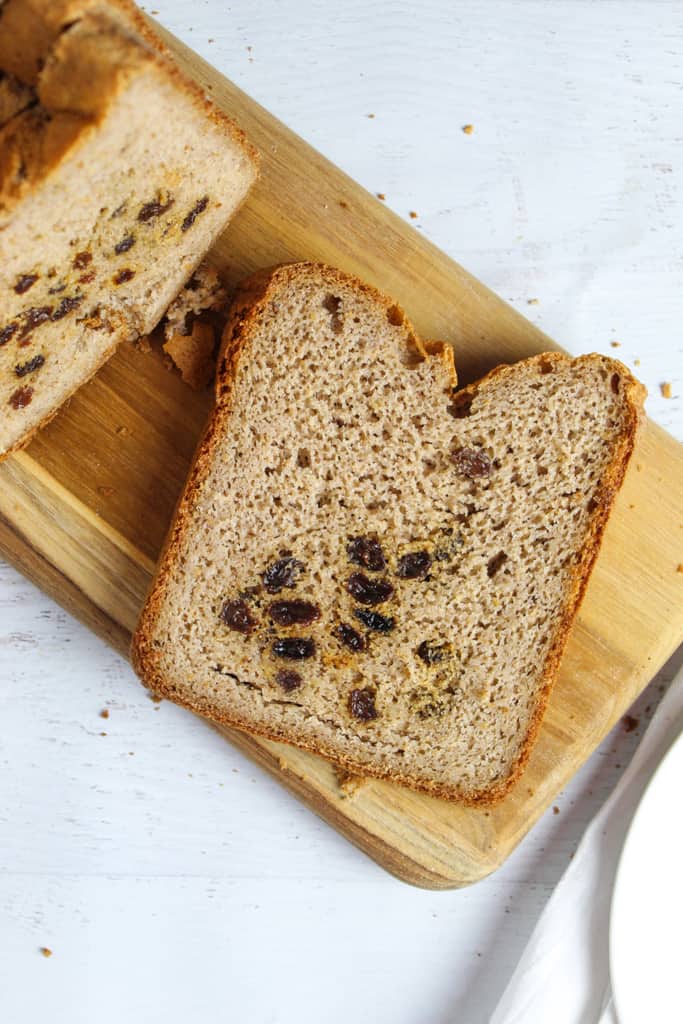
The raisins stayed suspended instead of sinking. The cinnamon was warm but not overpowering. The crust was golden and just firm enough to hold a good smear of butter.
You know that moment when someone slices the end piece, pauses, and says, “Wait… this is gluten-free?” Yeah. It was that loaf.
Since then, it has become the bread people request for brunch, for holidays, for “just because.” A feel-good bread. A comfort bread. A bread that makes weekday breakfast feel like something worth waking up for.
Why This Gluten-Free Cinnamon Raisin Bread Works So Well
Gluten-free bread has a reputation for being fussy — dense, gummy, flat, temperamental. But this recipe is the opposite: reliable, tender, beautifully risen, and consistently delicious. Here’s the magic behind the texture.
A Tall, Soft Loaf (Without Xanthan Gum)
Traditional gluten-free bread relies on xanthan gum to mimic elasticity, but this loaf gets its structure from a smarter combination: psyllium husk + flaxseed + a perfect balance of starches.
The result is shockingly soft, impressively tall, and unexpectedly tender.
Texture That Rivals Regular Bread
If you’ve ever baked gluten-free bread and gotten a gummy center or a dry, crumbly edge, you know the struggle. This recipe avoids both by dialing in moisture, structure, and bake time.
Raisins That Stay Put (No More Sinking!)
The bread machine’s mix-in cycle ensures juicy raisins throughout every slice — never all at the bottom.
A Foolproof Bake Time
Finished at 205–210°F, this loaf bakes through evenly and stays soft for days (or freezes perfectly for weeks).
How to Make It (Bread Machine Method That Always Works)
This process is shockingly simple once you’ve done it once. The biggest “technique” here is trusting the bread machine — it truly does the heavy lifting.
Here’s how to set yourself up for warm, cinnamon-scented success.
1. Bring All Ingredients To Room Temperature
Cold ingredients = sluggish rise. Warm ingredients = tall, happy loaf.
Liquids can be warmed in the microwave for a few seconds.
Bring eggs to room temperature with this handy tip:
- Add water to a measuring cup and microwave for 30 seconds.
- Add the eggs and let them sit for just a few minutes.
Room temperature eggs in no time!
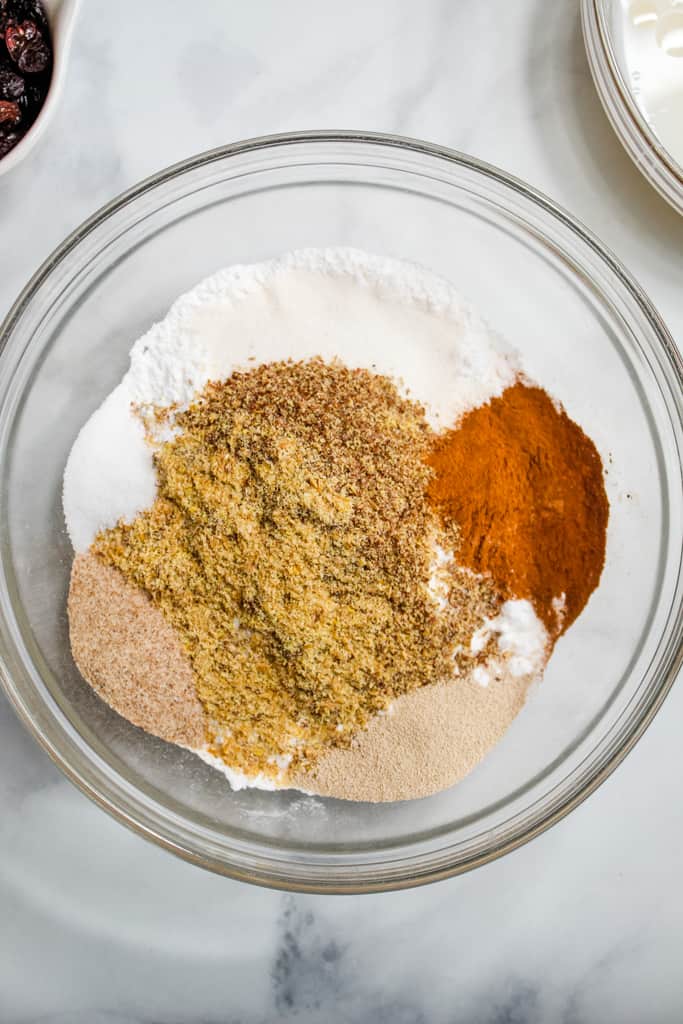
2. Mix Dry Ingredients In One Bowl
This ensures the starches, flours, psyllium, flax, cinnamon, sugar replacer, and salt are evenly dispersed.
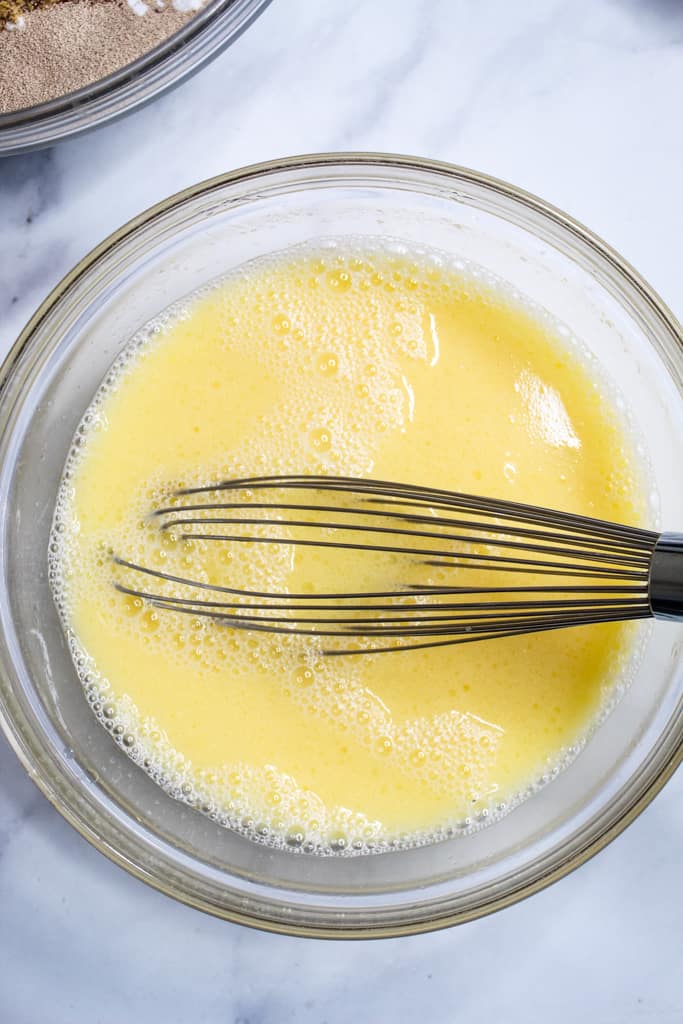
3. Mix Wet Ingredients In Another Bowl
Whisk until smooth — this helps everything incorporate effortlessly once the machine starts mixing.
4. Pour Wet Ingredients Into The Bread Machine Pan First
This keeps the yeast away from the liquid until it’s showtime.
5. Add dry ingredients on top
No stirring needed — just level gently.
6. Make a shallow well for the yeast
Keeps it dry until kneading begins.
In order to have the best results with this recipe:
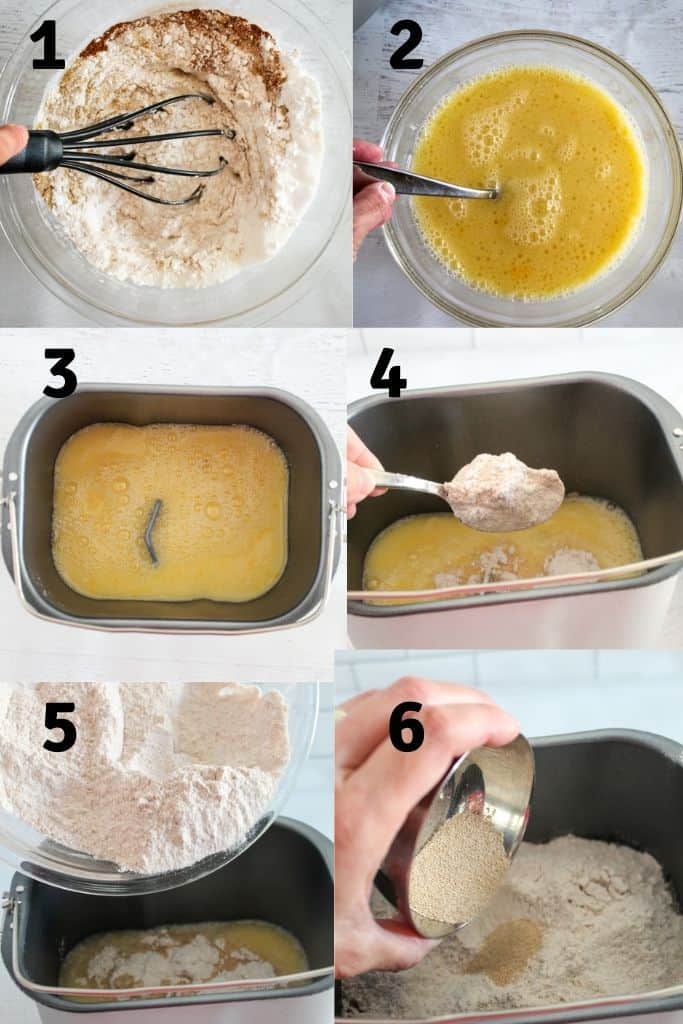
- Mix the dry ingredients together first in a bowl (image 1)
- Mix the liquid ingredients in a separate bowl (image 2)
- Add the liquid ingredients to the machine pan first (image 3)
- Add the dry on top of the wet (images 4-5).
- Add the yeast last (image 6).
This method is essential for a nicely formed loaf of bread.
7. Select the gluten-free cycle (2-lb loaf)
Select the gluten-free cycle on your bread machine. Press the mix-ins button if your machine has one.
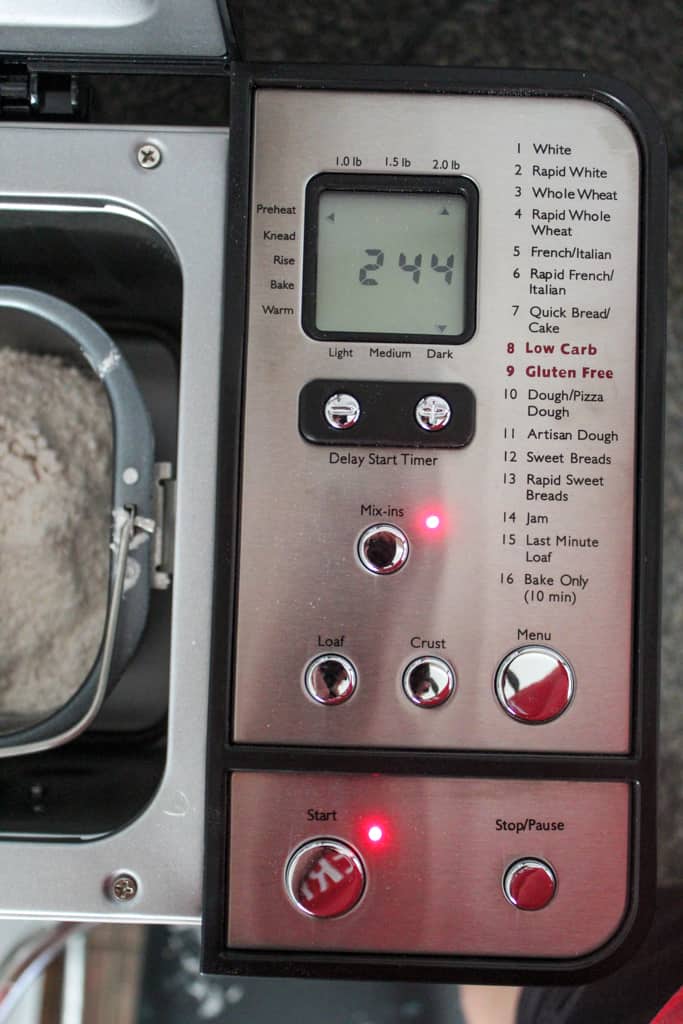
The gluten-free cycle is about 2 hours and 45 minutes on this Cuisinart machine. After adding the ingredients, push number 9 (gluten free setting) and the mix-ins button and then the start button.
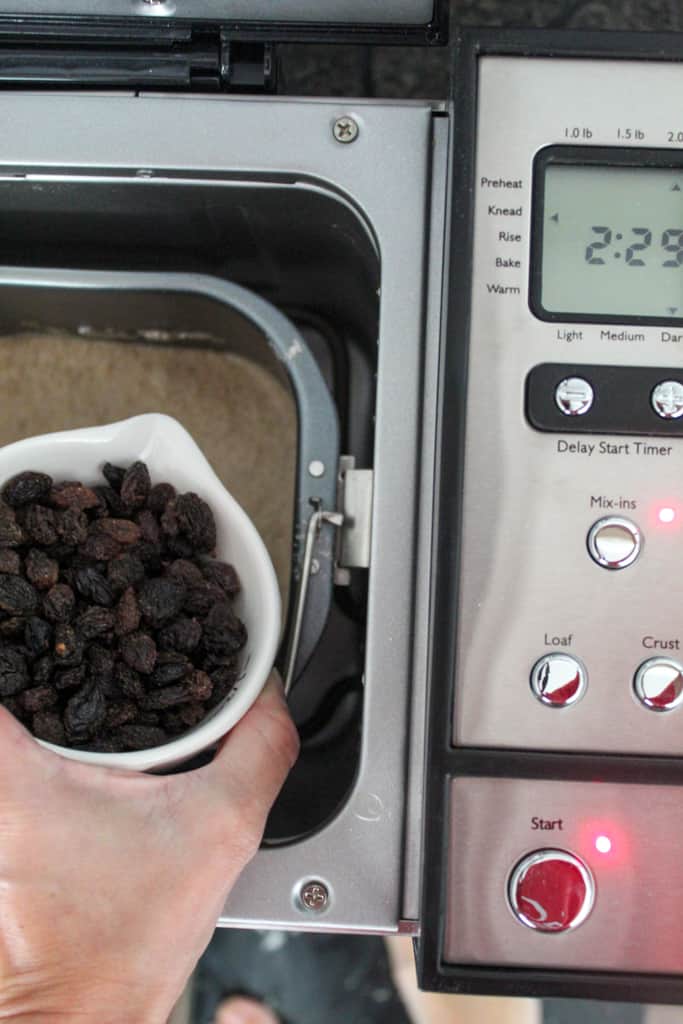
8. Add raisins at the beep
Usually 12–15 minutes in. Dump them in all at once and close the lid.
9. Bake until internal temp reaches 205–210°F
After the baking cycle is over, check the bread to ensure it’s done. An instant-read thermometer should register between 205 – 210 F.
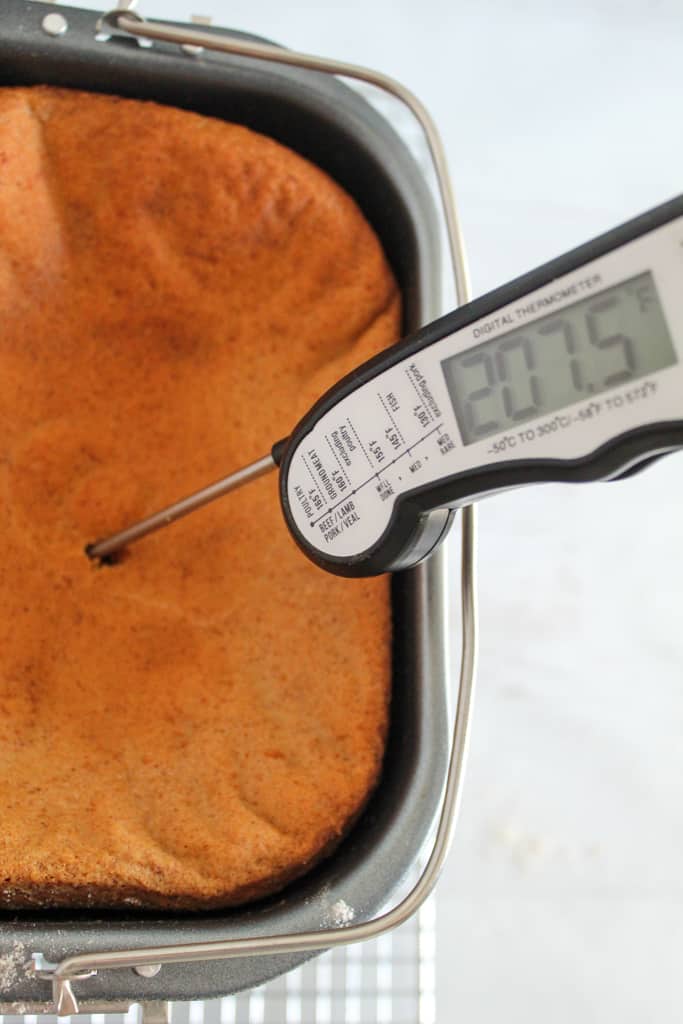
Pro tip: The baking time on this two-pound loaf of bread comes in right at 55 minutes. So, depending on your bread machine, you may need to add more time.
With most machines, there is a “Bake Only” setting, so once the cycle is complete, just push that button and add the minutes to equal 55 minutes total. Check the bread for doneness as it bakes.
10. Cool correctly to avoid gumminess
Once the bread tests done, remove the entire pan from the machine and let it cool on a wire rack for 10 minutes.
Don’t slice early. Warm GF bread will always be gummy.
- 10 min in pan
- Remove loaf; cool 15 min on one side
- Flip; cool 15 min on the other side
This cooling method = perfect slices every time.
Variations To Try
Here’s where the creativity starts — every option brings a new personality to the loaf.
Cozy? Bright? Dessert-like? You pick.
- Cranberry Cinnamon: Swap raisins for dried cranberries for a tangy, festive twist.
- Cinnamon Swirl: Mix 2 Tbsp brown sugar with 1 Tbsp cinnamon. Fold lightly into the batter at the mix-in stage for a ribboned effect.
- Walnut Crunch: Add ½ cup chopped walnuts during the raisin beep for a nutty texture.
- Orange-Raisin: Add 1 tsp orange zest to the wet ingredients — tastes like a holiday breakfast.
- Super-Plump Raisins: Soak raisins in warm water for 10 minutes, drain, and pat dry.
Troubleshooting Guide (Fast Fixes)
Great bread happens, mistakes happen — this section keeps you from guessing. Each fix is quick, simple, and based on real gluten-free baking science.
My bread sank in the middle
- Too much liquid
- Not enough bake time
- Cold ingredients
Try weighing flour and adding an extra 5–10 minutes on “Bake Only.”
My loaf is gummy inside
- Sliced too early
- Internal temp wasn’t 205–210°F
- Too much moisture
Let it cool fully on both sides before slicing.
Raisins all dropped to the bottom
- Added too early
- Mix-in cycle didn’t activate
- Batter was too thin
Add raisins manually if needed, 12–15 minutes in.
Bread is too dense
- Didn’t weigh flour
- Old yeast
- Ingredients too cold
Use instant (bread machine) yeast and room-temperature liquids.
Storage & Freezing
Gluten-free breads stay fresher when handled properly, especially those without gums. Here’s how to keep your loaf soft, flavorful, and sliceable for days.
Room Temperature
Good for 1 day (gluten-free breads stale quickly).
Freezer
Best method:
- Slice entire loaf
- Layer slices with wax paper
- Freeze in a sealed freezer bag
To Thaw: Toast straight from frozen — delicious every time.
Can I make this without using a bread machine?
Yes! The ingredients are exactly the same, but the method is a bit different:
- Heat cup of water and cup of milk to 100F.
- In the bowl of a stand mixer, mix the dry ingredients until combined.
- In the water measuring cup, add yeast to cup of warm water to proof.
- In the milk measuring cup, add oil, vinegar, and honey and stir until blended.
- Add milk mixture and yeast to the mixing bowl and mix for 1 minute on low, scraping the bowl down.
- Add the 3 eggs and increase speed to medium and mix for 3 minutes.
- Stop machine and add raisins. Mix again for 30 seconds.
- Pour batter into a 9″x5″ baking pan and let rise for 45 minutes or until batter crests the top of the pan.
- Preheat oven to 350F. Bake for 50-55 minutes or until instant read thermometer reads 205-210F.
Gluten-Free Cinnamon Raisin Bread (Bread Machine Recipe)
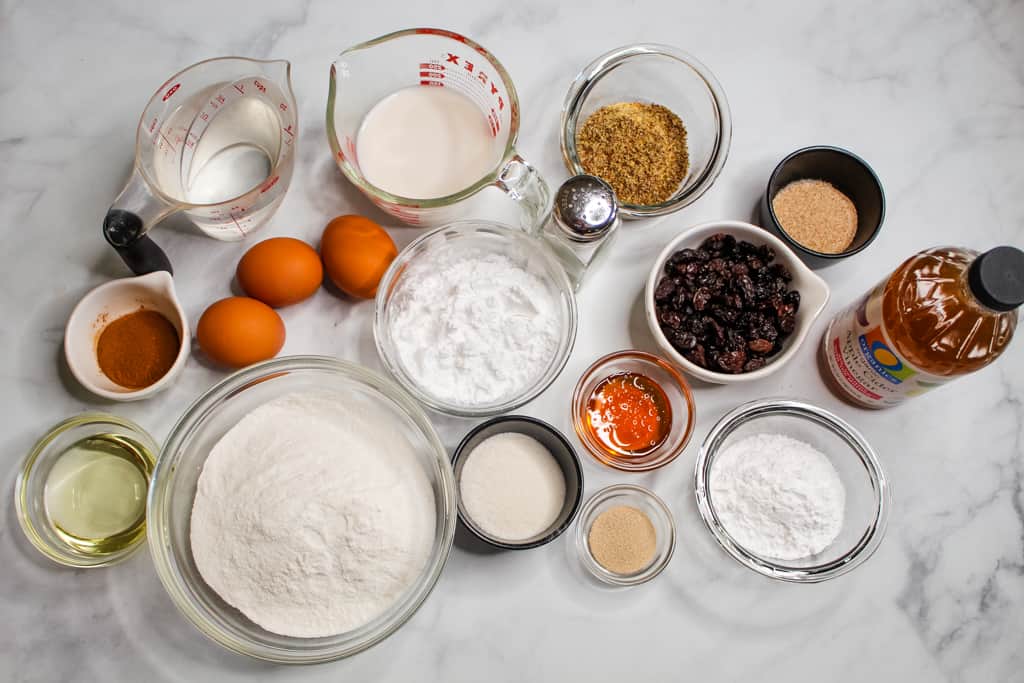
Ingredients
Dry Ingredients
- 340 grams white rice flour (about 2 cups)
- 100 grams potato starch (about 2/3 cup)
- 40 grams tapioca flour (about 1/3 cup)
- ¼ cup flaxseed meal
- 3 tsp psyllium husk powder
- 3 tbsp white sugar
- 3 tsp cinnamon
- 1 ½ tsp salt
Wet Ingredients
- 3 eggs room temperature
- 1 cup water (around 100°F)
- ½ cup dairy-free milk (like almond milk)
- 3 tbsp oil
- 2 tbsp honey
- 1 tsp apple cider vinegar
Yeast
- 2 ¼ tsp instant yeast (bread machine yeast)
Mix-Ins
- ½ cup raisins (add at mix-in beep)
Instructions
- Bring all ingredients to room temperature. Warm water & milk to about 100°F. Allow eggs to sit in warm water for 2–3 minutes if needed.
- Mix dry ingredients. In a medium bowl, whisk the rice flour, potato starch, tapioca flour, flaxseed, psyllium, sugar, cinnamon, and salt until evenly combined.
- Mix wet ingredients. In a separate bowl, whisk the water, dairy-free milk, oil, honey, vinegar, and eggs until smooth.
- Load the bread machine. Pour wet ingredients into the pan first. Add the dry mixture on top. Make a shallow well and add the instant yeast last.
- Start the gluten-free cycle. Use the GF setting (e.g., Cuisinart #9). Press the mix-ins button if your machine has one.
- Add raisins at the beep. When the machine signals (~12–15 minutes in), add all the raisins at once.
- Bake to completion. The loaf is fully done when it reaches 205–210°F internal temperature. If your machine finishes too early, use Bake Only mode and add extra time until done.
- Cool properly. Let it cool in the pan on a wire rack for 10 minutes. Remove from the pan and lay the loaf on its side. Let it cool for 15 minutes, then flip to the other side and cool an additional 15 minutes.
Notes
- Use room temperature ingredients for the best rise.
- Weighing flours produces the most consistent results.
- If your bread machine doesn’t have a gluten-free setting, use the rapid/one-rise cycle.
- Freeze slices with wax paper between them for easy toasting later.
- For extra-plump raisins, soak them in warm water for 10 minutes, then pat dry.
Nutrition
Frequently Asked Questions
These are the most common questions bakers have when making gluten-free bread in a machine. Each answer is simplified for quick reading — especially helpful for first-time bakers or anyone troubleshooting a loaf.
Don’t see your question? Respond in the comments, and we’ll get back to you!
What if my bread machine doesn’t have a gluten-free setting?
Bread machines are one of my favorite kitchen appliances. They work efficiently and free up so much time!
And the best part is, you don’t even need a gluten free setting on your machine. Use the rapid or one-rise cycle. This recipe was originally developed on older machines and still works beautifully.
What bread machine is best for this recipe?
Any reliable machine with a 2-lb loaf capacity works. Tested on older non-GF models and the newer Cuisinart.
How do I know the bread is mixed enough?
The bread machines handle this for you. As long as you measured accurately and added raisins at the beep, you’re set.
What kind of yeast should I use?
Instant or bread-machine yeast. Avoid active dry unless you proof separately and adjust.
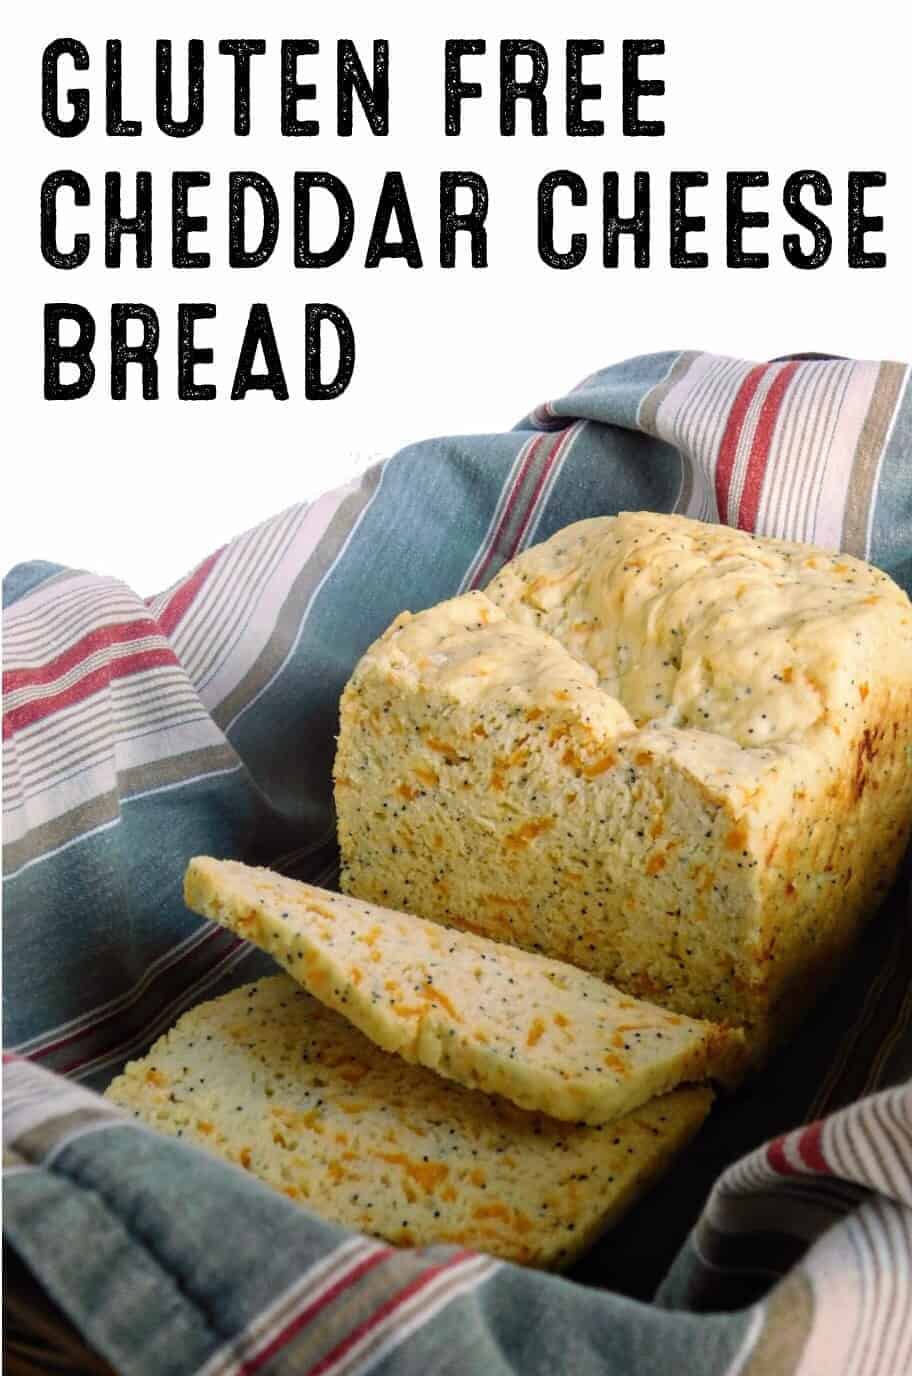
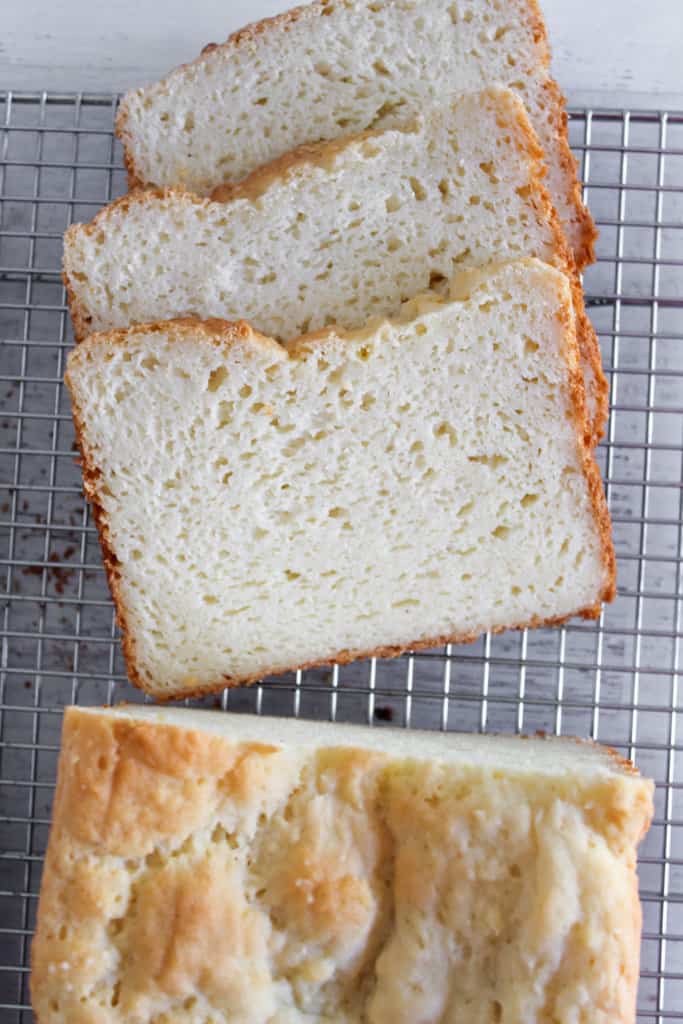
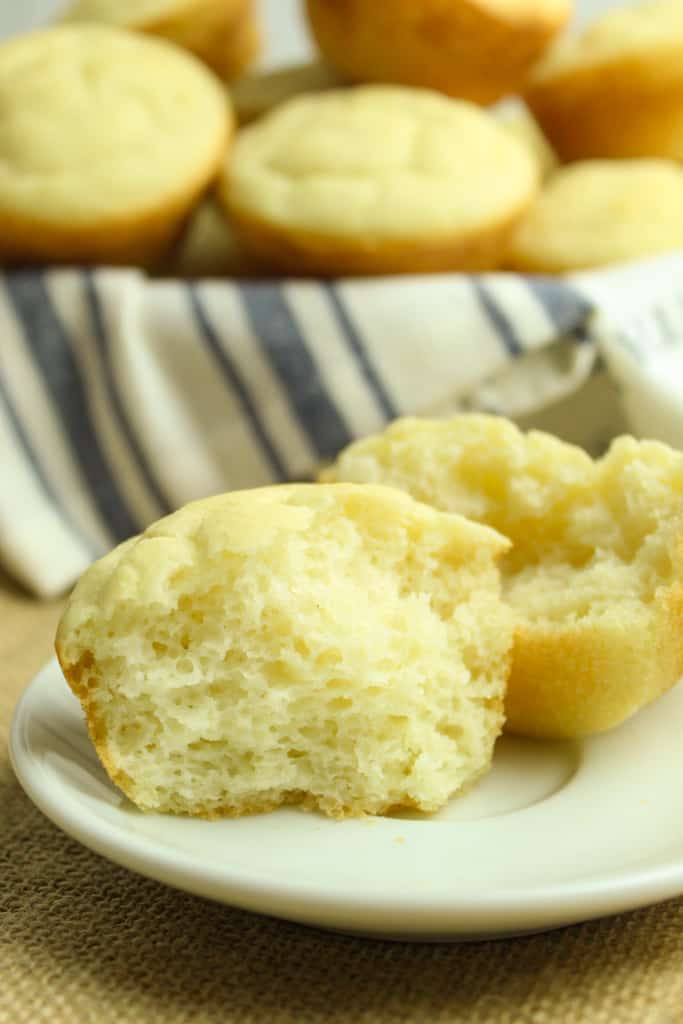
More Gluten-Free Bakes You’ll Love
If this cinnamon raisin loaf has you in a baking mood, here are a few more gluten-free recipes readers can’t stop making. Each one is soft, comforting, and just as easy to enjoy anytime of day.