Gluten Free Brown Bread {Dairy Free}
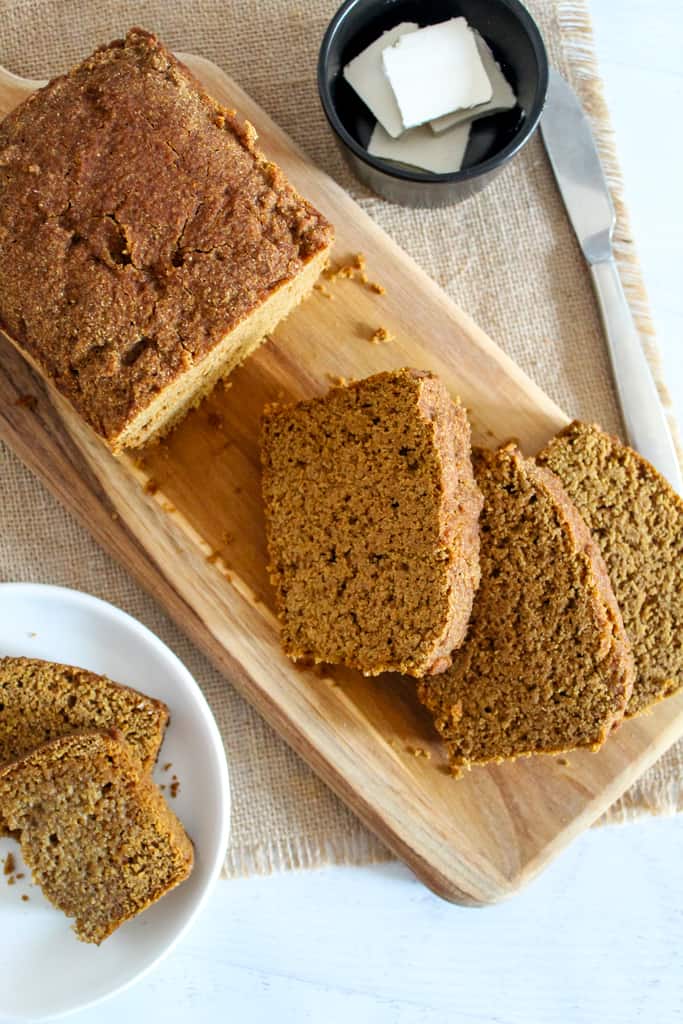
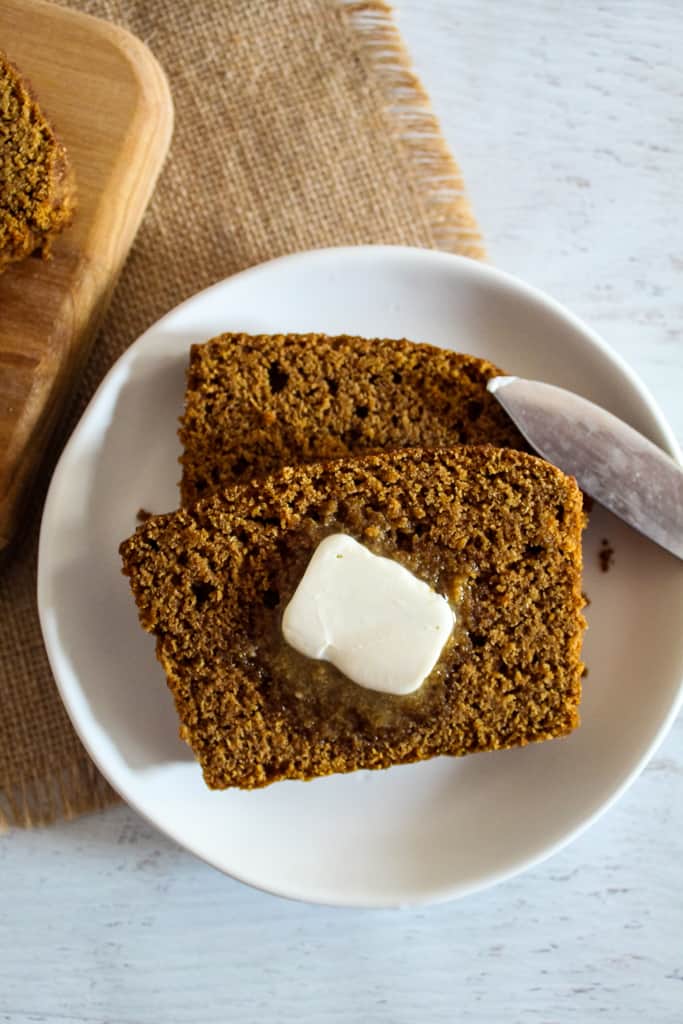
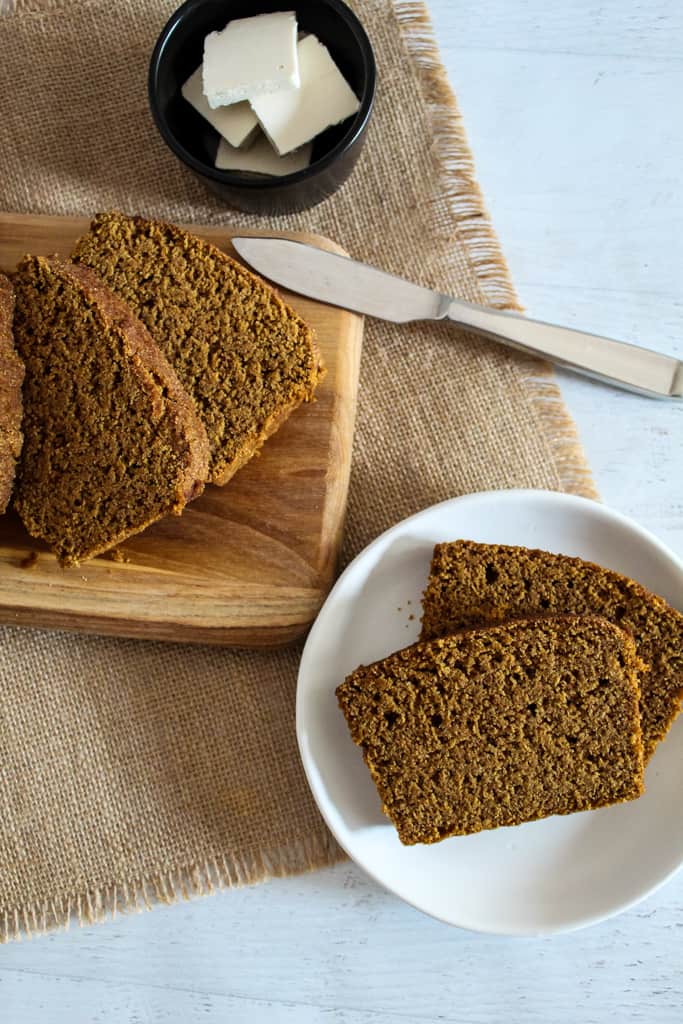
If you're looking for a bread that's as delicious with breakfast as it is alongside dinner, this gluten free brown bread is it! The soft texture and hint of sweet from the molasses takes this bread over the top in both flavor and appearance.
But there's something else that truly sets this bread apart from all others... it's the distinct style of baking that you'll use for this gorgeous loaf. Nothing complicated or overly hands on, but the baking process involves actually steaming the bread (more on that later!) but the result is a light, perfectly textured bread. This method and this bread were inspired by none other than Boston brown bread. You'll find a lot of similarities in the recipe.
As an affiliate partner of various brands and sponsored content, Zest for Baking may earn commission on qualifying purchases. Disclaimer
Why you'll love this recipe!
I have to warn you up front, this recipe makes just one loaf of bread. Seems like all the best bread recipes make just one loaf of bread! This tasty white bread is the same thing. (Tip on single loaf breads... they don't double well, instead make 2 batches side). But back to this amazing bread... this recipe isn't just delicious, it's also:
- Dairy free (just like these fluffy dinner rolls!)
- Egg free - this unique beer bread is too
- Xanthan gum free - I've written a lot about xanthan gum alternatives here and even have a
- Yeast free (Here's another yeast free bread)
- Quick to mix
- Beautifully textured
It's a spin on traditional Boston brown bread, only without the gluten!
Bread baking pro tips
1. Use room temperature ingredients
I often get asked about storing flours since gluten free baking means we end up with more flours and starches than with gluten baking. The chart in the article linked above is a great breakdown of the individual flour or starch and then how long they can be stored in the refrigerator or freezer. But if you do opt to store them in the refrigerator or freezer, you'll have to add time to make sure they come to room temperature before using in the recipe. That goes for pretty much any gluten free recipe - room temperature ingredients blend better and are a must for baking.
For the milk, just heat the milk in the microwave for about 30 seconds, then add the vinegar to make the buttermilk.
2. Measure by weight
Like temperature of the ingredients, the way you measure ingredients is equally important in gluten free baking. Use a digital scale like this one and measure the flours and starches in grams.
Think of it like this - two cups that appear equal can actually contain different volumes of flour or starch.... It's true. I actually show this happening in my baking class but they really are different!
3. Let the batter rest
If you've been perusing my recipes you'll see me talk about a 30 minute 'rest time' after mixing the batter. This goes for everything from these zucchini muffins to these almond flour cupcakes.
This rest time is an essential part of gluten free baking. It gives the starches time to absorb the liquid to create a nice fluffy end result. I show an example in my baking class, but the difference between batter that has rested and batter that hasn't rested isn't just the height, it's the texture, the crumb... everything!
4. Use the pan size indicated
I've experimented with different pan sizes for this bread but the best size to use is the 8" x 4.5". This size ensures that the bread isn't flat, but has a nice crown on it and also doesn't overflow in the pan.
5. Follow the steaming tips
I mentioned before but this loaf bakes differently. It follows the steaming method where you create an environment that steams it so the resulting loaf is super tender and moist. Follow the details for it below but this steaming method is very important to proper bread texture.
How to make this recipe
Ingredients & substitutions
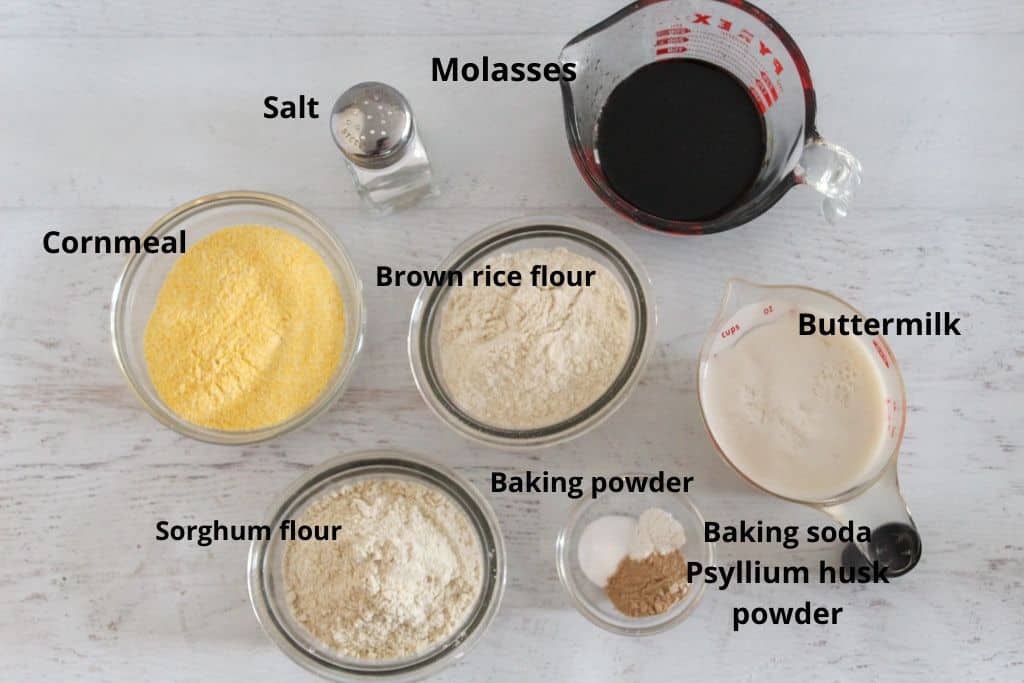
The ingredients list for this recipe is nice and short. Below are the brands I use and recommend and then some substitutions I recommend if you need to substitute an ingredient...
Cornmeal - the Nuts.com brand of cornmeal is the perfect texture, plus it's GF.
Sorghum flour - also head to Nuts.com for your sorghum flour, it's the most budget friendly option. To substitute sorghum flour, check out the guide to GF flour substitutes chart.
Brown rice flour - I buy the 5 pound bag of flour from Nuts.com. The quality is amazing and the price is super. Also reference the flour substitutes chart above for an alternative to brown rice flour.
Baking powder - I use Clabber Girl brand, but any brand that is GF would work well. As a substitute to baking powder, you could use xanthan gum.
Psyllium husk powder - I use and recommend this brand of psyllium husk powder. An alternative to it would be ground chia seeds or flax seed meal.
Buttermilk - make your buttermilk using almond milk and white vinegar. (Pour 2 Tablespoons of white vinegar into a 1 cup measuring cup then fill with milk to the 1 cup line). I would not advise substituting this.
Molasses - I recommend the Grandma's brand of molasses. If you need to substitute this, use ½ cup honey and a ½ cup dark brown sugar. Add it when instructed to add the molasses.
Mixing
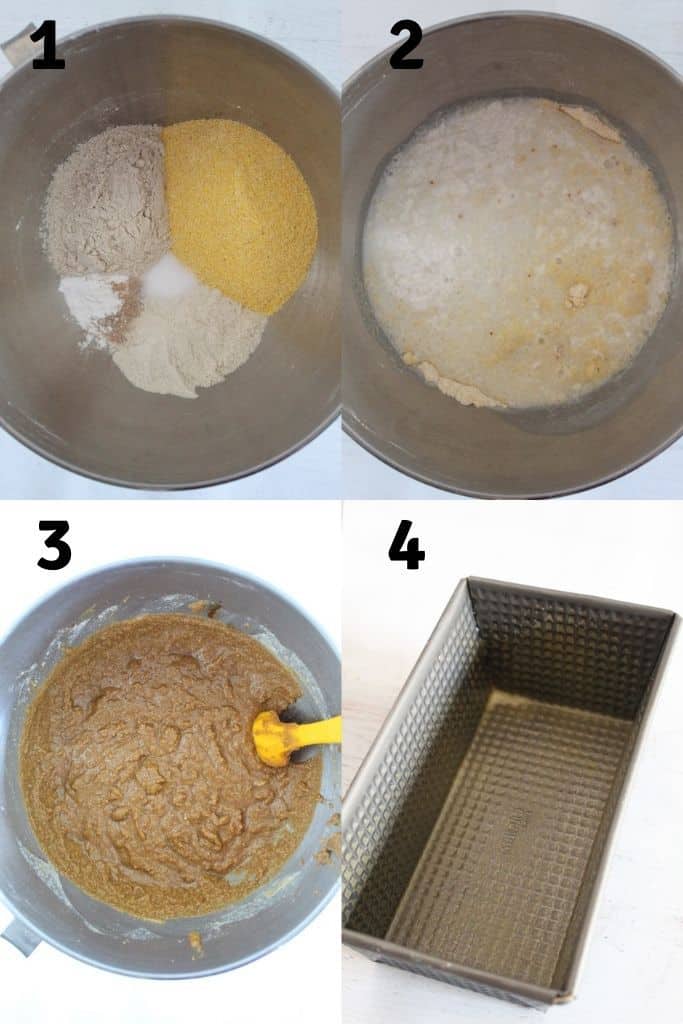
Mixing this batter is super simple. Pull out your stand mixer and add the dry ingredients to the bowl (step 1 in image above). Mix together well and add the buttermilk and molasses (step 2). After the batter has mixed thoroughly, set it aside to rest for 30 minutes (step 3). Meanwhile spray an 8" x 4.5" baking pan with cooking spray (step 4).
Steam prep
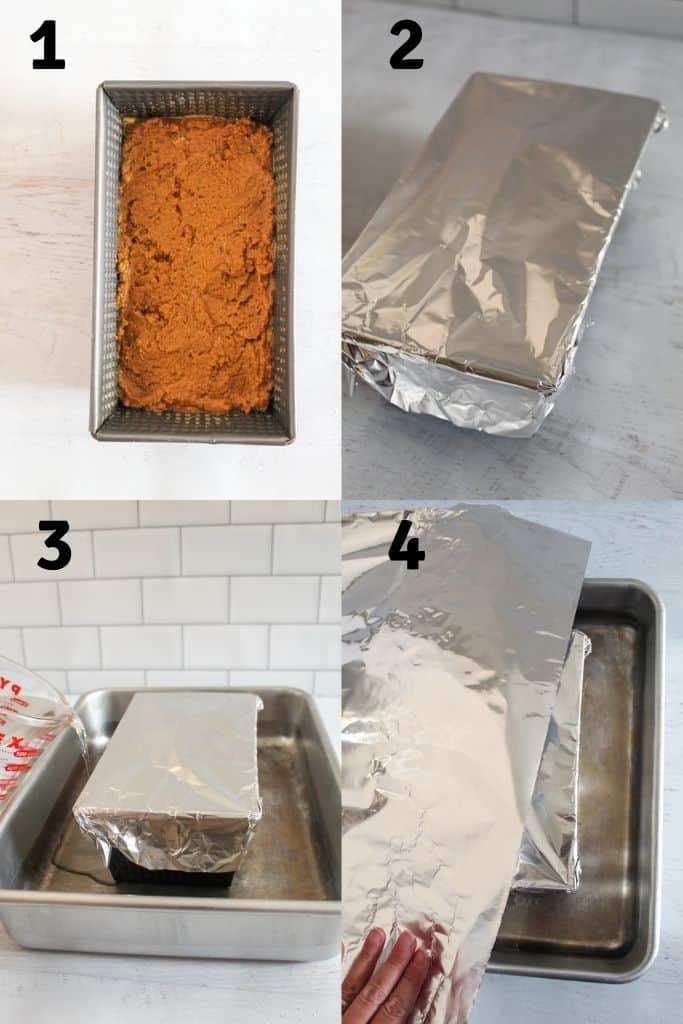
After the batter has rested, pour it into the prepared baking pan (step 1 above). Cover the pan with a sheet of foil (step 2).
Place the pan inside a 9" x 13" baking pan and fill the 9" x 13" pan with water (step 3).
Side note: Water plays a critical part in this bread. When you add the water in the pan, it should reach a couple inches up on the loaf pan. I’ve found that either a Dutch oven or a 9" x 13" pan works equally well. Use a pan that will give the bread loaf pan room on each side, so it's not hitting the sides of the water bath pan.
Cover the 9" x 13" pan tightly with foil (step 4).
The bread in the water path should be baked on the lowest rack in your oven. This allows for enough air to circulate around the pan and it creates an optimal steam bath for the bread.
FAQ's about this recipe
See the point above in the Ingredients section with detailed explanations for each flour but in general, yes, you can.
Yes, absolutely!
Like other homemade breads, this bread doesn't stay fresh for long. If you don't enjoy it within a day, the best way to store it would be to slice the loaf and freeze it. Then just take out slices as you need.
Since the bread is covered in foil while it bakes it's a little tougher to gauge doneness. The baking time is anywhere between 90 - 100 minutes or when an instant read thermometer registers 195F (which is lower than typical yeast bread).
Check out these other quick bread recipes!
Recipe

Gluten Free Brown Bread {Dairy Free}
Ingredients
Method
- In the bowl of a stand mixer, mix together the dry ingredients.
- Add the buttermilk and molasses into the bowl and beat for 30 seconds on low speed.
- Stop machine and scrape batter down. Beat for 2 minutes on medium.
- Set batter aside for 30 minutes.
- Preheat oven to 325° F. Adjust oven racks so that the bread will bake on the lowest one. Grease or spray an 8" x 4.5" loaf pan with cooking spray.
- Spread the batter evenly into the prepared pan and smooth the top.
- Cover this pan with a piece of foil.
- Use either a Dutch oven or a 9" x 13" baking pan as a steamer box for the bread to bake in.
- Place the baking pan into the 9" x 13" pan.
- Add about 6 cups of water to the baking pan or Dutch oven.
- Cover the whole pan with another sheet of foil.
- Carefully place the pan into the oven and bake for 90 - 100 minutes or until an instant read thermometer registers 195F.
- Use caution when removing the foil as the steam will be very hot and will come out very fast. Remove the loaf pan from the steamer and let it cool on a wire rack for 10 minutes.
- Remove the bread from the pan and enjoy!
Video
Notes
- Mix the batter on medium speed for the full 2 minutes.
- Set the batter aside to rest for 30 minutes before pouring into baking pan.
- Cover both pans with a sheet of foil each.
- Water should be enough to fill the pan and come up the sides.
- Be very careful when removing the foil as the hot steam can burn.


I’d like to try making rolls from this recipe. I’m thinking I could bake them in a muffin tin in the water bath. Would you recommend a cooking time?
Hi Terri,
So it should be possible - I haven't tested it, but I'd like to hear how it turns out - start checking at about 15 minutes in, use an instant read thermometer to check for doneness.
Christine
I’m wondering why this is called “dairy free,” when the recipe calls for buttermilk?
Hi Kris,
Sure, so it's dairy free buttermilk - there's a little more about it in the ingredients list in the post.
Thank you for asking!
Christine
Can this recipe be used in a bread machine? And what size loaf is this considered? 1 lb, 1 1/2 lb or 2? I have been desperately looking for a gluten-free recipe that will work in a bread machine. It’s difficult to find a mix or recipe that is egg and dairy free, and does not contain gums. My body can’t handle any of those things.
Hi Sheri,
So I can understand your frustration! I haven't tested this loaf in a bread machine though. It's about a 1 pound loaf though. If you do try it, I'd be curious as to how it turns out.
There are some substitutions that might be helpful though - most of my recipes don't have dairy as I am DF as well. For the eggs, something like JUST egg works wonderfully. And then for gums, I have a ton of helpful info on substituting for it here: https://zestforbaking.com/category/gum-substitutes
Hope some of that helps, let me know how else I can help!
Christine
Sorry, quick correction to my post. It's Quick & Carry: https://quickandcarry.com/recipe/instant-pot-boston-brown-bread/
Thank you for sharing the info Sharon!
Christine
In answer to the question about cooking this in an Instant Pot, I found this from Cook & Carry that describes a similar gluten free Boston Brown Bread recipe. It also has a video that shows how to go about it. That may be enough information to try Christine's recipe in the Instant Pot. I'd love to hear how it turns out.
https://quickandcarry.com/recipe/instant-pot-boston-brown-bread/
I looked up Psyllium Husk Powder, it said it is used for a laxative? Is there a substitute for it?
Hi Michele,
So I only use it in small doses in recipes - it works wonderfully as a binder. But ground chia seed or flax meal could also be used.
~Christine
need a substitute for the sorghum flour. Don't have it.
Hi BJ,
Thanks for asking. So amaranth or buckwheat would be the closest substitutes for sorghum, if you have those.
Check out this article, it has a chart with all types of flours with ones that will most closely match up for a substitute. https://zestforbaking.com/guide-to-gluten-free-flour-substitutes
Hope that helps!
Christine
Awesome recipe, Christine. This reminds me of the bread my grandma always used to make us. Definitely going to have to make it with the kids this weekend!
Hi,
Thanks for the kind words - made my day! It's a great one to do with kids too - other than the water part, they can mix it all.
Enjoy!
Christine
is there anyway to adapt this to an instant pot recipe
Hi,
Thanks for asking!
There could be, but I did not create the recipe using one, so I would be experimenting as I went. It is definitely an idea though - I will see if I can incorporate it into a future recipe!
Hope that helps.
Christine