This gluten-free potato bread recipe addresses the most common problems with gluten-free bread. We’re talking about dense texture, crumbling slices, and bread that goes stale too quickly.
Potatoes improve the texture and stability of the loaf by increasing hydration and helping the crumb remain more flexible after baking.
Table of Contents
Our recipe ensures a loaf that slices cleanly and works well for toast, sandwiches, and everyday baking without falling apart.
If you enjoy reliable gluten-free baking recipes like our Dairy-Free & Gluten-Free Almond Flour Cornbread, this potato bread is another practical option for everyday baking.
Recipe Snapshot
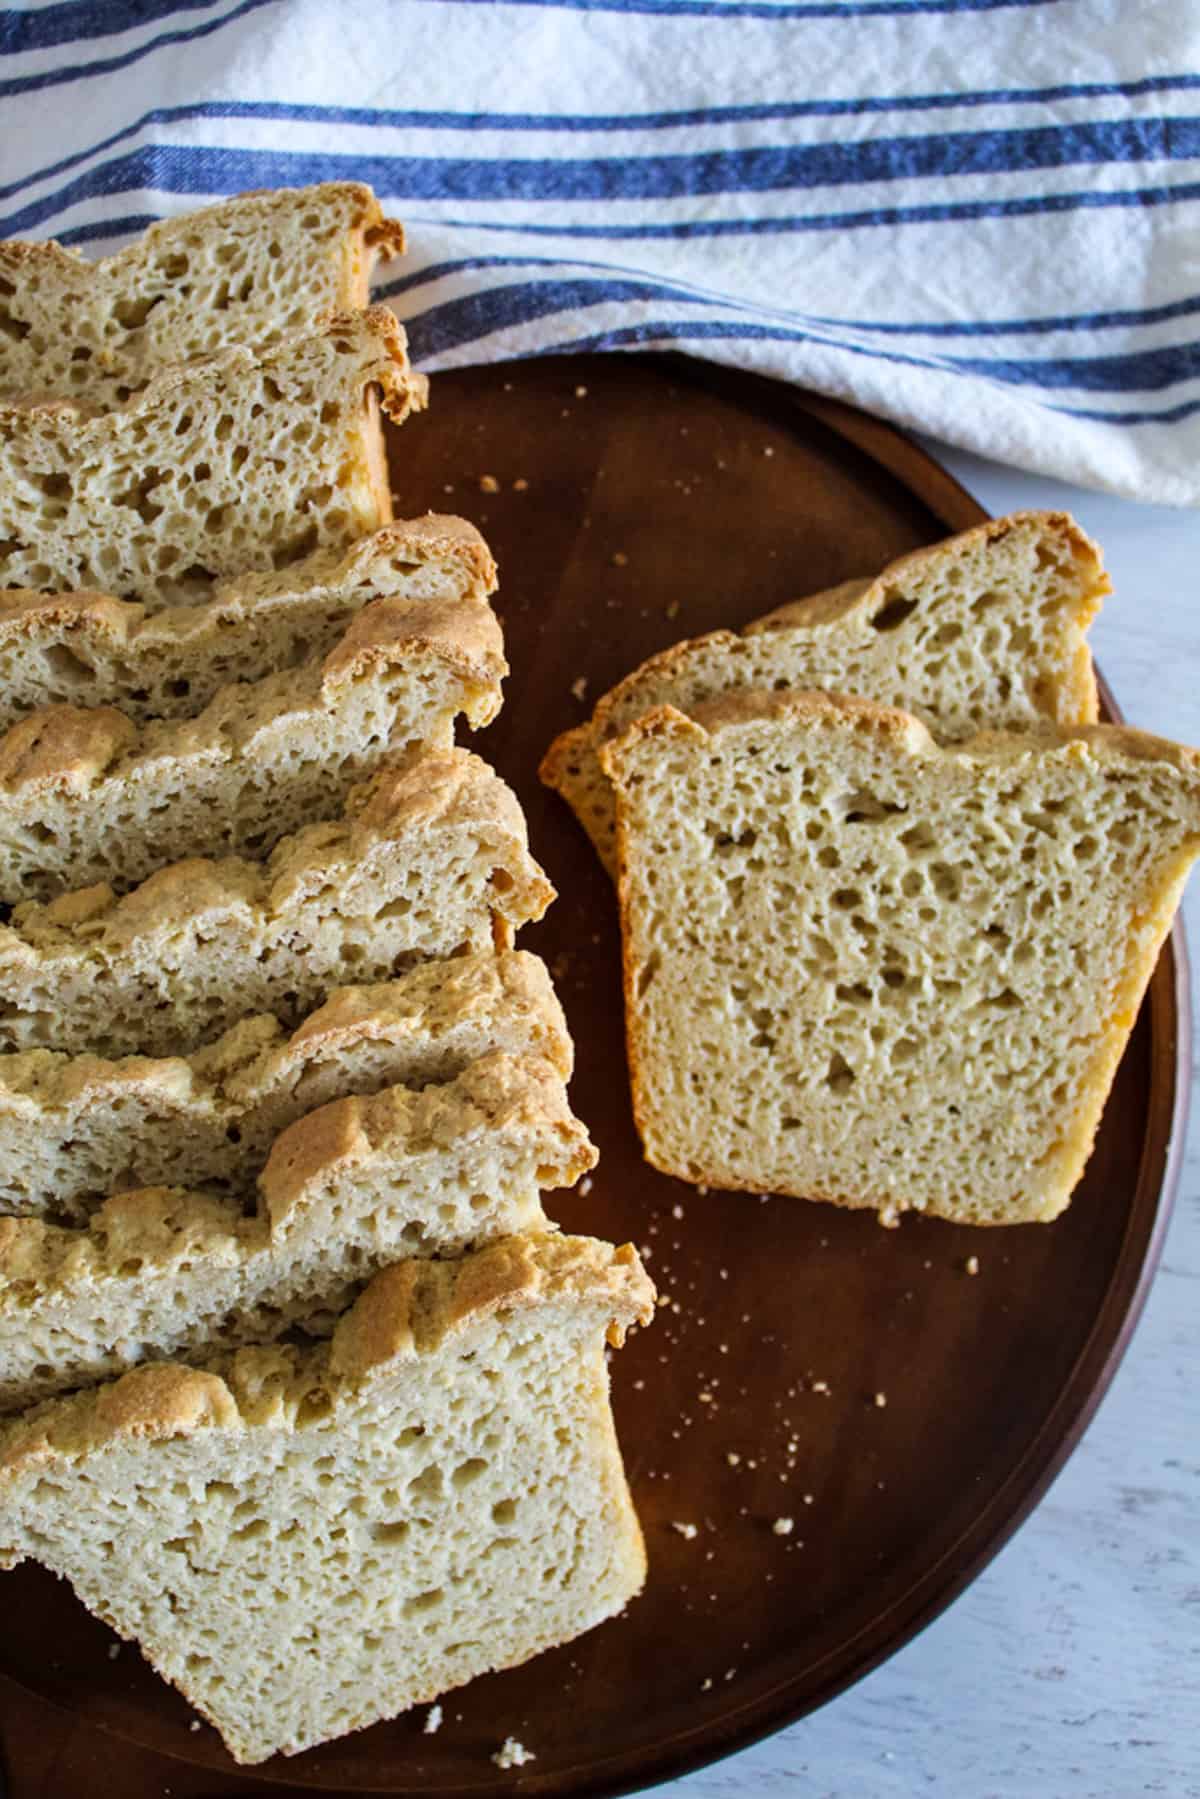
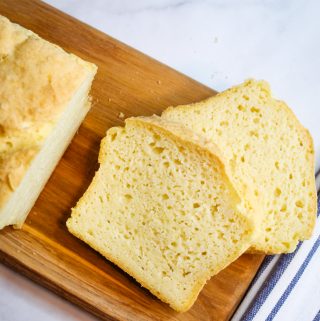
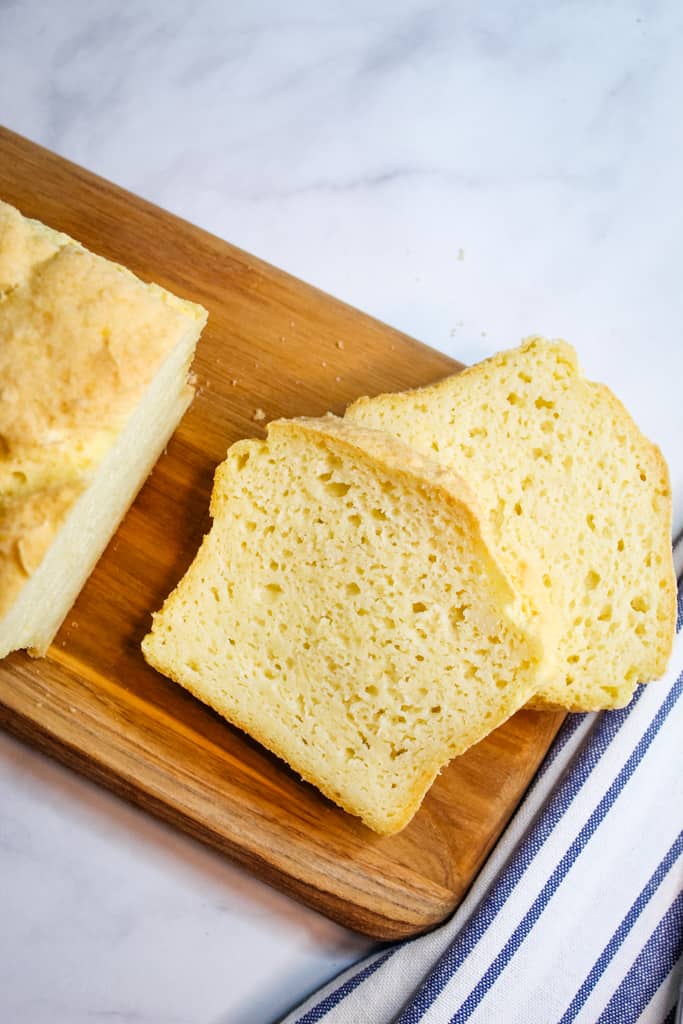
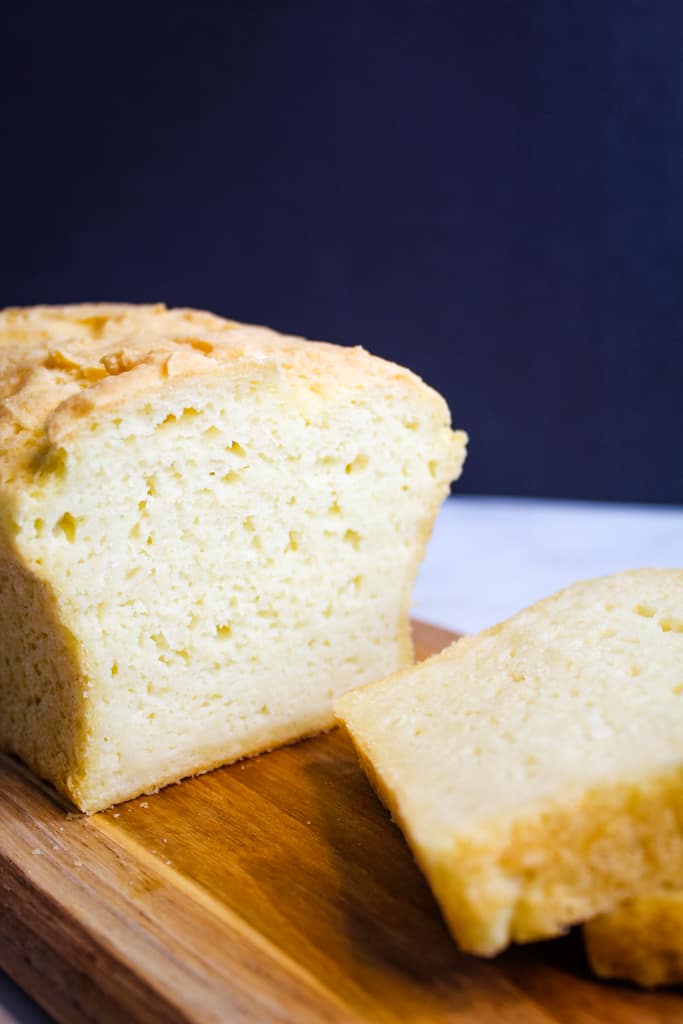
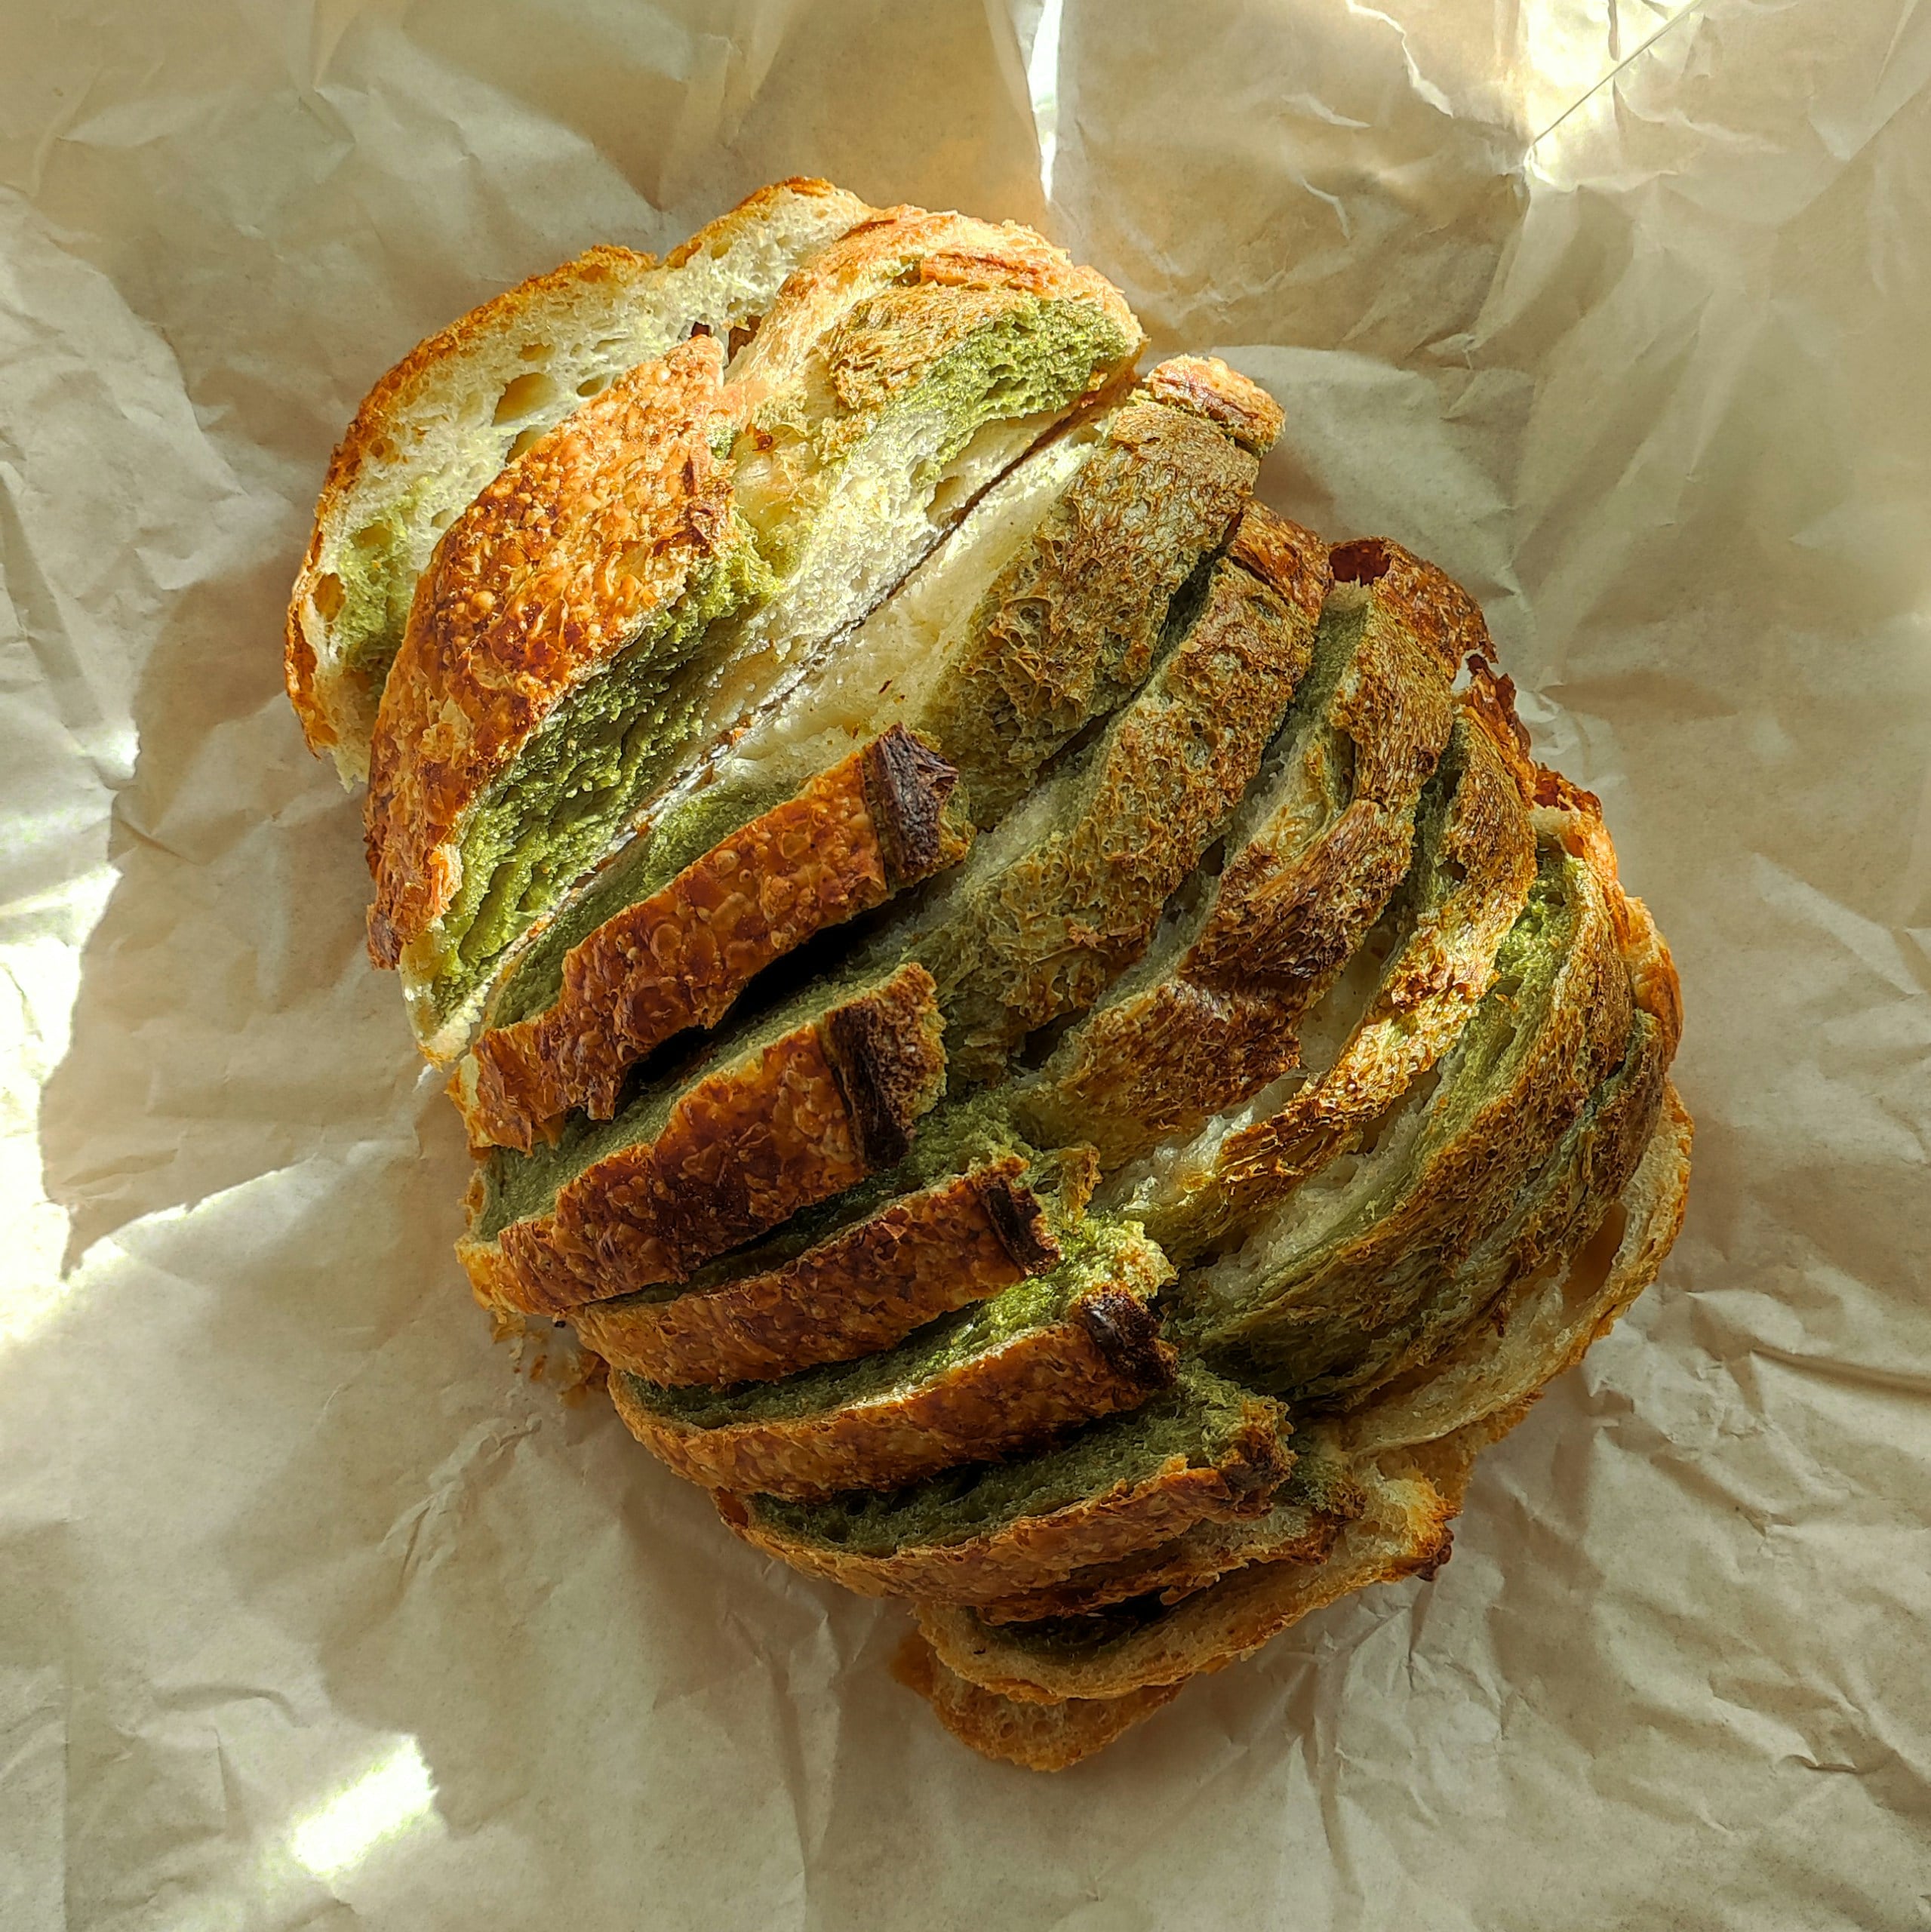
This gluten-free potato bread is soft, sliceable, and made for everyday use. It has a tender, moist crumb that works well for sandwiches, toast, French toast, and grilled cheese.
The recipe uses both potato starch and dry potato flakes to help create a softer texture than many homemade gluten-free breads. The dough will look more like a thick, sticky batter than traditional bread dough, which is exactly what you want.
Plan on about 30–45 minutes of rise time, depending on how warm your kitchen is. For the best texture, bake the loaf until the center reaches 205–210°F, then let it cool completely before slicing.
Before you start: skim the proofing and doneness tips below so you know exactly what the dough should look like at each stage.
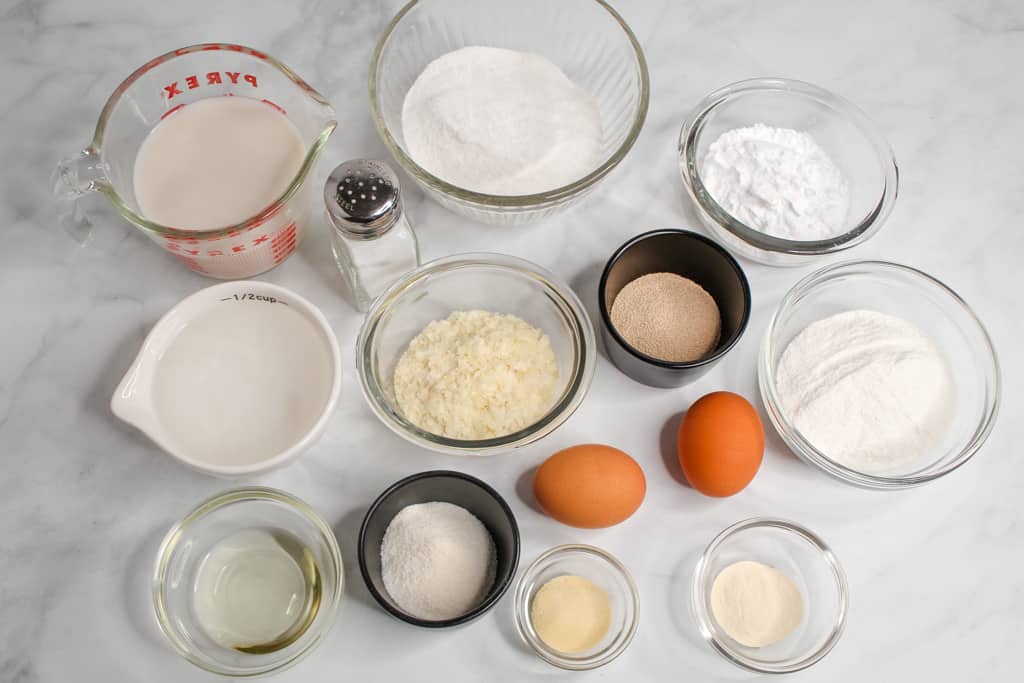
Gluten-Free Potato Bread Ingredient Quick Scan
Most ingredients in this gluten-free potato bread are pantry-friendly, and each one helps improve moisture, rise, or flexibility.
- White rice flour
- Sweet rice flour
- Gelatin
- Potato starch
- Dry potato flakes
- Granulated Swerve sweetener or granulated sugar
- Salt
- Xanthan gum
- Instant yeast
- Warm water
- Vegetable oil
- Eggs
- Dairy-free milk or regular milk
Ingredient Notes & Smart Substitutions
In this section, we discuss what each ingredient does in this recipe. Also, note that small substitutions can change the final texture, so learn what to expect before baking.
White Rice Flour
White rice flour gives the bread structure and stability. It creates a lighter crumb than heavier gluten-free flours. Brown rice flour can be used instead, but the loaf may become denser and slightly grainier.
Sweet Rice Flour
Sweet rice flour improves softness and flexibility. Also, it reduces crumbling after slicing. Do not replace it with regular rice flour, because the bread will lose moisture and become more fragile.
Potato Starch
Potato starch helps improve texture and keeps the crumb more flexible after baking.
Cornstarch or tapioca starch can work in small amounts, but the loaf may become slightly chewier or firmer.
Dry Potato Flakes
Potato flakes help the loaf stay fresher for longer and improve the overall crumb texture. Instant mashed potatoes can also work if they are plain and unseasoned. Flavored mixes may affect both texture and taste.
Xanthan Gum
Xanthan gum replaces some of the structure that gluten normally provides. It helps the loaf hold its shape and slice cleanly. Note that skipping it will produce a weaker loaf with more crumbling and less rise.
Instant Yeast
Instant yeast helps create lift and improves the overall crumb. Active dry yeast can be substituted, but it should be activated in warm water first. However, the rise may take slightly longer.
Dairy-Free Milk or Regular Milk
Both options work well in this recipe. Dairy-free milk keeps the loaf soft whilst making the bread easier to adapt for dairy-free baking.
Unsweetened almond milk or oat milk are the best substitutes. But coconut milk may create a heavier crumb.
Eggs
Eggs improve structure, moisture, and stability. Flax eggs can work too, but the bread will usually rise less and have a denser texture.
Do you enjoy adaptable gluten-free baking recipes? Our One Bowl Gluten-Free Banana Bread is another good option with flexible ingredient swaps.
Printable Gluten-Free Potato Bread Recipe Card
Ingredients
Dry Ingredients
- 2 cups white rice flour
- 1 cup sweet rice flour
- 1 teaspoon gelatin
- ½ cup potato starch
- ½ cup dry potato flakes
- 2 teaspoons granulated Swerve sweetener ,or granulated sugar
- 1 teaspoon salt
- 1 teaspoon xanthan gum
- 2¼ teaspoon quick-rise ,also called instant yeast
Wet Ingredients
- 1¾ cup water warmed to 110 F
- 2 teaspoons vegetable oil
- 3 large eggs ,slightly beaten
- ½ cup dairy-free milk or regular milk
Instructions
- Mix the dry ingredients together on medium speed for 30 seconds in the bowl of a stand mixer.
- In a separate bowl, whisk together the warm water, oil, eggs, and milk.
- Add the wet ingredients to the dry ingredients. Mix at low speed for 30 seconds, then increase to medium speed and mix for 3 minutes.
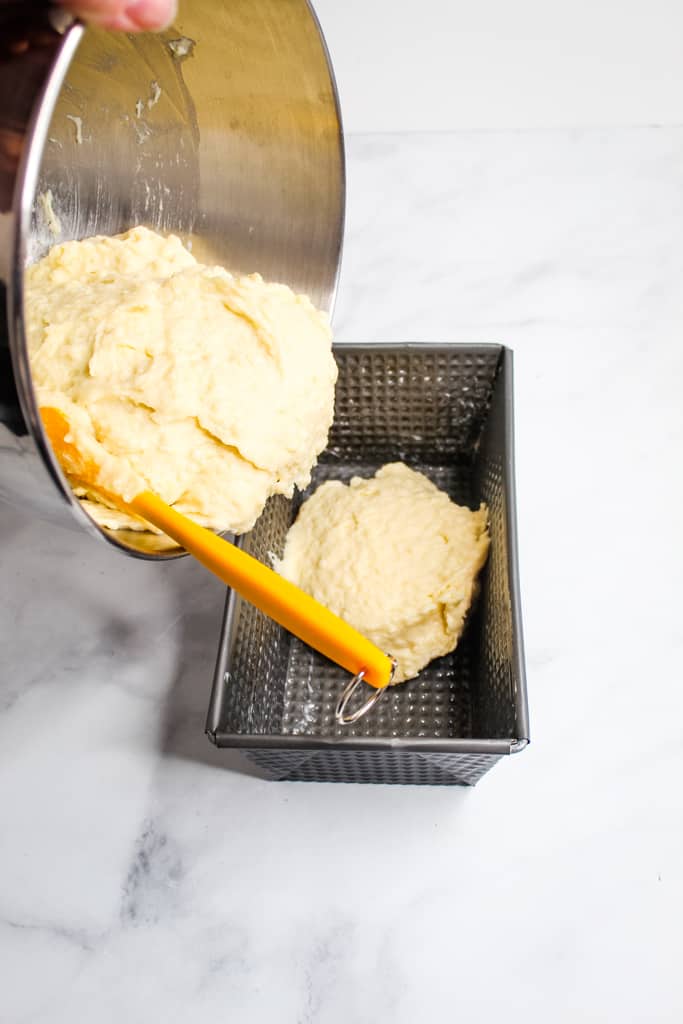
- Grease an 8×4.5-inch loaf pan or line it with parchment paper.
- Scrape the batter into the pan and smooth the top.
- Place the pan in a warm, draft-free place to rise for 1 hour. A toaster oven or unwarmed oven works great. The dough should rise to the top of the pan.
- Preheat oven to 350 F.
- With a sharp knife, make 3 diagonal slices across the top.
- When the oven is fully preheated, bake the risen loaf 50 minutes until the bread is browned on top and an instant-read thermometer registers between 205-210F.
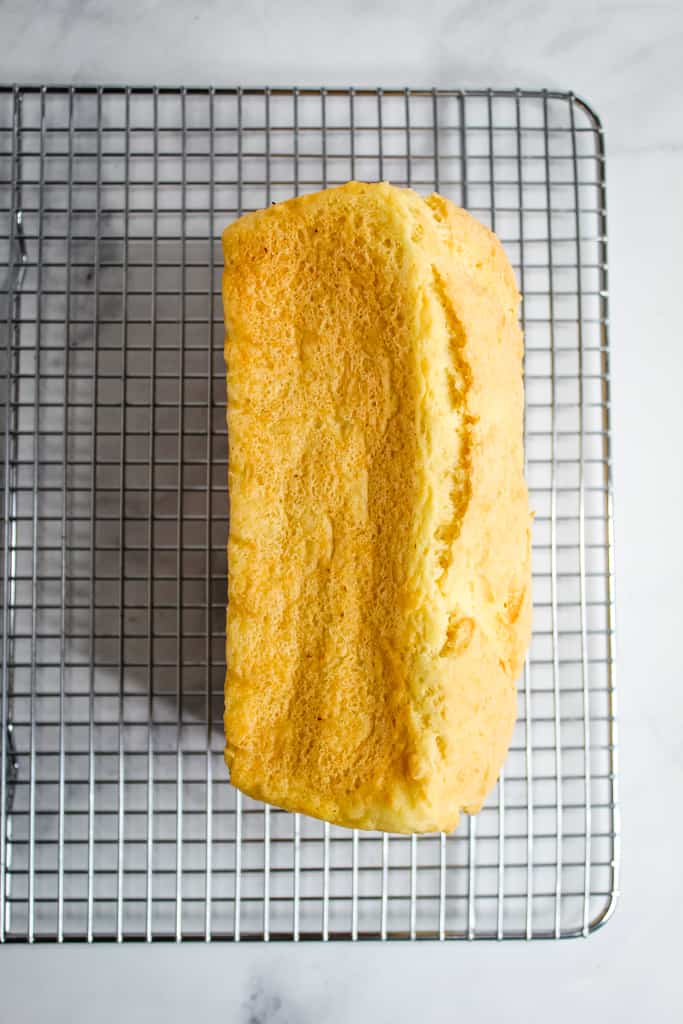
- Remove bread from the oven and allow to cool for 10 minutes on a wire rack in the pan.
- Remove the bread from the pan and cool it on one side for 20 minutes. Then flip and let it cool for another 20 minutes on the other side.
- Once the bread has fully cooled, slice and serve.
Notes
- Use potato starch, not potato flour.
- Room-temperature ingredients help improve the rise and texture.
- Sweet rice flour should not be replaced with regular rice flour.
- Gluten-free dough will look wetter than traditional bread dough. This is normal.
Doneness Cues
- The top should be golden brown.
- The loaf should sound slightly hollow when tapped.
- An instant-read thermometer inserted into the center should register 205–210°F.
Storage Reminders
- Cool the bread completely before slicing.
- Store at room temperature for up to 1 day.
- For longer storage, slice the loaf and freeze it between sheets of wax paper.
- Reheat slices in a toaster or warm oven for the best texture.
Nutrition
Did you make and love this recipe? Give it your review and rating below! And make sure to follow me on Instagram, Pinterest, and Facebook , too!
Why Potato Works So Well in Gluten-Free Bread
Potatoes change how gluten-free bread behaves during baking. It affects hydration, crumb texture, shelf life, and elasticity in ways that many gluten-free flour blends cannot achieve on their own.
That difference becomes more noticeable after cooling, when many gluten-free loaves begin turning firm or fragile.

Potato Improves Moisture Retention
Potato starch absorbs water efficiently during mixing and baking. This helps reduce dryness and improves the loaf’s overall texture after cooling.
It also helps the bread maintain better sliceability during storage.
Potato Creates a Softer Crumb
Many gluten-free breads have a gritty texture because they rely heavily on rice flour blends. Potato helps create a smoother crumb with better flexibility after slicing.
The loaf bends more easily and holds together better during use.
Potato Helps Gluten-Free Bread Stay Fresh Longer
One of the biggest challenges in gluten-free baking is rapid staling. Potato helps slow texture changes after baking, allowing the loaf to maintain a better consistency the next day rather than becoming firm around the edges.
Why Potato Bread Feels More Like Traditional Bread
Potato improves elasticity and chewiness, giving the loaf a less fragile texture after baking. That balance helps the bread hold its shape more effectively during slicing and toasting.
Since you enjoy softer gluten-free breads, you should try our Gluten-Free Potato Buns recipe. It uses similar ingredients to improve texture and moisture retention.
How Gluten-Free Bread Structure Actually Works
Gluten-free bread behaves very differently from traditional wheat bread. The mixing, texture, hydration, and rise all work differently because there is no gluten network holding the dough together.
Understanding those differences makes it much easier to get a softer loaf with better structure and fewer baking problems.
Why Gluten-Free Dough Looks Different
Many first-time bakers expect gluten-free dough to resemble traditional bread dough. Instead, it usually looks closer to thick batter.
This consistency helps the loaf rise more effectively and prevents it from becoming heavy after baking.
Understanding Hydration
Gluten-free bread usually requires more liquid than wheat bread because gluten-free flours and starches absorb moisture differently. Higher hydration helps improve crumb texture and reduces heaviness after baking.
How Yeast Works in Gluten-Free Baking
Yeast still plays the same basic role in gluten-free baking. It creates gas that helps the bread rise.
Warm water helps activate the yeast, whereas sugar feeds it during fermentation. If the liquid is too hot, the yeast can die. If the kitchen is too cold, the dough may rise very slowly.
Because gluten-free dough has a weaker structure, overproofing can cause the loaf to collapse more easily.
Why Gluten-Free Bread Needs More Support
Traditional bread develops elasticity through gluten. Because gluten-free bread lacks the natural protein network of gluten, other ingredients are needed to provide structure.
Xanthan gum, eggs, starches, and potatoes all help support the loaf by improving flexibility, moisture retention, and stability during baking.
Do you understand how gluten-free baking ingredients work together now? Our guide, How to Make Gluten-Free Cornbread Without Flour, explains similar principles in another straightforward recipe.
Step-by-Step Instructions
Once your ingredients are measured and ready, the process becomes much easier. However, pay attention to texture and visual cues to get the best result.
Step 1: Mix the Dry Ingredients
Add the white rice flour, sweet rice flour, gelatin, potato starch, dry potato flakes, sugar, salt, xanthan gum, and instant yeast to the bowl of a stand mixer.
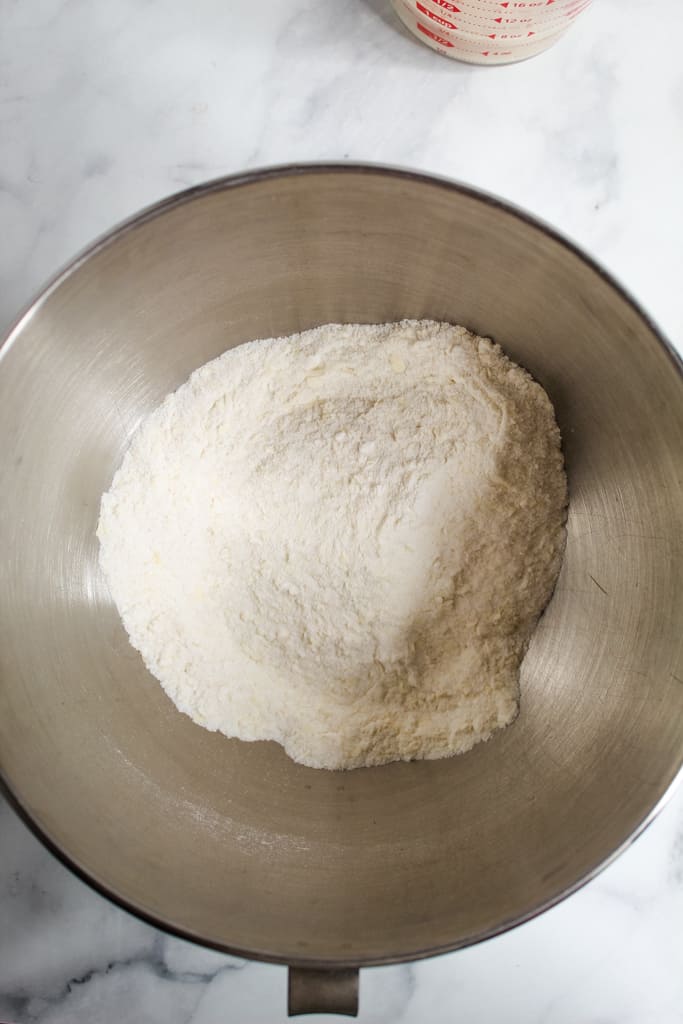
Then whisk until everything is evenly combined with no visible pockets of starch or flour.
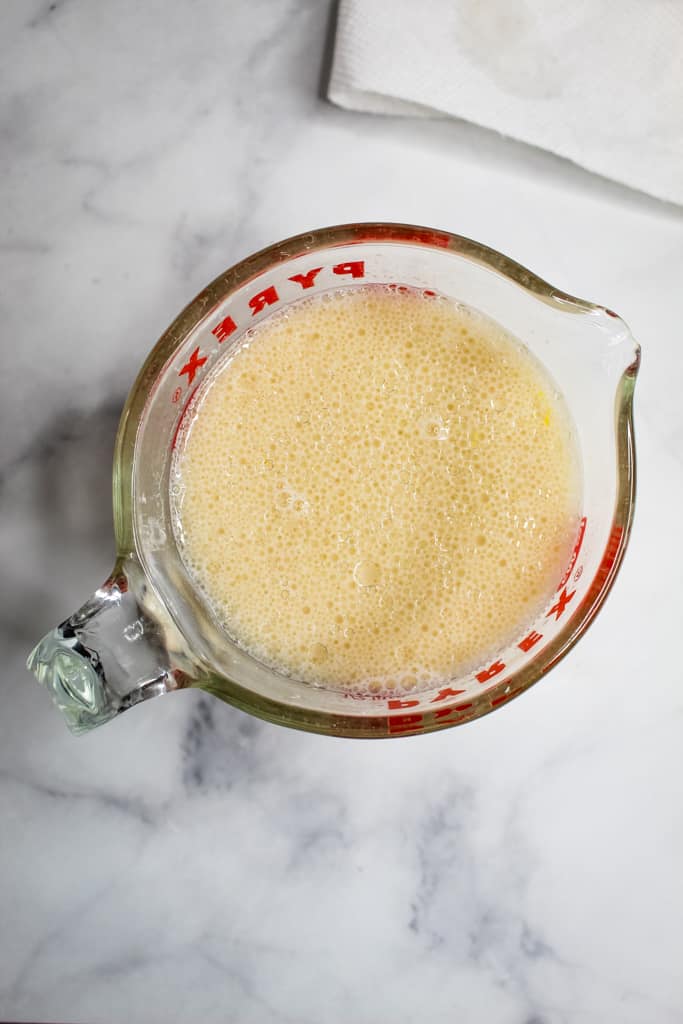
Step 2: Combine the Wet Ingredients
In a separate bowl, whisk together the warm water, vegetable oil, eggs, and milk. The liquid should feel warm but not hot.
Step 3: Mix the Dough
Pour the wet ingredients into the dry ingredients. Mix on low speed for about 30 seconds, then increase to medium speed and continue mixing for 3 minutes.
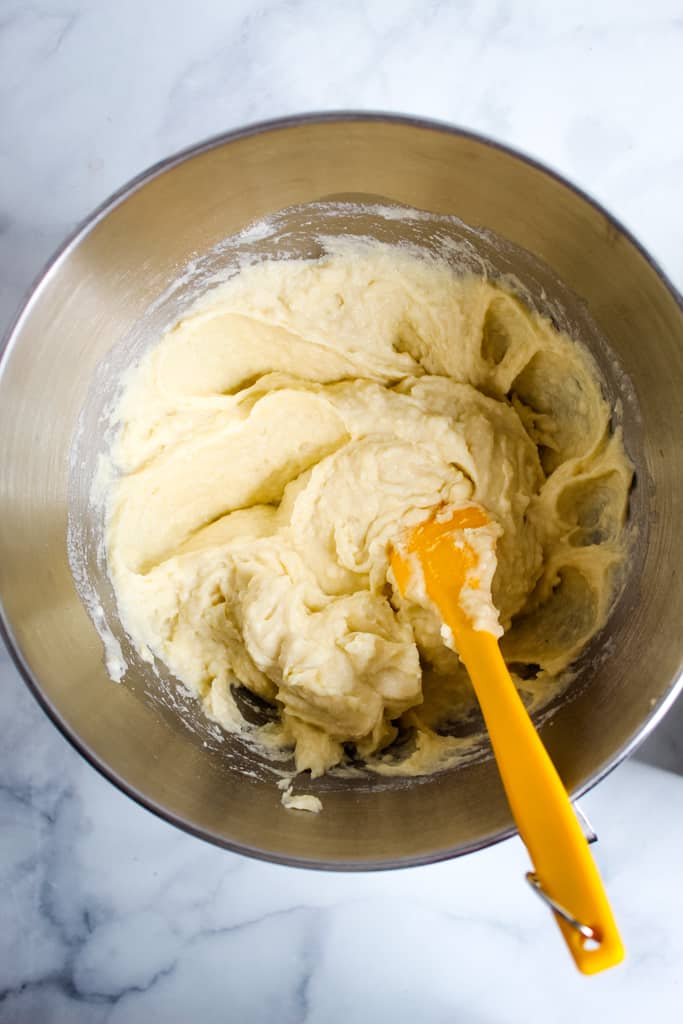
The dough will look wetter than regular bread dough and should resemble thick batter. This is normal for gluten-free bread.
Step 4: Prepare the Loaf Pan
Grease an 8×4.5-inch loaf pan or line it with parchment paper.
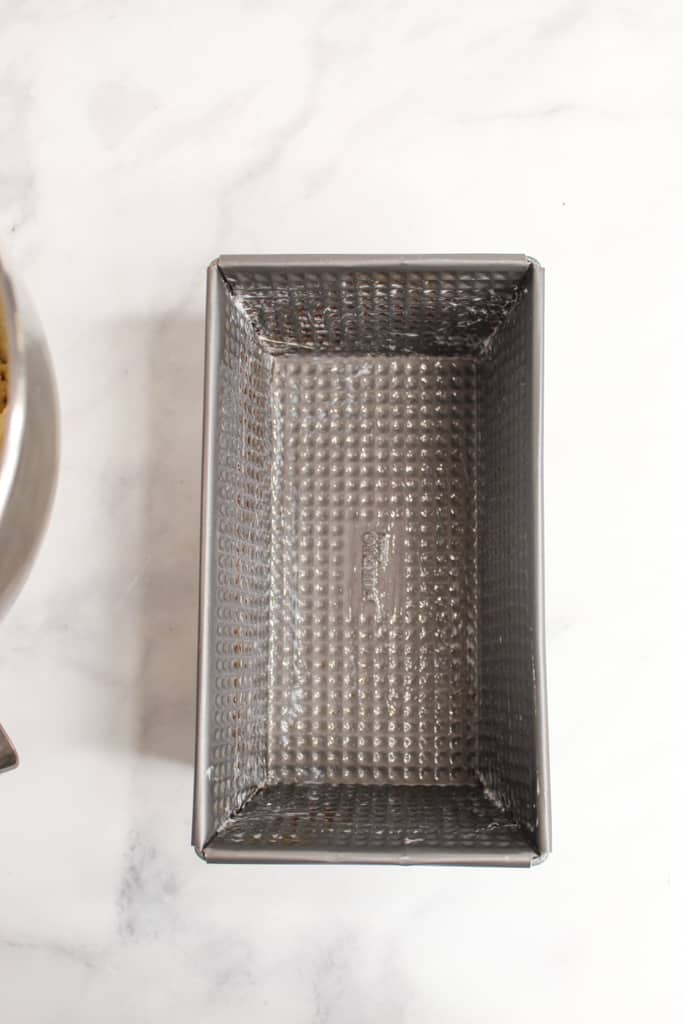
Afterward, transfer the dough into the pan and smooth the top with a spatula so the loaf bakes evenly.
Step 5: Let the Dough Rise
Place the loaf in a warm, draft-free area for about 1 hour. The dough is ready when it rises slightly above the top edge of the pan and looks slightly puffed.
However, do not let the dough overproof. If it rises too high, the loaf may collapse during baking or cooling.
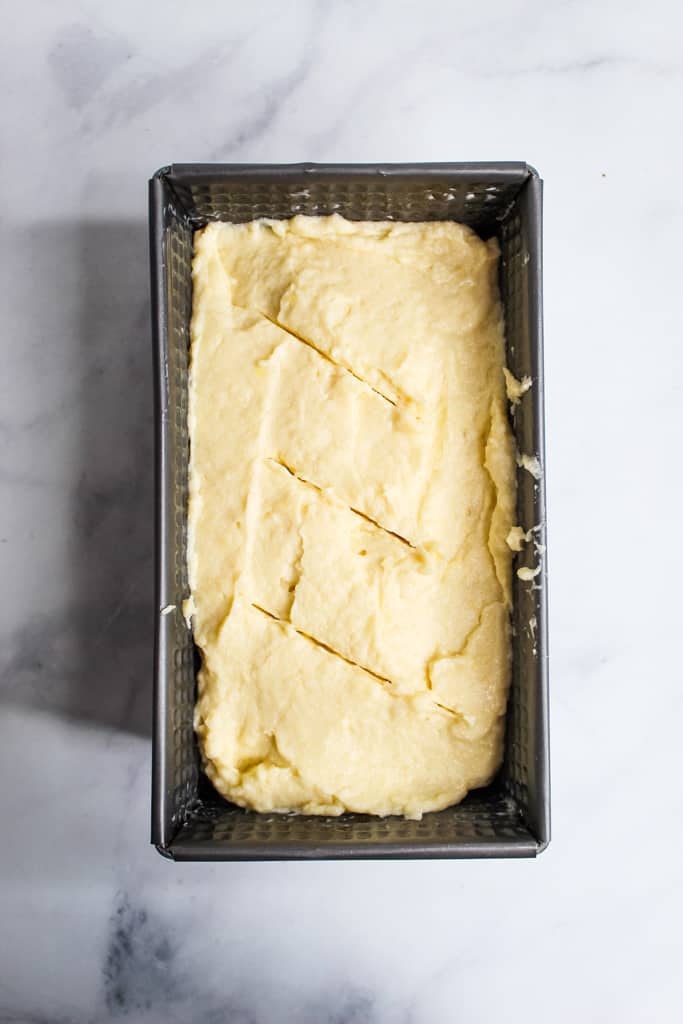
Step 6: Score the Top
Use a sharp knife to cut 3 shallow diagonal slashes across the top of the loaf. This helps control expansion while baking and improves the final appearance.
Step 7: Bake the Bread
Bake the loaf at 350°F for about 50 minutes. The crust should become golden brown, and the loaf should feel firm across the top.
Step 8: Check for Doneness
Insert an instant-read thermometer into the center of the loaf.
The bread is fully baked when the internal temperature reaches 205–210°F. The loaf should also sound slightly hollow when tapped on the bottom.
Step 9: Cool Before Slicing
Remove the bread from the pan and let it cool completely on a wire rack. Slicing too early can trap steam inside the loaf, resulting in a gummy texture.
Proofing & Rise Guide for Gluten-Free Potato Bread
Proofing is one of the most important steps in gluten-free bread baking. A proper rise helps create a lighter crumb, better texture, and improved structure after baking.
Because gluten-free dough is more delicate, paying attention to visual cues matters more than following the clock exactly.
How Long Should Gluten-Free Bread Rise?
Most gluten-free bread dough needs about 45–60 minutes to rise in a warm kitchen. The exact time depends on room temperature, yeast activity, dough temperature, and humidity.
Also, a colder kitchen may take longer, whereas a warmer one can significantly speed up the rise.
Signs the Dough Is Ready
The dough should rise slightly above the top edge of the loaf pan and look puffed and airy. The surface should appear smoother and slightly rounded, rather than dense or flat.
If you gently touch the top, the dough should slowly spring back rather than collapse immediately.
What Overproofed Dough Looks Like
Overproofed gluten-free dough often rises too high and becomes fragile. Common signs include large air pockets on the surface, dough spilling over the pan, weak or uneven structure, and dough collapsing when touched.
Bear in mind that overproofed bread may sink in the center during baking or shrink heavily while cooling.
Ideal Kitchen Temperature
Gluten-free bread rises best in a warm, draft-free environment. An ideal proofing temperature is around 75–85°F. If your kitchen is cold, place the loaf near a slightly warm oven, a microwave with the light on, or a warm countertop away from drafts.
However, avoid very hot environments, as they can cause the dough to rise too quickly and weaken its structure.
Common Gluten-Free Potato Bread Mistakes
Gluten-free bread can react very differently from traditional wheat bread, especially during proofing and baking. Small changes in moisture, mixing, or baking time can quickly affect the final texture.
The good news is that most problems have simple causes and easy fixes once you know what to look for.
Why Did My Bread Collapse?
Collapsed bread is usually caused by overproofing. When gluten-free dough rises too long, its structure weakens, and it cannot retain the trapped air during baking.
The loaf may appear tall before baking, but it can sink in the center as it cools. Other common causes include too much liquid, expired yeast, underbaking, and opening the oven too early.
Also, try baking the loaf once it rises slightly above the pan, rather than waiting for a dramatic rise.
Why Is My Bread Gummy?
A gummy center usually means the bread needs more baking time or more cooling time. Gluten-free bread continues to set while it cools. Cutting into the loaf too early traps steam inside, creating a sticky texture.
Excess moisture or incorrect flour measurements can make the bread gummy. For best results, bake until the center reaches 205–210°F, cool completely before slicing, and measure flour carefully.
Why Is the Texture Dense?
Dense gluten-free bread is often caused by too much flour, not enough hydration, weak yeast activity, and insufficient mixing.
Gluten-free dough should look wetter than traditional dough. Adding extra flour to make it “feel right” can create a heavy loaf with poor rise.
Excessively cold ingredients can also slow yeast activity and reduce volume.
Why Didn’t My Bread Rise?
If the dough barely rises, the yeast may not have activated properly. Popular causes include water that was too hot or too cold, expired yeast, cold kitchen temperature, and skipping sugar entirely.
Yeast works best in warm conditions around 75–85°F. A dough that looks thick and dry can also struggle to rise properly because the yeast cannot expand easily through the mixture.
Are you looking for simpler gluten-free baking recipes with soft texture and fewer structural issues? Our Easiest Gluten-Free Banana Bread is another beginner-friendly option.
Pro Tips for Soft Gluten-Free Bread
- Weigh Your Ingredients.
- Don’t Overbake the Bread.
- Let the Bread Cool Completely.
- Use Warm Ingredients.
- Cover the Bread While Cooling.
Easy Gluten-Free Potato Bread Variations
Once you get comfortable with the base recipe, adapting the loaf for different flavors and uses becomes easy. Making small adjustments can yield softer rolls, more savory bread, or a sturdier sandwich loaf without significantly altering the overall structure.
Dairy-Free Gluten-Free Potato Bread
This recipe already works well with dairy-free milk, making it an easy option for dairy-free baking.
Herb Potato Bread
Fresh or dried herbs enhance flavor but do not significantly impact rising. Good options include rosemary, thyme, parsley, and chives.
French Toast
Slightly stale slices work especially well for French toast because the bread absorbs custard without becoming mushy. The softer texture creates a richer center after cooking.
Sandwich Loaf Version
For taller gluten-free sandwich bread, use a slightly narrower loaf pan to encourage upward rise rather than spreading outward.
Garlic Potato Bread
If you want a savory version, mix garlic powder or roasted garlic into the dough before proofing. Brushing the top with garlic butter after baking enhances the flavor and slightly softens the crust.
Have you tried flexible gluten-free baking recipes with easy ingredient swaps? If you have, you will enjoy our Foolproof One-Bowl Oat Flour Banana Bread Recipe.
How to Store, Freeze & Reheat This Recipe
Proper cooling, wrapping, and reheating can help the loaf stay softer and maintain a better texture for longer.
How to Store Gluten-Free Bread Properly
Always let the bread cool completely before storing it. Once cooled, wrap the loaf tightly or store it in an airtight container at room temperature. This helps reduce moisture loss and prevents the bread from becoming dry too quickly.
Avoid refrigerating gluten-free bread whenever possible. Refrigeration can speed up staling and create a firmer texture.
Can You Freeze Potato Bread?
Freezing is one of the best ways to preserve texture and freshness.
For easier reheating, slice the loaf before freezing and place parchment or wax paper between slices. This allows you to remove only what you need without thawing the entire loaf.
Store frozen slices in a freezer-safe bag or an airtight container.
Best Way to Reheat Slices
Toasting is the easiest way to bring back softness and improve texture after storage. You can also warm slices in a toaster oven, a skillet, or a low-temperature oven.
Avoid microwaving for too long, which can make the bread rubbery or gummy.
How to Prevent Dryness
A few simple habits can help keep gluten-free bread softer longer:
- Avoid overbaking.
- Cool completely before storing.
- Keep the loaf tightly wrapped.
- Freeze extra slices early instead of waiting several days.
Nutritional Benefits of Gluten-Free Potato Bread
This gluten-free potato bread is designed for people who want a softer homemade bread without wheat-based ingredients. The combination of potato starch and gluten-free flours helps improve moisture retention and texture while providing a practical option for people with gluten intolerance or celiac disease.
Potato-based gluten-free breads may also improve texture, fiber content, and overall acceptability compared to some traditional gluten-free loaves.
Our research shows that potato starch can improve the texture and sensory quality of gluten-free bread. This recipe also avoids many heavily processed commercial additives commonly found in store-bought gluten-free bread.
Baking Questions Answered (FAQ)
Below are some questions we frequently get about gluten-free potato bread. If you do not see yours here, feel free to ask in the comments section below.
Can I Use Honey Instead of Sugar?
Honey can help feed the yeast and improve browning. However, the dough may become slightly more moist, so avoid adding extra liquid until you see the final dough consistency.
Can I Double This Recipe?
You can, but it is usually better to bake two separate loaves rather than one large one. Larger gluten-free loaves can bake unevenly, leading to gummy centers.
What Is the Best Knife for Slicing Gluten-Free Bread?
A serrated bread knife works best. It helps cut through the crust cleanly without crushing the softer crumb inside.
Can I Make This Gluten-Free Potato Bread Egg-Free?
This recipe has not been designed as an egg-free bread, but you may be able to experiment with flax eggs.
To replace the eggs, try using:
2 flax eggs
Mix 2 tablespoons ground flaxseed meal with 5 tablespoons warm water. Let it sit for 5–10 minutes until thickened.
That said, eggs provide structure, lift, and softness in gluten-free bread. Without them, the loaf may be:
- Slightly denser
- Less springy
- More fragile when sliced
- A little more moist or gummy in the center
For best results, bake the loaf until the center reaches 205–210°F, then let it cool completely before slicing. Egg-free gluten-free bread often needs that full cooling time to finish setting.
Can I Use Mashed Potatoes Instead of Potato Flakes?
Dry potato flakes are recommended because they absorb liquid consistently and help create a soft, fluffy loaf. Mashed potatoes contain extra moisture, so they are not a direct 1:1 substitute.
If you want to experiment with mashed potatoes, use plain, unseasoned mashed potatoes with no butter, garlic, cheese, or added seasonings. You will likely need to reduce the milk slightly because mashed potatoes add moisture back into the dough.
Start by replacing the dry potato flakes with a small amount of mashed potato, then hold back 2–4 tablespoons of milk and add more only if the dough looks too thick.
The dough should still look like a thick gluten-free bread batter, not kneadable wheat dough. If it becomes loose, soupy, or pourable, the finished bread may collapse or turn gummy.
Best recommendation: Use dry potato flakes for the most reliable texture.
Can I Make This Gluten-Free Potato Bread in a Bread Machine?
This recipe is written for the oven, but it may work in a bread machine if your machine has a gluten-free setting.
For best results:
- Use the gluten-free cycle, not a regular wheat bread cycle.
- Scrape down the sides of the pan during mixing if your machine allows it.
- Do not use a cycle with multiple long rises, since gluten-free bread usually needs just one good rise.
- Check for doneness with an instant-read thermometer. The center should reach 205–210°F.
- Let the loaf cool fully before slicing.
Because bread machines vary widely, the texture may be different from the oven-baked version. If your bread machine tends to overproof gluten-free loaves, the bread may rise and then collapse during baking.
Related Gluten-Free Recipes
If you enjoyed this gluten-free potato bread, there are several other gluten-free baking recipes worth trying next.
- Try Sliceable Chia Seed Bread for another gluten-free bread option that works well for sandwiches and toast.
- If you want something softer for breakfast, our Gluten-Free Sweet Potato Pancakes are an easy option with a naturally moist texture.
- For a more savory option, our Savory Cassava Bread Recipe uses cassava flour to make a sturdy loaf with a slightly chewy crumb.
These recipes give you more ways to enjoy soft, sturdy, homemade gluten-free breads and breakfast favorites without sacrificing texture or flavor.
Share Your Experience With Us
If you try this recipe, leave a comment below and share how it turned out for you. Did you make any variations, ingredient swaps, or flavor additions? If you run into texture problems like gumminess, dense crumb, or collapsing, feel free to ask your troubleshooting questions in the comments as well.